Creating Rimlights With Mask (All On Your Phone)
Lesson 14 from: Mastering Masking with Lightroom MobileLisa Carney
Creating Rimlights With Mask (All On Your Phone)
Lesson 14 from: Mastering Masking with Lightroom MobileLisa Carney
Lesson Info
14. Creating Rimlights With Mask (All On Your Phone)
Lessons
Introduction: Discussion On New Masking Module
14:50 2Editing Modules Overview
15:59 3Masking Module: Introduction To Masking
03:49 4Masking Module: Select Subject
05:51 5Masking Module: Select Sky
07:11 6Masking Module: Brush
04:48 7Masking Module: Linear Gradient
02:10 8Masking Module: Radial Gradient
04:01Masking Module: Color Range
05:09 10Masking Module: Luminance Range
04:12 11Masking Module: Depth Range using Depth Capture
04:49 12Combining Mask: Adding / Subtracting To A Mask
10:31 13Organizing Mask: Naming, Mask Order
03:44 14Creating Rimlights With Mask (All On Your Phone)
05:06 15Creating Great Social Post Directly From Lightroom Mobile
10:43 16Class Wrap Up
00:49Lesson Info
Creating Rimlights With Mask (All On Your Phone)
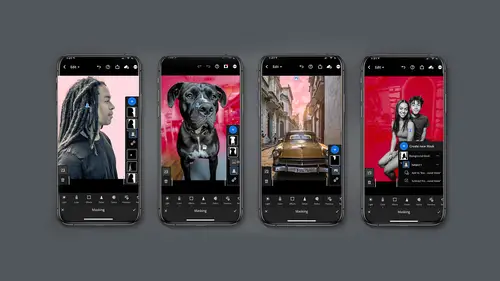
let's have some fun creating rim light and how we're going to do this is used to mass. So I use the depth range because this was shot with a depth range camera and then I'm going to use select subject and invert this is a fun way of combining mask and listen. One point I want to make is I shot this picture years ago, like 2, 2.5 years ago. So the fun thing about this masking is you can go back through your old catalog of work and play and see what else you can do. So let's take a look at Jack and see what we can create. I'm going to click on the masking button and click plus and you'll notice here I have the full range because this was shot with a depth map, depth camera that is giving me a depth mask and I'm going to use the pointer to pull this back and I can just termine look at the background here. I can determine how far back this image picks up. And what I want to look at is Jack's nose and his face and his ears because that's where you can kind of see some of this change. Look a...
t this cuts in, fills out a little. Now this is not going to be a perfect cut mask but it's going to be pretty decent and certainly good enough for the effect that I'm trying to create. So I'm going to click okay with this and here's what I'd like to do with Jack. I'd like to give him a little clarity and a little texture so that he shows up a bit stronger. Now what I'm gonna do is I'm gonna say that's okay, minimum click on the mask betting again. And I'm going to say, hey, I'd like to select subject, but this time I'm going to invert it. So now I have the background selected. We've done this before. And I think on the background, what I'm gonna do is I'm going to take the D haze and haze up the background a little look at that. Did you know that if you go to the right D haze, you get detail sharpening kind of, you go to the left, it looks like atmosphere and fog. And I think that's really cool to help Jack stand out Now. In addition I'm gonna take the clarity down a little in the texture because I wanted to look a little blurry. Now. I think I might go to the blacks or the highlights. Excuse me and bring the highlights down a bit. So it gets a little more gray. And I'm gonna see about bringing up bringing it up the blacks. I'm not sure I'm going to do it. Yeah, I do that now. Here's the thing on the image of Jack. I don't want the foreground to have this right? Not the foreground. So as you know, for masking when we click on the mask, I can subtract the mask and I could use a linear gradient and I can delete that effect from the foreground. Gosh, I love this application. This is on my phone, look how easy this is. It's crazy. So here's what I'm gonna do now. I'm going to do one more mask. I'm gonna click select subject. This is going to be for. Oops, I hit select sky. That was a mistake. I'm going to select subject and this is gonna be for the rim light. So what I want to do is I'm gonna go ahead and go to light and I'm gonna lighten up my exposure a little bit. Yeah, I think that's good but I don't want it on the center of Jack. So what I'm gonna do is click on my mask and I'm going to do is subtract only this time I'm going to do a brush now on the brush. You got your size here, right? So you go up or down. I think somewhere around 28 29 it's probably good feather. You can go up and super feather it or Not super feather it. I think I'll keep mine here at 47. And then of course I can do the flow. So what I'm gonna do is just paint out paint out the center of this. I might paint out just a hair more on his face. You notice that window came up. The one thing I find with working on your phone is your darn fingers. It can be really challenging to not click on buttons. So let's look at it before and after. That's before and after. Now I'm going to hit ok on the mask so that that dialogue box goes away before and after. And I think that's pretty darn cool. He's got extra light around the outside of him and if I want to be a little more precise, I could certainly go to the desktop or even ipad. But I think for now Jack looks pretty magnificent on the floor of the forest. I might do an overall saturation. I'm no longer in the mask, I'm overall and I'm gonna do the vibrance, just a hair and I might do an overall clarity. Let's see how I like that before. After. Yeah, I think that's pretty decent. Anyway, it's called rim lighting. Give it a try. It's multiple mass. And let's just for giggles. Look at that mask! One more time we've got the base mask, meaning Jack and his depth mask. You can see by that icon here we have mass number two, which is a subject mask, inverted with a linear gradient. And then the third mask is a subject mask with a slight brush masks. To paint it out. All these little icons will tell you what's going on. Have fun with some mask magic
Class Materials
Bonus Materials with Purchase
Ratings and Reviews
Christian Alsider
This was a great class! easy to follow and the teacher was excited about what she was teaching