Lesson Info
10. Lightroom Light Module
Lessons
Class Introduction
06:11 2Equipment
10:44 3Shoot Differently
10:59 4Capture Apps
03:01 5iPhone Capture
07:20 6Lightroom Mobile Capture
11:59 7Post Production:Editing/Processing
06:10 8Lightroom Mobile Modules Overview
11:29Lightroom Color Module
16:04 10Lightroom Light Module
06:15 11Lightroom Geometry Module
05:46 12Lightroom Effects Module
03:41 13Lightroom Versions Module
04:01 14Lightroom Profiles and Presets Modules
05:43 15Lightroom Selective Edits Module
17:13 16Lightroom Mobile Organization, Sharing, Exporting
08:43 173rd Party Apps
14:52 18Wrap Up
00:51 19BONUS: Premiere Live Kickoff
27:43Lesson Info
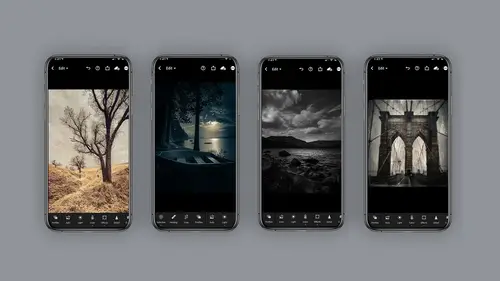
Lightroom Light Module
looking at the light module, I will have to say I think the light module is probably one of the most commonly used functions in this program, So let's look at the gallery here. I'm on my light room gallery. Do you know that if you pinch your fingers down, you could make your images thumbnail smaller? Or if you enlarge squirrel out, you could make a larger anyway. So in the light module, let's take a look at this one image here first and again. As you can see, there's there's all sorts of functions. Exposure, contrast, highlight, blah, blah, blah. However, here's how I like to start. When I first used an image, I like to click on the auto button. Someone click here on the auto button, and that will automatically set my highlights and shadows for me. So if you'll see here, if I now click on the light module, you can see that the highlights are already kind of helped along. So you can either cancel that out or increase them even further. It's up to you on your editing, and I'm gonna slide...
up and you can see also, there's whites and blacks just remember that those of their dark in your whites or lighten your whites, however you see fit, so there's a lot of personal choice here in the editing, but the key message I want you to take here is hit auto first. Now, in addition to the standard highlights and shadows and contrast, you can also click on the curve button, and the curve will allow you to click on the black and white here on the right. And now I can click and drag and also darken step. But it's not actually a black and white, but what it means is a tonal curve. So in my brain, I think of it as black and white because it's tones and you'll also see you've got some sliders here that you can move down here below for the highlight, the shadow in the mid tone. So let's say I make an edit. Now I'm fine tuning with the mid tone. Or if I make an edit in the highlights here, I confine Tune with these sliders. Isn't that amazing? So it gives you a bunch of different options in lighting. Thio even fine tune further once you like what you've done in the curves you can hit done and again because this is a nondestructive program. You can also go back at any time and, you know, rework it. Decide what you want to dio. Now, As you guys know, I like to do a lot of black and white work, so I might quickly click over here to the color click on black and white, then go back to my lighting and see how I like what this is doing in black and white. So, as you can tell after the color session, there's a lot of different moves you can make. And, um, it's all non destruct so you can keep editing as you need thio. So with that, let's go back to the library here, and I want to talk about exposure. So, as I said before, when you're shooting, you wanna expose for the highlights and edit for the shadow. So let's take a look at this image here. Looks crappy, doesn't it? But wait. All I have to do is hit that auto button. Wow. Not bad, huh? In two seconds and again, I can click on the like button and I can decide if I want to up the exposure down the exposure. Bring up the highlights. Take down the highlights again. You can fully edit this all you want. Isn't this amazing? And again, that auto button is phenomenal. Don't forget about the blacks and the whites because you can also handle the pure blacks and the pure whites with these sliders to I'm hoping that at this point in the course in the boot camp, you can see that it's the capture is really important to It's not just these modules. And let's take a look at another image here. I'm gonna click the return button and I mean, you know, let me do this for a moment. Let's go ahead and look at this image here of Ah, oops. Excuse me. Let me do that again. All right. So again looks kind of extreme. But if I hit that auto button because I expose for the highlights when I shot I have all that information Now it can go the light and go Great. Those highlights. I don't want them quite so light. Dark. Pardon me. I would like them a little lighter and then the shadows I can bump them up even a little more, and I can also go into the blacks and add density back in or take out density. Excuse me or add it back in as I see fit with the blacks. So keep in mind you have two different items. You can move the shadows and also the blacks. All right, let's look at another image. Let's look at this car for just a second, and you can see I've already hit auto when the auto button is great out. So when the auto button is great out, you have hit auto. And, as I've said a bunch of times, don't forget to check the shadows. Pardon me, the blacks and the whites, because a lot of people forget to look because you have to scroll down. And remember, I said about the curves. So on the curves. If you hit the total button, you can affect the tones so I can handle highlight or shadow detail mid tone detail by using my finger. But look what else is here. You guys, there's color, So just like you can handle lightened darks in the color palette or color module, you can also handle color in the lights and darks so you can get a little confusing the little advance. But I just need to let you know that this is available here, that you have these functions. You could change your color tone all in light panel. Wait, What? That's crazy. If you click on the whole RGB curve that will be doing tone, it will be doing all of it. If you click on the individual. Read it. Even shows you look. It gives you a red line green blue. Excuse me, Blue. So hopefully that gives you an idea of the depth that's available in the light. So it's not just tone. It's also color.
Class Materials
Bonus Materials with Purchase
Ratings and Reviews
Tiffany
I LOVED this class sooo much! Lisa did an amazing job of supplying a large amount of information balanced with a pace and teaching style so it wasn't overwhelming and so FUN to learn! Lisa helped me unlock so much potential in my device I didn't know was there. Everyone can learn from this class! Lisa is fun and real and you feel like you can connect with her. I am having so much fun with photos and have taken my images up a level with the education Lisa provided. TAKE HER CLASS, you will be so happy you did!!
Amy Vaughn
Lisa, your classes are wonderful and inspiring. Even though I already have a fancy DSLR, I love experimenting with mobile photography and have just been getting into using Lightroom a lot on my mobile devices. There were many cool ideas in this course that I wasn't aware of. I'd highly recommend it to others interested interested in creative mobile photography. Thank you so much for providing the slides as a pdf download - they are thorough, well organized and easy to reference when it isn't convenient to open a video file.
Thomas Hübinger
This course is a step-by-step guide on how to create better, more impressive photos with Adobe Lightroom. In her charming and unique way, the lecturer explains the content in an easy-to-understand way so that people like me who have never used Adobe Lightroom before can achieve very good results. The course is rounded off by a very extensive and detailed workbook. Thanks to the lecturer for this wonderful course!