Making a Portrait in HDR
Lesson 8 from: Making and Editing Natural Looking HDR Images: Lightroom CCJared Platt
Making a Portrait in HDR
Lesson 8 from: Making and Editing Natural Looking HDR Images: Lightroom CCJared Platt
Lessons
Lesson Info
Making a Portrait in HDR
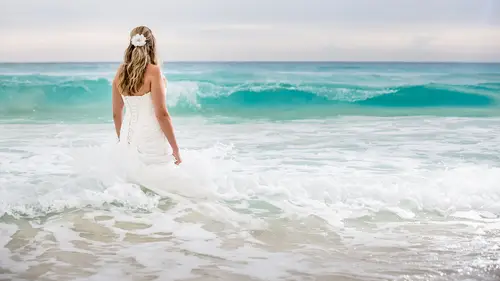
last thing I wanted to show you was kind of a fun, um, situation. So this is the final image of me and my family that is a lit photograph, but it's also a panoramic, and so we have a set of Pro photo flash. Well, one pro photo flash lighting us, um, over off to the to the left, and it's kind of filling in the shadows. So it's nice lit portrait, but then all of this is just a typical panoramic. So if you want to do something like this, here's how it's done. The first thing that's done is the portrait, not the panorama, and it's done on a tripod with a swiveling head. So you lock everything down so that the only thing that can happen is for the head to swivel back and forth, and you put your subject wherever you want them, and you're gonna take the initial portrait and you're gonna shoot and shoot and shoot. I think we have 27 versions of this photograph. Just shoot, shoot, shoot, shoot, shoot and it's lit. So it's it's gonna be nicely. Let's got the right exposure on it and everything, ...
and we go through all 27 of them. And then as soon as we feel like, yeah, we got it, then we hop out. The light comes out because remember the lights just off to one side. And so it's feeling if we were to swing the frame, you would see the light. So the family gets out, the light comes out the head, then swings to the very left and goes, Boom, boom, boom. And remember, you always have to overlap by about 1/3. So it's overlapping by at least 1/3. Maybe even 1/ is even safer. But 1/3 to 1/2 and it's does the panorama. Then, once you have the panorama and you have the photograph, you're going to merge the panorama. So let me show you. So here's the panorama. You can see all the pieces of the panorama happening here. Once you merge the panorama, you're going to get this. So now I've got the panorama. Then it's a matter of taking this image, this panorama and this image and right clicking the two of them and going to edit in and at the bottom. Merge, uh, Teoh, see open his layers and Photoshopped, and when I opened them up as layers in photo shop, then it's gonna take that big panorama, and then it's going to take that little vertical shot that's just the same as the middle of the panorama, but it just has people in it, and it's going to be plopped in the center. It will happen here shortly because that's a big file that's opening up, but it's gonna plop it in the center. And because the camera never moved, it's just gonna fit somewhere in that center. And it's just a matter of lining it up. And then once they're lined up, which actually, Photoshopped has the ability to auto align layers. Have you heard on that? So you do the Ottawa line layers, and it will find the appropriate place for the layer to sit, and then it's just a matter of softening the edges of the of the frame. So I in here. I've got kind of a hard edge right there on the frame I'll have to do is take a brush on a mask, mask out the edges right along the edge, everything else going to stay exactly the same. And then I'm sitting with the family right in the middle of this HDR. And then it looks like that, right? And no one's the wiser. But you can see this is the frame right here. That's that middle frame. And then all of this and all of this is the edges. And then once you've got, of course, you're Before you go to photo shop with these, you need to make sure you adjust both of them the same. So when I was adjusting this panorama and this, I was actually focusing on the portrait in the develop module. So I was working on here. I've got Auto Sync on. And so when I'm adjusting this file of my family, it's also adjusting the entire panorama, keeping him nine that I'm not doing any kind of like vignette ing because of Ivan. Yet. I'm you know it's going to see the vignette, and it's going to show me the edges of the photograph. So and then and then again, in the end, that's this. So then this is going to be a tiff file, not a raw. So all of the adjustments need to be done in the raw, and then the only thing that's done in Photoshop is blending the two to the two exposures together and then maybe some little retouching that goes on on their faces and stuff like that. And that's it, Um, and that's the whole job. Now it's important to note that when you look at this panorama, if I zoom in, the background is out of focus. So when you start the panorama, you're starting it with the same focus that the family had. Otherwise they won't fit in. So you focus on the family, and then you turn it on manual focus so that it doesn't get touched. And it would be even better to take a piece of Gaff tape and tape it across the focus and the zoom so that they can't move. Otherwise, if you go off of that, then it's gonna look peculiar. Um, but what I did is right after I shot this, I shot another panorama with it in focus so that I had a panoramic of the same scene that I could use for other purposes that was correctly focused for the job of being a landscape. So there are a lot of things that can be done with those two tools in your toolbox. The ability to create really good HDR and the ability to create good Spano's can help you in a lot of situations where your lens doesn't quite get enough of what you need, um, or where you want to get a wider scope on a portrait. So don't you can think outside the box And because light room is so simple to use and it does things in such a way that you can share all the exposures and you can share all the settings back and forth between images, it makes it very quick to do a pretty cool, interesting portrait that most people won't be doing. So it's something to think about. You can use HDR for portrait. You can use panels for Portrait SA's well in those two circumstances. I've shown you that now I'm a portrait and wedding photographer. So of course I would take a tool like HDR and panoramic and try and force it into my genre. But I think it works, Um, and it only works because light room is easy to operate, and it doesn't quickly. So now I shoot a lot of HDR at weddings. I shoot it handheld. And when I'm in a situation where I'm trying to get the entire scope of the wedding and it's outside and super bright and I'm gonna have to blow out the sky in order to make sure that the bride and groom when they're holding hands and looking into each other's eyes and they're not moving Bam bam, bam! Three shots really fast succession over under normal merger and HDR.
Ratings and Reviews
JIll C.
Though I've already been using Lightroom for HDR's and Panos for a while, I gained some useful insight into techniques and workflow from this course. Jared teaches you what you need to know to make good images without getting too technical. He even showed examples of HDR portraiture, which I would never have attempted.
Shelly Fields
Attended a workshop with Jared through AZPPA many years ago. Loved him then, but even more so now. He is a thorough, articulate speaker. I highly recommend him.
user-1c544c
Having never used HDR or Panoramic techniques before, this was a great class for me. Jared made the concepts and steps very understandable. I need to get out and try some!!