Live Demo: Global Dodge and Burn
Lesson 10 from: Local Dodging and Burning for Beauty RetouchingChris Knight
Live Demo: Global Dodge and Burn
Lesson 10 from: Local Dodging and Burning for Beauty RetouchingChris Knight
Lessons
Class Introduction
03:41 2Overview of Dodging and Burning
05:04 3What is Global Dodge and Burn?
02:59 4What is Local Dodge and Burn?
06:36 5Transitions
06:37 6Image Clean-up
10:06 7Live Demo: Local Dodge and Burn
03:36 8Live Demo: Creating an Action for Dodge and Burn
02:35Lesson Info
Live Demo: Global Dodge and Burn
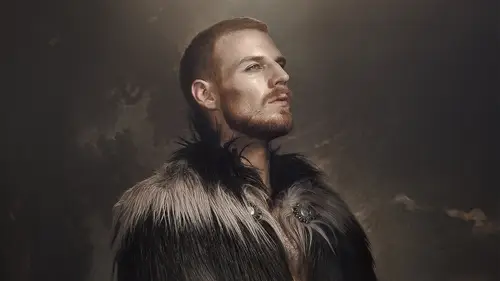
Now for global dodging and burning, what I'm trying to do is usually bring back some of the depth I lost or to accentuate dimensionality. The reason I do this after the fact is because I've already created a nicer, cleaner surface, and so any big adjustments shape everything I've already done, and it's gonna help sell my illusion more successfully. If you do this step before local dodging and burning, and you happen to overdo it with the local dodging and burning, you can't really bring it back without a lot of effort. And so this just becomes a nice effective way that you can come through, and you can help bring yourself a little bit of depth. Again, it makes no difference whether you're using curve adjustment layers again, or you wanna dodge and burn on a 50% gray. I personally do a 50% gray. It's just how I've been doing it for a long time. But at the end of the day, it doesn't actually matter just because 50% gray is relatively quick and easy to do. I'm using a dodge and burn, I ca...
n alternate back and forth between the dodge and burn pretty quickly. So we're gonna be lightening and darkening parts of the image, adding or removing depth. Generally speaking, this is where I'm adding depth. And I don't get too heavy handed on this. My global dodging and burning usually doesn't take more than a couple of minutes at most. So it's pretty quick to do. Usually when I'm doing this, I'm around a 5 to a 10% exposure on my dodge and burn, almost the same. It keeps my tools nice and consistent. I'm usually around 7 or 8%. I'm pretty much exclusively there, but sometimes I will lessen and increase it. And because we're gonna be doing this non-destructively on a 50% gray layer, mid-tones. 50% gray is a mid-tone. Gotta do it on a mid-tone. So let's head back into Photo Shop really quick, and we're gonna add the global dodge and burn. So like I said, I'm gonna do this on a 50% gray, but it doesn't matter if you wanna do this on a 50% gray or a curve. I'm gonna create a new blank layer. Very important. You're not creating a solid color fill, because you can't paint on a solid color fill unless you rasterize it. So what we're gonna do is hit shift+delete to bring up the fill dialog. You can also get to Edit and Fill, same thing. Shift+delete or shift+backspace on the PC. And I'm gonna make sure my contents are 50% gray up here. Make sure your blend mode is normal, and make sure your opacity is at 100%, even though this is a 50% gray, you do not want a 50% opacity. That's bad news for you. So we've got this. Now we are gonna change the blend mode of this 50% gray to either overlay or soft light. This is because these are the contrast blend modes, and 50% gray is invisible. But whatever change you make to the 50% gray shows up. Soft light and overlay are the same thing, except that soft light is more subtle. That's the only difference. But they basically are combinations of the multiply and screen blending modes and they are affecting contrast. So soft light is what I like to use because it is a little bit more subtle, but if you like overlay, that's fine. I'm gonna select my dodge tool. I'm at mid-tones and 8%. I'm using a pretty soft brush, right here. And obviously, as I paint the effect, it's brightening the image. It looks like this. So you can see that I'm making a change to the 50% gray, but the gray is not showing up. Again, I'm option clicking next to option or all, clicking next to the window. So the reason I like to use 50% gray is because I can lower the opacity if I need to. I can paint 50% gray over it if I wanna undo anything. I can mask it out in one fail swoop, and you can also blur this layer just by going to Filter and Gaussian Blur, and you can lessen the effect if you happen to think it's too strong. So it gives you a lot of flexibility. Now when I'm using the dodge tool and I'm using the burn tool, I'm on mid-tones, like I said, because we're on a mid-tone gray. If you hold down the option key on a Mac or alt on a PC and you press your brush down, it's gonna give you the exact opposite tool that you're working on. So I'm on dodge mid-tone 8%. If I hold down option without switching tools, it's gonna give me burn mid-tone 8%. And so it very quickly and effectively allows you to switch back and forth between the two. It's not gonna look different in any way, shape, or form. Like it's not gonna switch the tool, but just to show you what that looks like, here's dodge, holding down option, burn. It looks like this. Kay, so I don't have to switch tools to go back and forth between the two. If I wanna paint over it, I can fill it with 50% gray. I can also select 50% gray, 0050, and paint over to undo it. Selective undo. You can also go to Filter, Blur, Gaussian Blur and this will, the higher you do this, it'll lessen your effect. I'm gonna make this a little more abrupt so you can see it, because this is gonna be a little more of a common occurrence probably. So let's say you happen to do this really hard, hard layer. So we got this, and you got this. If you actually, it's very hard, right. You go to Filter, Blur, Gaussian Blur, the higher this goes, the more it's gonna soften your effect. 'Kay, and so gives you a lot more flexibility. Now I'm gonna dodge and burn this relatively quickly just so you can see it in effect. So I'm gonna, like I said, come through, create a little bit of accentuation, little bit of highlight on the cheek. I'll put a little bit right here, too much. Let me bring back a little bit of shine on the nose. Like I said, I'm lookin' for the highlights, to make the highlights brighter. And this is a little bit of a shimmery makeup, so we wanna make sure that's there. And then I'm gonna switch over. Be careful it you're working on a cleaner background and you happen to get a little sloppy near the edge. You can create really weird and unusual gradients on the background, so you do wanna be aware of that when you're dodging and burning. So I'm just gonna kinda make some of these shadows a little bit more carved. And this is not the end all, be all of the image. You know, you'd still probably wanna do color grading. A few other different things. Color grading, color toning, color pops to certain things. 'Kay, it just gives me a little bit more three dimensionality. The cheek pops out a little bit more. Looks like this, 'kay. And it's pretty abrupt because this was a harder edge. Just to show you one little bonus thing on this. I mention you sometimes get a little bit of discoloration, and it can be as a result of the dodging and burning. It can also be a result of the image itself and the makeup itself, so sometimes I wanna fix color a little bit. And there are several ways to do this. I'm gonna do it one very simple way. So I'm gonna grab a brush, and I'm gonna sample the color that I want, which is kind of this reddish color, and I'm gonna kinda paint over this. Now this particular color, no, let's not put it there. I'm just gonna paint it over the kinda more desaturated shadowier areas. Sometimes you're gonna pick a different blending mode. I usually alternate between, for this step, a soft light, a color, or a hue blending mode. It depends. Sometimes you're gonna need to change the opacity. But basically what I did was I just grabbed my brush, I sampled the color using option, option+click, or alt+click, and then I painted it over the area, 'kay. Now I'm gonna change the blend mode. And like I said, usually it's soft light, hue, or color. So let's look at soft light, 'kay. That's way too strong. Here's hue, which is better. It's subtle, but what ended up happening is it just changed the color in the shadows a little bit. And then color is gonna give me an increase saturation. Now this is a pretty colorful image. See that down there? See that by the chin? 'Kay, and so I'm gonna pick color, I think color was the best course of action here. I'm just gonna lower the opacity a little bit til it blends. And this can be a quick and easy way to equalize out the color on a face. This also works for bodies. So if you have a hand that's a different color than the body, or legs, you can do a similar thing here. 'Kay, now, this is pretty fundamentally the entire dodge and burn process. So I'm gonna take you through this one more time. This is where we started, this is where we're at now. Before, and after. And let's go back to the beginning. We started with cleanup, then we came through and we did our local dodging and burning. Here it is in black and white. Before, and after. And we went strong. You can always dial this back. It's a total personal preference. I'm gonna show you what this looks like. I'm option+clicking, or alt+clicking on the mask. This is my dodge. That's my burn. I'm gonna show these to you both at the same time. So I'm gonna command+click, load that mask as a selection. I'm gonna do the same thing here. Let's see, command+click. Load as a selection, and keep a solid color fill. Make that blue, 'kay. So this is actually what it looks like. As you can see, again, between the eyes, under the eyes, by the nose, by the mouth. Pretty consistent. Here it is on its own, just 'cause I think this is kinda fun to look at sometimes. You can actually see the dodge and burn mask. A good, good retouching, good beauty retouching, lots of little things. Lots and lots of little things. And then this is the global dodge and burn, and those few little color adjustments, bringing us all the way to the end of the image. I'm gonna show you a few what not to do examples, but before I switch over to that, I would like to field some questions on the image, if anyone happens to have them. Maybe a philosophical question. Oh great. Where do you draw the line, like what has been your experience in terms of how far you will go, especially in fashion or commercial? Sure, sure, I think that's a really interesting question, and it's really part of a much bigger discussion. It will always depend on the person who's taking the image, who it's for, and what capacity. This idea has existed for a long time. Even way longer than photography, this idea of retouching and making people look better than they were. It's been happening with painting and portraits for centuries. They would make the people who were, let's say, intermingling genetically, the royalty, right, they generally weren't the most healthy looking of people. They made 'em look great. So capturing people in a way that is a little bit more kind or little bit more polished has always existed. There was this really great image I remember seeing, and it was a Halsman image by Audrey Hepburn years and years ago, and he talked about this concept of dodging and burning the face to bring more attention to it, but also to make people see her how he wanted her to be seen. And I think that's a continuing conversation and it will change and it will evolve, and different people seek to be seen in different ways, but certain people wanna be seen flawlessly, and certain people don't mind their flaws, and I think we have to be a little bit flexible about who we are trying to please, and in what capacity, and what that means. I personally tend to err underneath. I like to keep the realism, and then I regularly have people go, "Can I have a little bit more?" Sure, sure, whatever you need. Because I don't wanna offend the person and make 'em look like a completely different person. That's not the idea. But you also have to know that especially in fashion and beauty, and I know Lindsey talks about this a lot, you are doing creative lighting effects that are not flattering fundamentally. Hard light is not flattering light, and so you know that people are gonna be, it's like being put under a microscope, and the camera sees differently than we do. We see selectively, the camera sees unselectively. And so when we shine a bright light on someone's face and we get right up in there, human beings do not often get this close to people's face. It's considered rude at cocktail parties, I'm told. So... when we are scrutinizing, when we are looking, sometimes it's a little bit more kind to make them see more closely how we would see them in real life, even though it's unrealistic literally, if that makes sense. But again, I think it's an evolving conversation, and I think it's changing, and it's all about the threshold, so this is how to take it to here, and if you wanna back it off, that's totally your call to do so. But knowing the tools, then you can know like where I can go with it and where I can come back to. It's entirely up to your taste and process.
Ratings and Reviews
Andreas Böhrnsen
Great course on dodging and burning and beauty retouching in general. Think he went through all the steps very thoroughly. Well explained and overall a good course. Would highly recommend it to anyone into portrait and beauty photography.
Bjorn Carlen
A highly recommended class! Chris Knight is super efficient and tremendously clear an instructor. He manages to sqeeze so much useful information and tips into this hour, that I have to go back and revisit several times before i get it all. That may say something anout me myself, but I think also about the efficiency of the instructor. Very good!
user-d5c913
I have viewed many Creative Live classes and rank this one among the best. Chris very effectively organized his class to impart knowledge. He Starts with an overview and summary level walk thru of the process and then goes into details and does an actual retouch. He concludes with a lesson on what can go wrong and provides practice images. I highly recommend this class to anyone seeking to learn Dodge and Burn. Thank-you Chris for a great educational experience!
Student Work
Related Classes
Glamour & Beauty