Lessons
Day 1
1Backing Up Your Life
22:35 2File Organization
30:59 3Building Your Preview in Lightroom
29:24 4Library Module: Nuts & Bolts
32:10 5Sorting & Selecting Images
30:58 6Keywording
26:39 7Exporting Your Collection
29:47Manageable Organization
28:58 9Importing iPhone Photos
29:17 10Critiquing Your Own Work
34:10 11Storytelling with Images
16:55 12Image Quality
28:21 13Develop Module Basics
28:30 14Develop Module Controls
24:59 15Installing Presets
29:55 16Saving Styles to Presets
38:02 17Making Every Image Better
24:29 18Correction & Calibration
24:14 19Heal & Clone Brush
31:12 20Videos in Lightroom
32:13 21Adjusting Video
23:22 22Creating a Collection of Videos
18:06 23Intro to Print & Book Module
18:25 24Organizing Your Story
39:35 25Framework of Building Your Book
39:13 26Stylizing a Photo Book
27:52 27Power of Page Arrangements
31:02 28Making Simple Slideshows with Video
30:11 29Mobile & Publish Services
16:11 30Creating Catalogs for the Web
28:24 31Printing Your Images
21:35 32Printing for Scrapbooking
26:53 33Final Q&A
25:33Day 2
Day 3
Lesson Info
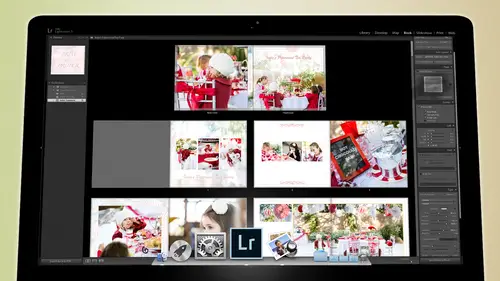
Installing Presets
We are heading back into our photos that we took of trade gin and for those of you who weren't watching yesterday we introduced trade jin this is trey gin and he is a five year old uh kid in our neighborhood good friends of our family and trade jin of they found out the tray jin had bone cancer just a couple months ago and he this this photograph is the day that he was going into chemotherapy for the first time and I decided that as ah as a parent what would I want if I learned that one of my children had cancer um and was going to go through that fight and so I decided that as a parent what I would want is that I would want that whole experience documented so that I either if things turned out well, I could then you know, show him the pictures and help them because when he's twenty he won't remember when he was five all that well on this other pictures would help him show help sean how much he went through in the fight and how courageous he was and how I would think that would help me...
is a kid or is a teenager or is an adult to know what I've been through and really understand what I could do in the future you know, give me courage but but if things didn't turn out well then he would you know, they would have that those pictures off him, so I just thought it would be a good idea to document the whole process that he's going through so that he can, he can really remember, and things were going well, and so I think that that in the end, these will be a great opportunity for him to look back and say this was a period of my life that was very difficult for everybody, but we fought through it way persevered, and so I've been doing this is a personal project, and I love it and he's such a fantastical kid very, very strong kid. So that's, that's, what we're looking at here is a project that's ongoing it's not finished by any means, and we're going teo just keep documenting, and today we're working on these photos so that we can build a book out of these photos on dh, then will also make a slide show and even cut a movie later on today will do some cutting of of of motion picture video, so, um, so let's get into it. I'm going to scroll a little bit further in the timeline here and again, we want to just be looking at our flagged images because I don't want to look at all the the non keepers, and I'm going to go to not see yeah question to him as you mentioned these pre sets a lot of people are wondering exactly how to install these presets maybe you could quickly show how they install these presets that's a great idea so let's do that let's go to this is this to me is a very dramatic photograph of trade jin on a day that wasn't going so well but his mom is always there um she she had to quit her job so that she could be there constantly and obviously the best decision that she could make but he's mean just always there I've never been there where she's not there. So she's just she's the rock there um but when I uh when I want to install presets let's say that I you know downloaded a set of pre set and I want to install those presets so uh I'm going to go and find presets and so let me let me quickly go to my set of pre set so that I, uh dropbox is an amazing place because you have theobald city where my presets here we go. Okay, so let's say that you went on the store and you got your free presets or you purchase some preset sir you purchase them from anywhere on dh ur or say a friend just shared them with you um from me they'll come in a zip file like this in most cases, that's what'll happen is they'll come in a zip file and I'm going to open up the intro preset pack, and when I do that it's going to open up a pack of of pre sets and you can see these air presets right here, so that's a preset that's, a preset this is this is what they look like see that little icon there says l are on it, so those air are pre set and we want to then put them somewhere. So in order to find where to put them the easiest place to go, you could you could go to the if you know the folder path you can get there through your explorer through your finer but in order to get their thie easiest way is to go up into your light room preferences so that's in the edit menu. If you're on a pc and it's in the light room with menu, if you're on a mac on dh, you go to the preferences menu when you're in the preferences there's a there's, a panel called presets, so you click on that second panel called presets, and then halfway down you will see a button that says show light room, presets, folder, so you're gonna click on that and it's going to open the folder. So this is now on my finder it showing me the path which is actually in the library application support adobe and then in the light room folder and then you can see there's actually a whole bunch of folders there there's the developed presets which is where all these presets that we just got our going but there's other presets as well there's color profiles so if you have paper profiles that you want to put into adobe light room this is where you put him um if you have, uh export actions that you want to put in there that's where they go if there are file named templates so if you created a bunch of file named templates remember yesterday when we're renaming stuff and I went to rename there was like a whole list of different ways I could rename something those air all presets and if you make them they store right here so there's all the templates for my different file naming types um if you go lay out templates so I have a whole set of layout templates on my store as well. And so these air blurb layout template so this is an eight by ten blur book and it gives you all of the custom pages and stuff like that it's the layout templates local adjustment presets so remember this morning when I went and made that radio uh, burn the radio tool and I chose a one stop burn from that little drop down menu that's all of them right here. All of those tools are sitting right here, and so any time you create a preset it's, putting it in one of these folders inside of your computer. So two things about this discussion and the first thing is once you've got light room the way you want it and you've got all your presets installed, it's a very, very, very good idea to click on this button and show light on presets folder, and when it opens it and shows you this light room preset folder, simply go in. And if you're on a mac, you khun just right, click it and you can compress it when you do that it's going to make a compression of all of these things and it's going to set it right to the side as light room dot zip, take that light room, zip folder and put it on your drop box. Put it in your creative cloud space, put it wherever you want to put it, save it, because now this is your backup, and if something ever happens or if you're in timbuktu and your wanting to get on someone else's light room, computer, light room uh light room program on their computer and you want to use your presets? All you have to do is download it from your dropbox and put it on their computer and then you can use their computer as though it's yours all you have to do is replace this folder on anyone's computer with your light room folder replaces folder and it will be your light room, not theirs. Just make sure that they save their light room folders so that you can put it back right so it's a really good idea to zip this up and then take it and put it on your dropbox so for me I would just take this and put it in the drop box and so now in my dropbox is a backup of my light room as it currently exists so that's a really, really important thing to do yeah, I have drop box but it seems like I felt I filled it with all my camera photos in orderto have dropbox have all this stuff? Is it a paid version of dropbox? Um dropbox is interesting you get free like two gigabytes or something like that and then as you share things with people, if they sign up, then you get an extra free to gigs or five gigs or whatever and they keep giving you gigabytes based on how much you push it out and so I share it with all my clients because my clients need to receive files and so every time they sign up in order to receive files from me, I get extra gigs. So I have, like, a hundred fifty gigs or and I have a big space, but you can also yeah, my, I have a lot of gigs on drop box because I literally share, like, like big clients that I have, we have a working relationship through dropbox, and so whenever I put something in, it just shows up on their desk top and they can use you so but you can pay for space to you can you can upgrade your space for, like, five bucks a month or something like that. So it's a respectable, uh, amount of space for five or ten bucks, so I don't know if it's totally, I think, but can you make a sale like a keyword list in another program that's like easier to type a bunch of words and put it in a pre set there for your light room? Technically speaking, I guess you could take your pre set because you can go in there's a keyword set here. So there's keyword sets technically, you could take this and you could open up that file in like a text editor and probably put him in and then save it again and see if it works it that should work but I don't know you know I would experiment with that yeah so you mean one with a good spell check because that's what I really need is easier does like you know listen like your family members are colors or so your key word sets is where you might do that but I don't know if you khun you know you can almost do anything in text editor but try it and see how it goes um so anyway all of your presets air in here so if I have a set I'm gonna hide light room if I have a set of pre sets here then all I have to do is take that folder of presets and I have to drag it into the place that it goes and in this case these air developed pretty sets so they're going to go into the developed presets area if I want to I can take those and drag them into a folder here so if I want to choose a folder where I think they should go like let's say I wanted him put them in this lr five folder I could highlight all of these and then just dragged them into that folder and then as soon as I restart light room they would be there but probably a better idea would be to create a folder with the name that you want so in this case it's my intro pack presets and now I drag them into that folder here, so grab these and drag them in now there there so now I just have to restart light room so I've gotta quit light room and by the way, we talked about this off off off the air of second ago when you close light room always back it up except for right now because I don't want to wait for it to back up, but when you're not on air and wasting other people's time always back it up because if something happens to it, you will be so perhaps e that the last time that you worked on it, you have a backup, okay, so now I'm gonna restart light room once you restart light room, that folder that you just put in there is now inside of light room and so we will go to the developed module back up to your computer or two like when you're doing your backups from light room. Oh, I just back up to the same folder that has that. So wherever the light room catalog is, itjust backs up to that same folder as a backup because I'm not really I'm not trying to protect myself against like total data loss because in the end the cloud is backing up the computer right and so at one point that backup will get backed up on the cloud I'm just trying to protect against the the one light room catalog somehow becoming corrupted I can just go right next door and grab it and you know I mean it's right there so I'm not really worried about as a way of protecting it for you no fire because that's what the cloud services for that's what you know your backup systems or for um so I don't need to put it somewhere else but you could if you wanted to you could save that to drop box if you want it okay so now that I go here I'm gonna close these up so that we can see all of our different light room collections are I mean our preset collections and you can see that I've got a whole bunch of these things now I don't really use all this money presets but I I've done workshops where I show people how to use them and so I keep them so that people can see what you know if I want oh so otherwise I if I weren't teaching I wouldn't have this money presets because that's really annoying so really you should have a very small number of pre census your goal should be to have a few presets as possible that will still keep you moving quickly and give you all the control that you need that's what you don't save extra spare presets it's not it's not worth the space because you end up having to scroll too much all right s o at this point because we have so many we're going to have to scroll through and find that one but it is our intro pack so it should be right there. Okay? So there's our intro pack of presets and if you click on this little arrow then you can see all of the things that you have available to you so and you could see that we have so if I wanted to take this and do some kind of ah you know documentary look click on that and it see how it changed the look it was just a normal black and white let me turn off the highlight shadow warnings on dh then when I click on the documentary look it kind of softens it up and it gives it a little grain and makes it a little bit more like a newspaper print type of look. So those are some of the pre sets that you can get for free if you just go to jared platt dot com forward slash life and that's how you install them and if you didn't catch that rewind and watch it again um that there is something very important that you should realize about this preset folder though you cannot put a folder inside a folder so the developed presets folder is where you put folders of pre sets. If you put a folder inside of this folder, it will not be seen by light room, so you can only go one folder deep so you look at the preset folder and inside of that folder you can put one folder if you try and extend the folder tree further down in any folders down there would just not be seen at all. Light room expects within this folder to see a folder with presets in it that's how it should look is just like this, and so if you get pre sets for me or anybody else, just make sure that when you install the presets that you're putting a folder of presets inside of that specific folder directly, no extra folders because light room just can't see others in that arrow represents a folder, but you can't put a full there can't have nested folders with inside of that, it just not built that way. I wish it wass it'd be great, but it's not okay, so now let's talk about making a preset, so we talked about working over here in the right hand side, we've talked about what these presets do, we talked about how to install them, but let's talk about making a pretty set. Um and in the process of doing that, we will show you howto work within these areas down here. So you have we've talked about this basic area quite a bit other than the the color black and white, which is very self explanatory. Um but we're going to talk about these now, so I'm going to take a photograph and I'm just going to take let's see, I really like this photograph a lot, I think it's a really striking photographs, I love it, but I'm gonna take this photograph down to its original, so I'm gonna reset it so that's, what it looks like originally so I'm gonna take this photograph and we're gonna work it we're gonna go different direction with that, we'll do something different with it, but the first thing that we do is we start by getting the exposure right, so get the exposure right bring the shadows uh blacks down highlights up a little bit, so see how it's working on that little crest on his face so we'll bring that highlight up just a bit. And then, of course, it's changed up here. It's gotten a little bit too bright up here, I don't like that takes our I away from him, we want it to be fairly dark and then, you know brings it to him and so I'm going to come up into my, uh, localized adjustments here and I'm going to get the grady in't so there's a brush here there's a radio tool there's a grady int and all three of those operate exactly the same way when it comes to the sliders, they all looked that they all have the same sliders that so you change the temperature of the tent, the control, the exposure contrast highlights etcetera, etcetera and once you've changed them, whatever you're doing well but but with the brush if you do an exposure change, see that it just it's doing it where you brush if on the other hand, you do it in a grady in its starting with one hundred percent, where you click first and it's going to zero percent where you click where you let go so it's one hundred percent burn here one hundred percent of whatever you have listed here, one hundred percent hair zero percent here and then you can change the trajectory of it the angle of it by clicking on that middle area and that will allow you to rotate the burn. You can move the burned by clicking on the center and you can move it in and out and you can change the distance of the burn by clicking on either one of these sides and you can lengthen the length of you know how quickly so sometimes you know that you can make a really quick burn and it just becomes a line or you can do a very soft subtle one that yeah that's much more subtle you can't actually see that it's in existence. Okay, so that's the grady in tool um and if you want to get rid of that great you hit the delete button and it explodes so, um if we do the radial we already worked on the radio a little bit but it's the same the exposure settings are the same and as you go from one to the next see howthe exposure change stays the same. So that that's the reason they do that so that you could do a grady it burn like this, then you can switch over to the over to your brush and you could say, I just want to add a little bit more of what I just did there right here and down onto that chair something like that. So it just allows you to just extend something a little bit on dh then you could go into the radio and see out, stays the same again and then you could, you know, do us a circle around him and now you've got, you know, that's this is what the photo looks like if you do that raedle radio burn, which is a little over the top, but that's the idea s o click on this delete that go over here, click on that burned a lead that click on this one and grab that delete that and now you're back to normal or you could just hit reset, but that would reset the whole photograph. Um, the other thing to know about these, uh, these areas up here, um and again, remember the effect right here if you go, people asked this all the time, so I'm gonna really dial in here, so if you're looking for presets and you have installed presets or you, you know, bought presets or whatever for these localized adjustments, those air actually inside of this folder, right local adjustment resets that's the folder there in inside of your light room folder in the presets area. It's called local adjustments presets and notice that it doesn't allow for any folders to be nested inside of it because it's just one big long list. So when we go here that's the list, everything is in that folder is in this list, and if you want to make one, you come down to the bottom of that full of that and save whatever your settings are, so if you you know, if you change these to be like that and you go to the effects and go all the way to the bottom and save that as a new preset then when you go to that, you'll be able to click on it and whatever it is that you click on so if I wanted to do a you know, turn the lights on type of thing or something uh see how it changes all of that just by clicking on a setting now here's an important point though if I did something with that and by the way let let's let's do it on say this one and were in turn it to color so I can show you what this does um I'm going to turn this whole thing to color and let's just say that I wanted to you know, there was a light back here that I wanted to turn on, so this is what I'm doing I'm going to this the paintbrush tool and I turned I used this preset here to turn my lights on and then I can go in and just let's say that this is a big light say I want it or I wanted it to become a light I would just grab it and go like this see now it looks like it's a light looks like it's a big you know, it's glowing now so I use this all the time to make lights or if I wanted it to look like there was light coming in from over here so now that looks like it's a window right? So um but that's just a preset and all it is is sliding the sliders in various places and adding a little color to make all that happen but but in orderto because you don't want to have to keep sliding these sliders every time you do something plus for consistencies sake you'll always get a much more consistent look about your styles if you just kind of codify those styles into a pre set so you click on it you're always getting the same style on dh then you can adjust that style a little bit yeah the same thing and to um make things darker so if I tend to know that sometimes I have light through a window or things get to light I have spots where there's light I don't want I've never quite been able to figure out okay how do I just let that turn that down so that there isn't so much your eye doesn't go to it right away right? So um can I do a preset tio? I mean yeah, you could you could you could create a preset here and generally if I was trying to tone down brightness usually what I'll do is all I'll reset this and I'll go to a new exposure down or or use the highlights highlights is a really good place to do that so we're creating a preset to do that. All right, so let me let me go to a photograph or we have, uh there yeah, okay, so there's a great photograph. This is right after he finally had his head shaved because his hair was getting thin and they had a big shaving party. So everybody, like all the some boys from the high school, came over and they got their head shaved and one of the one of his family friends the adult came over and got his head shaved and a little kid got hit, you know? So everybody was shaving their heads so that he, you know, felt comfortable about the idea on dh. So, uh, if I wanted to then burn in this area, which I don't, I don't know that I want to because I like the way it looks, but let's just say I did what I would do is I would come into here, I would reset my my brush. Um I would be using the brush area because I want to paint it and on lee where I want it on then I would take my highlights down first, because if you take the exposure down, you're doing mid tones but if you take the highlights down your generally dealing with, you know, this stuff up here and maybe that door and stuff like that, so the highlights would be where I go first, and then I would just start painting it in and you can see how the door see how the wall is getting darker and the doors were getting a little but it's obviously not going to do anything to that window because there's, nothing there, it's totally blown out, but at least we're getting, you know, the floor, I get the floor and and you can change the brush just by changing, you know, just by rolling across your the roller on your mouse on dh so I can get you know, that floor to come in a little bit better, and then what I can do is once I've got that, so if you come down right down to the tool bar there's ah there's a check boxes his show selected mask if I click on that, it shows me in a red form where I've spray painted basically and so you can see what you've done it's all I've sprayed around their kind of avoided this girl, and now I'm going to now I can see see how much I could change it. But it's all affecting on ly that area and so now I can really play with it and see okay, well what's my you know whats the effect I want to come up with you do I want teo rich in the shadows or do I want to thin them out? Um do I wanna add clarity or do I want to take clarity away so that it becomes kind of soft and blurry? Um do I'm on it take the saturation out, you know, as I'm burning something in because you'll find that when you burn something it gets overly saturated remember when I told you that exposure effects color it does, it becomes richer as you burn something that color gets richer and so if you want to avoid that so that it doesn't look like you're burning, you would burn something, but you would also take saturation out a little bit so it doesn't look like it was getting richer and color um, you could do noise and all this kind of so once you've got what you want, then you would go and save that as a new preset save current settings of the new preset and you would call it, you know, highlight dodge with negative saturation, so then you know what that tools going to do and I'm gonna make it, you know, number one hundred so that I know exactly where it's going to fall. So if I go it's in the bottom of my list, it's called highlight dodge with saturation negative saturation. So then from then on out, any time I want to use it. Even if I wanted to use it in the grady in tool, I could always come in and choose this one. And then do a grady in and and get something back. And you can see that it's actually getting a little bit of data back in. So if you, if you zoom in here, that's the outside portico area of the of the house, you could see this coming back in. So there's. Still something there. Raw data is pretty amazing for what it could still contain. But you can't see anything here, because it's, just too bright, but so that's. How I would do that.
Class Materials
bonus material with purchase
Free Bonus Material
Ratings and Reviews
Steve61861
I have spent a small fortune buying classes from Creative Live, and I have learned a great deal from many terrific instructors. This class ranks as the #1 best class I have purchased from Creative Live. It was done in 2014, and the changes and improvements in Lightroom since then are far too numerous to count. However, I just watched the entire class again (August, 2018) and I realized that the class is as valuable today as it was when I originally purchased it. The title says it is for Scrapbookers, but it could have been Lightroom for Everyone. Jared covers every part of Lightroom as it existed in 2014, not just Library and Develop! He has a marvelous teaching style that motivates and inspires one to grab a camera and go take great images. Yes, it is dated. Yes, it is a long course - but only because it thoroughly covers a vast amount of information about Lightroom. And, yes, it still has real value in 2018, and I plan to rewatch it once a year now for the motivation it provides and the incentive to bring myself up-to-date on ALL of Lightroom's latest and most valuable features in all modules. Thanks CL for bringing Jared Platt to us, and please bring more of his great classes soon.
a Creativelive Student
Good class. Jared is an excellent instructor and provided good information. I was more interested in Lightroom than scrapbooking and I think the mix was about right for me. While I found the focus on Trajen interesting and heartwarming ... I found that too much information was shared and too much time was spent on his story. It was distracting for me and I think would be hard to listen to over and over again if I were to buy this course. I think that some of the material was rushed because of the time spent covering this and other unrelated topics. I prefer a more focused approach. I was more comfortable when he was showing photos of his kids as examples the first day. However, I enjoyed the class and learned a lot. Thanks!!
cricutDIVA
Thank you soooo much Jared. I am an avid scrapbooker and still an amateur photographer, but you have given me so much helpful information that my pictures are looking really amazing now. I often share on Facebook and the compliments I have been getting since I started applying what I learned from you are astounding. I have never received so many compliments on my photos. Prayers and positive vibes for Trajan and his family and friends!!!