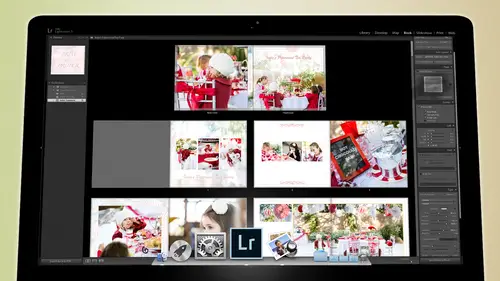
Lessons
Day 1
1Backing Up Your Life
22:35 2File Organization
30:59 3Building Your Preview in Lightroom
29:24 4Library Module: Nuts & Bolts
32:10 5Sorting & Selecting Images
30:58 6Keywording
26:39 7Exporting Your Collection
29:47Manageable Organization
28:58 9Importing iPhone Photos
29:17 10Critiquing Your Own Work
34:10 11Storytelling with Images
16:55 12Image Quality
28:21 13Develop Module Basics
28:30 14Develop Module Controls
24:59 15Installing Presets
29:55 16Saving Styles to Presets
38:02 17Making Every Image Better
24:29 18Correction & Calibration
24:14 19Heal & Clone Brush
31:12 20Videos in Lightroom
32:13 21Adjusting Video
23:22 22Creating a Collection of Videos
18:06 23Intro to Print & Book Module
18:25 24Organizing Your Story
39:35 25Framework of Building Your Book
39:13 26Stylizing a Photo Book
27:52 27Power of Page Arrangements
31:02 28Making Simple Slideshows with Video
30:11 29Mobile & Publish Services
16:11 30Creating Catalogs for the Web
28:24 31Printing Your Images
21:35 32Printing for Scrapbooking
26:53 33Final Q&A
25:33Day 2
Day 3
Lesson Info
Heal & Clone Brush
You also have spot removals, so you can take a spot and come in here. If I want to get rid of a blemish or something like that, I could just come over here and say, I want to get rid of this blemish and click on it, and I'm going to check the feather nice, nice and wide, like a nice wide feather. Click on it. And now that's gone. All right, so there's. Two different types of doing this there's hell and clone hell is a much more intelligent tool and so there's a difference between healing and cloning. I'm now healing here. So if I, if I heal this, it tries to find a spot that works. But it it's it's kind of copying over the color and copying over some of the detail. But it's, not it's, not just it's, not just taking a blob and placing it on top of it. Clone is a little bit more blob ish, so healing is a much more intelligent tool used. The hell. Um, the only time you want to use the clone is when you're getting rid of like a nen tire. Boat and somehow you just want to copy this piece of...
the ocean over that piece of the ocean and get rid of an entire boat or something like that, but healing is much better for skin and for, you know, subtle things and grass and things like that the healing tools I think much better when I s mine I don't always have that circled like sometimes it doesn't find the best spot could I see that's? So if if it doesn't if it finds a spot like here and see how it's copying that piece of hair over to there just grab the spot that it chose and drag it to another spot that's appropriate and let go and now it will copy from this those on me computer for some reason the line o okay, well, you don't see it right now either, right? Because I'm not over the photograph once I mouse over the photograph, they appear that the choices for that is down below in the tool bar you khun tell it toe auto show it always show it selected or never you might be on never I might be on, so put it on auto and that way if you want to see what the photo looks like without the circles, pull your cursor off if you want to see what it looks like with put your cursor back on so now you can go in and get rid of, you know, like these little flecks of mascara, we can get rid of those get rid of this one. So it's, very easy to remove stuff like that. And then when we zoom out, we've gotten rid of anything, and my rule of thumb is get rid of anything that I don't see in my eye when I'm taking the picture. So if there's like a there's ah, beauty mark or a mole or something like that that I see on them and you would see on them if you were talking to them and it's just part of who they are, leave it. But if it's something that I never even notice when I'm talking to you and then I looked the photo and like, oh, I never saw that she had, you know, this mark or whatever, then I'll get rid of it because it doesn't it doesn't isn't core of who she is, what she is and what the way she looks so that's my rule of thumb, if I have to do a lot of retouching, then I'll go to photo shop, but if it's just a, you know, a blemish here, there, I'll get rid of it here. Now the other thing that you could do with this it's not just for little spots you can also and this is new delight from five but you khun grab onto this tool and let's say we want to get rid of me we get see that line back there that line that straight line right there is a, um it's a it's a concrete barrier and let's say I didn't like that concrete barrier um I could then increase the size of my my tool here and I could and I'm gonna use the hell again and I can just simply go like this and then I'm gonna move the place that it's copying from over like that and I could just get rid of say, I got rid of it now obviously it's a little it's a little rudimentary I probably do a better job at it but if you didn't know that that existed, you wouldn't even it wouldn't even trouble you that there were two versions of the same shadow there, but if it did trouble you could always come in here and say okay, but now I'm going to go in and I'm just going to get rid of that one version of the shadow I don't know I don't know I chose toe uh ghost or foot, but I could just grab that's weird they're so now it doesn't even look like the shadow was doubled up retouching or you have to go into photoshopped you could work on that here's another thing that you can do, by the way, um, I'm gonna zoom into her eyes and if I want to soften under her eyes so that I don't see like the darkness here and everybody has a little bit of darkness under the eyes and it's not all that pleasing, but we always see bags and stuff like that under people's eyes on dh, the older we get, the more bags we get, you know, we just get older, so click on that same retouching tool and then just come in and you're gonna bring your brush down to the right size and in this case you're going teo change the opacity so I can come in here and go like this and it's going to try and find some random place, which is not correct, so let's hit. I don't know what its chosen, so I'm going to choose sam choosing a brighter area. I'm just choosing something that's a little bit brighter like that now if I leave it at one hundred percent it's literally copping a piece of skin and putting it over, and you can see the difference between that see how it's dark and then this skin is over, but that looks weird. Because there's no crease so now what we're going to do is take the opacity on that particular ones so see how that still highlighted we'll take the opacity on that and take it down to zero now you see the rial I and now we're going to increase it until it's just softened up enough that now it's nice and smooth and now we can zoom out and she has a much softer crease under her eye so now it's a much more beautiful look still looks riel but it's softer so a lot of the stuff that you want to fix and usually especially for mom and dad or whatever they're working on a scrapbook usually the only person that you need do this too is yourself you know it's like us older people that want to do this to ourselves because the kids look great as they are um sometimes you know you'll have a booger under a kid's nose I always deal with boogers under kids noses so there's always a booger there this is a great place to get rid of the booker you know or a great place to get rid of the chocolate you know right here that you were coaxing the child with you know those types of things can get rid you don't need photo shop to get rid of some of this stuff now if there's a lot of chocolate on their face don't get rid of it that's the way we talked about that yesterday that's the detail that's crucial you don't get rid of the chocolate you keep the chocolate if it's a lot of boogers believe the boogers because it's you it's your boy right? But if it's a little booger here and there and it's not crucial to the story get rid of the booger so it's always remember it's about the details that's one of the the most specific things it's important to what makes a photo a photo and what makes it successful is whether or not you're willing to leave the details or put the details in that tell you the story okay? Yeah, well quick with all these adjustments do you recommend on a raw photo since you are making these adjustments on a raw photo, making that into make creating a copy for that you know I'm gonna so you khun let me let me show this because maybe people don't know you're talking about you khun take any raw photo or any j peg or whatever and you can right click it and you can create a virtual copy and when you do that it's making a copy that's not really a copy it's it's a reference on lee but you can then work on that photo so I can take this copy now and turn it to black and white and so now I have a color and I have a black and white version of this photograph, and I can work differently on this one I could do different retouching on and I could I could do are amazing. Uh, I could do r eyeball thing, helen, there we go so I could do r r creepy eyeballs coming out of the grass on this one and on this one, do it normal, but I didn't have to copy the file. The file doesn't there isn't two of this file there's just one and so that's what we're talking about so the question then is do I? If I'm gonna work on a file like this? Do I make a copy of it and then start working on it? No, because I have the ability to go back and undo those things because it's, not it's it's never baked into the photo it's all pieces and layers on top of the photo, and so the only thing that I would do if I was a little worried about the way that I was going to be working on the photo and like I wasn't gonna like the photo. I might come over here below my presets and, uh and use the snapshot, so if you if you add a snapshot right before you work on it and right after then you've got the two versions and you can just click on one or the other that way you're not confused by all of the but if you want it visually see the difference between them you know or you want to export like five different versions of it that's when you would want to make those virtual copies because then you would see every interational what you're doing but for me, I'm pretty confident in what I'm creating and so I just go with a purpose and be done with it I don't I don't find myself fussing between option air option b I just move forward with it and when I finished, I figure that's the right direction. So and again we you you said that one of your takeaways from yesterday was that you're a lot of the learning process and a lot of you know, you getting better at what you do is just learning to trust yourself and I've got to the point where I trust myself and that's important in any walk of life, not just in photography it's important to trust yourself and everything and so you're going to kind of practise and practise and trusting yourself and once you get to that point then you stop fussing over is this the right way to go? Is that the right way to go? You know, when you're building a scrapbook page, you've got to trust yourself otherwise I can't imagine being a physical scrapbook er with indecision is a problem I mean it's hard enough it's hard enough to do that kind of thing in a digital world where you can say undo but if you I'll bet you that if I somehow studied the difference I'll bet that digital scrapbook er's and digital photographers and stuff have much harder problem with indecision than people who do it in a physical world the people who do physical scrapbooking probably learned very quickly it's not good tio tio have indecision is a problem and they probably just go this is what I'm gonna do gonna plan it out get it done and move to the next one whereas digital people are like oh well I can go back so I might as well you know and I think it causes the problem so ok any questions out there that we should be we have another question come up here and it might be worth showing one more time this question comes from d p seven and they're wondering if you can show another example of kind of taking care of facial blemishes they're asking specifically about chin peach fuzz another like little sorts of hairs fixing on the face maybe you could show that you know let me see if I can pulled on one second let me see if I can do a peach fuzz on a face what if I did like stubble because I don't know about peach fuzz, you know, I think any sort of small blemish on the face would would do the trick, but something with hair might be good. Okay, so two things that we have to consider so let's go into the developmental, and I'm just going to trade jin's dad, because I know he has whiskers, and so I was like, I'm not exactly sure where to go for whiskers, but so whiskers are one of those things where, you know, I think whiskers air manly and keep him, but you might want to minimize them to some degree, but in this case, like for instance, maybe I want to get rid of the shadow a little bit it's a little bit too harsh, it could smooth that out. Maybe I want to get rid of some of them. So in that case, if I'm just working on little kind of little, you know, blemishes and things like that, then I'll go for the the things that I was doing before I'll grab onto this tool here, the clone tool, and I'll go in and and just, you know, size it to the size of whatever like this blemish here, and I would click on it, and then I would move that blemish, like, right there and then you know, the capacity could be one hundred percent if you're trying to remove a blemish completely, but if you're trying to just soften something like for instance, he has this on, you know, like a mole on his skin, and if you I don't see that when I talked to him, but I don't want to remove it completely because it's it's part of him and I think most people that he knows probably knows he has that and it's, probably, but I might want to soften it for the photos sake, so I'll click on that one as well, and I wish see how it just removes it completely, and I don't want to remove it completely, nor do I want to put whiskers right here on this, on his nose, and so I'm going to take it back to where it is grabbing skin that makes more sense, and then I'm going to take that skin, and I'm gonna do the opacity changed so that I'm just muting it see that so it's still there, but it's just a little bit muted so that it's not quite a central figure in the portrait, so things like that I'm going to do here inside of light room, another thing that I can do inside of light room is this sometimes we get these deep lines across their forehead and some of them are fine, but some of them are way too big and too long, and they call attention to themselves and so and usually with men, you don't necessarily worry too much about this, but with women you'll worry about it more, but I'll just go like this and get rid of one that's a little bit over the top, and and then again, I can change the opacity here and decide how much of that see I'm still leaving a little bit of it, so there's a trace of it, but now it's not quite a serious right, and then the other thing that we can do in retouching someone's skin inside of light room is to go into the brush and in the brush, we're going to let's reset everything so I can show you what we're doing, but in the brush we're going to get rid of clarity and we're gonna get rid of sharpness, clarity and sharpness create contrast, contrast is what helps to show sharpness. So now if I go in with that lack of clarity and lack of sharpness and I just paint on his skin so I can come in here, and when I do that it's going to soften up the areas of the skin that air creating contrast, and so let me I got to increase the flow on this so siumut thirty percent thirty percent flow is very it's very light it's just you gotta work on it a lot to get that in so I'm going to take that up to one hundred percent so that whatever I do happens all the way so if I've touched it it's one hundred percent of whatever I've done to it then you'll be able to see what I'm doing here so I take clarity up see how that looks you might take the clarity down see how that looks so it's somewhere in the middle it's not it's not at either side and then if I take the sharpness up see how that looks I've liked taking the pores and increase them take the sharpness all the way down and now there are no pores it's somewhere in between so I can just kind of work on that until I feel like that's nice and now I have a nice look but I conclude create a new one and now I can come in and work on his whiskers whiskers are the same thing they're just contrast it's a contrast between skin and a black point right so now I can just take this and I can take the clarity way down and take the sharpness way down and then I can just start painting and you see I'm getting rid of whiskers now this is way too much so don't get don't no one out there start going well, that's ridiculous! I just want to see where I've done that, right? So now he has no whiskers, but he also has no pores and he looks a little bit like he's had, like major bo tox and plastic surgery or something. So what we're going to do now is going to play with this and find out where the happy medium is so that his skin has less black and andme or, uh, you know, just kind of a nice tone to it. There you go, and the other thing that you could do is take contrast down and see how the contrast when you do that, you start losing some of the severity of that, too, so you can see the difference between these whiskers here and the's whiskers here, so I'm minimizing, I'm not removing if I wanted to remove them and I'm going toe, I'm going to get rid of this because I I like the whiskers, so I'm just going to hit delete, it explodes and now we've got the whiskers back, but and I might also get rid of this one on his nose, because I don't think that was necessary um if I wanted to remove the whiskers, then I would go to photo shop and in photoshopped the best way to get rid of whiskers and I'm not really going to detail, but if there's anyone out there that's really steeped in photo shop, you'll know what I'm talking about the best way to get it with we're outta whiskers besides actually going in and trying to remove every single whisker which if you're doing that, you're way too over the top um the best way to do it would be simply too go in and to use a so so basically you want to create a lytton layer so you the type of layer is a light and layer it's gonna light things and then you're just going to use a you're going to use a it's, not a light I'm sorry it's, not a light layer it's a lytton um uh stamp standing like the stamp tool turn it toe the mod toe lytton and then you're going to stamp from someplace that doesn't have whiskers and then you're going on a separate layer you're going to stamp over the top of it and kind of paint in skin that has no, uh whiskers in it and what's gonna happen is if if whatever's underneath it is darker it's gonna lighten it up to that, but if something underneath it is an equal or brighter value is going to do nothing to it so what happens is all those little points of whiskers brighten up and all of them the skin that doesn't have whiskers on it stays exactly the same. So that's all I'm gonna say about that because this is not really a photo shop class, but it is possible to do in photo shop very quickly, but in most cases I'm just going to try and minimise things in light room. I'm not if I need serious retouching, I'm gonna go to photo shop and work in it, but I do have a rule and my rule is as a professional. My rule is that if I'm if I could do it in light room, I'll do it for free that's part of taking the picture and part of the imagery if I have to go to photo shop that's when I start charging my client for that work. So that's the rule photo shop is kind of that dividing line once you go into photo shop that's a charge thing, we charge for that, um, as a as a personal thing, I would only go to photos off if I felt like I absolutely had to. If it was just for personal work, I was like, I got to go in because this is such an amazing image and and it's going to be this big if if your picture is going to be this big don't go photo shop just don't do it there's no point it's this big you will never see the blemish you don't even have to do the blemish removal here unless it's just a huge goiter or something you're going to see it okay, so you got to triage and decide what's really important and what's not important and the smaller the image is going to be the less important it is which by the way is really import when we talk about scrapbooking because we're actually going to be making a book like this so this is a book from blur, but we're going to be working inside of light room and it's straight from light room we're going to create this kind of a book and it's it's beautiful absolutely beautiful work so I'm excited and we have a special guest coming tomorrow from blurb and so I'm excited about that but uh when we make these books I design the book first then I do the retouching or the work because it may be that the image is only going to be this big and it's only gonna be this big I don't need to do much work on it, but if it's gonna be like a two page spread, so if I'm gonna find me to do a picture that's, you know looking for well, if I'm going to do this picture where it's twelve by twelve picture, then I'm going to make sure that the image looks really good, but if it's tiny picture, then I don't need to do as much work. So that's the beauty of being able to lay out your print, lay out your book designed before you actually print anything, you could just lay it out, see outlays out and then go, oh, I can see something there because it's so big I'll work on that image, but on these I can't see it, so I don't have to do it. I love the ability to lay out the book first, then decide what to retouch, what to work on. So, uh, any questions? There is a question that came up in the chat room and kind of spurred a whole discussion in the chat room, and I want to get your take on this it's a little bit outside of what we were just talking about love outside it's still a very important question for a lot of scrap booker's out there now the question comes from and studio, and they say now that I'm finally going to organize all of my photos and light rooms, I wondered if jared could recommend a company to use for digitizing old photos that I had from before digital cameras came along so we have a lot of mostly physical scrap booker's out there who have actual physical pictures that they have in shoe boxes they have accumulated over the years do you have any guidance to kind of quickly digitize all those and get those and well, let me let me do this let me do to fold let me answer you first by saying if you send it off to a company it's going to be expensive very expensive because they're literally gonna be scanning everything and for you you could purchase a a really nice scanner for the price that you would pay on dh then you would still have an extra thousand or two dollars in your pocket that you could you know, buy more scrapbooking stuff so you are going to spend a very hefty fee to get someone to scan it however let me give you the rules for scanning because this is important my mom is scanning thousands upon thousands of old family like heirloom type photos and she came to me first I'm glad she did because my brother earlier on did the same thing and scanned them all really small and they're worthless they're they're good enough to put like on your iphone this big but you couldn't expand them at all and so we have to redo the whole process and so here's the rules if you're going to scan something if it's a you want in the end you want to have a file that's at least three hundred d p I that means dots per inch so dp I three hundred that's a printable size and you want the final size to be eight by ten or larger because at least you could do something with that if you scan a small four by six photograph at three hundred dp I it will be four by six and three hundred d p I that means you can on ly print it at four by six for the rest of your life maybe you want that to be an eight by ten now I wouldn't scan everything at sixteen by twenty or something like that because you don't really need to do that probably but eight by ten is a very reasonable size to expect so if I have a four by six I'm going to scan it but in the scanning software I'm going to tell it that I want the final size to be eight by twelve not eight by ten because a four by six turns to an eight by twelve not in a pretend so eight by twelve at three hundred d p I sometimes your scanner software will on ly allow you to input a dp I not a final file size so I have four by six I'm gonna scan it at like a thousand d p I and then when you compute it and change the thousand d p I to three hundred the size of the print gets bigger because it's just dots per square inch if you have a thousand dots per square inch and then you change the square inch toe are the dots per inch to three hundred then the number inches gets larger it's just mathematics equation right goes up and down what you do to one goes opposite the other right it's like when you learn fractions you do this to that and it does the opposite of the other whatever okay, so that's a cz muchas I know about math by the way I just gave it all to you that's that's my entire mathematics understanding right there. So you're saying that it's really important to kind of have the right file size there because in the chat room people are talking about using services at costco at sam's club kind of doing that bulk scanning a photo and you can you can use costco and they'll do a decent job but it's a very automated process and they're gonna give you back crappy little j peg it's going to be a really like if you know the person that's doing it and here's what I would do if I if I didn't want to do it myself I would hire a student at a local college to do it for me and if I had to I would buy them the scanner you know I'd say here's the scanner and if you buy a decently good aps and printer our scanner for over one hundred fifty dollars it will it will scan you a very good file okay, get that scanner and plug it into a computer and then have some student or have your son who's fifteen years old have your son do and pay him for it at least keep the money in the family you know because because scanning scanning princes not difficult it's not extremely difficult especially if you have a decent little absent scanner or something like that or canon scanner app center can and make great scanners now if you want to use a service I know that there are two or three services out there that will do that. But basically if you type in if you search on the web for digitally archiving prints on dh scanning prints there will be three or four service that come up. I know room the chat room is coming to our rescue scan cafe dot com one that you recommend here. So yeah so I would search for those and then I would look at how much it costs and then I would if if it if it's astronomical which it should be especially if it's shoe boxes and shoebox full then I would go and say, okay, it looks like it cost me twelve twelve hundred twelve thousand twelve hundred dollars to do this well, I'm going to spend three hundred dollars on a nice scanner and I'm gonna pay the rest to my son to sit and scan these things, you know? And then he khun, you know, do what he wants, so they're putting his college fund or something like that that's what I would do because skin now scanning negatives, on the other hand, much more challenging event scanning negatives is what they call the black arts because you can't see what you're doing in there and you, it really takes a good artist to scan a good negative. It really does. It takes a really good artist to do it, and so in that case, I would go through and light box all the photos that you have look on him on a light box once you've got them and you've chosen the ones you want, take them to a professional lab and ask the professional lab to scan on ly the images that you need because that scanning and negative you want the absolute best scan you khun get and it's difficult to get the best scan I have. I have a nikon nine thousand scanner, it does medium format and thirty five, but I've been doing this for almost twenty, twenty years now twenty more than that oh, jeez, so I've done it done this for more than twenty years, and so I understand how to do that, but it is an art, and if you don't know what you're doing, you're going to get bad results and it's pretty ex pricey to get a good film scanner, so you might as well just hire someone to do the individual images that you need, but you don't just send the whole lot, go through and look at him, choose the ones you want and then do it. Would that be the same first slide for the size slide slide film was well slide films or just actually slide films, or even more difficult to do because a slide film has so much latitude in it, and it has negatives are a little bit more forgiving, but slide film is pretty touchy and so there's you really got a lot of times you'll scan it five or twelve or twenty five times, if for one scan, so my scanner takes for a really excellent scan. I can spend upwards of two hours scanning one slide, which means that you want to get it right the first time, because if you have to wait two hours and then come back to it and do it again, that's four hours out of your life, so so hire someone
Class Materials
bonus material with purchase
Free Bonus Material
Ratings and Reviews
Steve61861
I have spent a small fortune buying classes from Creative Live, and I have learned a great deal from many terrific instructors. This class ranks as the #1 best class I have purchased from Creative Live. It was done in 2014, and the changes and improvements in Lightroom since then are far too numerous to count. However, I just watched the entire class again (August, 2018) and I realized that the class is as valuable today as it was when I originally purchased it. The title says it is for Scrapbookers, but it could have been Lightroom for Everyone. Jared covers every part of Lightroom as it existed in 2014, not just Library and Develop! He has a marvelous teaching style that motivates and inspires one to grab a camera and go take great images. Yes, it is dated. Yes, it is a long course - but only because it thoroughly covers a vast amount of information about Lightroom. And, yes, it still has real value in 2018, and I plan to rewatch it once a year now for the motivation it provides and the incentive to bring myself up-to-date on ALL of Lightroom's latest and most valuable features in all modules. Thanks CL for bringing Jared Platt to us, and please bring more of his great classes soon.
a Creativelive Student
Good class. Jared is an excellent instructor and provided good information. I was more interested in Lightroom than scrapbooking and I think the mix was about right for me. While I found the focus on Trajen interesting and heartwarming ... I found that too much information was shared and too much time was spent on his story. It was distracting for me and I think would be hard to listen to over and over again if I were to buy this course. I think that some of the material was rushed because of the time spent covering this and other unrelated topics. I prefer a more focused approach. I was more comfortable when he was showing photos of his kids as examples the first day. However, I enjoyed the class and learned a lot. Thanks!!
cricutDIVA
Thank you soooo much Jared. I am an avid scrapbooker and still an amateur photographer, but you have given me so much helpful information that my pictures are looking really amazing now. I often share on Facebook and the compliments I have been getting since I started applying what I learned from you are astounding. I have never received so many compliments on my photos. Prayers and positive vibes for Trajan and his family and friends!!!