Adobe Lightroom Automation Techniques
Lesson 1 from: Adobe Lightroom Automation TechniquesJared Platt
Adobe Lightroom Automation Techniques
Lesson 1 from: Adobe Lightroom Automation TechniquesJared Platt
Lesson Info
1. Adobe Lightroom Automation Techniques
Lessons
Adobe Lightroom Automation Techniques
1:20:10Lesson Info
Adobe Lightroom Automation Techniques
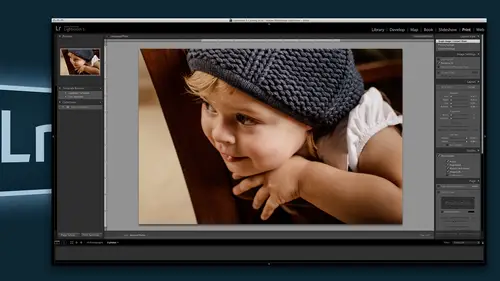
I'm the light room guy would just funny because light room is kind of a secondary thought to most people when it comes to photo shop but in my mind light room is the center of the universe and photo shop is just a plug in delight room so ah you'll find that most of what I do is inside of light room and my job here today in this segment is talk about automation techniques so we want to cover automating light room in such a way that most of your work can be done by the system and not necessarily by you and by clicking and all those types of things s o during our segment here we're going to talk about different techniques that we can automate doesn't matter if you are a beginner and intermediate or in advanced light room user there's going to be a lot of tips here that you may not know about that will change the way that you process your images so that you can get through them that's our job is to find little techniques that will help speed you along and get you out of the clicking and al...
low light room to do most of the work so that's what we're about here for the next ninety minutes um so let's let's first talk about some of the absolute basic automation techniques inside of light room and when I say automation I mean you're not doing anything right it gets hopefully we can get light room to stop toe work for you so that you don't have a job anymore that's really what we would like to do right? So we could be doing something else while light room is churning through our files so let's talk about some of the first things that we can do inside of light room tow automate the process of working on your files so if you go to the I'm sorry if you go to the import dialog box as though you're importing file, you're going to notice a couple things in there that are going to be very help awful to you to get things done first off if you go over to the top right hand corner of of the import dialog box um you're going to see building one for one previous so I'm gonna zoom in on that so you can see that so there's options you can build one for one standard or minimal previews there's a lot of different previous but if you build one for one previews as light room is bringing the files in its building full j peg previews of those images so that you can actually zoom in and zoom out without the churning you've all seen that right where you zoom in to a file and you want to see if it's sharp and then it sits there and spends for a minute and it's building a preview for you you don't need to do that, so automate that process on the way in and tell light room to build those on the way and that's the first step to getting things done at least when you're talking about looking at your images and calling through those images. The other thing that you'll notice inside of this file handling area is the build of building smart previews smart previous really important they're new to light room five, so if you don't have light room five you don't have smart previews but they're really, really important um because it allows you to work on your files off line so you want to check that on so that as it's coming in it's building smart previous it's going to increase the size necessary for that catalog because what it's doing now is it's building previews that air j pegs to zoom in and zoom out to look at photos but it's also building a smart preview, which is a tiny little raw file it's just little tiny raw file on dh so that requires a little extra space and that's going to go in with the catalog itself so there's going to be a catalog there's going to be a previews and there's going to smart previous all within that same catalog folder so you just have to be prepared for a little larger catalog size but in the end, because of the smart previews, you'll actually be able to detach all the original files and still work on the files even if you're on the plane or if you're traveling around the world, you can adjust your files, you can even export files, so even if I'm you know somewhere else and the my original files or a home, I can still be working and aiken blawg from those files even though they don't exist on the computer they're just smart previous so there's a lot that you can do as long as you check on that smart previous box so that's a really important thing to know about the other things that we need to talk about is this applying during import you can apply keywords and you can apply uh presets during during your import process. So if you come to this area here, you can click on this dropdown box that says develop settings if I click on that, all of the pre all of the presets that I have available to me are available to apply during the process of import. Now in most cases, I'm not in apply any kind of a pre set it all to my imports because there's not necessarily a style but there have been times where I have a specific job and I know that I've created preset that's gonna work specifically for that job and I'm gonna apply that pre set on import for instance one time I shot a black and white wedding now digital files air color the dmg or the raw file is color eso I could see color and I didn't want to be tempted because I'd already told the client it was a black and white job so we're shooting at all black and why I didn't leave I didn't want to see a color image come in and go oh, I got to keep that so I literally apply the black and white on import so that when I look at the files they're all exactly the way I want to see them right off the bat so some of you may have specific styles that used for different types of things I assume that you do deserve it here do weddings or weddings portrait ce what do you do a little bit of everything landscape ok, so so we've got landscapers and weddings and portrait's and a little bit of everything so you might have a different type of style that you want to apply to landscapes then to say detail shots that you've been doing or something like that so if you're out you know, photographing the grand tetons or something like that maybe there's ah ah, a specific style maybe you wanted to look like you're shooting on velvety a film or something like that that's the time to apply that general setting on the way in so that that way, when the images come into you, you're already looking at them with the style applied. Now all you need to do is adjust the exposure and the contrast and things like that because the styles already there and so, you know, howto look at those images so it's very important when you're working on a specific style to think about those presets, and tomorrow we're going to actually be doing a whole segment on presets so we won't spend a lot of time talking about building presets today, but we will talk about using them well, eso you want to use those presets on import um, also in the metadata area there's, a keyword area and that's something that we are going to talk about today because key wording is very important finding your images. And so you want to make sure that when you're importing, you're applying as many key words as are common to all the images, so we want to if if we were in importing, say, an entire set of images that were taken in budapest, then I would want to put in the key word budapest into the actual files, so every image that's in this set is already shot in budapest, so I need to put that into it. If I'm shooting a wedding than wedding is appropriate as a key word the location is appropriate arizona is appropriate phoenix is appropriate but bryant is not appropriate because there's not a bride in every single image. So those are the things that you can do right off the bat on import that you khun really get a lot done with your image is before you ever even see them now there's another thing on import that can happen to your images and this is a really important one and so we're going to talk a lot about it. How many of you have seen your images changes that come into light room so they look good right when they come in, right? And then they popped ugly, right? They were kind of bland. Okay, so they look bland, but right at the beginning they look great and when you're looking at him on the camera they looked great. And then when you brought him to light room, they suddenly got dull. And the reason for that is that a j peg is very contrast e by nature because it just doesn't have as much latitude in the file and then a raw image is very bland because it has a lot of latitude so there's a lot of space between black and white that means that the transition between those things is slow, therefore bland and that's good you want bland because then you could do a lot with it. You can't do a lot with the j peg to make it less contrast e s so what we're going to do right now is going to talk about that problem or that issue so that you get an idea of how toe howto work with that issue and that's something called camera deep faults so when we go to our images, we're going tio so your cameras taking a raw image and then it's making a j peg for you to see and when it brings it into light room it's going to be bringing that image into light room for you to see and it's when it first comes into lighter and the looks at that j peg that was created by the camera but as soon as light room has the ability or the access to the raw file, it goes in and builds its own preview, which is going to be different because now it's looking at the raw image and it's building a preview of what the raw looks like not what the j peg that camera made looks like so are they are golden is to go in and work on a set of images and I had collected some, but they seem to have eluded me just momentarily, so I'm going to find a new set of images here um so I have a wedding here and I and I just have a couple images that I pulled in from a wedding on dh these are the raw and the j peg side by side so what you need to do it this is what you saw as a j peg so that's you can see the color in the j peg and then if I'm gonna I'm gonna toggle over to the raw image and you'll see a change in the file it's not very big but you can see that there's a slight change in the amount of contrast in the amount of saturation so this is the raw and it doesn't have a lot of saturation in it and then that has more saturation a little more contrast now the first thing that you should do with your cameras you should set your styles on your camera to wait you like them now for me I like less contrast and less I don't like a lot of vibrant colors I like things to be softer and so I take my j peg settings and I turn him down I take the contrast and pull it down in the j peg settings on the camera and I also take the saturation and pull it down and so you're not seeing a huge amount of difference between these two because my j pegs are set to be a little bit less contrast a little bit less colorful and so you don't see as much difference but many of you see a huge difference because you really like that poppy look and so you've got all these great colors in this great contrast in it and then when it comes to the teo ride it looks bad ok so here's what you're going to dio and I'm going to go this little dog because I think this is cute and I don't know if you remember that I last time I was on creative live there was a lady that was really upset because I hadn't shown any animals and so I'm starting right off the bat with a bunch of with an animal so all of you animal lovers out there here's our animal for the session so you can feel really happy that I showed an animal in the session um so this is a j peg and this is the raw do you see the difference this one's a little bit better you see how dark the faces on the animal and then when you go to the raw it lightens up a bit so that's contrast from the j peg and that's the bland nature of the of the raw image so what you need to do then is you need to shoot raw plus j peg ok only once you only do this once you don't have to shoot rob plus j peg all the time but you're gonna have to shoot go out and shoot a bunch of images raw plus j peg and I would make it a full full size j peg nice pristine j picks so don't use like the small blocky version the j peg use a small farming a large fine j pegs you getting the same quality and the same size image as you are with you're wrong and then you're going to bring both for the men and you have to first go into the light room preferences and on import you have to have a setting set um inside of the general session set a general section here on gonna zoom in here you want it to treat the j peg files next to the raw files of separate photos that way when they both come in, they're not together they're separated otherwise that you won't see the difference and the file will say raw plus j peg and you can't you can't separate them out you want them to treat him is separate files so that when they come in you will see them the way we're seeing him here raw and j peg side by side now what we're going to do is we're going to create a camera default camera defaults or like the ultimate preset because they happen before you ever see anything and you never have to do anything to make them happen so they the ultimate automated preset and it you can have your camera default set for every single camera you own and every single ice so on every single camera that you own, we're going to do a very basic version of this now and then I'll tell you a little bit how to go further with it, and then you can play around with it on your own, but what you're going to do is you're going to take your raw plus j peg, and you're gonna first look at that j peg, and you're gonna figure out, what does this j pink have that's different from the raw and pretty much it's contrast, because I've kind of dumbed down the saturation of the colors in the j peg that's coming from the camera, and so I'm not really getting all of that, um, that much of a difference on dso, we click on this image, and we look at it, and then we go to the raw image, and we're going to go into the developed module, and we're going to choose the contrast settings here, and we're going to increase the contrast, and you can see as I do that see how the dog's face is getting darker, just like the j peg, so I'm adding some contrast, and then I'm going to go back and forth between these two files and see if I'm now notice I'm still got still a lot more latitude in the raw image than I do in the j peg so we don't want to lose our latitude we just want to you know kind of make the two looks similar to each other and so I'll go back and forth between the two and make sure that this it still needs a little more contrast but maybe that contrast could better be expressed in the clarity and so I'll pull the clarity up a little bit and now I'm going to go back and forth see how we're getting a little less difference between the two the colors are a little bit different you can see that there's a little bit more yellow inside of my my raw and less in there so we can go in here and you can take this all the way down to the bottom and go to the camera calibration area and then there's a whole host of color issues that you can start playing with and so we can come into the green and yellow area here and say ok well in our raw image we wanted to get rid of some of that yellow so we can kind of play with that so if I go this way get more yellow I go this way see how I get a little bit more magenta in there now I'm not necessarily in agreement with my j peg I would much rather use my raw but for the purpose of that is discussion we're going to talk about matching that j peg because I'm in assume you love your j peg the way it looks and so we're going to try and match that so you I'm just going to take this and push it a little bit more towards the green a little less towards the yellow and then as I go back and forth, I'm going to keep looking at that and see ok, well, I still got some yellow in there um so I could come in and take the saturation down a little bit on that say aiken, you know, I can really take it way down, but we can pull the saturation down a little bit and so we're getting a little bit better on that and then I can come up here and add any kind of subtle nuances that I want now you're j peg not may not be what you want you're j peg may not have grain and maybe you love grain and so if you wanted to have grain involved in all of your images, you could come down to the effects panel here and just add a little bit of grain and let's let's zoom in here and just look at that grain and make sure we like the way you know the grain looks so now I've got some grain added my image now keep in mind that everything that you do here is going to be added into the default, so you only want to touch the things that are specific to the way you want your images to look. Otherwise you're going to have problems, for instance, you do not want to come up here to the basic area and play with temperature or the tent, because those are unique to every single image. So the only things that you want to touch other things that are going to be global for that camera, for that I s o er or for that camera body style, those are the things that you want to touch so let's just say that we enjoy what we've created here, and we think that we've matched the j peg well enough. And so at that point, we would simply go up to the developed menu, and we're going to go down to set camera or set default settings. When I click on that it's going to create a specific default setting for the model number it's a five d mark three and at the eyes so speed rating of sixty four hundred s o and when I update this to the current settings than every single image that comes in from that camera at that that that s o is going to be changed to this default to the things that I have just touched now if you will take one hour out of your life and do this to every single camera, you will find that you almost don't have to touch any of your images again because on import, all of the images will get the flavor and style that you need and then all you're going to have to do is adjust the exposure or the brightness maybe some color temperature issues and that's it because the styles that you want to see happening on every camera will work now a couple more important settings if you go back to that preferences dialog box inside of the preset panel, if you zoom into that preset panel there, you'll see that one of them one of the check boxes that you have at the very top in the default developed settings is make default specific to the serial number. Now you notice that in that dialogue box when I was creating that that that camera default that the it was showing me the mark three but not a serial number just the mark three that's because I don't have this checked because I have to mark three's and they were literally purchased at the same time, so I actually have the two like their chips are pretty close together off of the production lines, so they're pretty similar cameras and so I've got these two cameras and they worked well together so I just let them all come in but if I had two very different cameras let's say my assistant had a mark three and I have a mark three and I want and they look different or their shot different for instance he shoots bright night shoot dark or whatever if those the case then I would check this on because now it's going to see the difference between my camera and my second camera and my assistance camera it means that I'll have to create a specific default for each camera but because I've created the fault for each camera I never have to deal with but for instance if my assistant always over exposes and I'm always having to recover the highlights then every time that comes in it will automatically do that for me and it will automatically recover those highlights if that's always what I have to do so you can set it up so each camera is it's correcting for the specific idiosyncrasies of that camera or that shooter um for instance I have a camera home that's an old camera that I won't look at it unless it's black and white because it's the colors or so bad on that camera and so any time images come in from that camera they automatically turned black and white because the default for that camera is black and white now the second check box that you have here is making default specific to the eyes of settings if you make them specific to the iso settings, then every single eyes so on the camera is treated as another camera, so I s so one hundred is camera one and I s o one sixty is a different camera and I so fifties a different camera every single isil is a completely different camera, so you have to actually do this to every single one of those ice owes but if you will do it if you'll take the time to do it and take a photograph from that camera at every single iso setting and make sure it's exposed correctly to that specific eye to that specific ideas. So so you have all the way from fifty two, two hundred fifty thousand eyes or whatever you have on your camera if you go on every single one and take a picture and then bring them all in as raw plus j peg and you'll adjust each one so that they look exactly the way they should for that I sell so that also includes that also includes doing for instance as you get up this one right now is sixty, four hundred eyes so so as you get up into six to four hundred eyes so you may want to come into the detail section and work on the luminous noise reductions so as that gets more I as you get more ice, so start increasing that luminous noise reduction and by the time you get to maybe sixty, four hundred or beyond you might turn them all the black and white. And so then anything that comes in beyond sixty four hundred eyes so just automatically gets turned to black and white automatically gets luminous noise reduction and automatically gets an a grain thrown over the top of it. That kind of unifies everything and then when you got your images coming in, most of the work is already done because you've automated the process of importing those photos and it won't change and this is a question I get a lot it won't change the current images in the catalog, so if you set the default, it doesn't just automatically override everything that's in the catalog it's only the stuff that's coming in so on import is when it sets the default for those images or if you come to an image like, say, this one here and you click reset once you set that, then it's using the camera default to reset the image to what it should be. So if you have an image that sat on an old camera default and then you've updated the camera default and you hit reset, it will look to the camera default and it will apply that to this image um okay so once we've got our images in so we've applied presets we've applied a camera default we've applied keywords on the way in so import is a place where you can get a lot of information and a lot of effort done to the images right off the bat and light room can kind of automate that process so that's the first place that you want o light room is a game of pre thinking issues if you pre think the issues that you're going tohave and you set it up and you spend the time making presets and camera defaults and all that kind of stuff and you you do the upfront investment on your time then light room khun do a lot for you if you just open it up and start using it it can't do as much for you it just doesn't have the but you if you train it it's like a dog basically if you train a dog then it won't bark and it'll fetch and we'll do all those things but if you don't then you know you get whatever the dog wants to do right um my sister has has this dog um and and he just he just unruly but they never went to the effort of training him and so he's just whatever he wants to be but if you take a dog and you train it and you spend the effort right at the beginning then you can enjoy the dog a lot more. And so the same thing with light room I just called light room a dog I just realized that it's a very wonderful dog. It's a wonderful pet tryingto really please that animal lover that's, right? I'm going for the animal over here, so if you spend the time training light room, then light room can perform really, really well for you. And so it takes a little bit of of investment on your time, but that investment pays off exponentially. Ok, so the next thing I want to talk about then is the process of synchronization. So when we're looking at images and I'm just going to go, um, find a set of images here this whole this one will work right here. Um, so I've got a set of images here from a senior portrait and those images I need to be adjusted, they've been selected, but they need to be adjusted so on and you, khun you can see that there's some adjustment done to them and the question is, when was that adjustment done? Um, that adjustment was done on import so there's certain things. Any time any adjustment has done, even if it's a pre set on import, then that adjustment will be labeled down here you can always see if you zoom in you see that little tag there that tells you that some kind of adjustment has been done to this it also tells you that some kind of key word has been done to this both of those were done on import so I haven't done anything to the image necessarily but light room did and so there's some work that was done to these on import but when you look at the images themselves andi you and you want to start working on them you don't want to be going clicking on an image so let's, you know let's click on the I think this is a cute image right here, so if I go in and I click on the developed module and I just work on this one image here I'm wasting my time because I'm going to go in and do a lot of stuff I'm gonna you know, brighten up the exposure I'm going to bring the black points down I'm going to bring the contrast up so there's a lot of things that I'm going to do to this image right off the bat and I did all this work and now that one has to have the same stuff done to it and so what I want to do is go through all of the synchronization techniques that are available teo and then your job is to learn how to use them together because you'll use every single synchronization technique some people will say, well, I only use this synchronization technique and I only use that secret ization technique and those people who are on ly using one synchronization technique those of the people that air taking a long time to do what they need to d'oh if you use all of them together there instances where one is better any other so let's talk about all of them so if I'm and I'm going to turn him to black and white just like this so that you can see it's very easy to see the adjustment of black and white so I've got this one and I did quite a bit of work to it change the exposure contrast black points clarity in black and white and then if I go to another image, say that one and I like that image as well and I think, oh, I should have used the settings that I used on the last one if I hit the previous button, all of the settings from the last one come to this one, whatever I was last on so and and again, if I if I'm here and I let's say I took this one, I'm going to really, you know, under expose this when you see I so underexposed that you can't see it now if I go back to this one and I clique, I'll anthony's click on I don't want to just anything I just click on it because I'm this is the image I like, and then I go back to this image and hit previous all of the settings changed everything every single last setting on that image gets stolen and put on this image, so it is a way of easily looking at us an image and saying, oh, I want this image now this one has nothing, right? I haven't done anything yet to it and then come back to this image and hit previous and now I'm back to normal. So it's, very easy on this because I always have the film strip open when I'm working in the developed module, and so I'm just looking down here and I can quickly run over to an image that I've worked on and say all this is the image that I need the settings on, and then I can click on this image and hit previous, and I've got them but it's all of them, you have to realize that it's all of them. Okay, now you can also use that in tandem than with if, if you if you click on an image and then you hit the shift key and you click on a set of images, so click one image and then shift, click another image and then if you turn on the synchronized auto synchronization so then if I click over on this guy and I shift, click here to hear and I keep the shift I'm noticed the shift is still staying down that button changes from auto sink to previous if I click on it now all of those get that setting because all of them are happening at the same time that's auto sink auto sink is very different from previous so let's let's shift click to images here and where an auto sink now and the way you turn on auto sink is this little toggle right here when you're an auto sink, what happens is your images every slider you use is going to happen all at the same time so see how that one changed as well so if I'm using the slider exposure slider, all of the other ones change at the same time but none of the other sliders air changing unlike previous because previous steals everything and plops it over here, whereas in auto sink it's on lee the sliders you're actually using are actually moving. So for instance, I can click on this black and white and go all the way to these colors so I'm shift clicking over and if I had just say the shadows bring the shadows up and bring the blacks down and add a little bit more clarity to the images I've done it to all of the images and all of these images see how the clarity has come up the black has gone down the shadows gone up but it didn't change in black and white so I can set a style to a lot of images and then I can highlight a set of images and work on him and they can all have various different styles and all that's going to be changing is the specific six sliders that I'm working on so it's a very targeted way of dealing with specific nuance issues that need to be done with a set of images and they can cross over between various different types of of of exposures or various types of styles did you have a question? I actually I got light room to organize like really old photos like peyton dating back to two thousand two oh so would that be with the auto sink be the better way to like because there weren't necessarily all taken with the same camera or but they need tweaks well, the auto sink is where you live on dh and this is different, which is funny because there we in photoshopped week you'll actually get two opinions on this I think if julian talks about light criminal but julian cost she she hates otto sink or do I wouldn't say I don't want to put words in her mouth but she doesn't she tells every not to use auto sing I tell everybody living auto sink so we kind of actually have two different methods so I live in auto sink because it's the most efficient way to deal with a lot of images now julian and I do different images she's she does art photography so she works on like one or two images at the time I work on thousands of images of the time and so so as a I'm like what's that yeah there's the costco version this is me this is me doing a lot of automated techniques because I want to get things done but when you're dealing with thousands of old images yeah, you live in auto sink and you work an auto sink and and you literally you can highlight an entire so I can highlight this entire job so I've just highlighted every image all the way down to stuff that's inside so this is very different um then say this and this is very different than say, uh that wouldn't you say they're different images, but aiken go, I'm going to hit reset on all of these so I have literally just reset all of the images to the camera default so now there's no black and white on and there's no nothing and I can come into the images and I can say, well, I'm generally fairly normal on my exposures like I don't have, like really dark exposures, really bright exposures and just kind of normal, and so I'm going to assume that I'm gonna want a little brightness on all of them. I don't want a little extra contrast on all of them. I'm gonna want the black point to be a little richer on all home, but I want some detail in the shadows and then I'm going to go down to the clarity. I like a little extra clarity, so I like that I like to bring the saturation down just a little bit and all of these air getting that style right now and then if I happen to come over to any of my presets and say, well, I also want to, you know, put a strong white van yet on all of them they're all done and that's one hundred ninety one photos and I'm done and I didn't even have to click click on an image, highlight the other ones, hit sink and then tell it what to sink. I didn't have to do any of that because it's all done now is it possible that when I scale over to here this one's not exactly the way I want it? Yeah, but that's fine, because now I just click on this set and by the way, when you're clicking inside of light room on these images, if you click on the image, it will change the primary selection, but all of the other selection stay intact. If I click on the frame, it will de select all of the other images and it will on ly select that one image so there's a difference between frames, selection and image? Yeah, quickly in ohio says, can it look at three variables camera, serial number, lens and I also all at once and really filter down what you're sinking too. So it's going to the default hammer default settings, look at the camera, serial number, the camera model and the eyes so and that's it that's what it does now, if you wanted to further work on that, then what you would want to do is sort we're going to talk about collections right after this. So right after lunch, we're going talk about collections so what's her name paula paula. So, paula, if you're out there, tune in after lunch for our collections discussion because during our collections discussion, I will show you how to very seriously fine the specific things that you need to work on, so apply your camera default on the way in, and then when you want to add a little extra something to something with a specific f stop number or a specific wide angle lens that's where your collections and sorting is going to be really, really important so tune in then and that'll be an important discussion for you here s o once I've got another subsection so I just applied all of these changes to all of the images the entire entire set of images so now I'm just going to go in and highlight a set of images that need a little something different so I've started and stop see I started on image number eighty two or whatever that is and I go all the way down to this image here and they're all fairly similar to each other and so now all I need to do is bring up the exposure just a little bit on this one and on this one I want to do maybe a different style to it so I'm going to go down to a preset here and say I want to do a d saturated uh kind of a warm tone feel so I'm going to do a softy saturation um with age so now I just see it I've done all of that just with cem presets but the presets changed all of them at the same time so now all of them even this one here has been changing right now it's loading in those changes but see what it's done and it did all of that um just just with the touch of whatever I was doing at the time and then I can go to the next section and say ok, well, now this section needs a little something different as well, so I'm in a highlight up to this one here and these ones I just want to turn to black and white and by the way, if I'm gonna do black and white, I also want to do kind of a rich black and white uh, add some skin tone changes and remove that split tone. And so now that's done because that's, another huge automation technique inside of light room, but you're going to use those presets while you're synchronizing, so if you're using presets that have already you've already designed what you want them to do and you're clicking on him and you're using synchronization while you're doing it, then you've just increase your speed exponentially by doing that each other using that's a really good question, so if you design your presets poorly, they will overwrite what you're doing if you design your presets correctly than in most cases they won't. And so that's why tomorrow's discussion is so important on designing presets correctly if you design correctly, then they become kind of additive to each other in some cases they will overwrite because if I you know, change this to a sayin it tight which is a very specific slider and then I say I'm gonna change it to a c pia that's the same slider and so I'm moving the same slider but if you design them correctly most in most cases they'll just add to each other so but but you see how that auto sink works then it's just a matter of highlighting a set of images or the whole set of images and tweaking him and then grab this little section and tweak just the one slider that needs to be changed on that one so really in a set of one hundred ninety one images is I'm actually going to adjust the bulk of the work is going to be done on all one hundred ninety one at the same time and then I'm going to do about three or four segments where I tweak one or two sliders for all of those each and then I'll take like one or two out liars that air just kind of there you know I'll find an image that the flash didn't fire right or I under exposed it or whatever so we were just talking about auto synchronization and the you're just working on individual sliders came once you've got your individual sliders accomplished the other two options you haven't sink is here so if you if you click on your auto sink little toggle and turn it off now you have the st dot dot dot and those ellipses there tell you that you can synchronize whatever you want so a lot of the times you'll come into a situation where you have say an image so you can see there's an image right there all right? And then you're going to say shift click to another set of images and maybe you know, these images here you have turned say in auto sink you turn them to black and white and then in this image here you want you've done something to this image, you've changed the exposure you've worked on the shadows, you've brought the whites down a little bit you've you've done all of that kind of stuff, right? So you've done all of this and then you want to synchronize it but you don't want to overwrite what you've done here, so if I hit click and then I shift, click over to here and then I come to the sink dot dot dot button I click on that and now I've got a choice of what I want to synchronize and I can choose all or I can choose none and then I can choose basics I can say ok, I only changed I only want to change the exposure on all of these and then hit synchronize and now all of them are synchronized is the crossed all the way right? So that's that's what we've got there is we got there there there say all that all of that's changed, but then the other things that I'd worked on didn't the synchronization the dot dot dot option is so that you can do very, very specific targeted things. Usually what happens is it's like, oh no, I need to change the contrast on all of these together, but I don't want to overwrite anything else and so that's when you click on it but the thing to keep in mind about the synchronization button with the dialog box is simply that when you see all of that right so you've got all the synchronization options here every time you synchronize after that it's going to use that as your preference so you always have to return to hear and synchronize something. So I wanted to synchronize everything except for, say, the crop, the spot removal and the local adjustments because those are the things that are like targeted tio each specific image I have to synchronize those and then those settings have been changed but notice that it changed these all too black and white when I did that. But now if I had synchronized see all the settings or staying there sticky, they stay there, they always stay those settings until you change them now the reason that's important understand is that if you hold down the option key that sink dot dot dot turns to a sync button it just turns to sink so what happens then is if I click on this image and say shift click over to this image and then I hit option and hit sink it one touch sinks over so it just used all of these settings here it didn't synchronize any local adjustments it didn't sink in I spot removal or crop it's synchronized everything else over so I got to choose but it was a one touch sting because this is annoying clicking here and then choosing and then hit synchronized that's a really annoying way to try and synchronize it it's kind of like the whole uh copy and paste idea so if you use aperture you have to copy the settings and then you have to pace the settings and then you have the copy the settings and then at the pace the settings and it's just it's just it's the opposite of automation it's literally creating more work for you so I like being able to then hold the option key down and simply click on an image yeah you know whatever image I want say this image and shift click over here and then just hit option sink and all of those get changed immediately minus the things that I unchecked and never fear the the command or control z that you're used to in photo shop that works here too so if I noticed that hopes I over exposed these by doing that if I hit command z it un does whatever the last operation was and unlike photo shop where you have to tell it I'll I want ninety nine undoes or I want a hundred undoes or whatever light room it'll just keep on doing it would just keep going and going and going because it's a database that's what light room does best is it's a database so it's a database of all the things you've done since you opened it and you can just hit control z until you're back to whatever you started with when you open light room so uh come commands is infinite pretty much so up to the point where you open light room ok, so those are all the synchronization techniques there's four of them there's auto sink there's previous there's sync dot dot dot and there's sink without the dot dot dot those your four options as you're synchronizing through now the way that works then is that most of the time you will live inside of auto sink and you'll be working on images clicking on a set of images and saying ok, this set of images needs this you know, needs a little exposure needs the the contrast uh I want to work on the tone curve a little bit so I'm going to bring the tone curve and play around with that and then once I've done that then I may want to click on this image here and say oh all of those could have the same thing so I shift click him, hold the shift down and hit previous and because I'm still in auto sink when I click it it does it to all of them and then I might say oh but you know what these say six images here probably need, you know, something different maybe maybe right here this exposure here I want this to be darker so then if I click on say, my grady int tool and I choose a preset which will talk about tomorrow burn one stop and then and then just burn that they're so that just happened all of them they all got synchronized auto sink is on and so that burn that I just accomplished on this image here also happened on this image so if I go say to that image see how that burn is still there and the burn is there on that one as well and so and then if I decide well this one's you know, these air closer and so that burn worked but this burn is wrong then I can shift click just these two images and then I could just grab that burn and drag it up a little bit and grab that one and drag it up a little bit and now both of those were accomplished so all of that is auto synchronous synchronized? The same thing happens if you're working on touching out dust spots or any of that kind of stuff happens when you are in auto synchronization. So, um, the next thing that we should talk about is the difference between working inside the develop module and working inside of the quick developed section in the library, so if you're inside of the library itself, then you will see that we are working on images one at a time, eh? So if, like, for instance, if I click on this image here, I go into the basic area and I bring the exposure down, I'm just going to really drastically bring it down, and then I'm going to take this one and I'm gonna bring it way up, so they're clearly overexposed and under exposed and then if I click on, say, these three images here, this one's normal, this one's under exposed this one's over exposed and if I grab this slider, I'm an auto synchronization right now, and I grab on to it and I fix it. So say point five five, this one got changed two point five five and this one got changed two point five five and the reason that that is because in the developed module, you are doing exact slider positions if you synchronize something inside of the developed module if you auto synchronize something and develop module it is it is looking at the slider position on one and it's moving the slider position two unequal on on the other one so it's keeping him exactly the same. So these are exact positions or exact settings instead if we go to the I just hit the geeky to go to grid if we go to the grid and we look here um if I highlight those same three let's help them let me go back to the developed module really quickly if I'm going to take this back so I'm gonna hit undo so that we have those dark there go so and we have one normal one dark and one light so now that we have both all three of those and I go to the grid now if I go into the quick develop section right here in the quick developed section same thing I'm going to use the exposure and I'm gonna brighten it up so I'm just going toe brighten it up by one stop this one gets brighter, that one gets brighter and that one gets brighter but they get brighter relative to where they were. So this is the original one see how that one's a little brighter and that one's even more brighter but the actual positions of the slider here see how this one changed a three point three this one changed to one point six five on this one changed too I guess one point six five on all of this is negative one point six five so they have all changed in relationship to where they were so their relative ok so in the grid inside of the quick develop all of those settings air relative to what the files currently are and there's a lot you can do there you khun do exposure contrast highlight shadows whites, blacks clarity, vibrance and if you hold the option key down you can also do sharpening and saturation so you have a lot of options here when it comes to your your images you can't do like the curves and and all that kind of stuff inside of the quick developed but that's not really important to be done here what's important to be done here and the reason that we have this is a relative option is so that if you have a siri's of images and let's say I really like the way all of these images look from the very front ones here that are outside to the ones that are inside here I like the way they look but I think they're all a little too cool meaning not awesome but meaning cold and so nothing could be too cool but I I wanted increase the temperature on all of them but I don't know where they are because they were literally all shot in auto white balance so if they're all shot on auto white balance then they could be like little minute changes on every single one of them and I don't want to I don't want to get them all to the same exact kelvin's I want them to just all be a little warmer and so all I have to do is take this temperature and increase it by two clicks so I click and click and so now I've got to warm clicks of basically in exposure this is of one stop increase and a one third stop increase so it's just small increase big increase temperature big increase small increase so I've just increased it a little bit and now all of them are warmer than they were before by a little bit but they've all gone up relative to where they were before yeah the question that was coming in earlier was whether when you're sinking when you're making changes to multiple images at the same time is it by the relative amount that you've increased or is it to the new pointed to the new point if you're in the developed perfect and so really what you should do and this is the way again so I'm giving you tools and if you only use one at a time you're going to be slow but if you use them in tandem with each other than suddenly that increases your speed and increases the ability for light room to do things for you so what you should dio is the first thing you do is you go in and and and work on the entire set and auto sink so I'll go to the developed module with all the images I've selected and work on that entire selection of images one hundred ninety one images in this case and I will do the basic tweaks that need to be done to all of them and then I'll go into each sat and just kind of tweak this one needs a little extra exposure of this and so I kind of get him all relatively the same so that they all look correctly exposed and then if I go into the grid module and I go into quick develop then I can start doing relative changes to all of them at the same time or this section or that section all at the same time regardless of what's been done to him because now it's all relative to what's been done the other way that you can accomplish that is a lot of the times I do I do weddings and so a lot of my weddings you know when you're outside the exposures are back and forth and all over the place but once you get inside and you're in a very constant environment and you're kind of moving a little slower and you're just taking pictures of, you know, toasts and speeches and and cake cutting and stuff and you can pretty much manage that's pretty easy everything's the same but my otto white balance is all over the place and I want them all to be a little warmer a little cooler so I'll go in and grab an entire wedding reception and right off the bat before I do anything, I'll just change the temperature where I want it and I'll increase the exposure I wanted and then it's done it doesn't take a lot to work on a reception most receptions can be done inside of the quick developed area because they're all fairly the same and then you can go into the developed area you know, tweak one or two outliers so it's a really, really powerful tool to know that you have the ability to go into that relative adjustment phase if you need tio but in the developed module it is exact positions exact positions only ok, so that's ah that's a pretty important point toe recognizing to know ok, so now we're going talk about key wording so key wording is something that no one does um and the reason no one does it is because it takes so long to do it so you can you can automate yourself in a way that will allow key wording toe actually be accomplished and I'm going to give you some quick tips on this it's not very difficult to dio on going to show you the different ways that you can key word the first way you khun keyword obviously is on the import remember we talked about that as you come in import the things that are common to all these images and then after that there's a key wording section down here and that shows you notice I've got arizona gilbert sr portrait photography those are all the key words that came in with the files because I imported him that way. Once I have that, I can then go in and say, all right, well, I want you know, this one from here too well, that whole set from there to there is all with a camera. So if I hit command k that puts me in the keyword entry point and aiken say camera and just hit enter and now it's added camera to that and it because I'm in the grid and I've highlighted a set of images that block has been given the keyword camera so you can simply if you do travel photography, you can simply highlight everything from this area and then type in the specifics of that area and then if you happen to go into a cathedral, highlight the whole cathedral and type in the key cathedral information and then highlight the next section of travel and do that for a wedding it's highlight the getting ready and type in getting ready highlight the portrait ce type in portrait's highlight the so you're just adding very large sections that you khun identify by specific keywords and in some cases you know, maybe you spend three hours while you're traveling doing some street photography in london and so you're in london you're doing street tiger fi well, now you got three hours segment you could just highlight the whole segment and say street photography, comma london comma, you know, united kingdom comma england and then hit enter and all of that information gets put into those specific images which you couldn't have done on import because when you're importing, you also had wales and scotland and wherever else you happen to be all right. All right, so then you do section so that again you start at this macro just like we did with the auto synchronization where we started macro and then kind of started going in same thing happens with our key words we start macro for the whole set coming in, then we do sections in the grid and then once we've done the sections then we can come down to this little spray can this spray can is my favorite little tool in light room if someone said what's the most surprisingly awesome tool in light room it would be the spray can because there's so much you can do with it so the first thing I want to do is tap about all of this information here because I want to get rid of this and I want to get rid of this panel here so if you hit the tab key that tabs out all of your information on the left and the right panel so I'm going to then take this and I'm gonna go to that little spray can and click on it and I'm going to go to the right here if you zoom in you can see that aiken spray keywords labels flags ratings et cetera aiken spray paint all sorts of stuff I'm in his choose keywords and then I'm going to enter in what key word I want to use now in this case it's all a girl and she's a senior like there's not a lot of different stuff going on but there are a couple things like for instance she has a clock uh it's a necklace and it's got expel medallion like that is that a medallion if not oh well so she's got a little clock medallion thing that she has and so now I've got three images here where she's got that thing that she's showing me that little medallion so I can click on it and so I'm I'm clicking, and then I'm spraying and notice that all of those got this a little wider key line to him see that wider key line and then there's a thinner t line on that, so the wider key line indicates that now I have a key word in there or a siri's of keywords, which our clock necklace medallion then I can click on those and aiken say book. So now she's got a book, simon, and just click on book. So now book is on all those on a wedding. I would simply look for bride and anywhere I see the bride, I would just start spraying bride if I'm traveling, I would like I would say any time I see a brick wall so all tied up in brick wall and then I'll just look for brick walls, and then any time I see, you know, because you'll have or if I see like an alleyway and then I'll look for alleyways or whatever particular thing keeps coming up on it, now you're not looking for things where there's one that's not what the spray canis tool for if I'm looking for books and I'm kind of scanning down, looking for books, looking for books, and then I see an image of dry ice. Then I can click on the frame not on the image if I click on the image is going to spray keyword onto it, but if I click on the frame it highlights it and then I can hit command k and it will open up my key word area and I can say dry ice and then I can go back to my process of spraying so this allows you to do several things at once now you're spraying for specific keywords that air re occurring all the time so like bride or groom or flowers or whatever at a wedding and you're spraying and then as soon as you're done a cz you're going through spring you'll see something like oh that's funny so you click on the frame of that one and type in humor funny whatever and then and all the specifics hat you know whatever is going on in the image that helps you to find it and then keep spraying and then as soon as you see another image that says all that one should be key worded heavily with these types of things click on the frame and then enter all the key words for that specific one most of your images need about ten key words total and that's plenty a couple of them you might want fifteen or so key words in there that are very, very specific so that you can find him again if you will take the time to do your key wording, then they will be findable not only on the web but they'll also be findable for you so you can you can actually search through your images so thinking of that just remember that you have the ability to key word very quickly with this spray can tool if you kind of follow that methodology of un import put all your keywords that air common all then do sections just highlighted section in the grid and type of men and it will auto synchronize all those and then go in and spray anything that's left over adding a couple key words here and there when you find something really specific if you do that it automates the process of making your keywords useful to you and so you might as well do it takes about fifteen minutes for me to key word an entire wedding so it doesn't take very long and it's very, very valuable in the end and we'll see that when we're starting to search their images in our collections discussion when you'll see the process of then utilizing those key words to your advantage when you're trying to work so that's a really important thing, any questions up there just a lot of people saying like, oh my gosh, I can't wait to use the spring can have not used it before this is going to change my it is going to completely change my work ok? So with that those people who are saying I can't believe I have I'm using the spray can tool I just want to also then make them feel even worse for not using because now we're going to pick up the spray can tool and instead of using key words, we're going to click on settings when I do settings now I can choose a specific preset so now I've got a pre set of black and white age cpo with clarity and now aiken simply just go through so I've done all of my regular adjustments and this I do a lot when I use so I I do a lot of outsourcing to shoot dot at it and so when I send my work off to shoot out at it and then they send back all of the normalized images, I don't have to go through in a just, um all I have to do is spray my pre set on it and so I add style by spring, so I'll just simply grab an image and just spray and now see how all of those air done. I just sprayed the style and then I can go in and say, ok, I want a different one, so I'm going to go to say color portrait film and I'm just going to spray this as color portrait film, which is a subtle change so you won't see much of a difference there it's easier for me to choose a black and white but so I'm going to do like a cool process across process for some of these so let's do that on the book one so I'm going to spray the book ones is across but see how they all got that cross process happen right there so now if I look at it, see how they've got a little cross process to him so all of my style is simply added by grabbing the spray can choosing the style I want to spray on it and just spraying a set of images and then I'm done because the underlying exposure is correct so you can do your underlying exposure and then just going and spray the other thing you can do is there anybody in here that has an assistant that works for him? Ok, so if you had an assistant that worked for you, you could literally from the start you could spray the settings like the styles you wanted and then just handed over to your system and say those were the settings there those with stiles now you just need to fix the exposures and they would then go in and change the exposures to match the style that you had sprayed on there so you would still be the decision maker but you just spray your styles onto the images in the grid and then they would go into the develop module and do all of the the leg work of adjusting I happen do it the opposite way I send my images off to shoot out at it and then they send him back to me finished and ready and then I could just spray styles s oh that's that's the way I operate in my studio because I don't have an assistant so she got that is my assistant um, so that is the other reason to use the spray can tool and I hope that in the future there will be even more options for this break and right now the spray can has quite a few, but I can just imagine that there's so many more other options for spring uh, I can just imagine all sorts of stuff that I could spray yeah, she went crazy with the spray can and you weren't paying attention? Yes, yes so if I have the spray can in my hand right now, it doesn't it's not going to until I'm gonna pull out this the preset, but if I'm doing key words if I'm in key words, if I hold the option to down it turns into an eraser and it'll race whatever key word is in the block if you're in the settings area and the option he's not going to do that for you, it's going to suck out the spray can then you just hit command z, and it will undo it, but option will get rid of a bad key word. Not necessarily a bad word. If you said a bad word, you can't take it back, it's, just that it's out, and then you has done. I just had to ask, um, on the key words, does it in some way, help with s e o like, is it just your key warning for your son self were at it? Or does it help with so so key words, they're helpful in two ways. Number one, you can find your images that's, pretty helpful, and number two. Those key words are embedded in the j peg, which means that when you upload the j peg to your where whatever website you have, whether it's, if you're uploading them to wordpress, if you're uploading live books or smugmug or any of those people, you can then utilize those key words in the metadata off the of the website, and then the ceo can happen as a result of that, because because google will look at what they're called, what it was google column, they don't calm keywords that call him a tax, so so a tag is a key word, and so the tag is useful to find images. And so if the tags and the descriptions and the text around the photo all match than google sees that image as correctly identified, and then it can show it to people. And so I use live books is my portfolio site, and I use smugmug as my client delivery site, and I use wordpress form, I blogged, and all three of those khun utilize that the tags, or the key words as you import them, so that then google khun see all that, but but key words alone won't do that on s e o keywords. Also, if you go down to the metadata area here, this title and caption area right here are also things that google will then be looking at as well. So so, yes, it will help you, but you need to have the right services up on the web that air converting those key words into useful information. Ok, um, okay, the last thing that we want to talk about, you've seen me use presets a lot here and so it's important that you're utilizing your presets and accessing him from the spray can or from the priest, that area or even like, if you have a set of rpg keys, you can actually use those tow access your presets but the important thing is that you're utilizing and we'll talk about building them tomorrow morning but it's important that you have presets and using because that's that's pretty serious in the automation process so use your presets the last thing I want to go over and and and this is an important one is utilizing light room to command photo shop um so if I have a specific type of thing that I want to apply to an image that I can't accomplish inside of light room, whatever it is that I've got maybe some tricky action that's going on inside of light room and I've got to go to a tricky action and photo shop I've got to go to photo shop to do it the trick to getting light room to command photo shop is in what's called a droplet um when I go to the export dialog box at the very very bottom is something called a post processing action that post processing action comes into play once the file itself has been produced so it takes the raw image it makes a j peg or it makes a tiff or whatever you want o make and it sends it out to photo shop and it tells photoshopped to run this particular action on this photo and then return it back so for instance in our case if I were to choose I'm just going to choose a fairly normal image here going to develop module and I'm going to increase the exposure a little bit and they're so I've got that happening there now I'm going to go um to the export dialog box I'm an export this file on dh I'm just going to put it out here on the the desktop and I'm gonna put it enough actually let's not do that let's just put it back so we're going to put it in the same original folder, so it's going to put it in the same folder is the original and I'm going to tell to add it back to the catalog and added to the stack so if you don't know it, stacks are in light room if you make a secondary copy of something, you can stack it on top of it so that then when you collapse the test actually only have to look at the final file and by the way, light room only export the final file. Um and then I'm going to tell it to put it above the original and I'm not and I'm not gonna have it re name it and I'm going to tell it to make a, uh to file pro photo sixteen bit that's the best file I can get out of it and then I'm going to tell it in the pros processing to choose one of my actions so these are the actions that I have created his droplets and I'm just going to click on it and say let's do uh soft brainless structure and so this is going to actually open up photo shop, run and nick software plug in inside of photo shop and then return it back to me so I'm gonna hit export and when I do that it's creating a new tiff of this file it's going to send it to photoshopped photo shops going open do the action that I ask it to do and then it's going to send it back to light room and like right now it's running the droplet now photo shop is opening photo shop is going to run it through and you'll see it kind of going through this process and it's quite a little process that is going through something that I don't want to be doing and that that the trick is that I can do this to fifty files and you can see how long it's taking to do it toe one file and by the way you have to make sure that you that's why I don't like tiff files because it those dialog boxes appear and so I would literally have to be you're hitting ok ok, ok ok it's better toe create a photoshopped document because they don't need those but you can also in your droplet tell it to teo, you can record in action to save as action to keep that from popping up a swell so as right now it's running through this action and then when it's done it's going to return it while we're doing that though I'm going to go backto light room and show you where to put these so if you go into a light room into the presets preferences inside of the preferences you can go to the preset area and then it says show light room presets folder right in the middle there you click on that it's going to show you the folder where all of your life from presets exist this is important folder to know about we'll talk more about it tomorrow, but this light room folder has a bunch of folders in it and one of them is called export actions and you can see in the export actions that I've got all sorts of things I've got these air droplets he's a little arrow looking things or droplets and then I've also got things like male and I photo and you know annette ftp server and ah new program that's out called smart albums all of those things are um if I drag something onto him they'll do something to a file on that's where these go all right? So as long as you know where that file is or that folder is then now when you come back you can see that this file's been returned to us and I'm going to zoom in and show you see the grain that's been added to it so I I'm done and photo shop if I go in fact, if I go to photo shop nothing's in photo shop so went to photo shop it did the action sent it back to light room and then I can use light room to look at the images and export the images now quickly before we leave I want to show you how to make this um I just show you where to make the droplet and if you don't know how to make a droplet, just go onto adobe and asked on adobe tv and look for making a droplet and it's very easy to make but you just simply go to the file menu and photo shop you goto automate and you create a droplet and that's the here's, the dialog box where you make your droplet this droplet then is going to choose from some kind of inaction so you just choose whatever action you're going to use and that's the action it's going to create into a droplet so it's basically program your action or by inaction or whatever and then and then take that action and converted into a droplet and you save that droplet into the folder that we just showed you and then it will always be accessible inside of light room. It'll always be accessible here inside the export action, our export dialog box, right here in the post processing actions. So that's another way to not only automate light room, but to automate. Photoshopped from light rooms so that you don't have to sit around and watch light room are photoshopped work. So most of the time, when I go to photo shop, photo shop is doing stuff automatically for me. And I'm staying inside of light room and letting photoshopped do that stuff on its own.
Class Materials
bonus material
Ratings and Reviews
Anjani Millet
Excellent class as always from Jared Platt. Informative, practical, interesting, fun.
escondrillas
great tips to save time
Ekphrasis Ku
Very practical course, suitable for anyone who want to establish a better workflow at lightroom