Lesson Info
3. Leveraging Video Light
Lessons
Class Introduction
01:33 2How to Analyze the Light
06:53 3Leveraging Video Light
03:26 4The Portrait Formula and Maximizing Opportunities
08:17 5Scouting Best Practices
10:55 6The Importance of Playing
09:32 7LIVE SHOOT: Safe Portraits and Creating Reflections
08:06 8LIVE SHOOT: Creating a Silhouette
06:30Lesson Info
Leveraging Video Light
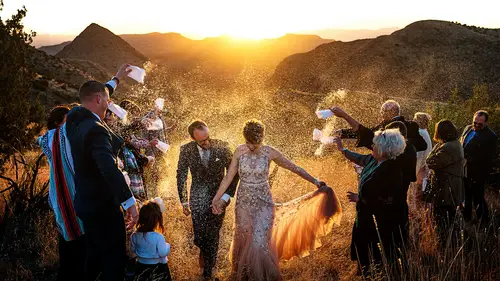
When we're not using natural light or ambient light, however you wanna call it, we will use our video light. And the reason why we like to do video versus off camera is because it's a continuous light source. We find that working with video light, so anything that's continuous, is much easier than off camera lighting in the form of an off camera flash. Again, we like to keep our approach as simple as possible without making it too complicated from a gear standpoint. So video light really suits that mentality for us. So, in this image, The way that it started is simply with visual curiosity so right before doing the portraits we were attracted by these palm leaves which were kind of falling and draping the scene so we just went up to it and started photographing them just to see what it would look like. This is the mid-tone exposure, the way that we, anybody as a regular civilian, so to speak, sees the scene. Then a second exposure just to make it a little bit more interesting, exposed ...
for the highlights, see what come out of it, and immediately once you do that you can see that there's a very clear dark framing area between the leaves. It just so happened that it was also a staircase so it was a obvious spot for us to place the bride and groom. So we put them there, turned on the video light, mixed the white balance of the daylight with the warmer light from the tungsten, sorry, from the video light, and get those blues and yellows come to play together in the image. In more candid environments, this is during the bride and groom's first dance. We, again, wanted to be able to see exactly what we're doing, rather than popping a flash to, and having to review our image after each click, this way we can really see what we're photographing. I really balance the exposure on the candles and the foreground which is the creative element that we're trying to add to the photo. And then make sure that we compose and catch the good moment with the bride and groom in the frame as well. The video light also allows us to throw it around and use it in a more creative way. This is during a day after shoot with the bride and groom. We really wanted to come up with something a little bit more interesting of the two of them. And again, using the video light allows us to just move it around ever so slightly, left, right, up, down, and really frame the couple within their own shadow. Here we're sitting, they're sitting on a bed and there's draping on each side and so the shadow that is casting of them is on that drape on the side of the bed. Again, staying with more candid moments, during speeches we love to use the video light because the lighting at the reception might not necessarily be exactly how we want it, at least from a photographic standpoint. So we'll add a little bit of that video light to bring the subject more into the frame. And again, by being continuous it allows us to focus on composing the photo and making it interesting against the background, and not, take the guesswork out of what we're doing in terms of lighting.
Ratings and Reviews
Sara NAomi
So love the way Daniel explains the thought processes for the images. Calm mental state...so very very helpful. The D+D pair are an amazing photographic team from the feelings, experience, teaching and the results of their vision. So want to take a class with them in person.
Carlos Rosa
Amazing, very short compared to other classes that I have, but it's really relevant, he goes straight to the point and there's a lot of great info, and that's what makes this class so good. I really like his style of teaching, very simple and clear, and that's what we need.
Iris
Excellent course! Daniel explains in details how to take the pictures and how to retouch them later. I like his easy and clear approach and the use of a lot of examples. I recommend this course to anyone.