Shoot: Natural Light Portraits - Maisie
Lesson 2 from: The Portrait Lighting Challenge: Natural vs StudioSue Bryce, Felix Kunze
Shoot: Natural Light Portraits - Maisie
Lesson 2 from: The Portrait Lighting Challenge: Natural vs StudioSue Bryce, Felix Kunze
Lesson Info
2. Shoot: Natural Light Portraits - Maisie
Lessons
Day 1
1Class Introduction
13:10 2Shoot: Natural Light Portraits - Maisie
21:29 3Shoot: Natural Light Portraits - Katie
25:45 4Shoot: Natural Light Portraits - LaQuan
15:36 5Shoot: Studio Light Portraits - Maisie
39:40 6Shoot: Studio Light Protraits - Katie
14:39 7Shoot: Studio Light Portraits - LaQuan
16:49Shoot: Natural Light Nude Maisie
37:27 9Shoot: Natural Light Nude Continued Maisie & LaQuan
28:47 10Shoot: Studio Light Nude Maisie
36:05 11Shoot: Studio Light Nude Maisie & LaQuan
18:43 12Studio Light Q&A
24:57 13Review
31:13 14Shoot: Natural Light - Backlight
17:50 15Shoot: Studio Light - Backlight
34:57 16Shoot: Hollywood Glamour Shoot
42:51 17Shoot: Low Budget Hollywood Glamour
14:47 18Post Processing: Sue's Style
17:44 19Post Processing: Felix's Style
27:34 20Post Process Q&A
33:07 21Shoot: Studio Backlight and Lens Flare
17:48 22Shoot: Studio Light - Strobe
25:28 23Nude Boudoir Retouching
15:29 24Contemporary Portrait 1
09:57 25Contemporary Portrait 2
05:12 26Contemporary Portrait 3
04:40 27Film Noir Male Retouching
06:35 28Film Noir Boudoir Retouching
11:07 29Nude Male Retouching
03:48Day 2
Lesson Info
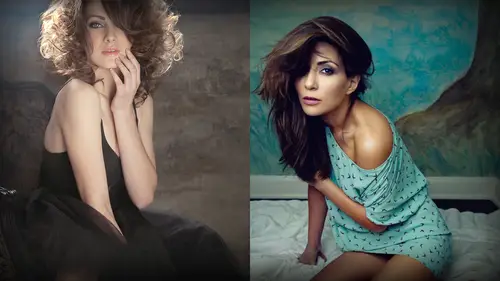
Shoot: Natural Light Portraits - Maisie
as you can see right now there's a lot to share those on her face from the light and so the first thing I do is turn off all the lights have a look at what my window lighters and I've got two things that I can use to diffuse the light of have got to match one of the miss this screen but you know felix and I were talking about it these screens of four hundred dollars it's a scrim creating it's a I don't know in one I get pieces of fabric you know as you know that a four dollars a yard and I usually kill them up in my camera bag and I clamp them onto the blind or thing and that is my scream so you can either pay forty dollars for a scream or you can pay four hundred for when and looked like a professional and I often clamp this onto my blind at home with here clips like I just came along I'm really macgyver and then I like lift up my blind so what I do is I bring it down clamp it on and then I rolled the blind up and so it just hangs like a team pre kit and so we've got both we want to t...
ry and teach you throughout this two days that you can do this on the cheap as well that you don't have to do this with expensive lighting I think way have expensive lighting but everyone no one wants to spend three thousand dollars just to get started but most people have enough speed light yeah they have bed sheets most people on dh we can get some from silk fabric so we'll do sit ups with the proper lights and then do the good guy version as well just to show you we have our referee bythe all right as you know this is the final call weight from colby flats it's black on one side it's white on the other so the first thing I'm going to do to take a shot of here is open it all the way out of the way felix I want a white o you want and I'm gonna tend the white be fline so working five b flat everybody asks me that you know things you can google felix things you can google it we get these from glazer's you do yeah just a camera store yeah yeah and you buy them and then you give taped them together the genius I couldn't shoot without everyone should have so have a look now at the amount of light that's hitting her and come into the center a little bit more so this is going to do two things one is I need to reflect the light back to my clients I'm watching you and I'm trying to lighten up her face so it looks even and then I'm lightening up the background as well because I'm putting the be nice and close to reflect light back if this light is too strong can you lift that up for me john and just see if it works can you see now how diffused her face is getting and can you see how I've evened out all the white light on her face there's no shadow there's no hard line it is soft and flat okay that is the light I want it now if it is a dark day she walks towards the lights to come this way towards the light yet stop and I bring this with it but this comes with him and it just keeps going with here and keeps going with here can can I just didn't just push this fourth and what it does is it just keeps lighting her up so there it is there okay now that's a lot of light on here and it's a lot of light in this hole um area so I have to decide then whether I want to diffuse mohr I just double up on the sheer curtains and just bring it down or if I take her away from their bright light I'm not going to get it even so that even this is what I'm looking for even this on her face and with might either let me take a before and after shot and I'll show you the difference because I think it's really significant thank you now as you know most of you know I shoot on one sixty three twenty six forty I like to shoot a two point eight because I love that painted lee drop away that you get from that if stop and I usually shoot on those three guys ten percent of the time I would go over six forty maybe less than ten percent of the time six forty years may go to s o generally in natural light it's what the cameras reading that I like so it's always where I meant if I get too slow then obviously I want to speed it up felix I kind of need you to then who here maybe I'm gonna put a little bit of life into here bored it's right here this's all right you okay holding that junk you're not getting any movement so we don't use fans we can use you know boards you can use reflectors to blow here just for some movement there all right what I want you to do macy's just kick out onto one hip so that yeah and just let this on go around a little bit further that's it beautiful ok we're not getting much opens here but let's see just lips together and just relax your mouth all right so here I'm a two point eight I'm six forty my shutter speed is two fifty and I'm just gonna take a shot and I've got a nice even exposure straightaway okay no what would do is I'm going to shut this down yeah let me just get you to shut this down first so I can just quickly take what it wass this reflector is doing so I'm not going to change my exposure and that's the difference that reflector is giving me so much bounce right now that that's the difference okay so I have to have that reflected light I also always cut my beef let's really small like this because often when I'm looking at her face I can bring that reflector and really close but sometimes I just need to put a bounce in here now sometimes I've been shooting on my own I'll get a cheer and I'll put this here or I'll go like this and I'll push it again my model's legs my client's legs push against me and I will literally do that like I do what I have to dio abouts like I get people to stand you know I'll get assistance toe move around like this I mean this little thing here will save your life because that big reflector is one thing so those two shots is really all that I'm looking for is the any questions around there you might think that that sounds what I just see it sounds really basic but I do not see many people achieve that so basically when you start off you get your model and just move over to where you want that side of facing that way you know where to move to d flat two and you got it so if it's a dark window I need to get it closer to the window and I need to bring the leaflet with her if it's a bright window I've gotta pull her away but the problem is is that white board is not going to reflect the same amount of light unless it's a certain distance from the window so it's better to be brighter and reflect more light and then adjust your camera sitting than it is to try and get away from the brightness because the more I took her away from the brightness walk away from the window into the reflector it still didn't change the shadow on her face that reflector is too far away from the window let me so I'm bringing here further away from the hot light and into the reflected light only when she's standing in there is she bride enough so I just bring it closer to that window which most people don't do that they're worried about the hot light it so now it's fear so come back to here and I'll just start shooting now and then I'm just going to start building in more contrast okay so so let me get a reference for the first look on the christmas ball I haven't charlie get to let me shoot when you can shoot her okay do we need this drop it feelings no it's not enough I can't just bring in this reflector a little bit more so why do I have one reflectors going to hear the other one is bouncing a shell of light onto the backdrop why okay let's have a quick look at that I'll show you why because what I want just puppet about bring you turn around this way bring your chin and lets it stabia now what I'm gonna do is because I'm shooting at two point eight I'm a two fifty shutter speed six forty there's my shot here I've got a good drop away to that background if I want that too look softer I just need to pull her off that backdrop right and I never should close to the backdrop that to me is is where I want to pay usually about a meter away from the backdrop for a little bit further than a meter it makes a big difference okay so that is my first let shot I just haven't I want to look around this and see usually if I'm trying to figure out light I'll just go with the model is scooter over way go and just look where the lightest I'm like okay so I'm going to be replicating the window light that's coming from her right and so would you mind if she holds this let's do this like I've got this mountain understand it's very very complicated setup here just puppet way she was standing just move to the right are you gonna hold it okay yeah if you hold it one of your face and we have a reference with your fire behind it just come to stand back and here then yeah right there don't understand quite close now that's it and we put up on the screen you can see why it's so genius just bring your chin forward ball I want people on that stage looking but on we'll put this in the download as well but if you can see here you can see exactly what light sources the main light source is coming from here and you can almost he was well how much that light is reflecting off the side you have to do a little bit of thinking to get that sphere into kind of something you can replicate but that's what this image I'm going to use to replicate that light the suit that's all I have to do that's a simple of it is there's nothing more complicated to it so this was the only gig moment I was going to allow felix with the black hole was like I want to shoot a black ball almost like why so good black e but I just thought to myself afterwards it didn't it didn't make sense to me I was like no I don't want to teach lighting the way people teach lighting thank you be technical staff to show me how to work the light and then I realized something he actually recreates my windows shape and height and everything so he's not going to show me a lighting set up he's going to manipulate studio like to make it look like my manipulated natural like you know when I when I have it set up you should be able to do all the same things exactly I'm excited okay kitchen bowl out let's do one without the model in it just sorry matloff yeah just right there and you actually need to go this way but maybe because you're gonna make it you're gonna make it all gold just skip past that b flat for us just go that well yeah you can walk around as much as you like it looks beautiful there's a shot good references all right this is something I soon learned I can't put mate either down so this is something I learned that really blew me away I learned that if you swap the white deflect for a black b flat like this just jump up and help yeah perfect if you swap the white for a black what does the black side sucked out life okay so now when she comes to stand back and here I am essentially exacerbating the fact that the light is coming from one side I need you about a meter and a half away from the back top and over here and so right now yeah towards it like right now she has a really strong light I'm going to take that shot because I want you to see it because now the contrast in this image is coming in a very very strong all right so all I have to do is take my little half my little food and just bring it into her face okay so that black is still sacking all the backdrop color and it's putting contrast all around her shadow but this little wee thing here is bouncing like to face can I have it danielle or okay I just want to get somebody to hold the reflector so if you want to go on that side yeah ok so now when I lift up my camera I'm on the same settings just chin down just a tickle may see that I'm installed two fifty two let's see how it raids and I'm starting to get more contrast in my image I found so you won whatever you say okay john fifty four hundred for the strobe we set at fifty four hundred okay okay so now what we're doing is I'm slowly bringing in more contrast around your body and around the back job okay so let's do one more well do you want to shoot the ball no because all I need is this and you're going to do the rest by aligning just the window and you're going to control it from there and just add more contracts on the rest you can come okay so the second one is I get another v flat let's are our friends and you can and I'm going to put it where john is we're getting a stand okay it's gonna take a while so john slide this down the chair slide the cheer towards you and then you can help this side and then you won't be in the way that you won't be in the way if I want to keep going come stand beside and then I confide this here so now what I'm doing is I'm going to open a second b flat can I just be a gig for minute suit everyone goes what's the c stand and why is that cool to see stand it's just a metal stand and it's called a c stand because a company called century originally manufactured it it's not any I always look at them go they don't look like a c shape why is that okay too much too much okay so this is what we call I need a two month hold that for me this's what we call the black tunnel okay we're going to make a black tunnel around here but still use the lighter backdrop and it's just going to bring in more contrast now come and stand here macy and now step towards me so this is putting the walk to contrast into the background and lots of contrast into here then I get my half reflector and my half reflector is just gonna go up to make his face okay and that could be half of this I could literally do it with this that's right I'll just folded in half like jimmy like this is it for me right there and what I've done is I put lots of contrast so if you come and hold that for me john I can take a shot just going for the face okay so now I'm a stop under but I'm going to take a shot I haven't changed my sitting once the reason I'm going to take it is entry darken your image the meter and the camera gets confused by the white skin the dark here and the contrast that's coming into the image and it's goingto ask me to up my exposure so I'm shooting one stop under this is something like I commonly does and high key images backlight and white I shoot one to two stops higher and as I'm bringing contrast into images I shoot one stop lower always I'm at six forty I so just straighten you hear that may see it that's it just a little baby smile is perfect good girl so there I am one stuff under if I push it any further I'm getting a lot of contrast step towards me into the light come back with me john yeah saying just there that's the one turn down now and so now I've got chin forward a little bit more good girl stay there I've got lots of beautiful light contrast around the backdrop into here and I'll just keep doing this okay so now my nix it up do a reference for this sure because we've changed the shape of the lights yes we've changed the shape of the light source is coming in on the right by putting a beef let there I'm going to use this I like holding it okay but you're in the light say you're right I'll just go wait just a bit lower felix I'm sure well what I mean macy cummins payoff okay now what I'm gonna do and you can actually see it kind of makes that black you're not getting anything anywhere else see what's happening you just get that main light source that's where your contrast is really coming from his room absolutely yeah so now what we're gonna do is come back may think is in a perfect world I would have more light on the road so this is a very dark space that's putting a lot more contrast and then then I want and so I feel like if I'm if that's happening I shut down one of the black tunnel sides so basically I turned one of the black tunnels toe white and it's gonna open up my whole shell bringing in cannes every time I come here just jump up yeah because then I don't have to walk around and waste time okay so now I assume as I bring the white and I'm gonna bounce light back again step back so that's really beautiful also watch with the black tunnel I try and push it back to the backdrop otherwise that causes a white lake onto the backdrop which you don't want and step back a little bit more no matter where she stands it's putting lots of beautiful contrast into the image so late I've moved it against and I have a half reflector just to her face yeah so near john perfect just turned down a little touch I meet her on her eye and I'm still one stuff under n amit two hundred shutter speed six forty two point eight okay and now I've got a really nice dad got the image oh well so it'll be so neat to work all of these in their stages it's so subtle but it makes a huge difference I turned that white tunnel so now I've got half white tunnel half black tunnel so the tunnels are really quite amazing if you think about it in terms ofthe controlling natural life the closer I bring these you can bring this one uh in the more I open these up the more I can block light to her so if this one's open and then I opened that one has a foot a long tunnel and then I bring her forward but I still product to the out of background as she comes into the light so go back because they can get a really good shot of this as she slowly inches into the light look at the light coming into her face stop right there and there and so then what I'm doing now is I'm now controlling the light on her face in the light on the backed up and it's really not because I by having the tunnels I've created deep my best images come from this one studio that I think my favor images and I couldn't work it out for years what I liked about the state of images I worked there for a long time right what is it about these ones that is so good and it was a big hi stud and I had this massive deep from where I was shooting into the backdrop and now I should in these little tight spaces so the more space I can pull her away from the backdrop but still control the light was the bit of my shots were going look and so we don't often have a lot of space and we simply don't have big studios and you know most of us have lounges that we should end stuff but the higher this dad the bit of the light and you can tell you can tell light that's you know in a big room
Class Materials
bonus material with purchase
Ratings and Reviews
Aliah Husain
I loved this course! I purchased it as a beginner photographer, unsure of whether to shoot natural or studio light and how to get the best results. After watching the course, I am fully confident in my ability to use both natural and studio lighting in my photography. And most importantly, I feel I have the knowledge base to be able to experiment with lighting in any situation. I am both grateful and inspired by these two amazing teachers sharing their technical knowledge and a personal piece of themselves. It is clear that they genuinely care about making their students better photographers. Thank you, Sue and Felix!!!
Geri
This is the best lighting class I've done, including several in-person ones. Covers so much, and the contrast between and dialogue about the two styles (natural vs studio) was so helpful. I didn't think there was anything at all negative about how Sue spoke with Felix, which a few reviewers said. Clearly she has great respect for him, which she sincerely says at one point, and explains why. Wonderful to see specifically how they both shape light. So many topics are covered. Loved Felix's clear and specific explanations about studio lighting. This class is worth every penny.
Wasabi Ben Kenobi
This was a fantastic introduction to studio lighting, and one of the best courses I've watched on Creative Live. I've only ever done natural light photos, but I want to learn more about studio lights because I'm creating a basement studio. I'm already a big fan of Sue's approach to portraiture. Now I'm a fan of Felix's soft lighting approach, too. In this course, he demonstrates how to replicate natural light portraits with a simple lighting setup. With a big scrim, a strobe or constant lamp, and v-flats, you can do so much! I'll be watching this course again.
Student Work
Related Classes
Portrait Photography