Lessons
Chapter 1 Introduction
01:26 2Why Just One On-Camera Flash
04:22 35 Reasons to Use Flash
10:37 4Common Flash Myths
06:51 5What Makes Flash Challenging?
04:56 6Chapter 2 Introduction
01:36 7Flash-Strobe vs. Ambient-Constant Light
08:19 8Flash vs. Ambient Light Exposure
03:07Flash vs. Ambient Demo
06:42 10Flash and Ambient Balancing for Natural Effect
07:11 11Flash and Ambient Balancing for Dramatic Effect
04:19 12Flash and Ambient Balancing for Creative Effect
07:10 13Understanding Flash Duration
08:37 14Chapter 3 Introduction
01:34 155 Common Key Light Patterns
08:38 165 Common Key Light Patterns w/ Diffusion & Fill
07:42 175 Common Secondary Light Patterns
08:28 183 Primary Subject Patterns
05:27 19Light Qualities
09:56 20The Inverse Square Law
07:50 21Inverse Square Law in Practice
08:21 22Corrective White Balance
10:02 23Creative White Balance
05:47 24Chapter 4 Introduction
01:58 25On Board vs. Hot Shoe Flash
05:57 26Full Feature vs. Manual Flashes
08:59 27TTL vs. Manual Control
08:12 28TTL vs. Manual Recycle Times
04:43 29Flash Power & Zoom
09:18 30HHS vs. ND Filters
12:29 31FCS vs. RCS
07:11 32Chapter 5 Introduction
01:38 334 Tips When You Must Use Direct Flash
06:00 34Bare Bulbing Done Right
11:42 35Grid Snoot + Direct Flash
06:43 36Mini Beauty + Direct Flash
06:08 37Ring + Direct Flash
07:52 38Understanding Modifiers
09:24 39Direct Flash + Shutter Flash
09:07 40Chapter 6 Introduction
01:55 41Ambient vs. Direct Flash vs. Bounce Flash
14:27 42Silver Bounce
14:27 43More Light Silver
11:02 44Soft White Bounce
15:41 45Overhead Bounce
11:39 46Overhead Bounce + Fill
09:42 47Event Bounce
12:42 48Chapter 7 Introduction
01:38 49Natural vs. Dramatic Light
17:43 50Filling and Refining Existing Light
08:44 51Coloring Light for Corrective Effect
13:33 52Coloring Light for Creative Effect
10:27 53Chapter 8 Introduction
00:43 54Case Study 1 - Dramatic Sunset
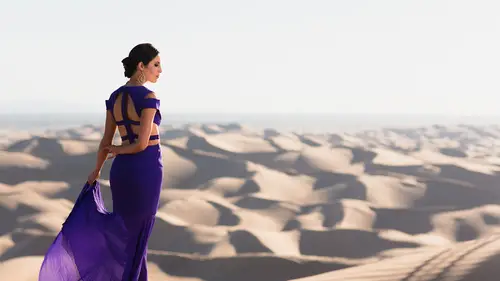
09:45 55Case Study 2 - Desert Sunset
10:04 56Case Study 3 - Sinister Headshot
09:40 57Case Study 4 - Family Portrait
08:21 58Case Study 5 - Athlete Portraits
11:19 59Case Study 6 - Working Angles
07:22 60Case Study 7 - Drag + Composite
08:09 61Case Study 8 - Less is More
07:16 62The Good Karma Jar
01:41 63Favorite Feature Flashes
05:52 64Favorite Manual Flashes
21:35 65Favorite On Camera Flash Modifiers
21:21Lesson Info
Direct Flash + Shutter Flash
Direct flash and shutter drags this is one of my favorite techniques to use, especially say on a dance floor at a wedding or an event. Anytime you want to capture motion and show action and freeze the subject at the end of it, this is a perfect technique, so you can use it really anywhere in fact, going to show you some really weird places. We've actually used this technique to get a really fun shot. The whole point of this technique is to create a shot that has imperfections that shows motion. It shows all these types of things, and it adds a lot of interest to this image. Now, there's a few different tips that I want to go through, and probably the first one, which actually I forgot the list over here on the left, the first ones to make sure that the primary, the bright light, the primary lighten the scene is actually coming from behind the subject. So if you're on the dance floor, there's a lot of dance for lights, whether you're at a concert, whether you had an event, whatever you'...
re move into position where those dance for lights are behind your subjects. If they're in front of your subjects, what ends up happening is you don't end up freezing them as well because there's a lot of ambient light on their faces you want that ambulance coming from behind because it'll look cool from behind, but not as much so from the front now primary number one is a dialing your shutter speed based on the scene and based on the speed of the action for the dance floor, I would say typically around one tenth tow one fifth of a second is around ideal. Okay, so I'm gonna go ahead and do that right now I'm dialling into one tenth next adjust your after an iso to arrive at the ambient light exposure now, here's what? I mean, turn off your flash and we're gonna do is just take a shot, take a shot of the room and kind of, you know, do the same kind of motion that you would if this were an actual shot, you know, actual motion shop. Now, right now, I just end up with this super bright image and actually don't have ah card in camera. Now let me take the shot again, so this is too bright, so I'm gonna do just adjust my aperture to f too, and I'm gonna just my exposure to say hi, so maybe around four hundred okay, just like get a nice bit of motion in the shot I might even take it a little bit lower than that going around so two hundred run anywhere between if I have to or have to wait usually my eyes those between one hundred four hundred okay that typically give me a good amount of light in the background for a dance floor so what I want is just to get some motion in the background but I don't want to be so brighten over exposed at that point, all I'm going to do is turn on my flash pointed directly my subject I still have my ring flash than you so let me take this guy off that way I can get this to point actually directly at my subjects so I'm gonna point this directly down powered on and I'm going to shoot in tl rimmer if I'm using variable flash and I'm going directly the subject, this will work actually really nicely and it's going to be very light power anyway so I'm not too worried about recycle times I want not just gonna point is directing my subject I can control my zoom again if I wantto pin light one person or if I want to get a group of individuals so usually actually like to use my zoom to around eighty two hundred five millimeters because I like that one individual that I'm focused on economy brighter than everybody else okay, so I'm gonna go eighty millimeters just remember turn on rear curtains sink when we were doing a shutter drag so you wanna have recorded sync on and at this point all you're gonna do is start firing away and adding action to the shot. Okay, so that's, how we have created the flash is going to end up freezing the person and in the motion from the shutter dragline of capturing the motion, the background so the other tips are to shoot a lot of images to make sure that you're getting good expressions and good shots of people and so forth. And then number six is two well, in this shop we didn't have, you know, a lot of stuff going on behind us, so rather than his have her like, go and just dance alone, we actually used a fan to kind of blow the hair around. But if your dance if you're in a group of people obviously had a wedding, you're not going to take a leaf blower onto the dance floor and let g like on everybody that doesn't make sense and plus usually on the dance floor, the wedding or at an event everybody's going crazy anyway, it's not one person against a backdrop, so when you're shooting, I'm gonna show you guys a couple of tips on motion and stuff like that but let's go through these shots real quick and just talk through how each of these shots are created so this very first shot this was basically too test our ambien exposure so what this is is on a hundred million or lens this is that one fifth of a second f four and s a one hundred with no flash this is that ambien exposure this is that same ammunition closure at one fifth f four is a one hundred with direct flash but we haven't added the emotion to it so now it just looks kind of blurry doesn't look good really at all okay? And then with our motion we get this third shot, so this third shot is one for them a second f four is a one hundred direct flash detail, but what we said was the motion was bad it didn't work now that's not because you know it's it's not because we did anything wrong it's just because for this particular shot, the lights and the traveling over the face and what not and so the motion in that shot is not good you're going to get shots where the motion isn't good where the expression isn't good where there's something wrong? So we say shoot a bunch you're going to shoot kind of high speed when you're doing this type of stuff but we just keep shooting and then we get to this so what I'm trying to do once I noticed that the lights were directly behind her face and they're trailing across your face I just got up a little bit higher and I put the lights in the background below her body so when I traveled back and forth now they don't conceal the face we get tons of great expressions general, you just want the lights either above or below the face of that way they're not going across and creating blurs and blocking out they don't have to be looking in the camera for these pretty good shots we did once we've got this set up we had a bunch of people in the studio like I want to do some of the dance for shots I never get a chance at weddings to do that so jack your city matter came in we got this shot with her we're out at the end of a shoot and it was really funny I was like let's get your dance moves on we're actually in a middle of a parking lot we just did the exact same thing in a parking lot this olivia I'm like dance because we just finished another shoot and she just starts dancing with no music my deal kind of weird actually and I start twisting the camera moving and create emotion we get the shot we post this online, we're like celebrate because we just finished our last shoot for lighting one o one outdoors and they were like, that's amazing! How did you do that shot were like, dude, this is the desk for set up, we're gonna show you the dance for senate, but this was actually in a parking lot, so you could make a parking lot looks like a dance floor pretty cool. All right, so let me show you some of emotions that I like to use when I'm doing a twist or when I'm adding motion particular, I'm shooting like events and that kind of stuff one is the twist, so the twist is basically where you're firing, you keep the subject right? The center, and what I'll do is I'll just focus on the subject, and then I general keep the subject right, the center for these type of shots, and once I get the seven focus, I simply twist while firing. Okay, now you can see how quickly we're kind of moving and twisting and firing set like that when you're doing this on a dance floor like, say, at an event. People are kind of surprised by because they're like whoa he's shooting tons of cool images so what I'd like to do is shoot that and then show a group of people who look at awesome this looks and they see these kind of shots and, like, that's wicked awesome, like I had no idea you're doing that and it's one of those wow type effects another great motion. So this motion right here, this is side to side, okay, so once I get a focus on her, I simply go from side to side. Okay? The slower the shutter speed well, the more motion you're gonna pick up, the faster the shutter speed, this less motion going pick up, so if your shutter speeds at one tenth of a second, you've got to move a little quicker, so if I'm not one tenth like I am right now, then to capture motion I really need to be doing this, okay, to be able to get enough motion in that shot. But if I slow it down the one fifth, then well, I'm not the one fifth and then I can kind of go more slow with these. So depending on the speed of the shutter is what's gonna dictate how quickly you're moving the camera, another one of my favorites, we get like a wavy look right here and we actually nailed a lot of these images that look great the way you look is like this so what we're doing is we focus and then we go up and down in a way okay, any emotion you want is fantastic if you have a zoom lens, you can sit there and zoom in and out while you're doing that same type of shot and you'll get a zoom pan type effect which looks great as well just play around with this remember to kind of look at each shot and see how the lights behind the subjects are moving and keep trying until you get these amazingly creative shots that are just blew people's minds when ugo post him that's our land so we can see them as well that's it for this video one quick mentioned as faras processing goes with these types of shots you're gonna have lots of color gonna have lots of things going on. One thing that really helps out is just doing a slight matt approached the processing inside of leg room just with the tone curve that way kind of it kind of reduces the direct flash look and kind of just even it out a little bit leave the colors and leave those kind of things sometimes all de saturated a tiny tiny bit because the inner being really rich but that's it it's very simple to process very simple to get cool and creative shots using the shutter drag plus flash freeze technique.
Class Materials
Bonus Materials with Purchase
Ratings and Reviews
Sid
The best class for understanding light and lighting there is bar none. Pye is an excellent teacher and the quality of the material provides for a rich and very informative experience. Pye breaks down the fundamentals in easy to digest packets and then elaborates as needed. If there is one class that you watch this is it! Worth purchasing and saving for future use. I would also HIGHLY recommend downloading the saving the PDF of slides that accompany the videos. Again, and can't say it enough, this is THE BEST video to lighting on Creative Live. A must watch for the novice and the expert.
Petra
Great course, I highly recommend it if you want to become a more confident flash user. Pye is a wonderful instructor and just such a nice guy, it's a pleasure to listen to him
Simon Metselaar
This is the best thing that happened to me since I've been into photography. What a lifesaver. Unfortunately I already payed for some courses that are not Pye, but Pye just nails it. Amazing, and kind of a life hack. Thanks again :)
Student Work
Related Classes
Lighting