Lessons
Chapter 1 Introduction
01:26 2Why Just One On-Camera Flash
04:22 35 Reasons to Use Flash
10:37 4Common Flash Myths
06:51 5What Makes Flash Challenging?
04:56 6Chapter 2 Introduction
01:36 7Flash-Strobe vs. Ambient-Constant Light
08:19 8Flash vs. Ambient Light Exposure
03:07Flash vs. Ambient Demo
06:42 10Flash and Ambient Balancing for Natural Effect
07:11 11Flash and Ambient Balancing for Dramatic Effect
04:19 12Flash and Ambient Balancing for Creative Effect
07:10 13Understanding Flash Duration
08:37 14Chapter 3 Introduction
01:34 155 Common Key Light Patterns
08:38 165 Common Key Light Patterns w/ Diffusion & Fill
07:42 175 Common Secondary Light Patterns
08:28 183 Primary Subject Patterns
05:27 19Light Qualities
09:56 20The Inverse Square Law
07:50 21Inverse Square Law in Practice
08:21 22Corrective White Balance
10:02 23Creative White Balance
05:47 24Chapter 4 Introduction
01:58 25On Board vs. Hot Shoe Flash
05:57 26Full Feature vs. Manual Flashes
08:59 27TTL vs. Manual Control
08:12 28TTL vs. Manual Recycle Times
04:43 29Flash Power & Zoom
09:18 30HHS vs. ND Filters
12:29 31FCS vs. RCS
07:11 32Chapter 5 Introduction
01:38 334 Tips When You Must Use Direct Flash
06:00 34Bare Bulbing Done Right
11:42 35Grid Snoot + Direct Flash
06:43 36Mini Beauty + Direct Flash
06:08 37Ring + Direct Flash
07:52 38Understanding Modifiers
09:24 39Direct Flash + Shutter Flash
09:07 40Chapter 6 Introduction
01:55 41Ambient vs. Direct Flash vs. Bounce Flash
14:27 42Silver Bounce
14:27 43More Light Silver
11:02 44Soft White Bounce
15:41 45Overhead Bounce
11:39 46Overhead Bounce + Fill
09:42 47Event Bounce
12:42 48Chapter 7 Introduction
01:38 49Natural vs. Dramatic Light
17:43 50Filling and Refining Existing Light
08:44 51Coloring Light for Corrective Effect
13:33 52Coloring Light for Creative Effect
10:27 53Chapter 8 Introduction
00:43 54Case Study 1 - Dramatic Sunset
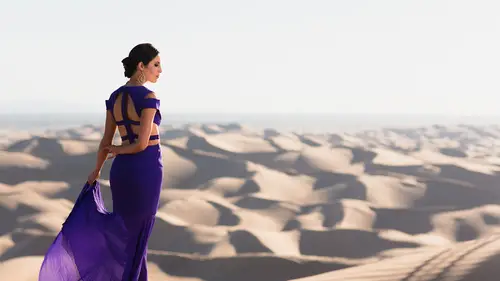
09:45 55Case Study 2 - Desert Sunset
10:04 56Case Study 3 - Sinister Headshot
09:40 57Case Study 4 - Family Portrait
08:21 58Case Study 5 - Athlete Portraits
11:19 59Case Study 6 - Working Angles
07:22 60Case Study 7 - Drag + Composite
08:09 61Case Study 8 - Less is More
07:16 62The Good Karma Jar
01:41 63Favorite Feature Flashes
05:52 64Favorite Manual Flashes
21:35 65Favorite On Camera Flash Modifiers
21:21Lesson Info
Case Study 1 - Dramatic Sunset
Case study number one our dramatic sunset shot now of course you guys have seen all the shots that we've gotten in this scene with jill and I want to talk about the approach and when you get to a scene like this how exactly do you work into the final shot? Well, basically when I arrived here I saw this beautiful sunset and whenever I see a beautiful sense I'm sure everyone kind of thinks the same thing. How should I shoot this? Oh my gosh, time is running out I got to get into a position what do I want my composition to be like? Oh, I want underexposed I wanted to be bright and airy what I wanted to look like I find it really helps in the situation just slow things down and I'll even take moments like when I'm shooting with clients I'll take a moment to say hey guys, give me five minutes I want to figure out how I want to shoot this shot, okay? And so during that five minutes I'm just letting them kind of relax and talk amongst themselves and what may be my lighting assistant well, I k...
ind of figure out exactly what I want to do it takes the pressure off me and trying to kind of keep them occupied keep them entertained during the shoot and also trying to figure out everything I want to do in camera now what I'll do is I'll usually take a quick test shot just to see what it looks like for this test shot. I left it a little more on the bright side to see do I want to go for that more bright, natural look, letting part of this guy blowout in keeping part of it? Or do I want to drop it down a little bit? After I took that very first shot, I thought, well, that doesn't really look that great doesn't look super dramatic and what do I have over here? I have a model I have jill, who is? I mean, she is the kind of epitome of dramatic she has this beautiful gaze, this smolder in eyes has an incredibly blue bikini on. She looks fantastic, she's fit everything about this shot to me screams dramatic, so I thought, you know, the first step in that is gonna be under exposure. I want to go with an under exposure, so what I do, I put a I often do this, I'll put the gel onto my camera, so I basically put a gel on the camera on this one. I don't think I'm using the grid, but you could or maybe not, used the great it's up to you. It really depends on whether you're getting spill or not if you're not getting any spill then there's not any reason to use the grid but what I did was basically underexposed and right here we're essentially at let's see we're at forty one millimeters of focal length on the twenty four seventy mark too I'm not one to hundred of second f five six and one hundred the beautiful thing about shots like this by the way is that you don't need a neutral density filter these air shots where regards of if it bright or if it's sunset you can run the aperture up and you really kind of want that everything sharp kind of look it looks fantastic look great in this kind of scene because it's clean scene but if it weren't if we wanted to blur out things that we have to worry about that but generally in this type of scene whether you're in a day or night time you're not going in the field because you're running after up anyway so what did I do? I set it up and I left my wife balance at daylight okay, so this is basically daylight white balance I think this is around like not quite daylight it's like forty eight hundred kelvin um but it's it's on the warm side and I put the cto gel on just to see basically what is this shot gonna look like if and what I'm doing is I'm thinking my head I probably want to do the cto I'm not sure yet let me just take my under exposure on the background first and let me take another shot with it dropped down and right now I can see her skin tone is way too orange because the ceo is on already but that's okay? I'm not too worried about that this is just a test shot after I get this I think you know what? I really love the under exposure I think that's the right decision but the thing is that the bikini doesn't really pop as much as I'd like it too and also the backgrounds and as blues I'd like it to the water's not as blue if I could get that water and the background and the sky to kind of be that same poppy blue it's gonna have a really beautiful kind of harmonious effect in the overall image and I want that so what I do is drop the kelvin I drop it tio we're at thirty six hundred calvin right over here and we get this beautiful blue and my flash didn't recycle for the shot so we end up getting just appear silhouette but that's great because then you can see exactly how dark it was if I didn't at any additional light she's literally blacked out okay we can't see anything it's effort just her form so once we have that configured I have my gel on the camera are on the flash I set up my assistant off the left with the silver again why the choice in a silver well because once again we want dramatic right we want a kind of harder and more speculator light I'm not too worried about it being a little bit more contrast it because we want a more dramatic image and I want some highlights along her body to kind of show off her form to show off her figure and all the features that make her attractive and beautiful so that light is kind of perfect for that because it gives me more of that edge it shows more that features and details versus a white that might be too soft and too rapping too really accentuate those features so we get this beautiful silver light now what do I have my assistant do typically my assistants just gonna hold this like this right and they're gonna hold it so it's kind of slightly top down because she's on her she's on our knees right now so she's a little bit lower than where my assistant standing so they're holding a little top down so lights coming from top and going down to her uh and then they're gonna angle kind of down towards the ground I have my system actually doing something called feathering and what we'll do here is if I aim this at the ground like this and I flash, you're gonna get a lot of my flash spilling onto the ground and it's gonna look just a little bit too modified. Its going to look like we added life. I don't want it to look that way. I want to look very natural and very subtle. So I have my assistant feather up. So rather than bouncing down towards her he's still keeping the angle the same. So life still coming top down. But he angles the reflector back. And what that does is it allows the light to hit this and basically skim the surface of the ground. Okay, so we're skimming the surface of the ground covering mohr of jill and less of the ground so you can see you can barely see a little shadow here coming off her because the flash is very lightly skimming the ground. But most of it is on her, and the rest is just kind of going up into the sky and it's not affecting the image, but that's what I wanted to focus on. I wanna focus on her expression, her figure and you can see kind of trails off. We have this beautiful shadow, like right along the legs, it looks fantastic. Otherwise it end up looking like this whole bottom area was lit with flash and I feel like it really take away from the image again these air small things this little small bits of refinement that makes a huge impact on the actual image. So for the final gear, what are we using? I believe for the shot I used my five eighty x two I'm totally down to use on camera manual flashes, manual ashes they're fantastic on they work totally fine the only thing is that notice how dark this shot iss it's extremely dark right? And I was kind of always in situations like this I'm always thinking well if I pop the newer if I pop a flash that has a really great recycle time onto the hot shoe all the shoot manual and get a really great recycle time especially the newer flashes it with that one point five two second recycle time at least for the first fifteen twenty shots the problem is there's no emphasised so without that auto focus assist in a scene like this where she's just blacked out it's very, very difficult to focus and that's why using a full feature flash the kotex metro's plus a nikon sb nine ten five eighty x two or any other just full feature flash is fantastic because it gives you that focus assist in dark situations where your subject is very dark so five eighty x on camera we have are finding mark three we have our twenty four seventy I'm using a gel sheet just thea standard cto gelsey sheet you can also use your magma if you're getting spill that by all means you can use a grid to control that but I wasn't really getting a spill based on whether you're bouncing and so forth on them for the reflector on this one I believe we just use the standard westcott forty inch five and one silver so that's really it but that was the steps and what we end up getting here with one single on camera flash has been modified. We're not having this image that looks as if we have off camera flash it looks like we have a one or two lights set up we have this beautiful light coming from the background and notice that I also placed her head in all these shots I place her head over the sun I've mentioned briefly why did that before? If you guys remember basically our eyes are naturally drawn the highlights of images right? So if we can kind of use those highlights those natural highlights in an image to draw attention to our subjects it makes for a more powerful photo so putting her head right over the sunset is the brightest area the sky so basically this highlight on the water and the highlight all around her head. This is the brightest area, the frame and it just accents and perfectly kind of lifts her out. It brings attention right to her. So all these things are thought about to get to this final image and make no mistakes. There are no mistakes in getting this point, okay, we just have to think through methodically slow things down and work through step by step to get the shot notice I didn't start from I didn't just go from nothing to this shot. I worked into it in siri's of different shots, and once I had the right pose once had the right everything that light set up, cameras, everything. Then I start working with my model and saying, do these different poses. Let me get these different shots, working with her and waiting for the waves to come up and get different looks and so forth that's it for the scene. Hopefully this little bit of case study analysis helps out with this particular image. Let's, move on to the next one now.
Class Materials
Bonus Materials with Purchase
Ratings and Reviews
Sid
The best class for understanding light and lighting there is bar none. Pye is an excellent teacher and the quality of the material provides for a rich and very informative experience. Pye breaks down the fundamentals in easy to digest packets and then elaborates as needed. If there is one class that you watch this is it! Worth purchasing and saving for future use. I would also HIGHLY recommend downloading the saving the PDF of slides that accompany the videos. Again, and can't say it enough, this is THE BEST video to lighting on Creative Live. A must watch for the novice and the expert.
Petra
Great course, I highly recommend it if you want to become a more confident flash user. Pye is a wonderful instructor and just such a nice guy, it's a pleasure to listen to him
Simon Metselaar
This is the best thing that happened to me since I've been into photography. What a lifesaver. Unfortunately I already payed for some courses that are not Pye, but Pye just nails it. Amazing, and kind of a life hack. Thanks again :)
Student Work
Related Classes
Lighting