Editing in Lightroom with Presets
Lesson 40 from: Lifestyle Newborn Photography - In the HomeEmily Lucarz
Editing in Lightroom with Presets
Lesson 40 from: Lifestyle Newborn Photography - In the HomeEmily Lucarz
Lesson Info
40. Editing in Lightroom with Presets
Lessons
Class Introduction
06:18 2What is Lifestyle Newborn Photography?
09:47 3Why Are You a Photographer?
04:20 4Why Shoot Lifestyle Photography?
07:32 5Integrating Lifestyle Photography into Newborn Sessions
05:24 6Strategies to Gain Lifestyle Clients
18:07 7Utilizing Your Website to Book the Right Clients
23:13 8Booking and Prepping Your Client in IRIS
14:58Integrating IRIS to Your Business
35:20 10Pricing Guide & Client Questionnaire
06:59 11Ways to Contact Your Clients
09:54 12Step One: Plan Your Session
20:37 13Step Two: Plan for Your Client, Not Yourself
08:43 14Step Three: Guide Your Client
04:04 15Step Four: Use the Available Light & Rooms
09:19 16Step Five: Trouble Shoot Problems
28:08 17Setting Up the Crib Shot
07:23 18Live Shoot: Crib Shot
15:19 19Live Shoot: Mom Holding Newborn
07:57 20Live Shoot: Swaddle Newborn for Crib Shot
14:00 21Live Shoot: Siblings and Newborn
07:41 22Live Shoot: Family with Newborn
13:39 23Images from In-Studio Shoot
12:08 24Gear List for Life Style Sessions
06:07 25In-Home Shoot: Before the Session
26:38 26In-Home Shoot: Family with Newborn
07:56 27In-Home Shot List
23:41 28In-Home Shoot: Newborn Only
22:18 29Newborn Only Shot List
12:03 30In-Home Shoot: Sibling with Newborn
20:38 31Sibling with Newborn Shot List
14:17 32In-Home Shoot: Mom with Newborn
19:50 33Mom with Newborn Shot List
16:16 34In-Home Shoot: Dad with Newborn
18:41 35Dad with Newborn Shot List
09:48 36In-Home Shoot: Pet with Newborn
07:56 37Pet with Newborn Shot List
08:40 38Shooting For Black & White
06:17 39Editing Lifestyle Newborn Workflow
06:51 40Editing in Lightroom with Presets
22:31 41Remove Grain & Fix Color in Lightroom
27:27 42Sales & Pricing for Lifestyle Newborn Photography
16:23Lesson Info
Editing in Lightroom with Presets
So what I'm done is I've picked a handful of images and I'm gonna show you we're gonna use the light style set that I've created. But I'm gonna tweak it a bunch, so you guys know how to do some fun tricks, not just using on presets. Now here's a train of thought. You can hand edit which takes forever. You can find a set which works for you. There are a million different people that sell your presets. These are just the ones that I've created over the years that have worked for me. Here is, remember this image right here. Do you see the color tones a little bit off. We had that room it was revered pewter. It's green in there. Okay you can see my settings. My ISO was at 800 and I needed that because when I first started, do you remember we pulled the shades down? And when that happen, it got darker in there. You'll see my shutter speed was at and I did that because Mom was moving the baby around. Yawning, stretching I was awaiting movement so I set my shutter speed. It is in a spot wher...
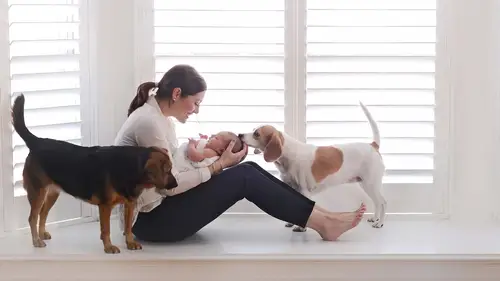
e I could actually be prepared for movement. It look like I wasn't thinking about what I was doing but my mind is constantly thinking, anticipating what is about to happen. I had not crank my ISO yet for you guys. Wait till I do, okay. So what I do with this one is I typically use number four on my lifestyle set is my lightest and brightest preset. If you guys have these, actually I just launched them the other day 'cause, I wasn't gonna sell these. Let me give you a little back story. This lifestyle set is what all of my one on one and my mentoring and my small group workshops get. It was gonna stay special to them and I feel badly. I'm gonna create something new for them but what happened was is I use these on every lifestyle session, and I wanted to teach you guys in Creativity Life what I actually do and not just make something up for the show so these are what typically, now they're for sale. But they were just for my workshop people, but now they're for everybody. Number four is everybody's favorite preset. This is what I used on mostly everything. Number four and number five. I wanna show you some things though on here. I'm gonna go ahead and go to number five. I wanna show you some tricks. This gives it a little bit of grit, but it's too pink for me. Some ways of pulling pink out of an image. Coming down here, see the red primary sliders. I work a lot on these primary sliders okay. I'm going to pull the saturation down a little bit in this red primary and then another thing that I like to do quite a bit. And this is just one of my go-to things is I'll come into saturation and I'll pull out the yellow. We were in a room that had a lot of green, and when you pull the yellow out, it tends to pull the green out, and I know all of our computers calibrated differently so everybody's gonna see this differently on their screen. So keep that in mind. My computer probably looks a little different. I'm gonna show you the before and after of this one just so you can see. This doesn't need much. I probably would have gone with four. Do you see how it just gives it some oomph. When you have flat lighting which we had in there, some nasty colored tones. What happens is the baby's skin looks gray okay, so a lot of these presets in here are set for baby skin tones if you run into that gray skin tone, it bring some life back into the skin tone. And we're gonna get into some and it's gonna be a little bit more complicated. For me though, I'll probably leave this at four. And do you notice on the face, I don't see much contrast 'cause the baby's face was facing away from the light. When you have a situation where this happens and it's just an organic moment that happened. Remember I don't aim for this to happen but it did happen. So what I do is I pull some contrast back in. I am a big contrast user okay. I'll show you before and after. Okay, it brought it back to life. It just made it a little bit prettier. Alright, let's move on. I'm gonna give you some harder ones. Same thing with this one. I do have it set in my Lightroom when I used my 35 to go ahead and do the lens correction. It tends to straighten everything out. You don't have to with the 35. I just like to with my lifestyle images. The way that I shoot that's completely up to you. You don't have to but just straighten it out 250. For this one, I would do the number four again. Look how this just fixes it. I was able to take this room, shoot in an extremely low light but you see how she's yellow? For an image like this, you either want it to make your white balance, but I don't really wanna tweak the white balance of the whole image. You need to really look at skin tones. Again I'm very boring. Saturation I pull that yellow out. I pulled the yellow out of her skin. Another trick for skin if you wanna brighten just the skin. The orange in the luminance slider. Okay right now I have it set down so it's darkening her skin. I'm gonna just go crazy on this. This isn't how I would do it but I want you to see the difference. See how her skin gets bright. The orange luminance slider, I always do the about 5 ish maybe a little bit one more for this one. That brighten her skin so I didn't have to go through and actually take, I didn't wanna brighten. A lot of people what they do when they're trying to brighten skin is they'll pull the shadows up right and what happened to the rest of the image? You lose your shadows. Okay I don't wanna pull up all the shadows. Or they'll pull up their exposure then what happens then you blow out the skin, so I don't want that to happen either. So a really good trick of mine in order to brighten skin is that orange luminance slider. I'm trying to give you guys some like tricks that you can use no matter what preset you're using so that's that one. Here's the yawning images, I gonna show you how to crop some of these. Here's a series, we're gonna batch these and I'm gonna show you how to crop them. Cutie, right? Ridiculous okay, hold on I'm gonna reset that. I had edited it earlier. Alright he's a little bit pink right. You can tell we had pulled the shades down and those shades were pretty significant. They weren't sheers. They were those heavy duty ones that made everything even more yellow. And it's funny 'cause you go in there, it doesn't feel yellow in the house. It feels warm and inviting but the cameras are like, right when you don't have a clean color palette. So for this one, there's two different ones. Again skin tone number four is my favorite for this one. But I also like number five. See how this changes the image. I'm gonna go ahead and shrink this down. An image like this we need to get rid of the extraneous information. That is number four. This number four is what I use on pretty much everything in life images in lifestyle images. I can edit probably a hundred photos at one time, click number four, go through and make my tweaks. And this is how I do this. And number five and my black and whites which I'm gonna show you. I have this set. This took me a long time to figure out exactly where I am within this preset to fix skin tones in low light situations okay. One thing I want you to be mindful of if you end up using these presets. I do have the grain set because I prefer a more real grainy type of image. However when you're in a low light situation, do we wanna be adding grain? No, okay so I can not tell you this enough. Presets actions do not fix images okay. You have to have a well shot image. A well exposed image. These will enhance your imagery number one. Number two, presets. Anybody's presets and you notice you get them and they're so harsh. Like what am I gonna do with this? This looks nothing like what the advertisement shows. You have to tweak them according to skin tone okay. They are all gonna be different. Lighting situations are gonna be different in all situations. My biggest selling, my old one is the clean set for Lightroom and I use that on the majority of my shoots besides ones that I wanna have some grit to where I wanna have some dimension to, and that's these lifestyle images. I just wanna show you the before and after of this one. I pull the grain down. I didn't have any noise but if I did what I would do is I would come up here in light room to noise reduction and I would pull that up a little bit. And that softens the baby. Let me show you the before and after. Okay do you see the difference? All of it, one click. There's no sense in reinventing the wheel. There are tricks you can do to fix skin tone. I'm gonna show you something, actually one of my students taught me this gradient filter. She's probably watching and she gonna be excited that I'm using her trick. I'm always opened for learning. If anybody out there has a short cut, I am willing to hear it, so I don't wanna do is I wanna to show you now how to batch edit. People say, "Why, Emily you use "to use Photoshop like crazy." I use to teach online Photoshop tutorials. I'm good at Photoshop. Photoshop is my jam. So when I started moving to Lightroom, I was redoing like my brain. It's like becoming a right-handed person to a left-handed person so your lunch you guys are all like and somebody was saying that they actually work for Adobe. And they're like, "I can't convert to a Lightroom person." I'm like, oh you will and I'm gonna show you why. When you batch in Photoshop, you handle it and it just goes slower. It has to run through each layer right. Watch this, you highlight all these. Which ones do you wanna batch? See down there, I highlight at the bottom. I've already added this perfectly how I want it. It's the same lighting situation. Nothing's changed, same baby, same light. I don't need to reinvent the wheel. I'm gonna need to crop down but I'm going to hit sync. I have everything selected 'cause I want everything to be synchronized. Sunk (audience laughing) It's not swimming, synchronized swimming. Okay there we go everything is completely done. And so what I would do now is I would go through and I would crop as I wanted to. I told you that you need to do this best in camera and I'm still saying that, but I'm just showing you that we don't always. You can crop down a little bit. I was standing over Mom's shoulder during all this. Now I wanna show you something. Cropping, where is that baby's head? Rule third, composition. I don't crop for fun. I'm not cropping here. I mean I could but I prefer it here. Do you guys prefer it there? Rule third composition. I just edited all those files at one time. Super easy. Got rid of the grain. I could probably get rid of some of the yellow in here. Saturation I just do this on the images. Get rid of that yellow saturation. It gets rid of that yellow skin color cast. One other little trick, I'm showing you all my tricks. If you want this to look filmier, I take the number four or the number 5 presets then I come up there to my tone curve. See this tone curve right here. I take the top right-hand dot. I'm not gonna use technical terms today and pull it down a little bit and it adds a little bit of a filmy look to the highlights. It's probably really hard to see on this monitor. I'll do it really far, that's too far. But if you do it a little bit. Try this at home. Pull that down a little bit and couple it with all the other settings, it will give you a film look. Here's little man. We're gonna show you some gradient filters because she taught me this and I wanna show people. Here's our dude dad, remember we talked about the due dad on the wall? The dude dad? The little thing on the wall. To me, it looks fine. Do it look fine to you guys 'cause it's a kid picture. It doesn't bother me at all okay. For these, I like to do these a little bit more fun. These to me are just I don't know, they're more fun. I'm gonna show you number four because number four is my go to. See the before and after. It gives it some oomph. Four is very clean, evenly lit. You're seeing my secrets now okay, that being sad let's go in and do a filter. Maybe I'll show another preset. Let's do number five. I like number five too. Number five is a little bit moodier and I like number five. I like number five as well. I don't like all of them. Here at number one, this might be come of your guy's jam. Some people like to pull that color out that really think destaturate your images. This one has a little bit more warmth, number two. Let's go back to number four and I'm gonna show you this gradient filter. Some of you guys might not like all of this stuff going on up here, the color. I like it but of don't and you wanna soften it. You take your gradient filter and you pull it down. You're gonna cover this up and what I wanna do to this. I want to change the tint. I wanna get it less green. I wanna brighten it which I had already done in here okay. And I'm gonna brightness the shadows and brighten the blacks. So did you see what I did? It's this little box right here. Let me redo it so you guys can see me do it again. Okay, gradually filter. I want to brighten this, if you want to even it out a little bit and I don't necessarily wanna do it on this image but I wanna show you guys just in case you were in processing rooms. Some room you'll have some such as deep shadows and it just looks off right 'cause you can't control lightening situations in every room. So see this box right here, that's the great. I'm looking that way, we can go backwards. This box is the graduated filter okay. You're gonna take it and pull it down or even do angles or whatever. And then within that graduated filter, you're gonna set what you want. I wanted it brighter with the exposures up and I wanna pull down the saturation and I don't want to let color up there okay. Done, okay there, so I brighten it up and got rid of some of that color. Again, you don't have to do that. I'm gonna technically do that but is something is bothering you on an in home image, which it might. That's a really good thing to do. Same with this one, straight at camera for this one. Go back to number four again. Number five, he's a little pinker. You can take this and you can highlight and do all of them. The same batch image that we did before. Let's go ahead and do a dog image. Okay there's the straight at the camera. We saw that one earlier in the show. This one is lacking something. Do you guys see the curtains behind her? I wanna get rid of that, that's a distraction to me. I wanna blow that back out a little bit. So I'm gonna take a preset where I know that that is gonna blow it out. So guess which one I'm going to number four. Oh it's all fixed. That's pretty good to me, it pulls those out. This is still not enough contrast for me so what I'm gonna do is I'm gonna come and tweak this. I want more contrast, that's better to me right. A little bit more contrast. Again, I'm gonna pull the yellow out. I don't want the yellow back there. Those curtains we couldn't get them down any further so it's one of those things where it is what it is. Pulling the yellow out. There we go so view before and after. Alright you guys, I add it so simply. Okay you so how it contrasts? It pulled them out. It pulled them out to make them the most important part of the show. Okay, let's do, here's the toe one. Cute right but needs some oomph. My preset number, my oomph preset is in number five. And that's the one I do with oomph. This would be another one. A good one in Black and White. See how that gave it some oomph? Right these are all set for skin tones in the home okay. You may not like these skin tones on newborns all the time and if that's the case then you need to kind of tweak it as you're like it. These are in raw right, so I have this as shot. 'Cause I shot it as I wanted it 'cause I knew how I was gonna edit it. You can still change the temperature of these images but be mindful when you are tweaking the temperature and images, look at the image as a hole. Is it the image as a whole that you don't like the temperature or is it the skin tone that you don't like the temperature of? And we added those things completely differently okay. Remember we talked about that orange luminance lighter. You might wanna mask some of that stuff off with a brush tool in Lightroom. Again take the Lightroom class, we'll show you how to do all that. You have a question. Can you take us through again, say with this particular preset. What are the elements of that the preset is doing to get that piece. Yes, so let's start with number five. What this one does, it does not change your temperature. It leaves your temperature as shot. A lot of newbies with presets, don't realize that when you get a preset if you have a poorly white balance image, it's not gonna fix the white balance okay. You're gonna need to fix the white balance so if you're in a situation where you have a difficult white balance situation. Make sure you're shooting in raw so you actually can change the white balance of an image. Effectively you can a JPEG too but you can't do it as well as you can in raw. So it leaves the white balance as it is. These don't treat the exposure a little bit. I like to brighten my images and home images. I do a lot of backlighting. When I'm doing backlighting, everything needs to be kind of brought up okay just a little bit. With all of my presets, I recommend playing the contrast I set mine pretty neutrally because I want you to play with the contrast on your own. 'Cause some images will be more contrasting than others naturally and it's hard to globally put contrast into a specific preset okay. Down here, I pulled the highlights down because we were shooting into the light. I shoot into the light a lot, so my highlights are pulled down a lot in these presets. I brighten the shadows quite a bit 'cause we're backlighting, so we need to brighten the shadows and in the white had pull back down a little bit. A lot of times, I'll desaturate with color cast at home. Desaturating just a tiny bit helps. Tone curves, these are just mild as per pops same thing as we do in Photoshop. We brighten in the midtones and pull down the shadows just a little bit. Now all of these colors, I like to desaturate some of his color 'cause a lot of these colors at homes are too harsh okay. The luminance, I like to brighten the reds and the oranges. That's brightening skin tone okay. That's why we have luminance layers, it brightens those colors. Okay down here, noise reduction. I always had a little bit of noise reduction. We're gonna get to the really grainy images next. We're still on the easy ones. We're at 3200 and gradually creeping. Do you see this? Down here I wanna show you. I have grain added to these. Pretty soon, we're about to take that puppy down because I have enough grain. I prefer a little bit of grain in all of my images. Enough where it doesn't affect the skin and then I'll still pull my files up a little bit 'cause that does help the skin. Just to tell you but not too much otherwise it's like plastic. And then down here these are just color tones that I've chosen that I enjoy seeing. Let me show you before and after of these. Those are the kind of, okay if you can see the before and after. And just to tip on that. You can just hit Y, which is whether. Our audience is saying to you on live. That's what I said, let me know tips. Exactly. It's like helping one on one for me. I'm just kidding. I don't know shortcuts in Lightroom like I do Photoshop. Photoshop is like my brain. But Lightroom I love more. I've worked so hard to create exactly what I want and how I shoot with these so just so you know. Okay let's move on to some grainy stuff huh. Are you ready? Oh, it's grainy. 3200, look at these shadows. Hey it's me, I did it for you guys okay. Let's just show you how to we do this. Okay, alright this one. You guys ready for this? I created these for situations like this, so I wanna show you what happens. Number one, is my go to for this. Do you see how that fixed that? Now it did not fix the grain. So shall we? Let's do it together, okay and then I get darker. My images get darker, I'm going to keep getting harder. Yes. I'm also wondering if you can zoom in, maybe it's the one to one so people can really see what you are talking about. With the grain? Yeah, you can even just hit that one on one. Oh there we go. That's like 400%. Look at my grain. Granted this is 400% so this is more grain than normal but still you can see it okay. So what are we gonna do? Noise slider okay because we shot this in raw. Pull it up, the color one. I'd like to pull up the colored one. 'cause it gets rid of noise within color. A little bit, right there. Okay, we might do the noise a little bit more. Now see, look at that. Now I don't recommend this okay. This is not ideal and you need to know that. I normally would not have shot this at this high of ISO, but I wanted to show you if you have to shoot in low-light. Turn it to raw because you can fix it. I hate fixing photos. I only like enhancing photos but in these types of situations, they're very few and far between okay. You do have the capability, let's zoom out okay. Is it (indistinct speaking)? Yeah, got it. Before and after, now that's too soft for me because we're not gonna have it that zoomed in. We don't need that much noise reduction. We're gonna leave a little bit grain but there we go. Okay before and after. That's usually my number one preset which I adore okay, and it tweaks the same thing. Exposure, contrast, color tones. They're just tones that I've come up to love with different images. It depends on the room, depends on the paint color, depends on who's shooting right. But that to me is a beautiful image okay, it pulled her hair back right. When I was shooting in here, I lost a lot of that total range 'cause I was brightening the shadows. Okay I do this to teach okay. I was brightening the shadows, typically I wouldn't have brighten this image this much in the camera. Okay because I lost some of that tone range. But do you see how just by tweaking it, I brought some of that back okay. 'Cause down here, I have my whites pulled down quite a bit.
Class Materials
Bonus Materials
Bonus Materials with Purchase
Ratings and Reviews
JennMercille
Oh my goodness!!! This was such a wonderful class. Not only is Emily a very gifted pro, she is the personable mentor that makes learning simple and the fun big sis you want to be around. She is a wealth of information and a total open book about it all. Being in her studio audience was so much fun, and the time flew by way too fast. I highly recommend this class not only to newbies trying to find their style and refine their technique, but also to seasoned pros looking to tweak their art with a creatively authentic perspective. As a newborn photographer with an established studio business model, I cannot wait to infuse what I have learned into my style and incorporate her business genius into my session and pricing structure. Thank you Emily Lucarz for sharing your creativity, knowledge and uplifting energy with us both in the class and behind the scenes! You are awesome!
Jessie Fultz
Buy this course! If you are at all interested offering lifestyle newborn sessions, whether you are a new photographer or you have been in business for years, buy it! It's 100% worth your time and money and you won't regret it. Emily is so fun and genuine which makes learning from her such a joy! Not only does this course go over troubleshooting different scenarios that are bound to happen during some sessions, but Emily also gives all sorts of other tips that you wouldn't even know you needed to know until she offers up the advice. It's fun to watch her interact with her clients to ensure that she is able to make beautiful pictures in such a natural setting. Thank you Emily and CreativeLive for coming together to make this course happen! I am beyond thrilled that I was able to watch these last two days and learn SO much!!
Hiba Alvi
Emily is amazing! I love how detailed she is and tells you how it is. It is nice she shares her personal journey and what she does - which is great! Love it and would highly recommend this course! I don't have a studio, and normally travel to clients home to do photoshoots - so all the tips here are more than helpful! I am so excited to do my upcoming photo session this weekend - can't wait to put these tips to use!