Lessons
Class Introduction
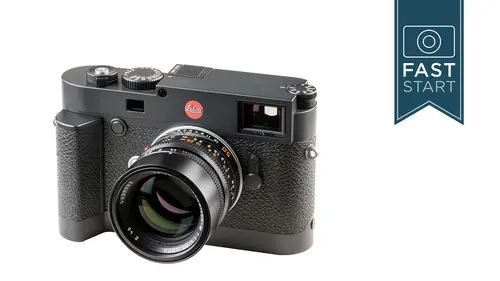
05:39 2Welcome to Leica
15:06 3Basic Controls
05:27 4ISO
05:58 5Shutter Speeds and Apertures
08:45 6Accessory Shoe
08:45 7Back Side Controls
37:00 8Bottom Controls
07:07Front Controls
06:39 10M Lenses
18:53 11Menu Functions & Lens Detection Menu
25:05 12JPG Settings Menu
03:44 13Capture Assistants Menu
07:27 14EVF/Display & User Profiles Menus
03:54 15Customize Control Menu
04:57 16WLAN & GPS Menus
09:02 17Date & Time & Language Menus
03:29 18Sensor Cleaning & Camera Info Menus
04:18 19Camera Operation
08:26Lesson Info
Customize Control Menu
Next up is Customize Control, and this is where we get to customize a little bit of the control on the camera. The first up is your Favorites menu. So I encourage you to set at least one page up in your Favorites menu, and this is where you can go through and select different items from the menu, and if you select only eight, you will only have one page to get past from the Favorites menu to the next menu. If you want to have more, you can have some in there. And let me show you on my camera real quickly. So in... Let me get out of live view. So when I press the Menu button, the first time, what it does, is it goes to the Favorites right there. And these are items that I've put in here that I think I'm going to change on a regular basis. And you'll notice there is no scroll bar, 'cause that indicates that we're in the regular menu. And if I want to get on to the regular menu, I just hit the menu button again, and now I can scroll through all the items in the menu. And so any time I wan...
t to get back to the favorites, I can go left, and I am into the favorites here. And so if I want to get to the main menu, I can either hit Menu, or I can go to the main menu on the bottom. You saw what I did there, is you can jump from the top to the bottom by just going up from the top, and that brings you down to the bottom. And you can go right here, and that brings you into the main menu, and left brings you back to the favorites. And so it's some pretty simple controls, and this is vastly different than earlier Leica cameras, and so I think it's a really good system, and I think other manufacturers can learn, because when you press that Menu button, it's nice that it goes straight to those items that you like to use most frequently. You can customize the wheel on the back of the camera. So you can either do a live view zoom, so if you're in the live view mode, it'll automatically just zoom in as you turn the wheel. Or you can do it as exposure compensation, which I think is a really good system and makes it very very easy to work with. And so I'm gonna do that on my camera, so, what I'll do is I'll hit the Menu button. And I'm gonna dive in, I think what are we on, page two, customize controls, down here. And go to the right, and we're gonna customize the wheel, go to the right, and I wanna set it as exposure compensation. So I'll just press the center button in, and then I'll back out to the left, and to the left here. And so what we'll do is we're gonna set this in aperture priority right now. And so we'll kind of point it in generally the right direction. And so I'm not in the live view mode now, but I can just press down on this button, and in the viewfinder, it's gonna show me whether I'm underexposed or overexposed. Now just to see this, I'm not gonna look in the viewfinder, 'cause I'm gonna block the view for you, so I'm just gonna shoot a photo. And that one seems a little on the underexposed side. So I'm gonna dial it up to the right. Let's take another photo, that should be a little bit brighter, which it is. And I'm gonna dial it up to the right again, and that should be a little bit brighter. And so it's very easy just to make your pictures a little bit brighter or darker in that aperture priority mode. So I'm gonna make it a little bit darker. Very easy to work with right there. And you can see, in the playback of the image, let's see, shows it. So I'm gonna play this back. And if I turn this information on and off, you'll see down here in the bottom what the exposure I was setting. Actually, okay, there's where we are. Okay, so that is exposure compensation, allows you to change that around very very quickly when you're out shooting. Next up is the Display Brightness. If you want to control how bright the display is on the back, you can do this. There is a little bit of battery power that is gonna come into play here, if you want to save battery power, you can have it a little bit lower. If you are trying to show images on the back of the camera under very bright conditions, you'll need to set it a little bit higher. I'm not a big fan of the auto setting here, 'cause it changes around under the different lights, and sometimes we're using this to judge exposure. It's not the best way to judge exposure, but it can be helpful from time to time. And so a setting of medium for most of the time is gonna work out pretty good. The EVF Brightness, if you do have an EVF, you have the same type of controls of how bright this is going to be. I typically like to leave this on medium. It works good in most cases. Auto Power Saving is simply how quickly does the camera power down when you're shooting. If you want it to save, conserve battery power, you can set it on either two minutes or five minutes, if you want it to stay on longer, you can turn it off, or to 10 minutes.
Class Materials
Bonus Materials with Purchase
Ratings and Reviews
Guy Neal
I am migrating from the Leica Q to the Leica M10. Though I know my way around a Leica digital camera, the Leica M10 is my first rangefinder. I wanted someone to quickly walk me through the front/back/top/bottom of the M10. John Greengo was the perfect guide. This class is "as advertised - a "fast start" for those who prefer not to page through a fairly dense owner's manual. I especially appreciated that the lessons were broken into small chunks - so I could skip the lesson on the wifi setup, for example. And kudos to the person who prepares the amazing slide decks. While there are two dozen free Youtube videos that review the M10, they do not convey the helpful information you get in this excellent class.
Simon Johnson
John does a great job of going through every aspect of using the M10. There's not a dial, stitch button or menu item that isn't comprehensively covered. He uses simple, but effective graphics to explain what's happening. He also touches on the fundamentals of photography and throws in some tips and secrets. I can't imagine anyone doing a better job than John. I'm a Leica Q owner, that's just about to upgrade to an M10 so this course has been very useful indeed.
Sylvia Hoke
John is an excellent teacher. I am so amazed how thoroghly he goes through everything in the menu, about the various lenses, how best to use them and so much more. I am keeping my fingers crossed John gives a class on the Leica SL2-S as there is not much out there at all about the camera and is very much needed. I would be the first to buy the class.
Student Work
Related Classes
Camera Guides