Lessons
Lesson Info
Value
So, once you've established your composition, once you've arranged your objects, you looked at how your establishing depth, how your moving the viewers eye around the composition. The next step, beyond just creating a linear version of that, which can be very beautiful, is asking yourself about values. Especially if you're moving tonal drawing, a tonal rendering. So, let's talk about what value is. On the screen here you see my ultimate setup. I've illuminated it from the side I've created a black and white or monochromatic version of it on the right side. So, value is basically the lightness or darkness of a particular color. So, this pumpkin has an inherently lighter value than, let's say, the red apple. Because the light yellow when it's filtered, especially when you can see it into monochrome, is much, much lighter as opposed to the red apple, which is much, much darker. So, if you're ever curious about what the value of things would be, you can take your phone, you can photograph ...
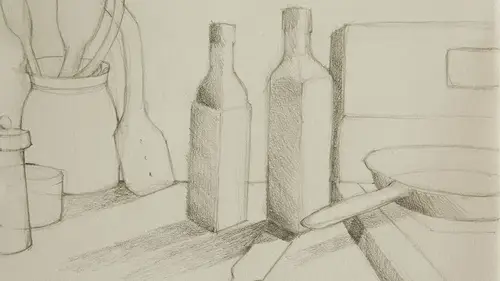
what you're about to draw from life, and you can just filter it on to monochrome and see what the value relationships are. And that's particularly important and interesting to look at when you're moving into a monochromatic drawing. Which is what we'll do in this lesson. If you're using graphite or charcoal, you really need to know how much darker that red apple is versus the yellow pumpkin. So, these are things to work with and sorta strategies to help you realize what the value relationships are. So, looks like a lot of numbers here. I call this value mapping. And, I do this a lot. I do it more mentally than like putting all the numbers on my picture. But you can do it with an overlay of tracing paper on your linear drawing, or you can just kind of realize it. But it's leading to, it's really leading and building up to us being able to create a beautiful tonal drawing working with light and shadow. Moving from just the linear definition to something with more dimension and atmosphere. So, I basically took the monochromatic photograph and I labeled it with numbers one through five. Five being my darkest dark, one being my lightest lights, and two, three, and four representing mid-tones along the way. So, you might think, wow that's a lot of work. Why should I realize all those things? Well, because even just doing this sort of diagrammatic work helps us divide the picture up into very succinct tonal boundaries or tonal areas, like a map, like a map of a region. And that's gonna in the end help us create more dimensional, clear differentiations between the lights, and darks, and mid-tones. So, just naming them and then in the next step we're gonna see how we can actually create a tonal range to ultimately add to our actual drawing. So, we have a five part gradient here. I'm gonna be doing it here on the iPad, but ultimately you could draw on the iPad, you could also draw just with a old fashion pencil or piece of charcoal. But if you're working monochrome, regardless of the material you're using, it's really important to notice how dark that material can go, notice how light it can go. And then assign these five part, this five part gradient to your drawing. And that way we can sort of get it dimensional and very dramatic. So, I'm just gonna show you how you can create this gradient, so you can try this at home. So, in you're fifth zone here, you can lay in your pigment, whether you're using really black color pencil, you might even be using an earth red pencil. Part one is gonna be my lightest lights, so I'm not gonna put anything there. And then in section two, and you can see where the twos are in this diagram, that's gonna be sort of the tonality that I'm going to put in those areas. Three is gonna go a little bit darker. And then four is gonna go a little darker still. So, we want these sections to progress and sort of even increments. We don't want one to be too much of a jump from the one next to it. And once we have those assigned and I go to do this drawing, I can say, well I know that this particular pencil can go that dark in my darkest darks. And I can have this along the side to remind myself that I need to push it that dark. And I can also ask myself, what the mid-tones should be. So, it's really, really helpful. And you might think, oh this is gonna take so much time, I'm gonna skip that step. But don't skip it, I promise it's gonna make your drawing a lot stronger. So, we're about to segway into an actual physical set up, but I have an image of it here because before we move into that, in actual objects, looking at actual objects. And I'm actually gonna be drawing with a graphite pencil for that one. I wanna actually look at the set up here on the screen and it would just be a really easy way to diagram out some of these ideas before we move into it. So, earlier in this course I talked about choosing objects, objects that have some significance to you. So, I kind of consider this set up of just, let's see, one, two, it's just five objects. So, it's an odd number of objects. I see this as having symbolic significance, almost a self-portrait for me, because it has elements like my meditation gong, my bowl, because I meditate. It has in the lower left corner this is actually, I used to live in South East Asia, and this is a cowbell, but it's made of bone and wood, and I remember hearing them go in the village I lived in walking by, kinda clanging by. There's a striped rock because I have a striped rock collection. And then that blue cup in the background reminds me of sort of my Scandinavian roots, that blue color. So you know, I put the objects together. I think they're beautiful objects, but I also put them together because I've orchestrated this composition with a lot of the ideas that we used in this lesson about certain things. And in particular, when you're looking at the entry point of this picture coming in along this piece of bone, coming off of the picture. Then the eye moves around this rope, around the rock, which goes back behind this and out this way. So, there's this sort of movement, this attitude that's happening with the picture. So, this movement and also if we think of the Rule of Thirds, we might see that, you know, maybe the rock might be the focal point, or maybe even this boxy cup in the background can be it, too. So, there's things in this that definitely as we look at them and start to sort of fold in all these concepts, we'll definitely strengthen our drawing and also strengthen our arrangement of these objects and space. So, we'll segway in the next lesson to this exact setup, and I'm gonna have a physical piece of paper and an actual pencil. And I'm gonna show you how we might build this with all these compositional ideas supporting it to the next level, which would be a finer tonal rendering in graphite.
Ratings and Reviews
Gina Nieto
Great class. Thank you Amy for your insight. The section on value was one of the best I've come upon. Now to start my challenge.
Student Work
Related Classes
Illustration