Lessons
Course Introduction
08:52 25 Things Every Landscape Photographer Should Know
23:32 3Camera Gear
11:26 4Gear Q & A
33:04 5On Location: Weather & Safety
18:55 6On Location Pre-Visualzation Sutro Baths
07:29 7On Location: Camera Settings
21:59 8On Location: Composition
27:09Matt Klowskowski - My Story
06:28 10On Location: Bracketing
15:15 11On Location: Artistic Choices
16:12 12On Location: Pre-Visualzation Marshall's Beach
06:09 13On Location: Long Exposure
15:05 14On Location: iPhone
17:31 15On Location: Wrap Location
02:15 16Location Challenges: How to Shoot in Open Sun with No Clouds
01:52 17Location Challenges: How to shoot Cloudy, Stormy, & Blah Weather
01:50 18Location Challenges: How to shoot Beaches
01:27 19Location Challenges: How to shoot Waterfalls
01:40 20Location Challenges: How to shoot Panorama Vista Scenes
01:38 21Location Challenges: How to shoot Lakes
02:11 22Location Challenges: How to shoot Mountains
02:24 23Location Challenges: How to shoot Deserts
01:29 24Location Challenges: How to shoot City Skylines
01:44 25Location Challenges: How to shoot Snow
02:53 26Location Challenges: How to shoot Backlit Situations
06:56 27Outdoor Landscape Workflow & Organization
31:38 28Basic Editing in Lightroom: Part 1
44:17 29Basic Editing in Lightroom: Part 2
26:52 30Lightroom and Photoshop: Intermediate Techniques Pt. 1
30:35 31Lightroom and Photoshop: Intermediate Techniques Pt. 2
12:31 32HDR for Landscape Photography
07:54 33Panoramas for Landscape Photography
18:14 34How to shoot Landscape with Adobe Photoshop in Mind
21:14 35Sky Replacement in Photoshop
18:48 36Processing Project: Stormy Mountains
09:12 37Processing Project: Crashing Waves on the Rocks
10:01 38Processing Student Raw Images
41:03 39Final Q&A
14:17Lesson Info
On Location: Bracketing
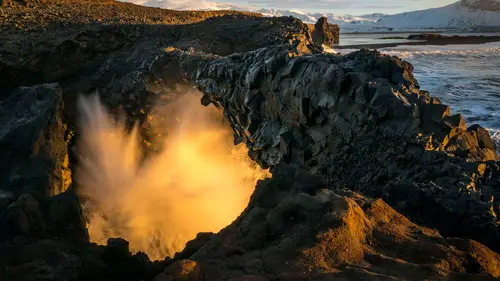
Bracketing is a topic I get asked quite a bit about. I'll explain it in the video here, so we'll just get right to it. Alright Dawson, so nothing incites more anger in people than bracketing and HDR. (laughing) or love in people, really depends on who you're talking about but we're gonna cover bracketing in this lesson here because I think its a pretty big one. And I wanna show the people how I use it. 'Cos I kinda use it, and I kinda don't use it. Awesome, sounds good. Alright, so what is bracketing? Bracketing is the official term, if you wanna see how your camera can do this, and chances are, whatever camera you have does it. The official term is exposure bracketing. So what it does is, you set your camera to, to take a photo, alright that's called the metered shot. So, if I just point my camera in the direction over here, and it goes to take a photo, that's the metered photo. Bracketing means, my camera is automatically gonna bracket minus and plus. So, minus is gonna be a dark...
er exposure, plus is gonna be a brighter exposure. Why do you do this? You do this so you can get all the ranges and tones that happen in a photo. This is really important for landscapes, because our camera doesn't see what our eyes see. Our camera can't see the tonal ranges that our eye sees. So you always see, maybe even the techie term, dynamic range, well that's HDR. High Dynamic Range, so your eyes, your eyes see dynamic range, your cameras don't see it quite as much. So we bracket so that we have one photo that covers all of the bright stuff, by under-exposing, it covers all the bright stuff right. So, nothing's gonna be over-exposed. We have a middle of the road metered exposure, and then we have our over-exposed photo, which covers all the dark stuff. It will over-expose the shot, and anything that's in the shadows will start to come out. Here's my thoughts on bracketing right, I typically don't do HDR, HDR conversions. Which we, we'll cover in the post-processing part about this, where you'd wanna do that. So, it's more of an artistic choice these days, than it is needing it, to actually get the right shot. I typically don't do HDR, and I typically won't even take multiple layers from that bracket, and combine them only if I need to, only if I realize I'm shooting sunset, and the sun's out there, and one of the photos, the sun is blown out, everything's really bright. But the foreground looks okay, in the other photo, its under-exposed, the sun looks okay, but the foreground's way too dark. Then I might combine the two, and again we'll take a look at that when it comes to the post-processing stuff. But, I will tell you, I use bracketing almost all the time, why? Goes back to what I said when we talked about camera settings. And that is, I wanna be creative. I don't want to look at the histogram at the back of my camera, I don't wanna look at the color values, I don't wanna look at anything that has to do with all the techie stuff about this. 'Cos I just wanna concentrate on getting a good shot. By bracketing, what I'm able to do is, so here, you know I framed up this photo. Compositionally, I did the same things that we talked about. I've got angles, I've got angles going in the bottom here, I've got some angles going along the top there. If this were me and we weren't with a camera crew and everything, I'd probably be down on those rocks shooting, and I'd get really close to it. But compositionally, I'm doing the same things we talked about, what I did is I set my camera up to bracket at minus two stops, the middle metered one, and then plus two, so when I press the button, it takes all three photos, and I'm done. I never have to look at the back of my screen again, I can pick up my tripod, I can walk onto the next location, and not have to worry about it, that's why I bracket. It's 'cos I don't wanna be looking at this stuff, especially on a day when the light's changing, the sun's going down, things are happening quickly. I don't wanna think of the techie stuff here. So, the other advantage to bracketing, because most of the time guys, I'm not gonna bracket a shot like this, it's flat. There's no sun, there's no range to speak of, one photo will pretty much get what we need. But there's another reason to it. I'm in aperture priority mode, and what happens, so, as it brackets, the camera's gonna change shutter speeds so I'm in aperture priority, that's locked down, the camera's gonna do a longer shutter speed, then a faster one, then a faster one. When I'm shooting water, I do it all the time. Again, so I'll wait until a wave comes in, of course, I say this and there's not wave coming in right at this moment but, there we go, I think one's coming in. It's not a big wave, but we're gonna take the photo anyway. What I got there, was three different versions of the water, I know one is darker and I know one is brighter, your camera files are so good these days that in Light Room or Photoshop, you can pull the exposure back and you'll be able to get a properly, ooh I hear the water, nevermind. You'll be able to get a properly exposed photo, but it gives me three different versions of the water, because it's gonna look different in every one of them. It's gonna be smoother in one, it's gonna be sharper in another photo, and that way I have some options when I get back to, back to the computer, and I'm done, and I'm ready to do some post-processing on it. So, I guess come on in man, do you bracket? I do, for actually pretty much the same reasons you do, it's really just a way to guarantee the safety, that you make sure you got the shot. And I can walk away and feel confident. Yeah. But I think I also do love to use Light Room's merge of the three, and it's really like what you said, to bring out as much dynamic range as possible. But I personally like to keep it very realistic, I don't like to get the over-stylize as much, but can you talk to me a little bit about why, what don't you like about HDR, why does it get such a bad rap? So, HDR, I mentioned it before, High Dynamic Range, so it gets a bad rap because you can push it pretty far. So, you can take all of the tone from an image. You can make an image with shadows, have no shadows. And then you can make an image that really looks like it has bright highlights, and you can bring those highlights so far down that the highlights are gone. And so, it incites anger amongst some people, and some people love it. And the best way, I think is, I see people who use it in an artistic nature, and it looks great. Because of the way that you work the tones and the shadows and the highlights, when you have something that's textured, like those rocks, like the rocks in the cliffs around us, architecture, buildings, anything like that. When you've got all that stuff and you do an HDR on it, and you bring out those tones, you can get some really nice creative effects with it. I think where its got a bad rap is, is where people take a scene like this, and they make it just look like Mars. And they do so many crazy things to it that, it's got a bad rap, I think those days are kinda gone. I think most people are using HDR just to get a good, well, properly exposed photo now. So, any HDR shooters in here? No , I'm totally, I'm half teasing. If you, if you do any type of an article or post on HDR on the web, you will definitely incite love and anger for many many people. But let's talk a little bit about the bracketing so, bracket settings, talked about it before. I shoot minus two, zero and plus two. If you don't know how to do that, the best place to go is, your camera's manual. Okay, so it's gonna be a little bit different for every camera, but most of your, almost all of your cameras will be set up to do exposure bracketing, and then you can even tell it how many stops to separate by. So a lot of people do minus one, zero, plus one, I want a little bit deeper of a range for shadows and highlights, minus one, plus one, you know, I can do that with the exposure slider in Light Room pretty easy so. That's why I do the two stop difference, I usually only do three photos, some people say, you could do five, seven, nine. I only do the three. And then, here's a little tip for ya. Is there, most of your cameras will have a setting, in the camera to change the bracket order. So, by default, most of your cameras are gonna take the metered photo, which is the middle one, and then they'll do minus, and then they'll do plus. So, every camera I've ever seen does that way by default. The trick is, is that, it becomes, when you bring those photos into Light Room, or wherever you're looking at your photos. When you're looking at the grid, it becomes difficult to figure out what groupings of photos are. 'Cos it's like you got dark, darker, bright, dark darker, bright, you know, but they're different groupings of photos. Most of your cameras have a settings that will let you change the bracket order, to go, minus two, or whatever, the minus, the metered and the plus so when you look through your grid, you see dark, brighter, bright and you start to develop the patterns and it just makes it easier to manage those photos so, again, check in your camera manual for that one. Let's take a quick look at, a couple of brackets, okay go for it. We have a couple of questions when you're done. Okay let's take a quick look at a couple of brackets, then we'll do questions, then we'll go to the next video. So here's an example, shooting into the sun right? I wanna capture all that highlight detail back there, and then, honestly guys, remember how I told you, I don't worry about it? So when I get back to the computer, how do I figure out which photo I wanna process? I'll bring it into Light Room, and I'll just wiggle the slider a little bit. I'll get a feel, like you know, okay what do I wanna do here, well I got all my highlights, I can bring that down pretty good, if I open this up too much, what's gonna happen? See that? Okay so now let's go to the next image, this is the middle one. Well, I lose a little bit more in the clouds, so I definitely need the darker one for something as I open it up though, do I get my detail here? Cool, let's look at it. Not bad, still a little, still a little funky there. So, let's go to the next one. You see? So, it doesn't have all that. Now, what did I lose? I mean, I killed the sky so, that's an example of a bracket in a more challenging situation of when we'd need it. Another example, remember how we talked about water? So here's the dark one, this is on one of the next shoots that we went on, you'll see here. This is the darker one, this is a brighter one, look at the motion see? Darker, brighter, super bright. If I want the two, I could probably get whatever I need from all three of these photos. Look how far back I can pull that? So, I can still, even though it's over-exposed, I can still pull it back. This one looks pretty good either way, even though this one's under-exposed, I can still pull it up. And I'm not really getting any noise, or anything to speak of back there. So, that's an example of what I was talking about with the water, gives me a couple of different ones to choose from when I get back to the computer. And then the same thing with this, the waterfall. If you look at the water, you'll see the texture changes. See how it changes, woops back to that one. So sometimes you see more lines in it. Sometimes it goes all white. Again, that's how long, I'm just bracketing aperture priority, letting the shutter change each time. And that water changes based on how long I let it go. Cool, question. Do all cameras do the bracketing the same? Meaning, are they doing the shot at the exact same time and then, electronically adjusting the exposure? Or are they taking three separate exposures, at a different time? They are taking three separate exposures, so yes it's three different photos. Most of your cameras will let you just hold down your shutter release or just press the button and just hold it down and it will click click click. Even if you're, and it won't go past that. Even if you're in the high frame rate mode, or whatever, if you're on, bracketing's on, it will just go click click click. Then it will stop, you don't have to worry about taking too many photos. And again, most of your cameras will also do, you can have your timer set up to like a two second timer, so I can press the button if I don't have a cable release. I can press the button and just stand back, and it will take all three photos. Thank you. You're welcome. Mr Jim? Matt a question from the internet, again another great question from Photomera, of course. (laughing) We do have a lot of people out there-- Can we give this guy a prize or something? So the question is for folks who may be potentially be doing it old school, "What are your guidelines for how many shots to capture when bracketing, three, five or more?" Three. Okay. Only time I would go more, the only time I've seen the need to go more is, interiors. If you're doing what's it called, real estate photography, or architectural interiors or whatever, you're gonna get a hard time to retain detail and windows and the shadows, with just three shots. Chances are that the windows will still be blown out, the shadows will still be too dark. So, that's a time where maybe you go to, maybe minus four stops, minus two, zero. And I don't know if you're, oh, one stop in between? I separate mine by two stops. Two stops okay. These files that are coming out of the cameras, are so good that one stop is a gimme in Light Room or Photoshop. So I don't even worry about one stop, so I separate mine by two stops and that way I got a lot of leeway on either side. Cool and this is just a question for me, 'cos we recently did a Photoshop bootcamp and, one of the things that Bill Willmore showed, was the new HDR in Photoshop, have you used that yet? Yeah. It's pretty amazing, it doesn't look like HDR. It doesn't look like HDR, yeah the old school HDR, it's the same, we're gonna see it tomorrow. I'll process some of these brackets tomorrow, and we'll go through it but yeah. Light Room and Photoshop's HDR are the same. Number one, they're fast, and even if you're not into that HDR look, it gives you a ton of tonal information to work with so. Cool. Thank you, cool.
Class Materials
Bonus Materials
Ratings and Reviews
Christian Ruvolo
Mat Kloskowski class is really amazing, full of very useful tipps and inspiration. Wonderful pictures by him help to understand the explanations an I am learning A LOT from him!!! Thank you for the class!!! TOP!!!!
Louie
I love Matt's teaching style, humor, honesty, friendliness. I love On1 and all the other demos and critiques he does. He makes me enjoy the craft/art of photography much more and is a great inspiration.
a Creativelive Student
This class was for beginners and I believe Matt did a great job of giving students an great introduction to landscape photography. More on the practical than technical side, but that seems appropriate for an intro class. He comes across as a "real" guy who loves what he does and is eager to share his knowledge. Those new to photography will get a lot of helpful information and tips in this course.