Lightroom and Photoshop: Intermediate Techniques Pt. 1
Lesson 30 from: Landscape Photography: Start to FinishMatt Kloskowski
Lightroom and Photoshop: Intermediate Techniques Pt. 1
Lesson 30 from: Landscape Photography: Start to FinishMatt Kloskowski
Lesson Info
30. Lightroom and Photoshop: Intermediate Techniques Pt. 1
Lessons
Course Introduction
08:52 25 Things Every Landscape Photographer Should Know
23:32 3Camera Gear
11:26 4Gear Q & A
33:04 5On Location: Weather & Safety
18:55 6On Location Pre-Visualzation Sutro Baths
07:29 7On Location: Camera Settings
21:59 8On Location: Composition
27:09Matt Klowskowski - My Story
06:28 10On Location: Bracketing
15:15 11On Location: Artistic Choices
16:12 12On Location: Pre-Visualzation Marshall's Beach
06:09 13On Location: Long Exposure
15:05 14On Location: iPhone
17:31 15On Location: Wrap Location
02:15 16Location Challenges: How to Shoot in Open Sun with No Clouds
01:52 17Location Challenges: How to shoot Cloudy, Stormy, & Blah Weather
01:50 18Location Challenges: How to shoot Beaches
01:27 19Location Challenges: How to shoot Waterfalls
01:40 20Location Challenges: How to shoot Panorama Vista Scenes
01:38 21Location Challenges: How to shoot Lakes
02:11 22Location Challenges: How to shoot Mountains
02:24 23Location Challenges: How to shoot Deserts
01:29 24Location Challenges: How to shoot City Skylines
01:44 25Location Challenges: How to shoot Snow
02:53 26Location Challenges: How to shoot Backlit Situations
06:56 27Outdoor Landscape Workflow & Organization
31:38 28Basic Editing in Lightroom: Part 1
44:17 29Basic Editing in Lightroom: Part 2
26:52 30Lightroom and Photoshop: Intermediate Techniques Pt. 1
30:35 31Lightroom and Photoshop: Intermediate Techniques Pt. 2
12:31 32HDR for Landscape Photography
07:54 33Panoramas for Landscape Photography
18:14 34How to shoot Landscape with Adobe Photoshop in Mind
21:14 35Sky Replacement in Photoshop
18:48 36Processing Project: Stormy Mountains
09:12 37Processing Project: Crashing Waves on the Rocks
10:01 38Processing Student Raw Images
41:03 39Final Q&A
14:17Lesson Info
Lightroom and Photoshop: Intermediate Techniques Pt. 1
All right, you doing good? Everybody's got, refilled the coffee? Back at home, go refill your coffee. Yeah, we got a question real quick. I just wanted to ask you about the tablet you're using for doing your processing. Oh, the pen tablet thing? Yes, so this is, I use the Wacom. Pronounced wah-come, not way-come, not whack-um, not way-comm. It's wah-come, W-A-C-O-M. And I use, yeah, it's just a... It kinda takes the place of my mouse. The pen is mapped to this space on the tablet, and so as you move your hand back and forth and you press down, it essentially takes the place of the mouse for you. And if you, so if I put my hand down in the right corner, the pen automatically appears in the top right corner. If I go down here, same thing. It's interesting, because I actually don't have a mouse. This is what I use. I've gotten to the point where it's like, it's just, it's more fluid for me to use this. And what I'll, what I find myself doing is, like, even emails and surfing the web a...
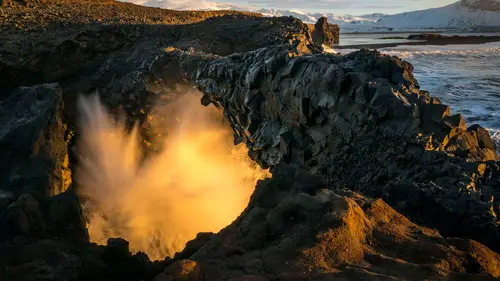
nd whatever, you know, I'll use this as my mouse, and then when I, like, when I switch over to type... So I'll use that, and when I switch over to type, I just kinda do, like, I just kinda flip the pen in between and I just, I type. So it's pretty cool. The way that I explain it is think of signing your name with a mouse. Think of the control that you lose by just going like this with a hand, you know? Versus you get this and you get very detailed control. The other advantage of it is it does have pressure sensitivity, so when I do something like, when I'm doing something in the brush, I'll be, I'll make it pretty blatant here. When I do something with a brush, if I press down lightly there, I get a brush mark. If I press down really hard, see the difference? So super light, really hard. So I'm able to build and kinda control the opacity of what I'm building. It has features in Lightroom. In Lightroom, it's pretty much what you just saw, so there's not a lot to it in Lightroom. In Photoshop, there's a lot more to it. If you're, you can get very, very artistic. You can control the size of the brush, the opacity of the brush, just by pressing harder or lighter with it, so... I don't know, I like it. It's just, it's one of those things. I use the small, the Intuos Pro Small version. So this is the small one. It's about the size of the laptop. And reason being is I don't wanna move my hand a lot. So the bigger the tablet, imagine how you have to move your hand to go across the screen. I don't have a traditional art background, so I don't have this feeling to do this with my arm and do all that. You know, the bigger tablets, you know, you see people, artists will sit back and they'll draw, and just, I don't ever that, so you don't wanna see my drawing. Cool? All right, we're gonna jump back into Lightroom in a minute. I wanted to touch on something that we talked a little bit about earlier, and that was talking about noise and sharpness and all that stuff. So what I did is... I'm gonna go take a look at this folder. I set my camera on the table over here, and I took four photos at various apertures. And my thought to you guys would be find the limits of your camera. So before you spend time post-processing and worrying about, you know, aperture and worrying about ISO and worrying about all these different things, figure out the limits of your camera. It almost goes back to the stuff we were talking about yesterday, too, but it's a good exercise. If you can't be out shooting one day and you wanna do something photography-related, do what I just did. So what I did, I did f/8, f/11, f/16, and f/22, and then what I can do is I can start to look, like, has anybody ever heard of, like, somebody telling you, oh, don't shoot at f/22 because there's diffraction at the edges, and this and that, and it's like... And somebody actually sent me a thing yesterday and they said, you know, did you shoot this at that because of that's the sweet spot of the lens? Have you ever heard of the mythical sweet spot of the lens? You know what I've never, ever heard is a lens manufacturer come and tell me, yes, that's the sweet spot of the lens. I've heard people talk about the sweet spot, but I've actually never had anybody say that is the sweet spot. So I think it's a bunch of crap. Is diffraction real? Absolutely. It is a real phenomenon. How much does it affect your photos? Doesn't seem to affect my photos that much, but if you're worried about it, why don't you just find out? So if you did this exercise, I wanna show you a little trick that you can do. I brought these photos into Lightroom. If I go Photo, Edit in, and I go down here to Open as Layers in Photoshop, it's gonna take all those images and it's just gonna bring 'em over to Photoshop and stack 'em on top of each other into one document for me, and then I can zoom in, and I can zoom in on the edge, if I'm gonna be a pixel peeper, and I can figure out how bad is diffraction really hurting or harming my photo. So it should be done in a second here. So I've got four of 'em. All right. So how do I know even which one is which? Well, you know how one thing I can tell is look at the light. So that's f/8, and then f/11, f/16, f/22. But, you know, when we talk about, like, you wanna get that sun star and how you get it, you know, they tell you to make your aperture smaller. Well, look at the difference. That's f/8, that's f/11, that's f/16, and that's f/22. So you can even see things like that, like, how much does it really matter? Well, apparently it does matter. So you want another useless techie thing? You know your aperture is basically blades? You can see, see how many little stars are coming off of there? You can see how many stars, if you went to your lens manufacturer's website and saw how many blades were on there, 'cause every, not every lens, but lenses are different. They're made differently. So some have a certain number of blades, and that's for every blade that comes off there. It's not like the Alpine glow thing. I promise you if you go look that up, it is true. I'm not just BSing you on that one. But yeah, you got those little blades coming off. So that's your aperture. Or that's your, you know, that part of it. But let's go down here to the edges. So let's go take a, you know... In every single photo, I focused right in the middle, basically right on the screen there. So let's go take a look at here. So that's f/8, f/11, f/16, f/22. I kinda moved the camera a little bit, but f/8... Oh, you know what actually is a good one here? Let's look at the chair. Eight, 11, f/16, f/22. So what's this telling you? It is a little bit softer. Now, do you really wanna stress over it? Well, it depends. Well, it depend what's back there. You know, if it's, what's at the edges of our camera in a lot of photos? Let's go here to... Go here to a photo. You know, that's at the edge. That's a half a mile off in the distance. It's gonna be soft, you know? There's nothing that's gonna make it that sharp. So, you know, just kinda think of what you're shooting. So while I did this in here, another good exercise would be go outside and try doing some of these things. Do it with ISO. That's a big one. Do it with ISO. Don't find out when you're on a photo shoot and be afraid to crank up your ISO because you're afraid of too much noise. Figure out what your camera will do and figure out where you're comfortable before you ever go out on an important photo shoot. But do these things. Learn the limits of your gear. Check your ISO. Check the aperture. Check all those different things. See what they really do. That way you're not relying on these mythical myths that you heard out there, and you can actually see it for yourself. All right, let's go jump back into some Lightroom/Photoshop stuff. So let's talk a little bit about sky. All right, let's see here. We've got a couple of different photos. Let's process this one. So let's take a day where we got kinda unlucky with the weather. I won't lie, the deck was stacked against, or the deck was stacked with me because I was in Iceland, so there's definitely deck stacking going on with the shot. Weather was kinda crappy, but it's like, how often do you get the chance to do something like that? So I'll go in here to the develop module here, but we'll, you know, we'll see what we can do with kind of a blah-looking sky. I will come down there, run through my basic stuff here, exposure, highlights, I'll probably pull 'em back. Shadows. This is an interesting one, 'cause this is a black sand beach. The problem with a black sand beach is it's black. It's gonna translate very, very difficult to a photo. So I am gonna, I'm gonna boost the shadows a little bit, because if I keep it where it is, it's not gonna translate the way that I want. So I'm gonna boost the shadows a little bit. Option or Alt + click on my whites, Option or Alt + click on my blacks. Okay. Let's go down here to, I'm not gonna worry about, you know what I am gonna do? I'm gonna boost my saturation. You know what on cloudy, overcast days, you boost the saturation, it'll pull a little bit of color and a little bit of blue out of that, and I find especially in this case because there's a lot of blue going on, like, if you look at the ice... I can, I mean, I can crank it up pretty high. HSL, 'cause there's not too much color in the photo, so there's nothing I'm gonna worry about there. Detail. Let's zoom in. Crank up my sharpness. Here we go. Take it to 100%. There we go. Radius 1.5. Detail. I'll just take a look at the before and after here. That's before, that's after, so that's looking good. And lens corrections will enable the profile correction, like I mentioned before, remove chromatic aberrations. It's not gonna hurt you. Transform. This is a good one for transform. So what I'll try is I'm gonna try auto, and it does a pretty good job of straightening the horizon line, so I don't really have to go any further than that. So I got auto. Effects, we'll add the vignette. I'm gonna add the vignette last, though, 'cause it's usually a nice finishing touch. So let's go take a look at the sky. First thing about making your skies look great, and this is so important, especially if you're gonna print spots. So I'm not the only one that has, you spend all this time developing a photo, you spend all this time and energy and money in printing the photo, and you get the photo back and you see those little spots in the sky. You know, most people don't see 'em, but it's just one of those things that it kinda irks you 'cause you know it's so easy to get rid of. So you gotta take a look at the spots in your sky. Easiest way to do that is to go to your spot removal tool up here, and there's a little check box right down there at the bottom called Visualize Spots. So we turn that on and see how it gives you this contrasty version of your photo? So now I can see exactly where those spots are. So what I would do is zoom in. This... My camera's horrible, like, I luckily just got it cleaned, like, two weeks ago, but... I got it cleaned two weeks ago after I took a photo in Chicago of the Chicago skyline, and I counted after I finished processing it, I removed 38 spots, and I realized it's time to get my sensor cleaned. (laughs) It was really bad. Apparently when I change lenses, they, you know, you're supposed to be really careful when you change lenses. Apparently, like, when I change lenses, I open it up, I sneeze inside of it, and then I get the next lens and I put it on, 'cause that's about what my sensor looked like. So I'm not gonna go through and remove every single one of 'em. I always say that and I always end up doing it, but it's pretty tedious for you guys to watch. But that's the idea is you go through and you remove 'em. So I just thought of this tip. Gosh, it's gonna be so, it's gonna be difficult to show you because I don't have my regular keyboard here. It's a really neat tip that we're gonna talk about. So going through and spotting the sky, you gotta zoom in and everything like that. So if you go to your navigator and you go zoom in, notice you can pull this little guy around. So I can set him in the top left corner, and if I go to my Page Down key, which I'd love if someone could tell me what my Page Down key is on my Mac keyboard without the key, like, I got a keyboard at home and it says Page Down. Is it the arrows? Function arrow. It is, it is, function arrow. Function arrow up/down. Thank you. So watch this. So look at the little doohickey in the top left corner. I'm gonna do Function + down arrow, which makes sense. Function + down arrow. So he just moves down the thing. Watch when he gets to the bottom and I do Function + down arrow again. It's like a typewriter. Boop! And then since this photo, I don't really have to worry about the bottom, I can do Function + right arrow. Whoa, no I can't. So you have to go all the way to the bottom. But that's a good way to go through your photo very methodically. It seems like a lot, but I'm telling you guys, if you print your photos, you have to go through your skies and do that. You have to be meticulous about it, 'cause you will be ticked if you get back and there's a spot in the sky. Yes. Do you do your spotting at 100% opacity always, or do you sometimes pull that slider back? Do I do the spotting at 100? Yes. There are times where if I'm gonna do maybe some portrait retouching, or you can use these tools to, you know, maybe remove some blemishes, I'll do that. 'Cause you'll see there's an opacity slider right over there. What about the feather? I'll drop it back to 50% 'cause you don't wanna get rid of it all. What's that? And the feather? The feather, feather I usually, right about 50%, too. All right. So we got rid of some spots in the sky. We're doing good there. Last thing that I wanna do is it's gonna be really impossible, if I pull back highlights on every photo, I'm not only affecting the sky. I'm affecting all the highlights in the photo. So normally what I'll do is I'll go straight to my graduated filter and I'll bring the exposure down, okay? And then click and drag. And now I can bring it down selectively there. The way that I do it most of the time is I actually have part of the ones at mattkphoto.com are the grad filters. So a hard, soft, 1.5, soft. So you can kinda bounce through a couple of them. And then once you see the one you want, you just have to go in here and grab it and move it where you want. But I think one stop soft is pretty good. Okay? And all that is is exposure. I reduced the exposure, but you can also see I boosted the shadows. I did that... On this photo, I don't have to worry about it, but on this photo... You know, I was trying to keep things simple in this photo because we're working through our Lightroom basic stuff, but on this photo, I probably wouldn't've gone to the highlights to pull back my sky, because by doing that, I pulled back my highlights everywhere in the photo. So on this one I would've gone to my grad filters and probably done, I don't know, let's try two stop. That's too dark. So one stop, move it where I want, and then the reason that I included shadows in my preset was because, see how that gets darker? When you open up the shadows, I can control that. So it's always gonna happen. Even if we used one in the field, right? Whatever you hold it over is gonna get darker. But by opening up the shadows, remember, the sky is not a shadow, so that slider's not gonna affect the sky. It's only gonna affect whatever the foreground is. So if I make it, if I wanted to make it a little bit darker, you can see I can control that. The other thing that's cool is if you really wanna get kinda detailed about it, your graduated filter has a brush. So when I go into brush mode, I can go to the top here, see the brush says plus? So if I brush, I'm gonna be darkening, and I don't wanna do that 'cause it's already dark. But if I go down here to the bottom and choose erase, now I can paint... Paint it all away. Okay? And when you get near the edges, turn on Auto Mask, and then here's the key for Auto Mask. See that middle, see how there's two circles? See that middle circle? Make sure that middle circle doesn't go outside. Especially the cursor in the middle, especially the little minus. So now I can go right along the edge and it'll keep me from spilling over into the sky. All right? If you wanna see what that was doing, all you gotta do is down there at the bottom, see that little check box, Show Mask Overlay? So now I can actually, number one, I can see it did a really good job along the sky, but the other thing is I can see all the streaks that I missed in the other area. Now, when I'm painting the open areas, I turn masking off. Number one, it takes longer. Number two, it just puts a lot of processing power onto the computer that you don't need. So now I'm able to, when you go to the little toggle switch for the grad filter right down there, now you can see... Totally just controlling the sky. So it comes in handy. All right, so that's a little bit about kinda working with our skies here. We saw... Let's go back to this photo here. We'll kinda finish it off. So what did we do? We went to our grad filter and I got, kinda dropped him on there. I think that's a good darkness for it. A couple other ones that I had a super... Ooh, one of my presets is Super Cloud Contrast. Might be a good one. Oh wow. Hold on. I added a couple to it. So what that did is it added clarity. You can kinda pull that back a little bit. But clarity, remember I talked about it adds a little bit of contrast? If you have stormy weather, clarity makes your clouds kinda look a little bit more ominous. So, like, when I have stormy weather, I kinda go with it, you know? I'm like, all right, I'm not gonna try to make this look like a beautiful, peaceful scene. I'm gonna kinda just kinda go with the stormy type of a look, and as long as there's detail and everything in those clouds, clarity brings it out, so it looks pretty cool. All right, so that's our sky. I'll kinda run through, oh, I didn't, I got, what do I have left to do here? Vignette. There we go. So... That's before, that's after. All right. I'll run through one more quick one just 'cause I love the sky in this photo. So we've got our basic panel. Again, exposure is tough to do. Highlights. I like it. I'm not really gonna worry about it too much here. Shadows. Open up those shadows. This might be a good one. I'm gonna go down to camera calibration, too, and just try. Incidentally, these are camera-specific, so if yours don't look like mine, number one, they only work on RAW files. Number two, yours don't look like mine 'cause they're camera-specific, so each camera has different ones here, so... But I kinda like Camera Landscape. Let's try Standard. I'm gonna go with Landscape. We'll boost it. So we'll go to basic, open up the shadows. As I look at this, I kinda still want it brighter, so I'm gonna boost up the exposure. And this is gonna happen a lot. So, you know, we look at that, and I still wanna boost the exposure a little bit, and I start to kill my sky. So that, I'm gonna want the graduated filter to pull it back, even though that the sky looked good in the beginning, as I start to process it, I'm gonna wanna pull it back. Whites and the blacks, Option or Alt + click. Option/Alt on blacks. So, a little bit of clarity. I don't think I need saturation for this. It already looks really saturated. Let's go grab our grad filter. Probably go... What do you think? Let's go Blue, Darken. Let's go Darken Sky Light. And then bring that back. See that spot in the middle? So I don't wanna bring the exposure back anymore. I don't wanna mess with the highlights slider on the whole photo 'cause it's gonna mess with my highlights everywhere. So what I'll do is just bring it back there. So I'm actually doing it in the grad filter in the sky, not over the whole photo. And again, the reason being is I don't, the only way I could've pulled that back before would be to make the sky darker, and I don't wanna do that. Bit of clarity up there. And on this one, honestly, guys, like, I don't know that I would pay attention to go in with the brush and trying to do it. You could if you got really picky, but... The shadows. We're already increasing the shadows. I don't know that I'm worried about that line that's gonna start to go over the trees there. It's already kinda dark. It's already silhouetted back there, so I'm not really too worried about trying to do that. But if you did, you can just go to your brush here. Again, go to erase and turn on your Auto Mask. Just brush... It actually does make a little bit of a difference. I think they've done something to Auto Mask, 'cause it actually has been working really good lately. It didn't used to work well, but look at that, like, that's actually pretty good. And then, all right, if you guys insist, we'll do a vignette. So that's before, after. Before, after. And if I were to go back, I'd probably tone that down, too. Cool. Any questions on that part? We're good? We're good out there, Jim? Yes, Matt, we are. Of course, everyone wrote the Function + down arrow in the chat room, so... Thank you, everybody. We got that, of course, after a while. You guys, see, I knew I could count on them. Yeah, and then one person, Achiva would like to know, I think this is a great question, Matt. What's your process for cleaning your sensor? Do you do it yourself or do you send it out? I have done it myself. I usually send it out whenever I can. So I was at a conference in Chicago a couple weeks ago, and it was the day after I had taken that picture that I removed, like, 37 spots from, and in the little expo area, I think it was Midwest Camera was doing camera cleanings for 30 bucks. So I'm actually a member of Sony Professional Services. I could send it in and they'll clean it, but, I mean,'ll take me... I've been wanting to send it in for three months and I haven't. Gotcha. So I'm walking by there and I'm like, dude, that was the fastest $30 I spent. It's like, take it, take it, take it. He's like, I don't know when we'll get back to you. I'm like, I'm teaching all day. Just keep it, just do it. Great. But I have done it. It's actually not that hard. I mean, have anybody here, anybody ever tried? Yeah, it's really not that hard. You buy a, the most important thing is you gotta buy a loop, which is like a big magnifying glass and it's got a light in it, and you place it over, and then you can see the spots, and then you get these swabs. You put, like, one drop of liquid on it and then you just swab across. Really not that bad. It sounds worse than it is. It, I was successful when I did it, but...
Class Materials
Bonus Materials
Ratings and Reviews
Christian Ruvolo
Mat Kloskowski class is really amazing, full of very useful tipps and inspiration. Wonderful pictures by him help to understand the explanations an I am learning A LOT from him!!! Thank you for the class!!! TOP!!!!
Louie
I love Matt's teaching style, humor, honesty, friendliness. I love On1 and all the other demos and critiques he does. He makes me enjoy the craft/art of photography much more and is a great inspiration.
a Creativelive Student
This class was for beginners and I believe Matt did a great job of giving students an great introduction to landscape photography. More on the practical than technical side, but that seems appropriate for an intro class. He comes across as a "real" guy who loves what he does and is eager to share his knowledge. Those new to photography will get a lot of helpful information and tips in this course.