Lessons
Lesson Info
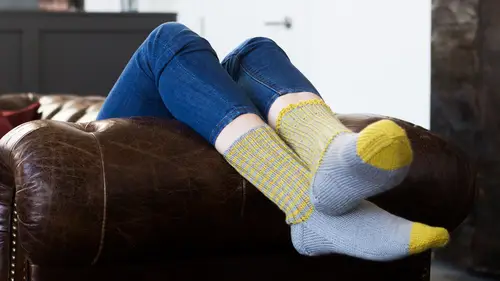
Getting Started: Casting On & Knitting Cuff
All right, so first thing that you need to do obviously is get yarn. And I have chosen for this particular project this really great yarn, this particular one is by Cascade. It's heritage 150 sock yarn. As long as you get the same gauge though you can use whatever yarn that makes you happy. Just make sure again, that it's the gauge. Just as a refresher, gauge is how many stitches and rows per inch you get with that yarn and that needles, and the needles that you're using. This doesn't really matter if you're making a scarf. I know in a lot of the, if you took my 101 or 102 courses, we didn't do a lot of projects in those courses. So I was a little bit wishy washy about gauge. It's on now though. These need to fit. So make sure you take time to swatch and check your gauge. All right, I'll get off my soapbox. So, we've got this yarn. It's really soft. It's squishy. It's got a little bit of nylon in it to balance out the wool. And I, I chose these colors. I like a neutral with kind of a, ...
I really like the nerdy colors. Like if there's a color that looks like it would go well with elbow patches, I'm probably gonna choose it. So, I did that with the chartreuse, kind of mustardy color. So we're gonna do a two-tone thing. But this sock pattern is basic. You could go straight up classic old school style and do it all solid. Or you could go bright and crazy. Whatever you wanna do. This is really gonna be more of a sock recipe class for you. So, you'll have the basics of construction down. And you can start with this basic sock. But the skills that you're gonna learn are gonna end up applying to any socks that you make in the future. So, we've picked yarn. Just a reminder, this is a hank of yarn and you cannot knit directly from this. You will get a big tangled hot mess. You can refer to my knit maker 101 class to talk about winding it in balls. Or go to your local yarn store and they will help you out. So, I've gone ahead and wound mine. You're gonna need a set of size four, double pointed needles or whatever needle size you need to get gauge. Little fun fact, my mom is one of my best production stitchers when she's not, I mean she's like a highly educated woman with a masters in education and teaching, but every once in a while she works for me free and works on samples for me. And she's been knitting for 50 years. But we have a, we have a different gauge. She knits a lot tighter than I do. So she goes up a needle size for whatever I say. So, it doesn't have, if you don't get gauge, don't feel like it's because inexperience, it's inexperience. Different people knit at different tensions. So, just make sure to check it. All right, so the first thing that you're gonna do when knitting in the round on double pointed needles is cast on. So when you're casting a double pointed needles, I'm just gonna stick this in the little table crevice so that it doesn't, so they don't roll away, you're gonna cast on, I usually, I like to cast onto one needle and then separate them. But you could, you could do whatever makes you happy. All right, so I'm gonna cast on stitches. And for this project, it says to cast on 52. I'm actually going to work a lot in mini-sizes today, and I'll talk a little bit about that in a second, so I'll be using a little tiny sock for most of it just because it's easier for you to see. But, for the purposes of this I just wanna make sure that you see, I'm just casting on the way that I would if I was using a regular single point needle. And the cast on method that you use doesn't really matter for this either. This is just the method that I use. But for this particular project it really doesn't matter. So once you get all of your stitches on, and again, I'm gonna do just a mini amount so that you don't have to sit here and watch me cast on 52 stitches. Let's see what we've got here. So, two, four, six, eight, 10, 12, 14. Okay, yeah, I'm just gonna go with that because it's, it's the right multiple. When you're working on, we're gonna be working on knit two, pearl two, rib. And whenever you're working in that rib, in the round, you always want multiples of four. Just a little fun fact. So if you're making a hat or if you're making socks or anything, or a cuff, anything in two by two rib you need to have that multiple of four for it to work out. This will also help you, these socks, the pattern is actually sized for just kind of a woman's medium so, you know, kind of just a general size will probably fit a woman from size like, foot size like seven to nine. But if you have a foot smaller or larger than that you can really kind of adapt this pattern just based on what I just told you. You just would add, you know, four more stitches for the next size up. Okay, so now we're ready to distribute over the needles. I'm choosing to use four double pointed needles instead of the full set of five. It's just my preference. I prefer to work with that amount. You can absolutely use more normally. However, this pattern is written for the four needles. And you'll see more of that later. So you've cast on the stitches. And now we need to evenly distribute them. So, you're just gonna take a new needle that you've introduced and you're gonna slip the stitches pearl wise, which means coming in through the loop from the top, and you're just gonna slide them over. So I'm just taking a third of the stitches. Ish. And getting them onto that next needle. Okay, but now I need to introduce another needle. So I let the needle that I'm not using anymore hang free and easy. Don't even worry about it. It's dead to you right now. Now we're gonna introduce that other needle by doing the exact same thing. With the next batch of stitches. I think we're about there. All right, so, I've got them on the three needles. But now I need to join the round. This is a crucial step. It doesn't seem like a big deal but it'll totally be a big deal if you don't take the time to pay attention. What, why I say that is because you need to make sure that you don't twist the stitches when you're joining the round. So to do that, I lay the needles on the table, with the working yarn, the working yarn is the yarn that is attached to the ball, I'm just gonna get that out of the way, over to the right. And then you wanna lay the needles down. And you wanna make sure that all the stitches are, let me get this, all the stitches are facing the same way. So you can see the stitch bottoms. You wanna make sure that they're all facing inward. So now, we're gonna pick them up. And I promise you this is the most preci, persnickety part of the entire process. Once you do this then, you're gonna be, you're gonna be smooth as silk. So you want to insert the new needle into the first stitch on the left hand side of this first needle. Then you wanna take the working yarn, this is the tail, not attached to the yarn ball, this is the working yarn, which is attached to the yarn ball, and you wanna join the round by knitting the stitch with that yarn. So, that means wrap it around, knit the stitch. I know that seemed crazy. Right? It's not though. I promise you. 'Cause that's the only time where you kind of have all these needles that are gonna have to go everywhere. It seems a little like fussy. And it is a bit really. But now, from now on, you'll never have to work with more than two needles at a time. So, we've got that step out of the way. You did great. Take a breath. And now we can move on to the easy stuff. So we've knit one stitch. Like I said before, this cuff is worked in two by two ribs. So we're gonna knit two. I had already knit one. So, knitting another one. And then I need to pearl the next two. So I bring the yarn in front, pearl one, oops stitch slid off. That will happen sometimes. Pearl two. So now we're gonna knit two. And you'll notice as you work a few stitches that it starts to get a lot easier just because there's a little bit of, you know, there's some foundation for your knitting to sort of stand on. And you're just gonna do this all the way around. Knit two, I clearly didn't distribute these evenly because there's not an even number left. But that's okay. So I just knit two. So I'm gonna pearl one. But I'm all out of stitches here, right? That means that I need to go to the next needle. I'm gonna take that empty needle, bring it to my right hand, slide these down, and introduce the new needle again. I'm on a pearl stitch, right? We'd already knit the first one of the pearl two. Now here's my second one. And then I start again. And, you can see I'm still only working with two needles at a time. And the yarn has a little bit of slippy slidiness to it so you'll notice every once in a while that my loops might be falling off. And just, you know what, take it slow. Bring it, bring it back on. If you've never worked with needles this small, there's a little bit of an adjustment period. But, once you get into your groove I think you're gonna find it pretty, pretty doable. So I'm done with this needle. Got one more to go before we're done with the full round. So let's see, I just pearled two stitches. So we're on knits. So I'm again letting the other two needles hang loose. Introducing that fourth needle again. Knit two. Pearl two. Knit two. Pearl two. So now we've completed one round. So what that means, I'm gonna go ahead and lie these down so you can see it, and again, I just wanna remind, I just wanna remind you yours will look a little bit bigger than this. I put about half of the stitches on here just for time purposes. And also just 'cause it's easier for you to see. So, what you're gonna see is that you've worked stitches on all three of the needles. Needles one. Needle two. Needle three. For this stitch pattern we are doing a two by two stripe. So two stripes, two rounds of each color. So we've worked one and now we wanna work a second round. And so I'll take this one a little bit faster now that we know what we're doing. And some people might ask if you need a stitch marker for working in the round like this. You really don't because when you get to the end of that third needle you know that you're done. So you, you really don't have to worry about it. It should be pretty obvious where that end of the round is. And you'll also see the tail from where you cast on hanging right in between that first and third needle so it gives you another kind of tell. Again, I'm switching. There's one. And we are getting, getting there for sure. Pearl two. Oops, I thought I had, I was done, but, here's that tail I was telling you about. So I know that I'm not done. That I have one more needle to go because I wanna get to this. Tail is, the tail is my home base, right? So I know that this must be needle three. So let's work the rest of needle three. All right, it looks like I'm on a knit stitch. I get people all of the time, you know, send, messaging me on Facebook or, you know, talking to me on Instagram or wherever about how intimidating it feels to be working with so many needles at once. And so I hope the one thing that you can take away from this course is that you see that you really don't have to be intimidated by that because you're never working with all of them at one time. So, now we worked the two rounds, and we are ready to introduce a new color. To do that, we're gonna insert our needle like we would if we were just knitting the other color, and then we're gonna take the new color and kind of just lay it over. Make sure that you have enough tail to weave it in later. You don't want your socks after you've done all that hard work to come unraveled. And you just knit the stitch with that new yarn. And you're gonna leave the other yarn just hanging out. It's just taking a break. 'Cause you'll be picking that up after the two, these two rounds are worked. So what I wanna show you really quickly, I hadn't really planned to show you both rounds, but I think what I would like to do is I just want you to see what it, how you pick up the color that you have, that's been resting once you are, one you're done with it. So, if you'll just hang out. Knit with me for a bit while I finish these rounds. That would be cool. Oops, and I just did a wrong stitch, I can tell. You know what, this is gonna be a good thing for you to see here. Let me see if you can get in a little bit closer on this if you could, just for a second. Right here, I can see that I was supposed to knit this stitch but I accidentally pearled it. And you can see here, see a knit stitch looks like a little upside down raindrop a bit? And you can see that these two rows, the first two rounds have been done properly. But I accidentally pearled that stitch. You see how it looks like it has a little necktie on it? That tells me that I pearled it. And I was supposed to knit it. So, that's just called reading your stitches. So I'm gonna unknit, which means that I just stick the needle in the stitch below and pull it off. And then correct my mistake. And then we can keep going. So, we're working the rounds. I'm on my pearl stitch here. And we're getting close to the end. So, instead of working the next round in the chartreuse, which you would do following the pattern, and again this pattern is part of, you can find this pattern in the bonus material section, just walk with me for a second. Pretend I've, pretend I've knit two rounds in the second color. And I'm ready to switch to the other one. All you do, is drop that color. And pick the other one up. What I like to do is put the color that I'm not gonna be using, I like to lay it over the color that I am. Just to get it out of the way. And then I pick up the new color and start knitting. And you'll notice that first stitch, look how like loosey goosy that looks. That's just because the two colors have been joined there but there's nothing really holding it stable. So you just need to give, you just need to give the tail of the color a little pull. Just a little pull, just to tighten it up. And you'll have to do that probably every round that you change colors. So you're just going to keep on as the pattern calls for working in that, the established stripe pattern, which is changing colors every two rounds, unless you decide to do only a one color round, and then just keep knitting your happy little heart out. You're gonna work for the, the cuff for about seven inches, or, as long as you want the cuff to be. If you want a little ankle sock, just do it for like an inch. If you want a super like tall knee sock, I don't know measure to your knee and go that far. This is, this is where you can kind of riff a bit if you want. But, in the instructions it says to go for about seven inches and then it'll be time to work on the heel flap. So, let's move onto the next step.
Class Materials
Bonus Materials with Purchase
Ratings and Reviews
E.L. Bl/Du
VICKY is so awesome, and now Im ready to knit socks. Ive been wanting to for a long time, she is so great about encouraging us to jump in. She has a way of making what seems so complicated seem easy and do-able. I am actually super excited about trying. I really miss all her great tips on Knitty Gritty, and was so delighted to see her on CL, my 2 favorites together, what could be better....MORE PLEASE....
evilmiss
Love Vickie Howell and I love this class! I've been wanting to learn how to knit socks for awhile and when I saw that Vickie was teaching this class I knew I had to join!
Laurie Andrews
Really happy to have learnt how to make socks it's always been something I've wanted to learn for years thanks Vicky really enjoyed the video will be telling all of my friends about you xx
Student Work
Related Classes
Knitting