Lessons
Class Introduction
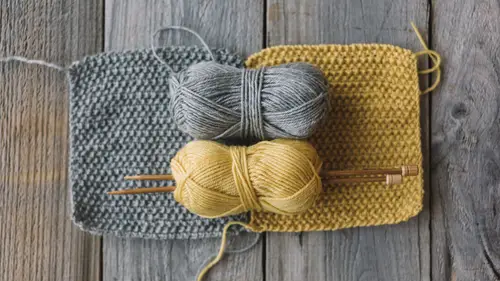
01:12 2What You Need To Get Started
11:48 3The Yarn Label and What is Gauge?
10:23 4How to Cast On
08:15 5How to Knit Stitch
06:09 6How to Purl Stitch
05:14 7How to Rib Stitch
05:02 8How to Seed Stitch
05:00Lesson Info
How to Seed Stitch
All right, another great way to use knit and purl stitches together to create a really cool... Again, I keep using the word texture but this probably is my favorite textural stitch, because it's called seed stitch and it looks like a, like a smattering of seeds, and what's really cool about it is that it's a really good filler stitch, like if you just need something to fill in an overall pattern on a project, but it also, if you're working with hand dyed yarn or something that has sort of a variance of colors, it's really, it showcases it beautifully. And I'll show you that here on this swatch that I have knit. This is just, this looks kind of like a field of flowers or whatever, but it's just alternating knit and purl stitches. Alternatively. So one row would be knit purl knit purl. The next row would purl knit purl knit. So you can see how cool that looks, and here it is with a solid, a less chunky yarn, and in a solid color. It's just a good solid stitch. I really like this stitch f...
or scarves. I like this stitch for dude projects. I don't know why, I just, I just like a good seed stitch scarf or beanie on a guy, so this is a good stitch to choose if you are kind of bored of just stockinette, and you want to move, move it on up, and you know, rib is a little too stretchy action for you. This is really a great go to stitch, so and I'm gonna pull in, I'm gonna keep pulling in the stitch sampler scarf, 'cause I want you to feel like you can really build on this scarf. Once you're done with this course and you make this scarf, I want you to wear this like a badge of honor because it's gonna display all of these skills that you worked. So this is right here, the stockinette, or I'm sorry, the seed stitch portion of this. Okay, I'm gonna show you how this is done now. All right, so as I said earlier, seed stitch is alternating knits and purls stitches. The difference between that and ribbing is ribbing are columns of knit stitches and purl stitches. Seed stitch alternates them so it stacks them on each other, so they're the opposite of columns. So we're gonna start with a knit one. So we knit one stitch and then we're gonna change to a purl stitch, so that our bump, that purl stitch bump is on our front as the next. And then we're gonna knit again, purl again. And we're gonna just continue doing that all the way down the row. And you're gonna know what you need to do, well A, there's a pattern for you, and again that's in the bonus materials for the, for the swatches, but also, I want to show you how to read this stitch so, you're gonna do the opposite of whatever the stitch is, you're gonna do as the stitch, so... I know that this is a purl stitch, because it looks like it has a little like turtle neck on. It's a stitch with a little turtle neck on. That is a purl stitch. A knit stitch does not have the turtle neck, it's more of v neck kinda stitch. It's a little looser, not as uptight. So that, you know, is a knit stitch. So if this is a purl stitch and we know that we're stacking stitches on top of each other, I know I need to do the opposite. So, I knit. That's a knit stitch, so I'm going to purl. The only reason that you would really need to know that is if you accidentally lost your place or like if the, I don't know, your kid needed something. You needed to get up and go get it and you sat down and you couldn't remember what you were doing or whatever, or which side you were on. That's just sort of a good, like failsafe. All right, so we've worked an entire row. We're gonna flip it over, and we think, okay I just did a purl stitch, so I must be on a knit stitch. Oh wait, no. So the back of a purl stitch is actually a knit stitch, right? 'cause I said that earlier. It's the opposite of each other, so it's the front and the back of each other. This is actually a knit stitch on this side. This is the wrong side of the piece, so we know that we've done the knit stitch right? So, we have to purl. So I would start here. Woops, my yarn was not in front of the needle. I wanna make sure it's in front of the needle for purl. Purl it, and then knit. So for this side, I'm doing purl one knit one. On the front side I did a knit one purl one. So you just would continue in that manner in those two, in that pattern. Those two rows. First row, knit one purl one. Second row, purl one knit one, are going to create this seed stitch swatch and also this section on our sampler scarf that has that really cool kind of nutty look. All right. You know how to seed stitch now. Let's go to the next step.
Class Materials
Bonus Materials with Purchase
Ratings and Reviews
Claudia Quinonez
I have to say that I am a fan of Vickie Howell and I absolutely love the way she teaches this class. The way she teaches this class is so easy to follow and understand. I am a beginner and was having a hard time with adding a new ball and decreases and this course has helped improve my knitting skills.
Ashley Sarikaya
Very helpful class! Vickie Howell is engaging and easy to follow. Excited to be taking more of her classes :)
E.L. Bl/Du
Vicky, WHERE have you been? You are missed on PBS show. VERY much looking fwd to this class. Vicky is one of the BEST knitting/Crochet instructors I have EVER watched. You are guaranteed to learn how to knit easily with her easy to follow instructions. Her own knitting is the most beautiful Ive seen. She tells you how to choose yarn, needles and how to follow patterns. Your set with this class. Even a seasoned pro will learn something.
Student Work
Related Classes
Knitting