Example Four - Gritty Street Photo
Lesson 31 from: iPhone Photo Editing Using Lightroom Mobile CCSean Dalton
Example Four - Gritty Street Photo
Lesson 31 from: iPhone Photo Editing Using Lightroom Mobile CCSean Dalton
Lessons
Chapter 1: Introduction
1Class Overview
03:30Chapter 2:Mobile Editing Overview
2The Power of Mobile Editing
04:43 3The Digital Anatomy of a Photograph
01:35 4Class Project
00:28 5Raw vs. Jpeg and Adobe .Dng files
03:06 6Chapter 2: Quiz
Chapter 3: Editing, Emotion, and Storytelling
7Exposure and Emotion
06:00 8Color Theory and Emotion
17:25 9Editing and Storytelling
02:02 10Editing Styles
02:48 11Editing - The Right and the Wrong
01:10 12Finding your Editing Style
04:19 13Chapter 3: Quiz
Chapter 4:Mobile Editing Applications
14The Best Mobile Editing Apps
03:20 15Chapter 4: Quiz
Chapter 5: Lightroom Mobile CC Overview
16Lightroom Mobile CC Overview
08:21 17Lightroom Mobile CC Editing Workflow
02:59 18Chapter 5: Quiz
Chapter 6: Editing in Lightroom Mobile CC
19Importing Photos and Organization
03:15 20Prepping the Photo
02:15 21Editing Exposure and Tone Curve
09:20 22Editing Color
05:29 23Effects and Details
11:33 24Fine-Tuning With Selective Edits
04:25 25Presets and Why You Should Use Them
02:59 26Common Editing Mistakes
04:34 27Chapter 6: Quiz
Chapter 7: Live Editing Examples
28Example One - Moody Portrait
07:21 29Example Two - Epic Travel Landscape
05:56 30Example Three - Warm Lifestyle
05:28 31Example Four - Gritty Street Photo
05:38Chapter 8: Tips To Remember
32How to Become a Better Editor
03:21 33Conclusion
01:39 34Chapter 8: Quiz
Final Quiz
35Final Quiz
Lesson Info
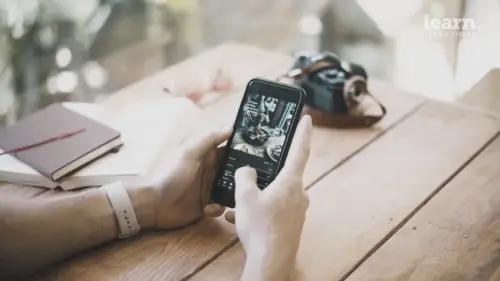
Example Four - Gritty Street Photo
Okay, so this is the last example photo here and this is a photo I took at a market um in Jakarta very late at night. Uh and this guy is just smoking a cigarette and uh doing something here, he's looks like he's cutting up something but this is a really cool image. We have one key light on top of him kind of spilling down over him, a lot of stuff going on in the background. This is a 35 millimeter, 1.4 as well. My favorite lens. So first thing I'm gonna do is is crop the image. I'm gonna bring him a little bit to the center and I'm going to drag this down because I kinda get maybe get rid of that light a little bit. I don't think we need to have that in the frame. That looks good where it is. Alright, so now he's he's more centered. We still have a lot going on in the background, a lot of interesting colors. But in fact, I I want to make this photo black and white. If you guys have seen my street photography course, you know that I love black and white street photos. I think they look ...
really cool. And this is also just another opportunity to show you guys how you would edit a black and white photo in Lightroom mobile. So in order to make it black and white, you can go to profiles. Uh and then you can go ahead and tap a w monochrome and that'll just change the profile to black and white. Um And it'll give you a black and white image and already it looks pretty cool. Um But in my opinion it looks kind of bland. So one of the first things I'm gonna do with this image is edit light like usual. The exposure gonna bring that up a little bit, maybe bring the highlights down a little tiny bit and then bring the shadows up to really pull out some detail in the image. And then I'm gonna go over to white and I'm gonna really drag that to the right really make sure that's at a point where not only the lights are being clipped where we're losing detail on the lights, but other parts of the image as well. I'm gonna go ahead and do the same thing with blacks. Really really get a lot of contrast in the image here. Very Ansel Adams style. So there's before there's after you have a lot of really interesting contrast going on and then we can go into the tone curve, Create our three points and do what we always do, drag that up, soften that out, drink that up a little bit. Very very cool. So now we've softened those blocks out um and kind of made it a little bit easier on the eyes, We can go back and drag that down if we want to awesome. It looks really cool. So one of the coolest things about editing black and white photos and the w Lightroom Mobile is you can adjust the luminous values of every color in the image. So even though the image is black and white, the computer still understands that there are colors in this image. Each color has a value and you can still affect them all, you can still adjust the luminant of all of them. So for example if we start off with red, if I increase illuminates here, you can see what that does. The image is going to affect all of the red objects in the image, change the color. So I'm looking at his shirt so I'm gonna drag that down a little bit now, we can move on to orange, we can do the same thing. Oranges usually gonna have a big effect on your photo because um skin is orange, we know that he's wearing an orange shirt. Some of the lights are really orange, so I'm gonna drag it up a little bit. Moving on to yellow. Yellow also has a big impact because there's a lot of yellow in the image. Green. Uh not so much, just some of the crates in the back. So I'm gonna leave that right there and some of these other colors, they're not going to have to profound of an effect. Usually orange, red and yellow, those have the most profound effects on your image. So after we've done that, then we can move on edit some some detail here, we can add some a little bit of clarity. Actually I think clarity is gonna pull too much away from him so I'm not gonna adjust that. In fact what I'm gonna do is create a selective filter, a radiant radio filter and put it around him and then I'm gonna invert it and that's gonna basically affect everything except for him. And what I'm gonna do is go over to two effects and I'm gonna drag clarity down just just to soften out the scene behind him and make sure we have our focus on him that's just gonna blur everything kind of around him just to enhance that out of focus areas in the back. So now we have full focus on him and the background isn't too distracting but we still have enough detail to know what's happening to know that he's in the market and that he's surrounded by other dealers and things like that. Very very very cool with effects. Um if you did want to increase the overall clarity, the photo that you could do that maybe ads have been getting but that's something I think we already have a lot of good natural vignette in here. So I'm not gonna just that, but there's the color version, there's the black and white version, make some fine adjustments here. Just maybe adjust those highlights and then maybe add maybe just a little bit of grain. Cool. Make it look more like a classic photo sweet and that's basically how I would edit this photo is the before, there's the after, um, and then, you know, maybe I'll go and make some changes later on. But right now it's at a place where I like it, so go ahead and export. And that's it. So I hope this was a helpful example for you guys. And with that said, let's move on to the next section.