Lessons
Class Introduction
03:37 2What Defines a Beauty Shot?
05:41 3Cameras & Lighting Equipment
20:05 4Flash Settings
14:18 5Flash Modifiers
08:32 6Lighting Styles
05:05 7Shoot: Butterfly Lighting
18:13 8Shoot: Beauty Dish Lighting
04:40Lesson Info
Shoot: With Umbrella
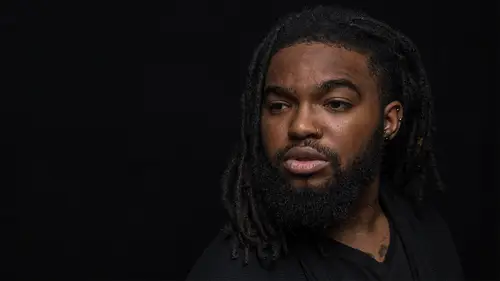
We started out today by doing a little bit with the soft box, and the reflector. We did a little bit with the beauty dish modifier and a reflector, and the next thing I wanna do is our third flash look for the day, and that is using umbrellas. So I'm gonna spend a good amount of time using umbrellas because they are ubiquitous. Everybody's got an umbrella, and everyone wants to know how to do a better job with your umbrella. So we'll start out with a smaller umbrella, and then I'll show what it looks like with the larger umbrella, and then we'll throw in a bunch of other reflectors. We'll throw in some smaller reflectors, maybe try a silver reflector, and then we'll try the V flat and again, the overall goal, what we're pushing for is fill in all the shadows and get a nice flat look around the models face so, why don't we call our model Natalie up again, Natalie I had change so we're gonna do some different looks for this next segment, and her hair is down so just a little bit differen...
t look overall so grab a seat, we'll kind of maintain the same position. And we might try a couple of things with her hair right now we'll keep the hair in front of her shoulders as we go on, maybe we'll move the hair behind the shoulders to show off a little bit more of that look overall so, feeling good? Yup. Natalie's feeling good you guys good? Yup. Let's shoot some pics, so I'm gonna start off with a simple umbrella, I'm using the same flash scenario that I had before, so this is that little Phottix light, and I'm at about a eight of a power minus two-thirds, from our last segment, so I'm just gonna leave it there as a starting point, you never quite know exactly where you need to start at. So I'm just gonna guess, and for this, I'm just gonna move it in now this is a, there's a couple of different types of reflectors, there's the reflect off the back, which is what this one is. Then there are some that are shoot through. Both are good, and it's rare to really notice that much of a difference between the two of them, in this case most of my reflectors just reflect off the back I find that works fairly well but if you want to get a convertible one, great, sometimes you need to think about the space considerations. If the room is really really really tight sometimes it's easier to get a shoot through scenario then you can basically put the flash really close to the subject like that. In this case, we're just gonna do that right there. So I will typically take the shaft of the umbrella and that shaft of the subjects face in the middle of the subjects face, and to do that, a lot of times I have to stand over by the subject, so let me get a little bit closer to you here and see, make sure the lighting is good, that's great and the next thing I'm thinking of is catch light so for the umbrella's really high, right if the umbrella is high I get shadows down below the nose and that's okay, just what's the look that I'm after today. So I will just start here, a little bit more centered and because it's centered I have to find a way to shoot around that umbrella, basically look here, mhm, not quite high enough, I got to go a little bit higher. Fine tuning, it's okay to take time, when you're setting these things up, and you want to get the right look, and that's the most important thing. You don't get the look and the model leaves, well you've messed up so, take the time, most the time you know, the model is fine with you fiddling around, it's also nice to have music playing on set, we don't have music today but that's one of the, shooting with your first flash, one of the most important tips, have music in the studio. Makes everyone happy and smiley, okay. I'm just gonna do a quick test to make sure that we are tethered properly here inside of Lightroom. Looks like we are at 250, the second f5.6, and ISO 200, I'm just gonna do a quick test shot. (camera clicks) It looked like everything fired and now we come into the Lightroom software, life is good, and we're ready to take some pictures. It's probably the best shot of the day right there. Okay, I'm gonna get connected to my old tether tools, spider holster thing here, and we are now ready so, picture number one, is just a test shot, just to judge the exposure. One, two, three, great. So used to looking at the back of my camera I forget that I gotta look over here to the screen. I'ma hit shift, tab, to make that a little bit bigger. Okay, wow not bad, the initial exposure is looking pretty good, we can see the shadow falling off on the right side of the screen, excellent. And then the left side of the screen is bright just the way we like it, if I want a little bit even, more even lighting, I have to find a way to get this umbrella even more centered. And so, to do that, maybe shoot just like that. Okay so there we go, and again, and back up a little bit. (camera clicks) Cool, nice job. Notice when her, let's look at those two images, I'm gonna compare these two, the first one, then I'm gonna go back here with her head up a little bit look how it changes the catch light in her eyes, it's something to remember, when the head is down, typically it can obscure the catch light like this one, they're still there but they're not as prominent so that's one of the things I'm always thinking of, how do you want those catch lights to appear. Okay so let's start taking the photo apart, where do we want to fill in the shadows? Well obviously we want to fill in underneath, so we're gonna now bring in a reflector underneath. Now remember this is a smaller umbrella, this is a 42 inch umbrella, or 40 inch, something like that so it's not wrapping all the way around her like that giant umbrella will so a lot of times, with the smaller, what I call the smaller key light, you have to add in a lot more reflectors around. A bigger keylight, like that giant umbrella, you don't have to use as many reflectors. Okay so we'll throw this in there. And a lot of the reasons I'm shooting the same general lighting scenario is just to show you that you can get the same kind of look with different modifiers, soft box, umbrella. Alright, here we go, nice. So now we fill in some of those shadows, oh yeah, look at the difference that made. Look at her neck, fantastic. Earlier in the morning, the clothing that she was wearing was a blouse, and it kind of came up to right around her neckline. Now we get a halter top, something like that, we get those shoulder, nice clean beauty look overall. I really like the look of that image. But we can do better, maybe we can throw in another reflector so let's see here. In this case I'm gonna pick, just gonna pick a silver reflector and I need to find a way to hold that reflector so if I got someone on set I can have them hold it for me, because I'm going solo here, I'm gonna show you that I can hold it with my hand, and then I'm gonna pull out another little tool to show you that you can clip it on, that's a very inexpensive part and product that you should all buy. So this is what it looks like without that, so you got to be like a juggler here. Gonna pull that in, assume the position, look good, nice look, cool, and again, alright towards me, nice. See how close that all is in, all there? It's all within inches of her body. Oh yeah, very very nice. Let's compare before the silver reflector and after the silver reflector. One of the reasons I like shooting tethered is that you can see this in real time, and if you're tethered to a larger monitor, a lot of the people on set can also see what's going on, and you can help describe what's going on, what needs to change, shoot tethered, you'll love it. Okay so this was there, let's go larger, so that was with no reflector, and then I'm gonna pull up along the bottom my film strip so I can see the images. And then this one we'll go command click, and then C for compare, and then shift tab to get rid of the stuff on the side. So there, on this one, I added the reflector on that side of the face, subtle, right? Pretty subtle, but now we're starting to fill in all of those shadows, and you can really see it down here, under the neck, it's a to brighter down there. That's what I'm after. Let's change things up again, let's add the big umbrella, so fundamentally the same photo but now we're gonna bring in the gigantic umbrella and let's see what that one looks like. As I do this, because it's gonna take me a minute or so, any questions that I can answer as I'm moving things around. My question earlier, pertaining to about beauty lighting I wanted to know kind of the scenarios on what you would use different types of lighting, like the clam shell versus the butterfly for different type of scenarios so they're all beauty portraits but I want to know the difference on if I'm shooting an actor headshot versus a business portrait, what would you use, different types of lighting for that? The modifiers themselves, right? In other words which modifier to use for what type of look? Yes. Excellent question, and you're not gonna like my answer. Because my answers is, what you're really after the look, the look is the beauty look, and you can get to that look using any of these modifiers so I'm sure, so I wanna show you that you can use this umbrella, I wanna show you that you can use the beauty dish, and I wanna show you that you can use the soft box, each of those decisions is a personal preference, it's a choice that you make. Some people really like the look of a beauty dish, so they gravitate that way. There's no right way with lighting modifiers, and I remember starting out, when I started out photography thinking through the same thing you are, like which one do I use for which type of scenario? And the answer is always yes, because you can get the look that you want, with just about any of the lighting modifiers that are out there, so I'm gonna ask you to change your thinking process, and your process should not be necessarily what modifier should I buy to get to that look, it's mostly what look do I want, and then how do I use that modifier to get to that look so it's flipping that on it's head just a little bit. I know you didn't necessarily like the answer but the truth, as you see today, we can get this beauty look with just about any of these modifiers, and that's the key. Some of them are inexpensive, and some of them are very expensive. Thank you. Yeah. So now we're gonna do the same thing with a big umbrella, and I'll probably have to change the power because now the light was going into a 40 inch umbrella, now it's going into a 60 inch umbrella. One other point I want to make here, let's see which camera needs to see this. Just wanna show this off here, this is a diffuser, but what I'm doing with that diffusion dome is I'm causing the light to really spread all around inside the umbrella. If I don't, then the light coming out of the flash, only actually utilizes small surface area of the umbrella, you want to use the big surface of the umbrella so you have to cause the light to send out all around, so put your little diffusion dome. If you don't have a diffusion dome, then at least pull out your fresnel lens here, your little diffusion panel that's built up inside of the flash like that. Okay, enough talking, now it's time to take some pictures. So I'll take this picture with just the umbrella, first of all with no other reflector and this is really big so, you have to be careful about where you place it because they're aren't a lot of places to move around this gigantic umbrella. I've actually thought about cutting a hole in there that I can shoot through and actually that would be very useful. Here we go, one, two, three, nice. And we'll check the overall brightness inside of Lightroom. I'm gonna go back to E, for loop, and there is the photo that we just took. I think that's the one we just took, no it isn't. That's the photo we just took. There we go, alright, nice. You can see the upper left is pretty bright, the lower right is not quite bright enough so, in order to solve that problem, I can bring in reflectors or I can move the light up and put it more on center. See when you put it on center, or on axis on the model it evenly illuminates that background, these are all the things you have to think about when you're only using one flash, when you have multiple flashes well then the solution is easy, you just throw out a flash there in the background and light it up but now we have to think about even lighting, light obviously because the flash is on the left side, that that sides gonna be brighter, and the right side is gonna be darker. So to even it out, center it a little bit more. We're blessed with a really high ceiling studio here, so I can actually move this umbrella up nice and high, if I'm in my living room, or my bedroom, or even my garage a lot of times you don't have that luxury or that space and you have to solve the problem with reflectors. But in this case I am just to show you what you can do with one giant flash, I'm gonna move it up like this, and then I'm gonna shoot right below it, cool. I bet this is going to look really nice, here we go. I think I got the light stand in there. Take one more, cool. So that's what's going through my head, I'm always thinking about how to get even illumination on the background, and ooh, that's looking pretty good, overall it's a little dark, and because I'm lazy I was thinking what was going through my head is that I could go up to the flash and increase the power, but that'll mean I'll have to bring the thing down, and that's painful so another solution is, I'm just gonna increase my ISO. So rather than shooting at ISO 200, I'm gonna ISO, let's go to 320. So that's up two-thirds of a stop on my ISO, and that will brighten up my photo a little bit more. Here we go, one, two three, and again. Super, nice job. As that's loading, the next thing I'm thinking about, oh yeah there we go look at that nice bright white background and you see, the higher that flash gets the higher the umbrella gets it's sending light also behind her onto that back drop. Another one of our cool tips for getting a white backdrop. And I like her collar, her neck, that whole line there looks fantastic. Let's bring in some other reflectors, in fact that photo looks so good, that I'm even questioning do we need other reflectors but today's all about reflectors and flashes so we have to, we just have to. Okay I'll bring in a white reflector on this side, like that, and then again we're gonna fill in those shadows. Excellent and I'm just taking these shots sequentially, so you can see how the photo is built. Nice, let that one load, and I'll show you my cool little tool that I brought. Okay, there it is we filled in some of the shadows. The next little tool I want to show you is this, it's about $15 and I don't even know the official name. But we're gonna call it a light stand reflector clamp, how's that? Light stand reflector clamp. It's very inexpensive, it fits on the top of the light stand and it just clamps the reflector and just hangs it there, I use it all the time so, and it was only like 15 dollars, maybe even 12 dollars not even expensive. So we'll pull in our, another light stand here, show you how that works. This goes here on the top of the light stand like that, and then I pull over, let's go with a silver reflector on this side, just add a little bit more sparkle on her face, you see it goes like that. The disadvantage of this is that you can't really angle it, you can't really angle it forward and back so it's just gonna hang there right next to her face. Okay I'll move into the zone, now it's feeling really claustrophobic. Alright we've lost our model. And about like that, okay so now, just to recap, one giant umbrella. One reflector there, and one reflector there. Excellent, and I'm gonna have you turn the other shoulder toward me, great, nice. See what those look like, oh yeah. Look at those images, they're coming out very bright, airy vibrant, cool. Gonna do one more thing than I'll let you guys ask some specific questions. I'm gonna bring in a V flat, just to show you what a V flat is, and how that works. So I'll pull these reflectors out. So V flat, you can make these on your own, you can make them out of foam core, you can make them out of corrugated plastic, that's how I made mine, I went to my local hardware store and bought some big sheets of corrugated plastic, it's like cardboard, but plastic. And i think they were like $15 a piece, and you just tape the middle, you use gaff tape, and they're about seen feet high, six or seven feet high and now you have these giant reflectors, if your ceiling is not tall enough for that then just cut them down, so they can fit inside your house. Okay now it's challenging for the camera guys in the room but at least you guys can see how this all works. This is a V flat, the ideal V flat you would make would be black on one side, and white on the other. Sometimes you want to take light away, and make one side of the face darker. Other times you don't okay, nice. I know I'm blocking us, you just have to trust me. We're just basically creating a light, a light tent. Okay, right on, and then I'm gonna drop this down, cool. So now we should get wrapping light all around her. The key light is still the umbrella, that's reflecting into the V flat, and now the V flat is just reflecting back just a ton of light from all different angles. Okay, here we go, it's a nice look, good job. Let's see how that looks. I did move the umbrella a little bit farther away, so we may have to increase the brightness just a little bit. But that's a pretty good look. Pretty good, I might actually change the V flat given a little more time, I might actually change the backside of the V flat so it's closer on this side so it fills in a little bit more shadow, and what the heck, let's just do it, because we're all about perfection here. Stands in the way, thanks Drew, you're always looking out for me man. Okay, and I just need enough space in there to get my camera, okay, great. Here we go, one, two, three, super. And I'll pull this off set. I love using V flats, such a great tool, fairly inexpensive, and imminently useful. Okay, look at this thing back there. Don't fall, so how did that photo look? Ooh, that looks good, oh that looks great. Have you seen yourself? No. Yeah, really fantastic, so we'll have to do a little Photoshop work to get rid of the V flat that's in the photo but that's easy, that's an easy solution. Okay well, we have done not everything you can do with an umbrella, but I've showed you a few different things you can do with an umbrella in a very inexpensive studio setup, basically a $70 umbrella, and a big piece of foam core produced that image. Way cool, so let's open up for some questions about that process or any of the other processes right before that. Sometimes I use flash because I need to do a mobile studio in other locations and the colors of the rooms, are obnoxiously bright and have a color cast do you have any tips what kind of modifiers or angles to do to control color contamination? Yeah, it's great it's really important color contamination, the scourge of photographers all around the world. So what she's talking about is maybe going to someone's house, and maybe they've painted it from the 1970s, there's some nice greens on the floor, some nice orange or yellow on the walls, it's like hey, it's time to update this, let's get some more neutral colors. But this happens everywhere you go, there's some weird color in the room, so we have to think about that as your flash lights the subject the flash also lights the rest of the scene, well umbrellas are the worst when it comes to color contamination. I always think of umbrella's being light grenades they just send light everywhere, and that's why they're wonderful but also why they're hard to work with in a scene like you were describing so, my recommendation, it goes back to your question around what type of light modifiers should I use. You need to be able to control the light a little bit more to keep it kind of on the subject and on the subject only and that's when we go to something like a soft box, or an octo box okay. Let me describe why that's the case. So I moved my soft box over there but I'll use this octa to describe it. Octa meaning it has eight sides. The idea here though is that you can see that the panel, the diffusion panel is behind the edge, so what that means is that it tends to direct the light forward a little bit more and light doesn't necessarily stray off the sides so an octa or a soft box allows you to kind of direct light and prevent it from going on to the walls and ceiling and then, let me grab one more thing, I see you still have another question but, this here helps a lot too, and this helps direct most of your soft boxes and your octa's have this, and this prevents the light from also straying on to the edges and on to the ceiling, and it just velcro's into place. So there we go, so that's another great solution for that. I was gonna ask if that would help. Yeah, and one of the reasons these things always cost so much is because they have other little tools and baffles and grids so this help prevents that stray light. Excellent question, and it also goes back to your question. A lot of times the look that you want you can't produce that look in a certain type of room because there is color on the wall so you do think, umbrella is the wrong choice here, I still want that look, how can I create that look with my soft box or my octa. Questions from the internet? Yup Let's do it. Terese said great class, can you ask Mike about feathering and where he points the lights as to not get hot spots? Okay cool, so feathering, the concept of feathering the light is, again I'm gonna go back to my octa here, and I'm gonna go over to our model, and just kinda show what I'm describing. So an unfeathered light would mean like this, just straight on, so light straight on, she's basically getting the full force or brunt of the light, the full surface area there. A feathered light would be something like this, where I angle it, so she's only getting a portion of the light, we're like feathering it so you get an edge of the light. In this type of photography, we're not really going for a sculpted look on the face, right? Everything we've done so far is all about creating that flat look so you don't necessarily want to feather here in this scenario, let me show you what that would look like if we tried to feather it, and I'll do it with this big umbrella. Feathering would basically be more side lighting, and then maybe pulling it off this way, or even pulling it off this way, so she's not getting the full force of it. And the reason why we don't necessarily want to feather it is because we don't even illumination which is the second part of her question. So let's just say we did something like, let's do this, so you can see what I've got going on here, the light's not fully on her, she's kinda getting a portion of the overall quality of light from the reflector, we'll just take a shot. Sometimes we feather in a more dramatic type of lighting scenario. You can see what we've got now in the scene, in the final photo, is the left side is really bright, and the right side is in shadow. So that's one of the dangers we run into when we try to do that. So, I think my answer to her question is, in this type of lighting scenario, don't feather. Try to keep it straight on. Why a front curtain flash sync, I thought a rear curtain was better because any slight movement in the rear curtain is preferable to avoiding blurring basically. Okay, cool so there are, most cameras have three of four different synchronization modes. One of those being front curtain, and that's what I'm shooting today, another one being rear curtain, and there's another mode called slow sync flash. So what we're looking at, it doesn't really matter in this scenario if the flash fires at the beginning of the exposure, or if the flash fires at the end of the exposure, right? Because she's not moving, well she's moving ever so slightly but it's not like she's doing jumping jacks, or it's not like she's on a skateboard going off of a ramp. If she was doing those things, then it would matter. Lets say she is jumping off of a skateboard ramp, well then I want the blur to be behind her, and in that case I use what's called rear curtain sync, because it fires the flash at the rear, or the end of the exposure, so she's moving through the air, there's a little bit of blur, so you get that blur, and then the flash fires, and now the blur is behind her. In the studio, it really truly doesn't matter. Because everything is happening fast we got a fast shutter speed, she's not moving around a lot, so it's just a mindset, I just generally use front curtain sync because it's simple, I don't know if you've noticed, but I'm pretty methodical in my approach, and I like having systems in place. If I actually had a checklist I would be checking it off my list, but it's in my mental checklist.
Class Materials
Bonus Materials with Purchase
Ratings and Reviews
Suzie
Practical, informative, affordable instruction that’s easy to understand and leaves you excited to jump into the studio with a single flash and whatever you have on hand .. soft boxes, umbrellas, v flats or even a bunch of cheap reflectors. Mike is a superb instructor. Highly recommend.
user-4cec79
Really good. Superb teacher. Bought it. Worth the money.
Anthonia
Loving this class so far! The instructor is amazing
Student Work
Related Classes
Lighting