Lesson Info
5. Masking
Lessons
Introduction
00:59 2Lighting and Concept
02:07 3Cropping
02:38 4Bringing in the New Background
02:44 5Masking
32:02 6Creating Depth
07:27 7Painting Wet Rain on Costuming
28:45 8Creating Rain Drops
15:06Lesson Info
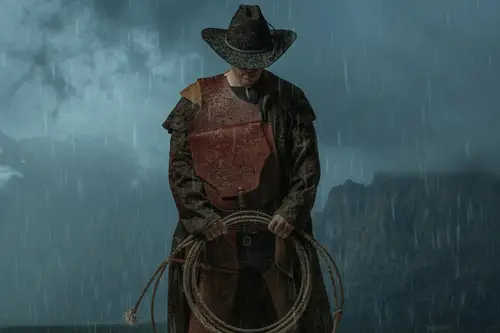
Masking
next up on our list here. We want to mask out our subject, which is typically everyone's favorite subjects. Asking, uh, this one here is gonna be kind of, like, relatively easy mask to make, but at the same time, uh, there's some interesting parts of it that will make it kind of fun. So first things first is I am going to, uh, click. I'm gonna turn off my I'm gonna call this here. What do you want to call this background there? Because if we say background there, but then the first layer, layer zero in the background there gets confusing. Uh, let's just call my God, I'm blanking on it. We'll call it rocks. We're gonna call that the rocks layer. And this one here, we're gonna call cowboy. So first thing I'm gonna do is I'm gonna go up here to my little quick selection tool. This brings up the select subject button, so I'm just gonna hit select subject, and this is a pretty good job. It's not perfect. Obviously. Like around here around the rope, we're gonna have to fix that, missing some...
spots around the face. And of course, this part here on the hat. This is what happens when you shoot on a warm color temperature and your subject is warm and the leather is all warm. This is all very like a monochromatic image, so it does make the extraction kind of a pain in the butt. This is where people who love to shoot green screen have it easy because they're just click and that's it. But I don't like using green screen because, especially when it comes to transparent materials like this little fuzzy part here around the bottom of the last Sue, uh, it gets semi transparent. You get this like weird green glowy stuff, and if you have any close relationship that the subject is close to the ground, you get this green color cast and yes, you can correct for it, and there's lots of techniques for it. I just don't like doing it, so that's always when it comes to masking is just like, What's the stuff that you like doing? What's the stuff you don't like doing? The next thing I did there I did that little bit quick. Sorry, I just so we've selected our subject, and then I went to the next button here. What's his select and mask? Select the mask. And here I just hit the smooth by like, I don't know, four pixels or something like that. Basically just makes the edges a little bit more gentle, Especially around part of the jacket here and around the hat. So I just like to make sure that this is all I'm gonna work. Um oh, man. Come on, do the thing I asked you to. Now maybe we can get it to hold salt. So well, alternate keyboard, and then click some of the areas. So this is kind of like cleaning up some of that masking stuff, but it's still causing issues around the face. So maybe we can clean up these spots here, and it's still no matter what we do, we're gonna have to fix some of this. Yeah, that didn't work at all. Control Z. So it saved us, like a little bit of time here, but not tons like see it just, like, went all over the entire lawsuit. So that's not helpful. That's actually not helpful at all, So we're just not going to worry about that too much. Um, you know, we'll take a little bit of extra time here that will save here, but we're still gonna have to fix these lines and part of that rope. So I'm just making sure this is too smooth and I'm just gonna hit, okay? And I'm gonna go to my rocks layer, turn on the visibility of that layer, Hit this little flag of Japan down here now, Right now. Because what we did was we made a select subject. We're going to have to invert the selection. So here, though, if we zoom in close, we can see where the mask went over parts of the costume, part of the face, etcetera, etcetera. So we're gonna have to go in and clean all that up, which is kind of normal. So, actually, kind of like a cool silhouette. Ideas for later, maybe. Okay, so we're going to click on our mask. We're gonna make sure we're not on our layer. Because if we're on our layer and we hit control, I it's going to invert the colors. We don't want to invert the colors of this. We want to invert the mask. So we're going to hear gonna go here and control I and that just inverts our masks. So now our rocks layer is more visible and our cowboy is coming through. Now, let's go in and clean all this up by hand. So I love the legacy brushes in Photoshop. Anyone who follows my staff knows that I do. Legacy brushes can be found if you haven't gotten voted already. Uh, depending on the version of Photoshop, they may have got rid of them in 2021 but I'm not sure. I've heard rumors that the legacy brushes are back in regular brushes, general brushes, But they've been renamed, so it might take some digging to find the brushes. I am running a Photoshop 2019. I'm always a couple versions behind because I just don't like dealing with bugs. I need Photoshop. As soon as I loaded up, I needed to work every single time. So I always run a couple years behind. So hit this little gear here. So we're gonna go to a brush panel. So we're going to be for brush on your keyboard. Gonna go up here to this little pressure, here's little gears, and then you're gonna see here This is load legacy brushes you don't need converted legacy to a piece that's just legacy brushes and the money like that. What's going to happen is you are going to get this little folder here. It's gonna pop up at the bottom of all of your brush folders, and that's the legacy brushes. And that's where all the fun stuff is. So I like to use texture brushes. I'm gonna play with some chalk brushes here for a little bit. Uh, did too. I'm just finding a texture that I think will work. Nice. Very yeah. 17. Sure. Let's see what that looks like. No, I am making sure that I am on my black brush. So right here, This is white and black. If I was painting, uh, white, where I've already masked, it's gonna just bring everything back in. Now, if I paint black out here, then it's going to mask everything else. So if you're really not sure about masking, um, I would recommend burning through a little bit more. There's a lot of places to find out more about masking and, like, how does this work? Uh, it'll take a lot of time to explain it in detail here, so I'm asking is not your thing. Uh, quickly go read up on it. Or like, watch another video on it. They are everywhere, Um, and just to explain the basics, so just basically just search like masking basic Photoshop and you'll get some videos. But basically, all we're doing is we are painting away the layer the rocks layers so that we can see our cowboy coming through underneath. So and I am using a textured brush because I don't like using software and brushes in most cases doesn't mean I don't use them always, but I I'm not just not a big fan of them. So now here is he's got some, like, face with screws and stuff, and this brush is not the right brush for that job. So, uh, there's another brush up here and it's called splatter 59. If you follow any of other tutorials, you know that I have a love affair with this brush, and the reason why I like it, especially when it comes to hair and fur, is that it has texture. And so these little edges. So if we hold all and click, that looks like whiskers. So that's why I love love, love these brushes. And it looks like I missed a spot here, so I'm just gonna switch back to my previous brush. Get rid of that. I just tried to clean dirt on my monitor. Nice. I don't know if you're a Photoshop. If you haven't tried to clean dirt off your own monitor before. Okay? So now I'm just gonna go through here and clean up some of these areas here. And if you're not sure what you're working on, you can always just turn down the opacity and so you can see exactly areas that have been covered. So this is just your layer opacity. Okay, so now that I have that, I do like to make sure, So here. I totally went over. No, I just painted right on the layer itself. Great. There you go. Okay. So, just to invert back and forth between black and white on my keyboard, you'll see how it's alternating here in the corner. I'm just hitting X and then to increase the size of the brush on your keyboard. Is the brackets up and down? What's really handy, though? If whenever you're ready for it, you don't have to do it right away. You can reprogram your keyboard for new shortcuts. So if you don't want to be moving your hands across the keyboard a whole bunch, you can re program everything. But it does sometimes break other shortcuts. So make sure that you're sure before you start mucking around in there, but just know that it is possible about 49%. Let's turn that back up. Actually, you know what? I'll leave it down just to make sure we'll do one more quick check here when we're done, make sure I don't miss anything. Okay, so here we are, finally at the rope. So here are finally at the ropes. At this point, I'm probably gonna change the texture of my brush because this texture doesn't really match the texture of the rope. Uh, 11. That's too soft. Do do do. Okay, let's try this guy. Chalk 44. Let's turn this up a little bit and make sure we can see what we're working on. Invert this guy here. No. Sure, we're good on that side. So here, this is kind of one of the things about using these quick, select tools. Does it give everything kind of like the same edge when you're masking, so everything, everything looks like it's the exact same transition points. So like the gradient and I don't like it, um, so that is why I like to do it by hand. I just find that it looks a little bit more like real life when you have masks that aren't just like, oh, it's a three pixel smoothness across every single surface. Um, it's just that's not how life is. And that's not how these things are like so just looking from this side to this side. So this side is all like pokey and spiky and everything else in this side, because I use the quick selection tool. It's quite smooth, Um, and I don't like So, uh, it's just the thing for me. It's just like you don't have to subscribe to that if you don't want to. Um, it's just my thing, and it bugs me when I see it in my own network, I don't judge other people don't work on it, of course, because I'm not that person, but I don't like it when I see it, especially when I print something big and I love printing my work big So that thing for me that I always try to keep in mind. So we are here now, and we're just gonna get into these little tight spots and slowly increase our brush size as we go. So when we get to the bottom of this, you'll see like you'll really start to see the difference between doing it by hand and then the machine way, although the automated masking tools are getting better and better and better. And I, for one AM super stoked about that. Um, if all of a sudden there's some AI tool and it gets me, like 98% of the way there really quickly, I will be the first one in line. Even though I do find masking kind of relaxing, it's a little bit meditative. It's not quite like Bob Ross, but it's a little Barbara. See where you're just like Oh, yeah, it was just, like put a pretty little like texture edge there and just like a happy little texture here and all this kind of stuff, I don't know. There's just something about it because you can't really do much else at the time, so your brain just kind of relaxes into the void. No. One thing that can happen with this is you can, uh, definitely have repeating patterns because I don't have, like, the jitter angle, jitter or anything set up with a special parts of the brush. Sometimes that matters a lot, and sometimes it doesn't matter all that much. So, uh huh. In this case here with these textures are repeating. Pattern is not a big deal, but sometimes for sure, a repeating pattern can definitely cause some havoc. And I'm not going to tackle this just yet. I'm gonna get the rest of the masking done first, and then we are going to fight that stuff because those lines are gnarly. I don't really care if I go over a little bit here like it's not. It's not a big deal. Ah, because I mean, these areas, they have a bunch of textures. So, whatever. I'm just going to give that a lot of wide space because we ain't touching it yet. No, I want to turn this up all the way. Actually, I'm gonna go ahead and click on the mask and make sure see, there's this stuff here that I missed. Now there's this handy little trick here. Gonna go burn tool. We're gonna set it to shadows. And we're just gonna use it on these edges here because we could go through that by hand or we could use a burn burn tool does a pretty good job. Looks like I missed a spot here, so I'm just gonna go back to my brush, which is to be burn tools right here. Little hand. Dodge Burns bunch tool. Um, I'm just gonna make sure Didn't miss any other edges up here. All right, now, let's go back down to the other side and deal with this. Make sure we are selected on our mask. And don't start painting on the layer because that happens all the time too soon down here and just quickly go through this. So there's this kind of cool trick. If you hold, make a point and hold shift, it makes it perfectly straight line. And that is super handy for doing edges like this. Especially like parts of the jacket where it's not really it's not that quickly. So let's make a mark shift. Click. First time I learned that it saved me a ton of time. I think I was masking out like a car or something, so went over the edge of a teeny bit. Just bring that back. So in some ways, doing like messy edges, it's easier than doing like super clean edges because, like messy edges, it's like, Oh, if you go over under a tiny little bit, it's not a big deal. But if you're going over like a car or something, that has very clearly defined smooth edges, that if it's wrong, then it's super obvious. Basically, when it comes to the texture of the rope, I'm just changing the brush to the size of roughly what the texture is that the rope that's coming off. So I'm kind of looking at those edges and just matching it up Now, if there's like a little part of the brush or a mask that got kind of screwed up a little bit, you can also just use the smudge tool on the mask itself and just push that back out. So something looks a little bit funky. He was much tool and then go to your sharpen tool and just sharpen that edge back up with that mask. It's kind of a quick little trick. We'll go back to our brush. So as much tools. Right here. Click and hold. Blur, Sharpen. Smudge. So it's just above the dodge and burn tool. If you were in, you are a standard. It'll be Photoshop layout again. Just holding shift. That's okay if you're not totally perfect. Like I said, we can just smudge. Some of those are just back in so smudge tool shows back out a little, and I'm making sure that I'm swinging the mask. I'm not smudging the subject itself, and then we're gonna go to the sharpened tool. I'm just sharpen the edges of that smudging. Okay, Go back to brush, be on your keyboard. We're almost done. We're so close. So there's, like, these little glowing parts here, so I might grab my smudge tool here. I'm gonna turn the strength down. I'm just gonna push because these auto features also sometimes give a little bit of a halo and you can shift it. Ah, in the settings itself, you can push the mask in a little bit, but I like to look at each judge individually and see what it needs. I'll go in and fix it up, so I'm intentionally making that a little bit more messy so that I notice it. Otherwise, if it's not super obvious, I will absolutely miss something. So it's like basically making revision notes for later. So one thing that's happening right now is that this with the angle of everything, I don't have that nice texture. So I'm just gonna go to my brush settings. Um, and you can also get to those go window brush settings also F five on your keyboard, and I'm just gonna go to shape dynamics, and I'm just gonna yank the angle jitter a little bit. That way, we'll see. What's happening now is how the brush, like every single turn, it's changing just a tiny bit. That is handy, all right, we're done that part now to the next spot. I made notes for myself and just butchered a mask. Quickly, go around here. This is all looking pretty good. Now remember, there's yet there's a spot there where it didn't quite pick up, and his face and some of that hat. We tried getting it with a quick, selectable thing. That kind of does is like I don't know. I guess I'm just stuck in my ways. I want to see how this looks. So this is why we check the mask So I'll click on the mask, and that will give us exactly what our lines are looking like. It's looking a little soft. There I am on the layer. I am not on the mask. That's the other thing that can happen. Keep that in mind. If you go all right, click and then you click off. It's gonna it's gonna put your selection sometimes back onto the actual image itself instead of a layer mask, and so you want it drawing on it. And then you're like, Why this this thing? Is it not going away? And then you realize that you have to delete at least that image and start over so your mask can stay the same. Because if you screw up, if you screw up your image, so let's say you paint on your rocks layer. You just click and drag this mask down, delete this rocks layer and just drag over another one. So it's not. The end of the world is just a pain You don't have to do it. It's nice if you don't have to see here. I'm drawing on the freaking layer again. Always make sure that your selection is on the mask. Double triple quadruple. Check it. Obviously, it happens to all of us. So we've all been there. We've all done it. So it's quickly getting up in that corner there again. I'm not too worried if I go over because I can just nip that back in. I'm just gonna grab my smudge tool, Make sure that shape is nice. And I'm gonna bring that mass that mask into the corner a little bit, Uh, gonna go back to my sharpen tool. I'm just sharpen up the edge of that mask again. So, looking pretty good on the hat and the body and everything else, let's turn this up to 100% and let's handle the fuzzy stuff down here at the bottom. So this is gonna take some back and forth for sure. There's a super handy brush like I was saying I was using earlier that splatter 59. Probably gonna come in handy here. I'm going to mask make sure I'm selected on the layer mask. Oh, my God. I'm smart. I'm on the sharpen tool. Nice. Well done. So put that back to the soft edge. Totally, man. What is going on? Okay, go to the brush tool. Now we're gonna go to the splatter brush. There we go. Okay, So that was the wrong direction. That makes sense. So I'm gonna make sure that I'm a little bit too far for what I need, and we're going to do this in stages. Now, the parts that are gonna keep this mask looking believable are these soft, fluffy edges down here and this guy right here. So this spot here, these points here, this little guy up here, this space here and then these spaces in between here are really going to help, like, make this look like it belongs in this scene. So let's get started. So we're gonna use that textured brush, but I'm gonna move my flow down quite a bit because these parts here they are semi transparent. So it's okay. Have some of this brushing just kind of go over and inside into the material itself. I want to make sure that I stay away from your repeating patterns, which can definitely happen with the brush settings the way that they are. But also, um, I want to have a relatively predictable pattern when I'm working on this. Um, this is where I don't necessarily want a ton of angle jitter, because if I want those stripes, those like streaky part's going into the brush. I don't really want that like hopping around too much just yet, So if we zoom out that's looking not too bad, it's gonna take a little bit more finessing. But just this is kind of like this is like the rough sketch of the mask itself. Now let's turn the flow up a little bit now. I don't want to be pulling this way on a piece of material that is obviously pulling down. So it's definitely something to keep in mind because we want to be brushing the direction of these little fluffy parts. Let's go up into here. We want to retain the shape of this guy and this guy, and I might go in here just a little bit further, and what I'll do is I will just like on like I will, uh, mask out. Essentially, I'm just gonna make a little bit of it's like a few lines up in here that will just make it look as if there's little pieces and then I will soften them after. So let's go here, these guys. So these fluffy guys here, these guys have, like, curl to them. So we are going to get that back. So I'm just inverting now, and I'm just painting back in some of those curls, just going back and forth really loosely. So that's too strong. Let's reduce our flow down to, like, 2%. And here I'm just like wanting to soften these blending points here because what it will look like museum out. It looks like there was, like, a little chunks right, like those pieces of it. So I'm just, like, ever so slightly blending these pieces in here. One thing I can do again, as if I want to sharpen some of these edges on this mask, is one of my sharpen tool. I'm just sharpen some of these pieces, so this area here there's like one spot is standing out to me is a little bit too strong. So just blending that tiny bit more blending this that's looking pretty good. Still go a little bit bigger around direction. Just bring in some of that because we're at, like, 2% flow, just allowing some of the color that's in the background to come home and to come through some of this just because some of that material is semi transparent and I want to make sure that just a little bit of it is coming through there, so Yeah, well, nice. Look at our mask here. Click Stephen were missing. Looks like I accidentally painted over here. So we're gonna go back to our burn tool, nipped that quickly. And a quick scan of the rest of the body. It's like goodness to Tony spot here. Fresh tool. Get rid of that. So you can see here. Like what? The difference is when you mask it by hand on some of these surfaces and then the auto selection. Um, it really does make a big difference. And I like the way that it looks. Sure we're good here. Open. Just a little spot here. Burn tool. Get rid of that. We can't actually invert this if we wanted to and just go to the Dodge Tool Also, I can dodge tool some of these guys, but also sometimes it's just as easy to go in and just paint wait 100% especially when it's not on an edge. If it's not an edge, then I tend to like using the Dodge Tool, just like using the burn tool there. But it's not whatever alrighty. I think we are done masking time to the next thing.
Class Materials
Bonus Materials with Purchase
Ratings and Reviews
Steve Vick
Great hands-on course. I love Renee's straight forward approach. This is the tool, this is what we are going doing with it and here's how to use it. For me it is the fastest and most practical way to learn. No fluff, no long-winded stories... just doing! In some of the other courses I viewed, I find myself skipping ahead waiting for them to get to the point. But this course has a great pace. I will certainly look for more from this teacher. Thank you.
Lukas Ujma
Greater, nice work! Semply and clever.
a Creativelive Student
I've been compositing for a few years, but masking a subject always presents its challenges. Renée gave a series of tips that were very helpful, including information about how to use the "burn" tool to enhance a mask. That's something I'd never done before. Can't wait to try it! The part of the lesson that explained how to make the subject look as though his clothes had been in the rain was also an eye-opener. The method is simple, but the results are outstanding. I had tried making my subjects look as though they had been rained on, but it never looked real. Now I know how to fix that!