Lesson Info
8. Exporting Assets
Lessons
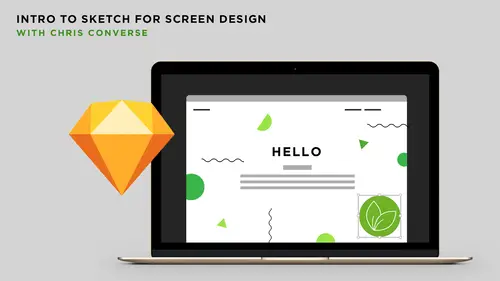
Introduction to Sketch
05:23 2Beginning the Web Page Design Project
05:10 3Designing the Header Section
24:57 4Designing the Main Section
12:16 5How to Replicate Layouts to Other Art Boards
12:24 6Creating the World Map Section
06:06 7How to Draw with Sketch
28:37 8Exporting Assets
12:31Lesson Info
Exporting Assets
Now we need to do two things. We need to export artwork that we can share with our clients to get approval so that we can build this in our other course, and we need to get the individual assets themselves, the actual final web graphics that we can use when we're building the site. So the first thing we'll do is export all of our Artboards to get some client approval. And so, and again, later versions of Sketch they added this right to the File menu. There's an option down here called Export Artboards to PDF. So every Artboard you have in your document will be put into a multi-page PDF. Each Artboard will have its own page inside of the resulting PDF file. This way you can use that PDF file in any content management system that allows you to comment, things like DropBox or Slack, you can use Acrobat's commenting features, Document Cloud if you have a Creative Cloud account, or you can just simply email the PDFs out. So really simply we can come in here and just choose Export, so let's ...
use my desktop, get herbs and spices, save the PDF file, and then if I go back out to my desktop, open up the PDF, we'll be right inside of Acrobat with a multi-page PDF, or any tool that reads PDF. We could be in Preview on the Mac, we can be in anything that will read a PDF file, and so I happen to be inside of Acrobat here. I can go to my Pages panel and I'll get a page for each one of my individual Artboards. So that's really fast and really powerful for getting our content out. So once we get client approval, we'll probably wanna come in here and start exporting individual art for our project. And so to demonstrate this I'm gonna close my Sketch document up a little bit here because I want you to see the desktop as we're creating all of our assets. Just gonna close this up here a little bit, so here's our Artboards PDF, here's our original Sketch document. So inside of Sketch what we can do is we can select any piece of art, any text, any imported graphic, and assign this to our Export panel, and what Sketch will do is take the artwork right out of its position inside the document, compress it into a web format, and save it anywhere on our hard drive that we want. And so I'll be saving these out to the desktop so we can see them. So now we can go through, once we get client approval, and say okay, we need to get this to our web designer so we can get this content out. So first let's say we want to get the countertop out. So what I'm gonna do is come down in the Artboard, let's come down and find the countertop. Now if you remember earlier, we actually created the countertop inside of our document by importing a JPEG file and applying a mask to this. So that original countertop is very tall, but we wanna conform this to the 400 pixels inside of our layout. So I'm selecting the mask layer here, or actually, I'm sorry, I'm gonna select the group of these two items, and over in the lower right hand corner I'm gonna come down and choose Make Exportable. And so by choosing this, what we're telling Sketch is everything in that group, the image and the mask together are going to be saved out as one individual web graphic. So by default it's gonna choose a PNG file. PNG file's are gonna be much larger than JPEG files because in addition to 24-bit color they have an 8-bit alpha channel, which means they can have really nice semi-transparent images. It's almost like they have their own layer mask associated to them. But they can be really large, so if your image doesn't have any transparency you wanna come down and choose the JPEG format. So that's what we're gonna do, so we're gonna choose JPEG and we also have this option here of a size. So a 1x size means that the height of that JPEG file is going to be exactly 400 pixels tall, and when we're creating graphics for high definition screens we wanna have extra pixels inside of our content, and we'll talk about that more in a moment. So let's come in here and add another export option here, and if I click on the plus sign we'll get another option, and the default here will be 2x which means the second JPEG is going to be 800 pixels tall, so that when we're on a large screen or a screen that has a high definition number of pixels, high definition, sorry, a higher pixel density on the screen we'll have enough pixels in there so it'll look nice and sharp on those devices. And for the second piece we're gonna come in here and choose the JPEG file as well. So with these two items selected I can come down here and just simply click Export countertop it'll ask me where, I'll choose the desktop, click Export, and now on the desktop I will have two JPEG files that got saved out. Hit the spacebar to preview this, here's the original size, or the standard definition size, and then if I come in here this is the high definition size, so I can see that this is much, much larger than the original piece. And so if we can switch over, oh yes, question? So when you save assets, I guess, in this case, typically how many files would be exported for just one asset? Would it depend on the media device that you're using? The number of assets you would export, it would depend on how your design is gonna change from screen to screen. So the countertop, for example, we used the countertop at the same scaling size for the medium screen, so we can use the same graphic for both screens. We are going to create different versions of the cutting board, because one, the cutting board is much smaller on the medium screen, and two, the cropping is a little bit different. The other thing we can do in CSS is we can change the images that are used with CSS. So somebody on a smaller screen doesn't download as much data as somebody on a larger screen. So in those cases we'd wanna create multiple versions of those, which we'll do in a moment. For the 2x countertop image, would the resolution be lower? Because-- Oh that's actually a great segue. If we could switch to our keynote slides. Okay. Yeah, so when we create a 2x graphic what we're really doing is we are setting up a graphic that has more pixels in the image so that when we have a screen that can display more pixels we have more pixels in the image to be replicated across there. Sorry, I realize that was a complicated answer. In print design, we typically will set up our images to be 300 pixels per inch, because if you're using a film output or the plates, forgetting all my print terms, the plates can be up to 300 PPI or pixels per inch. And so we have the same sort of thing here when we we are talking with high definition screens. A high definition screen will have more pixels available on these screens, so when we first saw this come out from Apple and then from other companies like LG, and Samsung, and Google, all of our screens, our handheld screens, are 266 pixels or higher. So the number of pixels per inch of the JPEG doesn't matter, the resolution is purely for things like printing. If the JPEG file has 800 pixels, for example, it's still gonna be represented on the same screen, but if the screen can show twice as many more pixels in the image, then we're gonna have a higher definition view of that image by feeding an 800 pixel image here where if we still fed an 800 pixel image here we would only see the number of pixels that the device has. And again, in CSS we have the ability to not only detect the screen size but the pixel density of a device. So if somebody has a low definition screen, we can send them the low definition JPEG, the standard 72 400 pixel image. Somebody that has a higher screen is gonna see the higher version of this. So this is really interesting, people who come from a print background know this already and what's interesting is designers who come up who do interactive work haven't really experienced this before, because, you know, back in the olden days in the '90s and early 2000s, we only had sort of low definition screens so we never really dealt with this on the web before, but now this is becoming something that we deal with on digital screens as well. All right, so if we can go back to the screen let's define a couple more assets so we can export this out. So we have our two different countertops, our high definition with the name of @2x, and you'll also notice that the name of the files that came out are based on the name of what we have inside of our layers document, so you can talk with your web designer or web developer on how they wanna signify or specify images that are twice the resolution of the standard definition graphics. A lot of times people will use the @2x to represent the fact that those are using twice as many pixels. So let's come in here and define a few more properties. So let's come up here and select our cutting board. So we can see down here we have our cutting board in our high definition screen here, so this is gonna be the cutting board for high def. So let's come in here, and let's assign this to be a PNG file, because again, it's got transparency in it. So we'll keep the PNG, and what I wanna do is for this cutting board we're actually using two versions of the cutting board, but we have the crop set a little different, which means we're not simply taking one cutting board and scaling it for two different sizes, but we wanna use a completely different image for the cutting board on the medium size screens as the large size screen. So what I'm gonna do is come in here to the layering panel and we're gonna call this cutting board, and I'll just put hd for the hd or desktop version of our design. Now I'll come in here and add a second version, so we get two different PNGs for that, and now I'm gonna come over here and let's select the cutting board in the tablet size, double-click in here to find it, so it's inside here, so we're gonna call this cutting board tablet, press return, because again in CSS we'll use this to sort of art direct a different image for small screens. Make exportable, we'll get a PNG, I can simply click the plus sign again and get the 2x. So again, this is really fast, Sketch knows what you wanna do when we're coming in here and assigning our export. And then finally let's come in here and let's grab the artwork that we need for these icons. So I'll select the icon ginger root, and I'm gonna change the name here, I don't wanna use any spaces, spaces are still kinda bad on the web, so we'll use an underscore instead. So we'll just call this icon_root, select this one here, we'll call this icon_herb, and with this selected I'll come down and choose Make Exportable, and since these are vector, we drew these inside of Sketch, we're gonna choose the SVG format instead of a PNG or JPEG. This way we can use these in any size in our web page and scale them, either with HTML code or CSS code and they will always look razor sharp in the browser. So let's come over here and make the ginger root exportable as well as SVG. So now with all of these in place let's come up to the file menu, let's come down and choose Export. And if we have a bunch of different icons or slices to find, and by making something exportable it becomes a slice, going up to File and choosing Export will show all of these individual pieces here, and I can turn on and off the different artwork that's going to be exported. The SVG files, we'll just have one version, but notice here we're gonna get two versions of the cutting board hd, two versions of the cutting board tablet, and two versions of the countertop. And so from here we can simply hit Export and we'll see our desktop fill up with all of these individual pieces of artwork. So I'll just override for that, and now on the desktop we have all of our art, including, if I open up an SVG file in a code editor Sketch will convert all of this to mathematics here, including putting in colors that we can come in here and change in code and modify the SVG file manually if we wanted to, or, again, our developers could go in and change a color without us having to go back and do that in Sketch.
Class Materials
Bonus Materials with Purchase
Ratings and Reviews
Hannah Pearce
I thoroughly enjoyed this Intro course to Sketch by Chris. He broke things down and explained things clearly, and it was great to see the layout come together. I picked up so many tips and tricks, which I hadn't come across before from youtube tutorials. I would definitely recommend this Intro course.
Anastasia Rozhkova
Liked it very much! I am completely new to Scetch and UX design - and it was a really good and not to long intro. Thank you very much
Linda
Chris is really clear on explaining how things work on sketch. He makes it fun and easy to follow along as we go.