Lesson Info
7. Final Mixing
Lessons
Lesson Info
Final Mixing
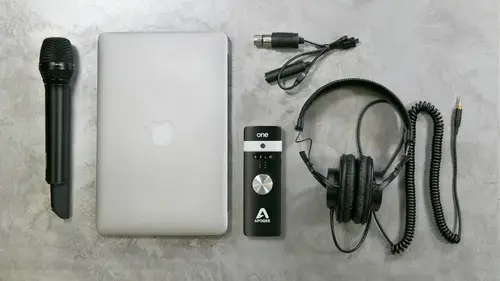
Let's jump right into mixing. This is sort of the last phase, so once you've done everything that you've already done and you're ready to sort of like bounce everything down, we're going to sort of talk about how you go about finishing up your track and getting it ready to listen to and put onto a cd or upload the soundcloud or do whatever you want to do with the actual track. So we've got all these other parts, this part, and I'm not going to spend a ton of time on you could literally spend and people do spend, you know, weeks on courses just on mixing there's a lot of different ways to mix there's a lot of different types, I just want to kind of introduce you to a couple different plug ins and then talk about how you go about bouncing something that you can actually listen to an actual way file so we'll go ahead and write through and go ahead and hi it over here with the tracks were going to hide the scratch tracks and the click track and make sure they're muted, so we're only dealin...
g really with the stuff that we've recorded about all of our tracks here, one thing we're going to pull up is what's called an auxiliary track for a reverb zen. This is really helpful if you wanna have river apply to a lot of different parts of the tracks, they kind of all sound like they're in the same room. Instead of pulling up a river, plug in on every single individual track and copying and pasting the settings, you can use a dog's input to be able to put a river about in august and then send all the different tracks to that river. So how you go about doing that is going to track? We'll say new track, we'll add a stereo, dogs input and then once that's there we're going to set the input to any one of the buses, eh? So we're going to set it. Tio I've already named some of the buses here will call one, um chamber, which is a chamber reverb we're then going to pull up a plug in right now we're going to use the r verb, which is just kind of a renaissance reverb we'll have to just kind of a hall setting and then any track that we want to send to it so let's say we want to listen to the vocals, let's see, we're gonna bring up a sin, and if you look right underneath the inserts there's sends, I'm going to send to the chamber. And it brings up this little tiny mini mixer here that allows me to send as much as I wanted that track to the river. Some of solo, both the reverb and the dogs track and the vocal track and play back part of the locals here. Well, I got this tone a black go, conan aside, turnout this feeder by rule. But I got this gets me play. I got so seeing is your best my way. But I got nothing. Keep me down long. So now I could do that to any track. I can pull up that same chamber bus on any track and send that instrument to there. So maybe the acoustic I want to send there too. You like this on a black coat and my pants are held up by rope bag so you can use those og sense to be able to put all of the instruments in the same river bs and and a lot of times that really helps make it cohesive. Sounding like it all sounds like it was recorded in the same space instead of having sort of a different reverb on every single channel, especially with bedroom recording using you're like using re verbs in time based delay and stuff is really important to give it the sense that it has more space than it actually is in so you don't end up with everything sounded like it was in a carpeted bedroom, which can, you know, really be stifling to the way that it sounds. Um okay, so I'm just gonna walk through really quick kind of how everything is set up with this mix I'm saying let's get a sense for what it sounds like and what some of the plug ins that I've used and why we use him for certain things so you can get a sense what that sounds like um, pretty much every channel I use this plugging a lot, which is the last channel it doesn't do a whole lot other than just add the sense of an actual analog mixer teach channel I don't really it's changing the settings on it, I just bring it up, and it gives each of the channel's mohr of like an actual analog mixer sound. So I've put that if you notice on every channel that we've recorded for the christie guitarist, which have panned left and right, I've brought up a compressor, and this is an actual eleven, seventy six compressor. With just slight compression, I'm not trying to get a ton of really pumping compression out of it. I just want to sort of, like, have it be a little bit of level control. What a compressor basically does is it puts a cap on how loud the certain signal can get. And then as the single gets above that it's sort of like naturally turns it down whenever the signal gets above a certain point. It's a lot more complicated now, but that's the basic idea of a compressor compressors air used all the time to sort of change the dynamic range of an instrument, especially with percussive things like snare drums and vocals. You can really sort of, like, change and sculpt the dynamic range of a sound, and they become really useful in mixing so the christie guitars here, I'm not trying to really alter the sound. I just want to put a slight cap on it so that when he gets the course and it gets really loud, it's still kind of stays within the same range. If you look at the meter here, it's not really going so much into the into the red, which means it's not compressing a whole lot yet until it gets to the chorus, which will do here. So when I guess the course is still kind of like compresses it as you start to hear that you can hear that it's definitely putting a cap on its putting sort of a ceiling on how loud that can get and that just helps everything kind of sound more cohesive and a little bit more of a consistent level. The other thing I have on both the acoustic guitars is an equalizer. This is an e q made to model after an a p I plug in, we're basically I just brought up some of the high end eso around seven kilohertz and then cut out some of the mid range just so it's not so bumi in basic kind of in that middle range, and then have it high past a little bit of sixty hertz that way, everything kind of has more than warmer, more like brilliant sound that not so much kind of earthy basis and then for vocals, I'm also using an e q and a compressor on vogue on josh's vocals. This right here is in late two way, which is kind of a famous compressor, and you can sort of see how it responds a little bit, his city. And so you can see there as you start to turn up the peak production, and it really starts to compress a lot. You hear it a lot more certain styles of music. You really make people use compressors to make things sound very gritty and sort of like yearning you could get sort of like a sound from a compressor that way, some other types of music. If you use compressors to heavily, it becomes really transparent because really apparent excuse me and the compressor kind of overpowers everything, and it becomes really hard to listen to its, like, grating on your ears. So you kind of have to get a sense for the style of how much to use compressors, especially in vocals, so there should be a particular order that you have those plug ins and right that's a great question. So yeah, when you think about signal flow in an analog world, if you're dealing with an analog mixer, you're plugging each one of those effects into the next one so they're in order. So whatever the compressed signal, the signal going into the compressor and then into the queue is actually compressing it before changing the if it were vice versa and the key was going into the compressor, you'd be making changes to the q and then compressing it so it actually lessen the amount of the queue that you're doing. Because it's sort of evening out the changes that you're making in the, um, there's different theories on which way to go. Some people prefer to put their ekeus before there compressors. Some people prefer to put the issues after the compressors. That kind of depends on what kind of sound you're going for. But that's a great question, the order that you have these in here absolutely matters that changes the sound of each of them. And then I just kind of have a general plate reverb up on his vocals here. That's what? That sounds like it, eh? Okay, on the drums, we've got the easy drummer most virtual instruments. You should be really careful about using e q and compression on because most of them have already had that applied when they recorded the samples. You can definitely tweak it slightly, but they're probably gonna sound pretty good by themselves. They don't need a lot of compression, so all I basically did is put up a bus compressor on the drums so that you get kind of overall sound of just kind of squeezing it and then on the base like because I'm running virtual instrument through an amp modeler there's really a lot of processing and compression going on, I could do some slight e q if I wanted to kind of notch out some of the mid range for the most part, I don't need to make a so like I said, I could spend the whole of the time talking about e q compressors and getting into a lot more detail on how they work. But as far as mixing the best thing is really just to dive in and start twisting knobs and thinking about what it sounds like, andi, figure out kind of where to go and what, what you how, how best you could manipulate the sounds to work well together. One general piece of advice I usually give with mixing is really to start with extremes and then work your way back start with twisting things all the way so you can really start to train your ear on what you're hearing and then dial it back to something that makes a little less extreme of a change and then really start to listen to the instruments as they work together. Because you're not, you're not making each instant instrument itself sound good, you're making them all sound good together, which is kind of the hard thing about mixing. One last thing really about sort of the last process of before you're through in like you're ready to export your whole song and like, listen to it in your car probably the biggest thing question that people ask when they first start recording is I've got this song I recorded in the computer it sounds awesome it was so good I bounced into a stereo file and it took it in my car and it was so quiet I couldn't hear anything. It was way quieter than anything I've heard on any other cd. Why is my recording so quiet? What am I doing wrong? Every engineer I've ever talked to that started off working in their home like that's that was the biggest problem that they had and the thing you have to realize that there's not really a simple answer to that most records that you hear in your car or on the radio have gone to a mastering engineer where they've leveled out the sound to be at the same level as what you would expect from any commercial according, you're probably not going to be able to send off every bounce you due to a mastering engineer to get it to commercial level, but there are things you can do now just to be able to get it within the range where you can actually listen to in your car without having to crank the volume all the way on get it somewhere near that range and using the way to do that is with sort of a stereo limiter across the master bus compressor, which is really simple to do and pretty easy to use. So like I said before there's something called a master fader so when I want to add the master fader I'm goingto ad track and make a stereo master fader I'm gonna add that it's going to pop up here and if you see everything is going to go through that fator and then I'm going to bring up a plug in just on the master fator that's a limiter this is a really popular one that waves makes just called it el too andi, all I have to do is drag the threshold down until it gets to a volume that is loud enough where it's going to be close to commercial if you notice the more that I pull it down the mohr compression I'm getting over here, I really wouldn't recommend staying above anything but three decibels of attenuation anything about that you start to really over compress what you're doing and the recording starts to sound pretty pretty over process you see, as long as you're keeping it around three d b you should be good and you're gonna get a level that's pretty consistent with what you're going to hear in any other commercial recording ok, so you've got kind of the level set. If you look at the meters here, it's going to show you the the average meter and then it's going to show you the peak meter of where you're actually hitting the master fader, we definitely want to make sure it's not distorted in the red, but if you look at this meter right here, you can sort of see how the peaks were getting really, really close to the top, but never going in the red that's what the job of the mastering limiter does. It sort of puts a ceiling on the very top of the threshold and allows you to get really close to it without distorting a cz long is you kind of stay within a certain acceptable range of that so everything's kind of set I've got kind of a decent sounding mix. The last thing that I want to do is to be able to put in, actually bounced. The whole song is one whole thing that I could go back and listen to. So if I were just to go to hit filing export, it would export everything from the very beginning of the session all the way to the very last thing that was recorded. Which might be a whole lot of dead space in the beginning and a whole lot of dead space at the end, which I don't want to do, so I want to set the parameters on when to start the song when the end the song that I'm bouncing um it's really easy to do that all going to do is basically go appear to the timeline and start where I want the songs start, which is right here and I'm gonna drag all the way to the very end of the song where it should end right at the end here and then if you notice up in the transport it's telling me what the length of that song is so I could go look in minutes and seconds it's, about two minutes and sixty seven seconds, which is awesome I'm sorry two minutes and fifty three seconds that's the length of the section it starts at two minutes or two seconds and ends at two fifty six so that's about two and a half of almost three minutes long once that selected him to go to file and just go to bounce to disk and it's gonna bring up a whole bunch of options on these air actually pretty important and you want to make sure that you do this right? Otherwise you could end up with files that you won't know what to do with first thing is, I want to make sure that the bounce source is the actual master output that I'm listening to which for the most part, it's, probably in a default to that. But you might just want to make sure that it's your master main stereo output, the file type if you want an mp three or wave file, the cool thing about pro tools eleven is you can add an mp three, so it'll give you both a wave and an mp three in the same bounce, which is really handy the format this is really important right now, it's set to multiple mano, which, unless you're sending it to a master engineer, you don't want to have it built. Amano will tomorrow is going to give you two files, a left channel and a right channel file, and you would have to then combine them in a mastering program into something you could actually burn onto a cd or send to someone. So you want to make sure it said to enter leaved, which is one stereo inter. Leave file on that if you're sending it to two, burning it onto cd or if you are going to put it in itunes, you probably want to make sure it's set to sixteen bit and forty four. Point one, which is kind of the standard for cd audio you could do things like added to your itunes library, you can share it with gobbler soundcloud right within the bounds session there's all different kinds of stuff you can do here last thing that I want to do is name and make sure that I put this file in a location that I confined, so I'm gonna call the song what's the song called josh that sun shines on the city and I'm going to choose the directory um so right now it's not going to put it in any specific place, so I'm going to the desktop and make sure that I have a space that I can actually put all the bounces for this song, so I'll say sunshine's mixes and often I'll do, you know, ten, fifteen different mixes of a song they listen to throughout the course of working on it, so I want to try to keep those all in one spot so I could always go back, so I'm gonna call this sun shines on the city the one and then I'll have to do is hit bounce. The cool thing is, is that up until pro tools eleven you had to bounce in real time so you'd listen to the entire song all the way through is it bounced and then you have a file with pro tools eleven you could bounce off line, which means I can just click bounce and it'll bounce it not in real time, which is a whole lot faster I always like bouncing sessions in real time so that I can listen to it over and over again and I can stop it if I want to fix something it's sort of like the last line of defense to make sure it's everything I want but if I'm just doing a quick bounce to send to someone that's really handy so once that's done I can actually go to the desktop find my mixes and here's the way fall I just created and I could listen to it oh, I got a way you don't know yeah that's basically the whole process I mean, once you have the final version you can go back and make changes obviously and then added, you know create more instruments, send it to people for feedback that's kind of the whole process you just keep continuing and getting better at it. So so if you wanted to send it to a mastering or mix would you send it for people that want to do that and not actually makes it themselves? Would you send it just like that? Or would you leave all the plug ins offer what sort of and that's a really good question so typically what I do I get a lot of sessions to mix people just send me sessions it's really helpful if they save the session separately for mix so they'll save like the bounced version um and then they'll say save as josh session dot mix and they'll go through and remove all the plug ins because a lot of times two I might not have the same plug ins as they do but you said that they also send like the reference file yeah get what they have kind of what they wanted it to sound like right exactly. So typically they'll send rough mixes and then they'll send a session that looks just like this where it's all edited so it's all the same takes that they want but the mix is all set to zero and they say that his mix okay so so you wanted master yourself what program would used to do that and so mastering is a really tricky thing to get into especially since it's sort of like the last line of defense if you do have to master it yourself there's a number different problem programs once called wave lab that's really popular that's that's used that's probably the most professional program I think logic has a mastering function built into it if I would probably recommend to just use pro tools used the master bus function and or even just create a new session you could do everything inside pro tools and just be really careful about, like, how much compression you're adding and and comparing it to other reference disks. If you're doing it yourself, are these plug ins, like downloadable, or did they come with pro tools? That's a great question. So pro pro tools does come with quite a few plug ins, especially the new pro tools. Eleven comes with their channel strip plug in, which is actually really great sounding, but a lot of the plug ins that I showed her third party plug ins that you purchased separately from manufacturers. Awesome. Cool, so good. Yeah, I think that's like the whole thing. I mean, we basically created a whole song in today.
Ratings and Reviews
kyle
Clear, concise, interesting! Zach presents a lot of information in the context of an actual song being constructed from start to finish. The entire process was easy to follow, and Zach provides key insights for each step. For example, when starting a project, I've never known what to do first - lay down a drum track, record guitar, record vocal ... ? After watching this course, I have a much better idea about how to decide which thing to do first, and the concept of scratch tracks adds a lot of flexibility to the process. The addition of doubled tracks and other instrument layers ("overdubs") made a huge impact on the overall sound and these seem like very achievable steps for a home studio. I've done some home recording and mixing with garage band and an old version of logic. This course is a great update on that. While Zach demonstrates protools, I think it's pretty easy to map most of what he did to other apps like garageband (which admittedly has more restricted functionality). I'm looking forward to starting my next recording project using what I've learned here!
Mark73
This was a great course! I've found some valuable information over the years here and there, but this is the first time I've actually found a substantial amount of stuff I can actually use in the same place. It's the best course I could've imagined taking on the subject and I even learned a thing or two about other products and plugins that I may use in the future. Right now I'm using the simplest version of Pro Tools available (SE), but even so, I learned a few new functions on it that I had no idea how to perform before taking this class, as well as some valuable recording techniques and concepts that will help me for years to come. Best class I've ever taken and I look forward to taking several others! Many thanks!
Don Trapani
This was a great course for beginners, it was a true introduction. Of course the instructor used high-end software and equipment; he is a professional music producer, and is comfortable with the tools he uses on an everyday basis. I did not hear him say you had to get the products he was using, he just identified the tools so anyone watching can do their own research. After watching this class, I checked out several sources for more info, and found that you can get a basic interface that comes with the DAW software, for as little as $100. If you have an interest at all in home recording but don't know where to start, this is the course for you. 5 stars.
Student Work
Related Classes
Sound Mixing