Lessons
Lesson Info
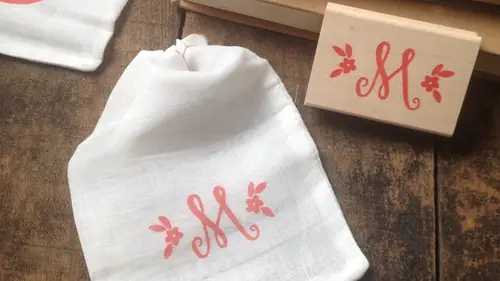
Preparing to Mount a Handmade Stamp
Okay, so now there's a little bit of graphite left on them on the stand there and I think we talked about this earlier j k o you had asked if I messed up when I transferred the template and I said something about pigment inc this is actually where I would use that trick to kind of remove that excess graphite off of the rubber it's not gonna wash off, so don't you know think that if you go take it to the sink and rinse it with water, that graph it's going to come off because it's just not really going to do the trick and, you know, you don't need to wash your stamp of this point. You don't need to use soap or anything like that either. It's just not gonna work, so I'm going to get out and ink pad a pigment in pad, which, like I, um, I told you guys about is that sticky, slow drying type of ink it's almost kind of like paint? What I'm going to do is kind of brush this onto the stamp a little bit. I get a little bit of ink on there and I'm going to take my old towel and I'm going to rub t...
he ink onto the surface of the stamp and it's just taking that graphite right off course is going to stay in your stamp the ink is gonna stand your stamp but the graphite is gone and it's not going to come off onto whatever I stand because if you did leave it the graphite you would be able to see a little bit of the shadow of the graphite coming off onto whatever you were printing so there we go pretty clean at this point if you wanted to wash it, you could if you're changing colors or something like that reds one of those colors that will definitely you know it will get in get all over the place um let's go ahead and moved to our project here. Um this is where I can kind of show you my little cooking demo here. Now I've mounted my stamp. This is where I used the mounting we found um maybe I can tell you guys a little bit about getting image on the wood block tio in case you want to do that that's called indexing your rubber stamp. So you know, if you start making a lot of these and you have um you know, you want him have them stored and know what stamps air there instead of having to look at them upside down and figure out what what you have you can index them on a woodblock so what you want tio system I bring he almost fits, I'll make him work okay, what you want do is you get you get your wood block and I like the pigment inc for indexing you can buy indexing ink from like a rubber stamp manufacturer online, but it comes in very limited colors so I kind of like the pigment because comes in so many colors and it's just fund a toe index in a in a bright, bold color so again, my stamp is a little bit bigger or wider than my ink pad so I've laid my stamp face up and I'm dabbing the ink along the stamps I can see exactly where the ink went can I wipe off my little fingers? Think everywhere I should have brought a slightly bigger block from home but that's ok, I'm going to make it work and this is kind of your you got one shot to do this take a deep breath, look at your rubber stamp and try and visualize you know, does it need to be? Do I want my eight and angle for this when it doesn't really matter? It's a circle that's awesome! If it was a square, those ones get me sometimes I have to go through a few would pox before it works but that's okay, I'm just gonna hold it the way pretty sure I wanted to go flip it over the best I can without rotating in and pressed it onto the wood. The other thing with negative space stamps is because there's so much surface area on the on the stamp oh he's a little bit I'm going to start over on this side I see that you get two shots see conditions and I had a bigger block this wouldn't be such an issue but I'm pretty much trying to match it exact to the woodblock anyway what I was saying because with the negative space you have so much rubber um left on the stand you almost need like a little bit more ink really really released a saturated with think um here we go that's pretty good um because it's just a lot of a lot of space that you're trying to cover their ok the pigment ink dries really slow and to get that to be permanent what I like to use is just like a spray fix or like a spray polyurethane some sort of sealer that feels would um this's just something I got at the art store and I just do a little a little spray and it's it drives almost instantly so mounting that what I would do is I would clean this off before I mounted it um but again back to my cooking channel we're zooming forward here it is so it's mounted and it's dry um the print is on there and we're ready to start our little project
Class Materials
bonus material with purchase
Ratings and Reviews
a Creativelive Student
Meagan gives you some basics on how to make a negative and a positive stamp. She makes it look so easy. I can't wait to try it. I watched the free version. Thanks. I didn't hear or see what to use to connect the stamp to the wood. Did anyone hear this?