Portrait in a Pinch Challenge
Lesson 9 from: Incorporating Actions into your Portraits WorkflowKristina Sherk
Portrait in a Pinch Challenge
Lesson 9 from: Incorporating Actions into your Portraits WorkflowKristina Sherk
Lesson Info
9. Portrait in a Pinch Challenge
Lessons
Lesson Info
Portrait in a Pinch Challenge
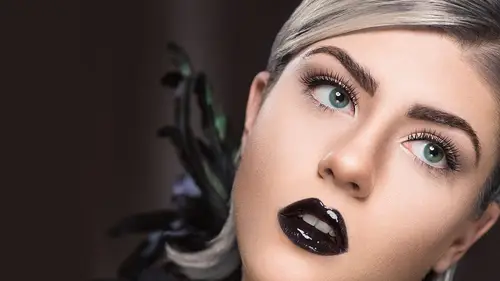
Alright, and go! Alright. Alrighty, I'm gonna use this tool. Okay, make sure to sample all layers. Okay, get rid of those blemishes. Alrighty, get rid of that. You guys tell me when there's 10 seconds left. Gotcha. Okay. You want 10 seconds? Yeah. Getting rid of those eye whites. Blue-green iris brush for adding in that blue-green iris there. Brown hazel she doesn't have. Blush, three percent, or 30 percent blush. Highlights brush 20 percent. Contour. Okay, teeth I don't have to do. 20 seconds. And lips, how much? 20. Oh, I'm good. Done! (cheers) Wow, stopped the clock! Oh, I think that's a record! That's a record! Alrighty, so what was I able to do? Alright. Wow. So, pretty good, huh? For, what is this? (timer dings) (people laugh) That was nice, nice touch. Alright, so there you go. So that's how you can kind of, I went way crazy on the contouring, but that's fine. But what you can do is really start to work powerfully in the little time that you have,...
and start really just nailing these things down, and start being super productive with these actions. Question? And so I saw you went bottom to top. Is that the best direction to go? Yeah, because everything's gonna compound on itself, right? So a lot of times when you have a brush, you're gonna be sampling current and below on that layer, so that's why you want to start on the bottom and work your way up, so that was a good question. Alright, so now, what if I want to add this whole portrait in a pinch action to five or 10 different images from a photoshoot that I had that I need to retouch? Say my client has come back to me and they say, I want these 10 final files for deliverables. I've got my Casi B folder here, so this works with .psd files, so these are all flat .psd files. So file, automate, and I'm gonna choose batch. I'm gonna have this batch window show up. It's gonna ask me what action do you want to play, so I'm gonna choose my group, my action group. I'm gonna choose my action which has no stop. Remember how that final slide showed up? What I did was I duplicated that action, and I deleted that last step from the action, because I don't want to have to press OK every time this is applied to an action in order to move on to the next file. So I have this version of it which does not have the last step, no stop. Choosing which folders, let's go ahead and choose Actions, Casi B, and then as the final, I'm going to choose Save and Close for my final. So what I did originally was I exported flat .psd's to Photoshop, or to Finder, I just exported those, and that's what I'm gonna be doing this work on. And then I'm gonna go ahead and press OK. And so now what it's doing, it's opening each one of those files, it's adding all of those layers on my portrait in a pinch action to each one of those files. Then it's saving that file and closing it out, and it's doing that seven times. So you could do this, you can automate this, and then you can go walk your dog. Go get a cup of coffee, go get some fresh air, because you've been working in the dungeon all day on retouching, and you can come back and this is done. So now, if we go to our folder of Casi B, we select all these images, we sit down, we're ready to retouch, come in here and open these up. All of these images now have all of the layers created, so now if you get really good, these images should only take you 90 seconds per image. And then you're really saving time. So thank you guys, thank you for everything. Shift f, free stuff. Go to sharkpixel.com/store, and you can download this action for free. Alright, I think that's it. Here is the action, you have to scroll down to the action. Shark pixel, portrait in a pinch, right here. Zero dollars! Yeah! For CS5, and CS6, and CC. Alright, thanks!