Lessons
Lesson Info
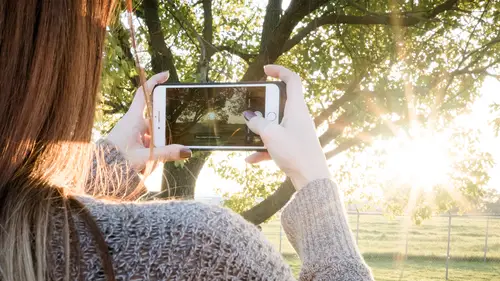
Portrait Mode
now portrait mode doesn't necessarily mean you have to be taking pictures of people. You can also use opportunities like this where we're doing a still life. So we're gonna start with that. So first we're going to go into portrait mode instead of square mode and inside of portrait mode, I'm going to I'm gonna reframe cause it's a horizontal or vertical mode. It's not necessarily square, but you'll notice that it uses both cameras in order to create a really cool effect, which is like using a really wide aperture on a lens that kind of blurs out the background. So if you want to completely blow out the background so it's completely out of focus. So we really are just looking at the thing that you want us to see. That's when you're going to go into portrait mode. So inside a portrait mode, I'm going to do the same thing. I just simply click on the thing I want in focus, and then I'm gonna re expose, make sure everything's exposed correctly, but you'll notice now that the background it's ...
super out of focus and it looks awesome because now things aren't competing with the background um, now, Aubrey, can you come back in and like that thing again? So she's just gonna fill that back in? You can get in the even closer. There you go right there, and I'm gonna take a couple shots here. Now, you'll notice something about portrait mode when you click on it instead of taking ah, whole bunch of photographs like you can in all of your other photo modes where you can hold the shutter down and it takes a rapid number of photographs. You can't do that in portrait mode because it takes a while. It actually spins. It does like a little spinning thing on the actual trigger. What that means is, it's it's doing some computation before you can do the next photograph, because what portrait mode is doing is it's actually using both of those lenses. At the same time, it's taking two photographs, one from a wide angle lens and one from a telephoto lens. The reason it's doing that is because it needs to be able to see around the subject so it can figure out what's in the background and what's in the foreground. And then the camera app is actually going through and cutting out the thing in the foreground and placing it onto a backdrop that it is artificially blurring. So it's a lot of stuff happening at one time. That's why it has that little spinning dial, and you have to kind of slow things down. But that's okay, because you're probably taking pictures of either some kind of a still life or you're taking a portrait. You're not gonna be using this for, like taking pictures of action or your kid's sports events or anything like that. Now, when we look at the photograph itself on the phone, you can see how beautifully blurred the background is and how great and crisp the photograph is in the foreground. You can see what's happening back there, so see, the grapes are nice and sharp. But then, as we get to the back of this board starts to fall out of focus and then the bricks in the background are completely out of focus, and you can't even see a brick that's called portrait mode, and we'll do it with a person now. So if I'm photographing Aubrey, you can see in photo mode and I'm zoomed in at two times, which means I'm using the telephoto lens. And as I'm looking at Aubrey, I can see all the light switches over there on the right, a left hand side of the screen. The bricks are really sharp. When you have a small camera with the lens very close, the actual sensor, everything's sharp. And so that's why we have portrait motives so that we can pretend that we have a bigger camera and get better results out of it. So what we're gonna do is I'm gonna change over the portrait mode. So look at this mode here and you can see how everything is very sharp, even when we're in a telephoto. And then when I goto portrait mode, watch the difference. See that? Now everything blurs out in the background, which means that I can do a far better job at isolating Aubrey rather than having everything sharpened everything and focus. Now she's the thing is in focus and the background falls out of focus. So now I'm not so worried about the window coming into the frame. I'm not so worried about those light switches because they're out of focus, So I'm gonna start here in portrait mode again. I'm gonna lock the focus and the exposure on her face. Then I'm going to re calibrate the exposure until I like the way it's gonna look. All right, Aubrey. Ready? Here we go. Smile. There you go. Nice. Very nice. Good. Now, if I wanted reframe just a little bit there, I like that. That's perfect. We're gonna try that again. We're going to refocus on her face and perfect. Here we go. So now when we look at the photographs, you can see that we have this beautiful soft focus all around her, and you can see that it's kept her in focus. But around her is out of focus, and it's just trying to choose the background versus the foreground of her face. So now let's compare those two. But remember back when we talked about settings, we talked about using the setting that allows it to keep the original photo when doing hdr and also when doing portrait mode. So I have the original portrait here, and then I can swipe to the right and you'll see there's the portrait mode version. So there's the original, and there's the portrait. You can see how much it's done to help push our focus or our interest to her, rather than to the background and all of the bricks and the windows and things like that. So it's a very useful mode, both for still lifes and for people.
Ratings and Reviews
a Creativelive Student
This is a fast and very effective course. The teacher is excellent with his great teaching skills. Really recommended!
Kris
This course was quick and full of very specific ways to use the iPhone 7 Plus and its abilities. I only own an iPhone 6 and still found this class useful. Even though I've taken thousands of images with my phone I STILL learned a couple things I didn't know. If you have questions about your iPhone camera I would absolutely recommend this course. Well worth the money.
Vincent SMINK
Great class, with all the basics you need to take good photo's. Some interesting extra's that I wasn't aware off! Just start here and then move on!
Student Work
Related Classes
Mobile Photography