Lessons
Lesson Info
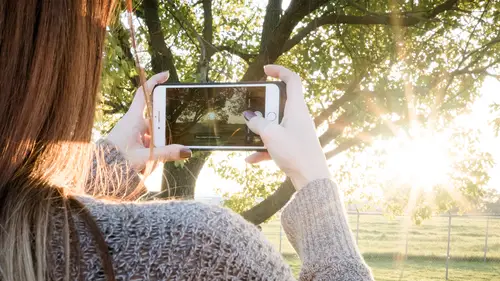
HDR
now, often times you'll be in a position where you'll find beautiful light, but maybe the lightest too drastic, and you want to get a photograph that includes all of this light. And so we're going to use what's called H D R mode, which is high dynamic range. That means it's going to actually take multiple exposures. And it's gonna expose one for the windows cause they're the bright light source, and then it's gonna expose other exposures for the darker areas in the photograph, and then it will merge them together, magically in tow. One photograph. Now remember, we put in our settings inside of the IPhone to keep both so that we can see the original exposure and the HDR exposure. That way we can choose between them If we for some reason like the original better. Okay, so in order to do that, we just simply go back into photo mode. And remember I when we were talking about composition, I want to include all of these windows because they create those cool vertical and horizontal lines. So...
I'm gonna start by framing up my shot, and then I'm gonna ask Aubrey to move this way a little bit. There you go. Good. So now she is in a nice spot and it actually puts her right in the dead center of the photograph, which, remember the rule of thirds says we're not supposed to do that, But I'm gonna break a rule right now. What I want to do is I want to expose on Aubrey here. So I've locked in the exposure. But now I'm gonna go over to the left hand side where it says HDR and I'm in. Turn it on. Once I have hdr on, it's going to know to take multiple exposures of this scene, and it's gonna merge them together. So here we go. Are you ready, Aubrey? And ready 321 where we go and you gotta hold it steady because it's going to take multiple photos of the right one after the other. So I'm taking quite a few because who knows which one is going to be the most? Steady. Okay, so now I have taken multiple photographs. Any time you're doing hdr, make sure that you take a number of them, especially if you don't have like, a tripod or if you're not really holding that thing study. You want to make sure that you take a many as possible so that you can then choose the best version of that HDR. So now we're gonna go to the HDR, and we're gonna look at these and see the difference between the one with HDR, which you can see how the windows air actually exposed correctly and you can see the detail in the windows. But you can also see Aubrey or if we go to the other one, you can see Aubrey and she's nice and bright. But look, I've got no detail in those windows. And so then later on in post production, when we're working on him on our phone weaken, brighten up Aubrey a little bit. But we'll still have detail in the phone. Now, If you want to change the exposure for an HDR, you simply change where you're getting the exposure from. For instance, if I go back to my camera and I take this photo again, But instead of locking my exposure on Aubrey, I locked my exposure over here, say, on the wall, which brightens her up just a little bit, where I could lock the exposure on her and then change the exposure up or down. Here I'm giving my preference is to the camera and telling it I want it to be a little bit brighter. And then when we take the HDR photograph, it's going to know that my intention is to be a little bit brighter. So let's take another couple HD ours here. So now you can see that Aubrey is just a little bit brighter because in the original photograph, when we're looking at sea, Aubrey's nice and bright, but the window is now even more bright. But when we go to the HDR version, you can see the Aubrey is a little bit brighter and the windows are a little bit brighter, but it's still trying to hold them in. So play around with the place that you choose as your exposure point and also play around with giving your instructions to the camera by swiping up or down to brighten it up or darken it down and then use the HDR and you'll see that there's a difference in the way your HDR finally comes out. If you give your preferences or what we call compensation to the exposure on the actual camera,
Ratings and Reviews
a Creativelive Student
This is a fast and very effective course. The teacher is excellent with his great teaching skills. Really recommended!
Vincent SMINK
Great class, with all the basics you need to take good photo's. Some interesting extra's that I wasn't aware off! Just start here and then move on!
Kris
This course was quick and full of very specific ways to use the iPhone 7 Plus and its abilities. I only own an iPhone 6 and still found this class useful. Even though I've taken thousands of images with my phone I STILL learned a couple things I didn't know. If you have questions about your iPhone camera I would absolutely recommend this course. Well worth the money.
Student Work
Related Classes
Mobile Photography