Lessons
Class Introduction to How to Retouch Portraits Using Lightroom CC
01:46 2Getting Started: Setting Up Lightroom
09:31 3Retouching Blemishes
11:49 4Creating & Saving Adjustment Brush
09:56 5Eyes Selection
19:13 6Retouching Skin
12:15 7Teeth Whitening
03:09 8Comparing Texture & Clarity
03:32Lesson Info
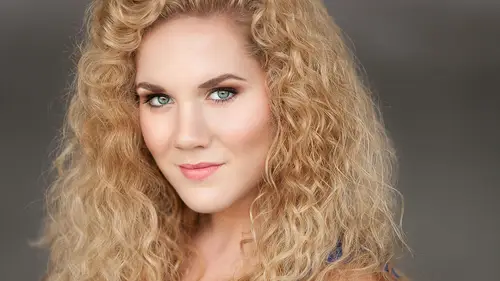
Retouching Skin
I got an image here. Especially with men, if you are gonna be smoothing skin, you want to make sure that you are protecting the texture of the skin when you smooth it. Okay? So, what I'm going to do is I'm going to do some skin smoothing first. So I'm gonna get my fly out menu again, trusty fly out menu. And we're gonna use skin skin low light. What I've done is I've divided my skin smoothing into a high and a low brush. Ones gonna apply more skin smoothing than another and then I've also done a difference between dark skin and light skin because it definitely makes a difference of the skin color that your working on. The same brush isn't going to work on both light skin and dark skin. So, skin low light and then I'm going to paint in this effect. This would be a situation where I would activate my O, my mask overlay so that I can just look at the area that I'm painting in the skin and so of course, here's my old school method of doing this, of doing skin smoothing. And then I'm gonna ...
show you the new school method which is going to activate our new handy dandy range option that we have down here. So, for my old school, I'd would come in here and I watch very closely the areas in which I'm adding the skin smoothing to. If you're like, I can't really see what the skin smoothing is doing because it's just turning everything red. You just hit your O key and that's going to turn it off and now you can see the skin smoothing that's going on. And you can see though, that when I'm doing this, I'm avoiding areas of contrast and creases. So, I'm avoiding crease areas because as soon as those areas look smooth, it's really going to be a telltale sign of over retouching and over smoothing. Alright, so that looks good. But again, we have we have lost the skin texture. So yes, it's smooth but, we have definitely lost the texture underneath. Can you guys see that it looks a little bit softer? Right. Exactly. It's starting to look plastic and that's what we don't want to happen. So, what can we do? We can come up here and we can come to our axis pin and because we've already created this nice intricate mask what we can do is right click on this axis pin and choose duplicate. And what that's going to do is it's going to duplicate the mask and it's going to duplicate the brush and everything that the brush is doing. Well, that's not exactly what we want to do. We did want copy the area in which it brushed on but we don't necessarily want to double the skin smoothing effect. What I did was I just clicked and dragged this axis point right next to it, but we're going to zero out what this axis pin is doing. And we're gonna do that by, again, just double clicking that word and that's gonna take the second skin smoothing effect off of it. So while we do have the mask, it's not doing anything. You can see over here that there's been nothing changed on this brush. But what we were able to do is copy and paste that mask, well I say mask but it's not technically a mask right, we're not dealing with mask. I was able to copy and paint the area in which I want to be working with moving forward. For this, what I'm going to do is I'm going to, we're gonna add a little bit of texture and a little bit of sharpness, a little bit less texture, a little bit of sharpness. And we have a noise reduction slider here which if you pull it up, it's going to reduce noise but if we pull it down, it's going to create texture. So, it's quite similar to my new texture, I told you I'm doing the old school methods so this is pre-texture slider. But that's what I would do, I would pull that noise reduction slider all the way down to - and so now all of the sudden we see that skin texture back but we're also smoothing the color but we're not losing the skin texture. You guys see the difference? It's very slight but we've gotten rid if that shine. We've smoothed out the color of the skin but we're not losing the texture. Alright, so that's my quote, unquote frequency separation type of skin smoothing in light room. If for any reason you feel like, well maybe this isn't strong enough now that I've added the texture back in, we can go and access the smoothing one and just decrease that clarity a little bit more. You know. Pull it all the way down, or all the way up, and that's modifying the color , the underlying color but because we've divided the color that we're dealing with and the texture that we're dealing with into two different pinpoints, we're able to modify them differently. Does that make sense? Cool. Who knew that frequency separation was possible in light room? (laughing) Oh, man. Sometimes, I'm just totally geeking out about the craziest stuff. Alright, so that is a little bit about frequency separation. I wanna talk about so let's just look at this. Before and after. Yeah, that looks good. Not overdone, right? Okay. I know it's slight but we're all the way zoomed out, that's why it kinda hard to see. Do I have any wedding photographers in here? Have anybody that shoots events? Events where there's alcohol involved sometimes? So, in these situations what ends up happening is some of the camera sensors nowadays are getting so sensitive that their starting to pick up infrared in peoples skin. Especially when they drink alcohol. He did not look like this when I shot the camera. But as soon as that flash hit him, he really became red. And so we need to think a little bit about color theory. What I want to do is talk about what is a color that is going to neutralize this redness of the skin. What I did was I created a brush which is called My Redness Removal High Brush. And let me show you what the changes are of this brush. I decreased slightly the native color of the underlying image and I added a mint green color. Because if you think about the way color theory works, every color has a complimentary color and if you take the color and you take it's opposite color and you put them on top of one another they're going to neutralize each other. Would it work? So, would this actually work? Would painting green on a face actually neutralize the red color? So, I was like, I'm just going to try it. I'm gonna see. I don't know if it's gonna work but we'll just see. So, I'm gonna bring my flow down again because I like to have to build in the effect on certain areas and I'm just going to paint in this redness removal. On certain areas of the skin where I see the most red. What this brush is technically doing because I'm adding a color overlay to this brush is it's basically adding that color using a specific blend mode and I'm not exactly sure what blend mode that is, otherwise I would tell you but I don't want to tell you something wrong. And it's adding that color on top to interact with the color underneath it as I'm working. Alright. You see any other areas that look overly red to you guys? Maybe the cheeks, just a little bit more. Alright, let's see. Before and after. So that's why this, this is another reason why the local adjustment brush is so powerful if you really learn how to use it. Is because you can add any specific color to it and if you know a little bit about color theory, what you can do is you can actually fix a lot of problems or amplify a lot of different things just by adding a specific overlay to that area. So, you can see skin looks a lot better now than before. Oh look, he looks normal. Before and after. I think he'd be happy with that, right? Okay, so that's a little bit of color theory. I didn't open it up for today. I wonder if I could get there. Adobe color wheel. This is where I was kind of like if you're ever wondering like, well what is my complimentary color exactly for something that I'm trying to do. What the complimentary color of yellow teeth? For example. You just click over here on your complimentary color and then you take your primary color swatch and put it over where the yellow teeth would kind of be and then your complimentary color is going to be this guy right her so this is like a periwinkle type color. So if you were trying to neutralize yellow teeth with a color, this would be the color that you would go for. Does that make sense? Cool. That is the perfect well there's one other thing that I want to talk about and then we're going to get into teeth. If you have a minute to go to color.adoble.com/ and then choose complimentary from that color wheel it's a lot of fun you can play around with it.
Ratings and Reviews
Laura
Great class, good, clear, easy-to-follow instructions. This is going to have a big impact on my workflow and save me a LOT of time - thank you!
JennMercille
As fast as Lightroom is growing and improving, it's a hard to keep up with everything it is capable of. Kristina did a great job of showing how to speed up workflow by retouching in ways that I though you could only do well in Photoshop. This class is super informative and well worth it!
Robin Spencer
Excellent! This program was short and sweet but packed with lots of very useful tips and tricks. I have been using Lightroom for years and still learned so much. All of her time saving tips especially "Sync" were really appreciated. Highly recommend.