Lessons
Lesson Info
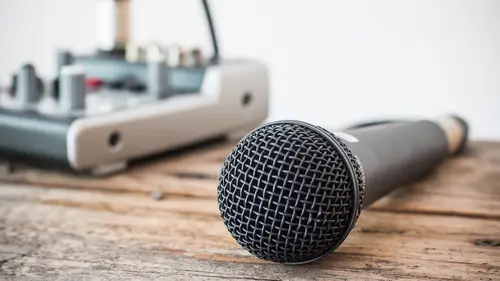
Audio Settings for Podcasts
Some audio settings. Our gear is physically set up but we need the thing that's doing the recording to be ready to receive our voice. So in that case, our recorder is gonna do the recording and our software is gonna do some recording. So let's go to, let's start off with again our most basic setup, our USB microphone here which is already plugged in and a couple things you want to do here. So on a Mac, we go into the system preferences, and you pull up your input, so I'll go back out here. We go to sound and just look for the input, and there's my Samson Q2U. That's this microphone. It's selected, good our computer is hearing that. Now, if you're on Windows, just go the control panel for your sound settings. I think it's control panel, sound, so on Windows just do that. And there's another, it's more hidden, so if I go to the spotlight, the search, and I just type in audio. First thing you're gonna get is audio midi setup. This is also in your utilities folder. I imagine in Windows it'...
s also in that sound control panel. I'm gonna go into that and now you see, I can actually control the settings. This USB microphone, everything it needs is built inside here. There's no external controls, so we need to control it thought this. So we're gonna select our microphone. There it is, Samson Q2U, and you can set the output to be the microphone if you want because it has that monitor if you're gonna playback audio, but we're monitoring here, so you don't have to worry too much about that. What I would say is don't let your computer output through the speakers and play something, and have that go into your microphone, so the input is what we're actually looking for. So we've got our input and we're selected to the Samson Q2U, and you'll see format here, and it's 44.1, so that's basically a web standard for audio. That is what your final mp3, the mp3 is the file that your listener is going to get. This is where we're gonna end up. So we're just gonna set it to 44.1. They call this CD quality. I'm looking at you guys. You all have blank stares because you're like, what a CD? It's a shiny disk. (audience laughing) Embrace it because it means you're super young, and you have no idea what that means. They call it CD quality. We're gonna have to update that. We'll call it like iPod quality? Anyways, it's plenty for voice. It's exactly what you want, so 44.1 we're gonna set it up there. And like I said, it's also gonna be what your final mp3 is so we don't have to do any conversions. And from there those settings are pretty much, that's the computer interfacing this microphone. Now, what are we gonna record on? I'm gonna use some free software. We're on a budget. We got a nice affordable microphone. I'm going to go into Audacity. It's a free software. It's not what I use, but it can be used. Again your quality of your recording is not going to be determined by the price of your editor. So I would encourage you to try all the different editing systems. Adobe Edition, Hindenburg journalist, Audacity, garage band, logic pro 10, there's a lot. They all have free trials, so check out the one. Because again, what you learn on is probably what you're gonna stay on, and you're gonna be like, I learned on Audacity kinda looks like 1995 Microsoft, and I want to go to Edition, and so maybe start where you want to end up. So in Audacity, I'm just gonna go to here on a Mac, here I'm gonna go in the preferences, and let's see, we want to set up a few stages. There's a lot here, but we're only going to deal with a few. So right here in the devices, I'm gonna go to recording, and I'm gonna select my microphone. So the Samson Q2U. This is actually tethered in this case to those settings we already set up, and Audacity is sort of plugging into that, but we just want to make sure. That's why it's already selected here, so the Samson Q2U. I speak in monovoice. Uh, sorry guys, I just topped the microphone. I am conscious of that as an audio guy, my boom. So I speak in mono because I'm human, so I'm gonna put it to mono, and this buffer length, this is like, this is going to change for everyone's computer depending on how powerful your computer is, but I mentioned we're not monitoring from the computer, so you would set this low if you were trying to hear your voice through the computer and have it come back without it being delayed, and you talking like this. We're not doing that. We're getting our audio monitored right here. We can hear ourselves, and if you have a guest online, that's why you would set your output so you can hear it through this mic as well, but start it like 256 for your buffer. You might have to play around with this. But start at 256. You can go higher than that because, again, this is just giving the computer enough processing power to capture your voice and not create any issues, so 256 and above, it can be, you don't have to worry too much about what that is. Just don't set it too low, or you'll start getting drop outs and stuff because your computer can't really keep up. What else do we have here? Playback, we're not gonna do. Recording. So this one, in Audacity, so let me tell you that all these settings you're gonna find in whatever editing, recording app you're going to use. They just might be labeled something different. But they're pretty standard. The 44.1, you select your device input. This software play through of the input. This is like, I wanna monitor the app. It'll send the audio from the app back to. We don't want to hear that, so I just uncheck that. And then quality 441, there's that one as we set that up before, but if you need to reset it here, if it's set to something else, you go to 441 and then this is sending 16 bit, so I'm just gonna match it. If you know what the bit depth is of your device. This is generally like 24. This is 16. 16 is plenty. The internet is yelling at me right now because they're like, dude, you gotta do 24, but I'm gonna match the device. In this case, it's 16 so that's gonna be good. Again, CD, that beautiful CD quality. And this one is a little, the interface here, so this meter dB range. This I have here for a special reason, and I'm gonna set this to -60 dB, and let me show you why. This is like a little tip. So that noise we talked about that could be in your room. If we click the monitoring. I don't use Audacity. There's our microphone, so I'm talking into the microphone. You see it's going around -12. That's gonna be good And when I don't talk, everyone hold their breath. See the meter disappear? That -60 dB if you see these numbers, the lowest that we're seeing is -60 dB. We can set that to -96 whatever, but when I don't talk into the microphone, and I look at that and I'm not seeing any green bar. It's not picking up any audio above 60 dB, I have an awesome space. That noise floor, you're good. If you're seeing it bounce above 60 dB, you probably have something in your room. There's a fan on. There's a buzz. This happened to me just the other day actually. I was setting up for this and what is going on? And it was this microphone was on the desk and picking up interference. So I like to see the audio when I'm not talking go below, and that's in a quiet environment. If you were in a coffee shop, obviously you're gonna have audio levels, right? In that case, when we get to the gain stage, we're going to just set it up for our voice, and we're less concerned with the background noise cause it's part of the podcast. But in your studio setup, just this one tip, 60 dB if you're below that. It's nice a quiet in here, so kudos creative live for having a nice environment. Even when we've got all this stuff. I hear a fan and it's not being picked up. So that is telling me that this microphone is doing a great job of rejecting. So you guys probably here whatever that is. Normally, I'm like I'm turning that off. My mic's not really-- I would still turn it off, but you can see it's not really being picked up. So that's cool, alright. Audio recording, our recorder setup. So kind of a lot of the same settings, but a little different for our recorder. So I think you're gonna get a cool shot of this overhead. I'm gonna turn this on and again, just some general settings you're gonna apply to pretty much any audio recorder. My menu items on this DR60D are going to look different. Look how cool that is. It's gonna look different but you're gonna have the same settings in your audio recorder. So the recorder, I go into the menu, and the first thing I got here is record mode, so depending on how many microphones you have going into this one. We have one, so we're only using one of the channels. That one and this one is empty. So I can do a cool thing. A lot of audio recorders have this dual stereo options. Let's see, hold on, I want dual mono. So essentially what this is doing, you can see this channel is my mic channel, and the other channel that I'm not using is being used to record a signal that is -12 dB quieter. So if I screw up and I peak my audio on my primary channel, I have another track that's being recorded at 12 dB less, so I am saved. Because if you clip your audio, it's the waveform is being cut off, it's distorted, it's gone, right? You're not really going to fix that. Some good editing apps, you can help it, but mostly just don't do it. In digital, it's like death of your audio. So we don't want to clip, so it gives us a protection track. You wanna know the honest truth is why this is here? These have digital limiters in them. They're not that good so you can set a limiter to try to protect you. It can still be peaked and clipped. It can still happen. So they give us protection track because their limiters aren't as good. In a previous class I showed this Sennheiser, I mean, Sennheiser is a brand. The sound devices mixed pre, which I sort of said is a professional amazing device. It has analog limiters. It stops the signal before it gets transmitted into digital, and you pretty much can't make it peak. So guess what? They don't give you this protection track because their limiter is so good. So that's what's going on there. It's a cool option if you have it. If you have two people plugged into this microphone, you're gonna select a different setting. So you're just gonna go to either this four channel or like a dual stereo and this one actually looks like it will give us a -12, so just depends on how many people you have in there. What record mode you set up, but mostly it's just going to be mono and you. So the input setting, you can set a limiter if you have one. Still good to use it. I've got the limiter off here, but we can just turn on a limiter, and we're good. And then the um, we'll deal with gain in a minute, but this is also where you get to your gain. The record setting. So in here you're gonna find the quality. This is waves. So if you have the option to record mp3, don't do it. Record wave. That's an uncompressed file. It's basically raw. We're getting all the bits that are going in, and then we'll process that in our editing system, and then we'll compress it out to mp which says there's stuff in here I'm gonna throw away this information and it's a small file for your audience. You want to deliver-- people upload waves to their audio hosts for pod, it's not going to work and it's a massive file, and you eat up all your hosting space that you're paying for. So record in wave, you'll deliver in mp3. Back to that sample rate, 44.1, again there it is. That sort of option I talked about. Let's see if I can get back there. This monitor is off. That is if I have to arm, so this one you have to press twice. You can't see it on here, but that's flashing. So that means that it's ready to record, but it's not recording. I have to hit it again to record. So if I don't monitor, if I don't arm this to record, I'm not hearing me in my headphones. So I'm like something's wrong, so hopefully that's a cue to be like, oh hey, press record. Cause that'll happen. You won't press record, and you'll just talk for an hour, and you'll be like, oh my god, it's not there, which is a horrible feeling. So that just sort of helping you, if your recorder is able to do that. I like to set that up that way. And then, we have some others. This here if your recorder will let you choose. Where is the battery type? Just match whatever batteries you have lithium in here, you have alkaline batteries. Match it to what batteries you have in your system. That little battery indicator up here will be more accurate when it knows what kind of batteries you have inside. So you don't want to be fooled by that. It says hey, I have two bars and it just runs out on you. So match that to the type of battery you have and then initialize is where I would format my card, so consider doing that once in a while just to kind of clean up your card, but also to make sure you have enough space. So that's some basic settings on the recorder.
Ratings and Reviews
Julio Lemmen Meyer
Great detailed information and technical best practices for the new podcaster. Ray is a great teacher. He explains complicated technical stuff in an easy to follow way. I got a lot of value from this class. I am sure that it will allow me to avoid and headaches and some time consuming mistakes in the future. Thanks Ray!
Chrissy Gabelman Dunham
Such a Great Course! Wish I would have had this before I started my podcast and bought the wrong equipment, twice, LOL! SO Good!
Michelle MartinF
Ray had a lot of information to cover in a short amount of time and he was generous with his hard-earned insights, well-organized and offered detailed information on hardware. He did a great job talking about the must-haves as well as the great-to-have-when-you're-ready items.