Create Back of The Cardigan: Waste & Armhole Shaping
Lesson 3 from: How to Crochet an Arcade Stitch CardiganVickie Howell
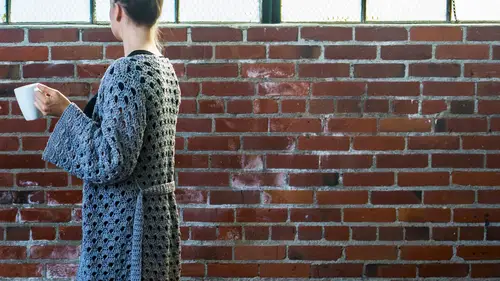
Create Back of The Cardigan: Waste & Armhole Shaping
Lesson 3 from: How to Crochet an Arcade Stitch CardiganVickie Howell
Lessons
Class Introduction: Crochet Cardigan Sweater
02:43 2How to Use the Arcade Stitch Pattern
15:14 3Create Back of The Cardigan: Waste & Armhole Shaping
18:49 4Front of Cardigan
22:41 5Cardigan Sleeves
01:47 6Sew the Pieces Together
21:30 7Front Edging of The Cardigan
08:33 8Crochet the Belt
04:08Lesson Info
Create Back of The Cardigan: Waste & Armhole Shaping
All right, Now we're ready to dive on in and make the back of our sweater. I'm actually gonna be working on little mini versions for much of this project just because it's really hard to see. I feel like from a student's perspective, if your entire you know, desk is covered with fabric, so you can't really see the piece coming together. So I've kind of made doll size watches that will create sort of, you know, Justus mini version of what the overall sweater will be with the exception of, if I'm doing any shaping work, all move over to bigger pieces so that you can see the exact number of stitches. But I just wanted to give you a heads up on that. So we're going to start by making the back, and I'm gonna go ahead and take this tie off. Uh, so the back is essentially just a rectangle, but with very little amount of shaping, which we're going to be covering, it's harder to tell one it's draping, but there's just a real subtle way shaping, and then we're gonna do a little bit of armed shap...
ing. But overall, for the majority of this you're just going to make be making a rectangle. So that takes the intimidation factor out of creating a government. Totally. So dive on end with confidence. So I'm going to start from the beginning. Please keep in mind that I'm making a small version, so you will actually follow the pattern. And the pattern is, of course, available as a bonus material. All right, so we're going to start by doing a row of the pattern. Says for you to change. It depends on what size you're making. So chain, whatever the pattern calls for for the size that you are making. Okay, so you've got your chain whatever number that you decided to use based on the size that you're making. And the first thing that we're gonna do is we're gonna create a row of of single crush A. So we're gonna single Cochet and the second stitch from the hook in every stitch across. And what this is doing, this is creating your edging. It will be the bottom portion of your sweater back. It gives a little stability to an otherwise kind of open weave pattern and will almost create what looks like a hem line. All right, So we've come to the end of our first row of single Cochet. You'll notice that it's gonna curl up like this. That's totally normal for single Cochet. It all will even out. Once you add more fabric to it and stitches to it, you're gonna flip it over and you need to work another row of single crow. Shea said chain one, you're gonna single Cochet in the exact same stitches the chain one because we're not counting that chain is a stitch and you'll work all the way across keeping in mind that now that we're not working in chains, we're gonna be working in the stitch. When you work in a stitch, that means you're gonna go under both loops. You can see the top loops there. I'm going underneath both of those when I work. All right, We're getting We're making our way across and I'm finishing up with row two. All right? Now the pattern says that you're going Teoh work Row three, you're gonna work. Row three is actually Row one of the arcade stitch pattern. So what that means is that you're gonna refer back into the pattern to the either the chart or the copy, the text, whatever you'd like to dio. So we know that Row one starts here. We see that the numbers on the side, the number will be on the side of the direction that you're supposed to read it And as well, we're gonna chain one single crush A in that same stitch single crush a in the next stitch Chain three, Skip the next three single crash A in the next three stitches. Chain three skipped. Skipped three single Christian and the next three stitches. Chain three, Chain three. Skip three. Did a little extra wraparound on accident. Single Christian in the last two. All right, so from there, the pattern says that you're going to continue an arcade stitch pattern. I showed you in a previous lesson how to do that. So I will not put you through that again. But you're going to go ahead and you're going Teoh, as established now that you've set up and you've got your little edging row. And in fact, I'm actually gonna pull off the sweater just for a second off the dress warm so that you can see in riel size What we just did, which is? We created this edging right here. And then we just worked the very first row right here. So from here on, we're gonna be working just in straight up stitch pattern arcade stitch pattern until the piece measures whatever the measurement calls for, based on the size that you're making. So I have gone ahead and made a little piece that is that proverbial side. Remember, this is dull size, so keep that in mind. This is where we're gonna do some very subtle way shaping. But the cool thing is is that it requires zero extra work. It's pretty much my favorite way to do subtle shaping ever in crush A Because all we're doing is we're going down a hook size. Or actually, it's probably to hook sizes. Now that I look at it, just it just one you're gonna set down. You have your little loop, you're gonna pull your stitch out of it, set it aside and you're gonna introduce your smaller hook. Now, I should say that the instructions say that you should. You work it to the length for whatever size that you're making it, and then you are going Teoh change to a smaller hook. And it doesn't necessarily matter what row of the search pattern you end on. You just want to measure it because you can pick up anywhere that you need, Teoh. So you're just going to switch? And I happen to know that I ended with a I'm gonna move this back over. I ended with a road to, So I'm ready to go for a row three and you can figure that out. You know, you would obviously know what row you were on, and then you would switch over and you're gonna continue in pattern as if nothing changed at all, but with the smaller hook now. So I'm working with three that I'm skipping this one. Double cash A chaining skipping Single Cochet in the next three, Chain three skipped the Little Valley again. Single cachet in the next three. Skip three all the way to the end, as established chaining to skipping one single Cochet. So you're going to just continue in that manner and keep working arcade stitch pattern for as long as the pattern tells you for the size that you're making and this is creating your waist shaping. So I have made this little this wee little piece, as you can see and it's really settle, it's really settled. This piece is meant to be drapey and easy and where anywhere but I want to just a little bit, a little tiny bit of nip and tuck, and that happens right here. You can see if I kind of stretch it a bit. It's a little more obvious the reason why it's going in just that the waistline is just because we worked that several rows with a smaller hook. So once you're done with that amount of that with the amount of inches that is called for in the pattern, you will switch back to the larger hook and then continue in stitch pattern until you're ready to shape your arm hole. Alright, so I've moved over to a larger swatch, and here's why. I want to show you the exact stitch count the way that this thing particular pattern works. The shaping for the under arm is pretty much the same for most sizes, so I want to go ahead and just show you on a real with peace. This just happens to be the smaller size. How to do the arm shaping. Just said that you can get a real clear visual on it. So imagine that this is a an entire piece worked up Teoh right under the arms, and we're ready to begin the arm hole shaping. So you had worked all the way up to the arm hole shaping, and you wanted to make sure toe end on a row three of the stitch pattern. So that means that we're now going to be working on what would be the fourth. But we're gonna work it as follows. All right, So we're gonna chain one, and we're gonna slip stitch in the first chain to space, which is right here and in the next to said this one and this one single Chris Shays and a slip stitches just yearning over and pulling the loop through both of the other lips. So urine over, pull it through that stitch, pull it through the loop. OK, so we've slipped stitch into those, and then we're going to start working our pattern, so we need to by now. You're probably getting the groove of what? Stitches go where and we know that we're any time There's this big chain three gape we know that's where we're doing our five DC's So I'm gonna go ahead and work those chance 345 OK, And I want to just stop for a second and show you that this is your actual arm shaping. All I did was by not working those stitches. He slips slips. Such is kind of the equivalent of ignoring something. You're just kind of like flying by. So because we ignored a few of those stitches by slipping the stitch is this is from now on where our whole piece is going to start, so it's very, very subtle, but there's just gonna be a little dip for where sleeve will set later. So that's how it works for that side. But I need to get you all the way to the other end so that I can show you how to do the opposite side. So just hang tight with me and we will all sit and crush a and work on our road. Okay, We're gonna We worked all the way across our row and we needed to get to the last single crush a grouping of three. So once we get there we are. We've worked our five D C's in the Chain three space and we need Teoh Skip the first single crushing slip Stitch in the next two single crush A. So 12 And then we're gonna leave the remaining stitches all of these guys completely and worked their dead to us. Removing those and we'd foot the peace over and from here on out will only be working the stitches that are left. These stitches will no longer be work because they are a little our whole shaping piece. So from there on your just gonna continue with the rest the back working straight as the pattern calls for and then fasten off and that is all there is to it to the entire back piece. I'm gonna show you what it looks like in real size again. It's super big, so they're going to get a wide shot. But you can see you see if I can get this. It's perfect. Okay, so you can see a little bit of other arm shaping here. This is where it was set in, and then you work straight and you're gonna fasten off and the bonuses because of the the stitch pattern, You get this really cool scallops back neckline that we're going to just leave as it is, we're not gonna do anything with that. I'm not gonna added edging later anything. We're just gonna let it be light and delicate as it ISS. So we're done with their back, and now we're ready to move on to the next step.
Class Materials
Bonus Materials with Purchase
Ratings and Reviews
Sarah Modrell
Great video! Beautiful pattern. Wish the camera would zoom in more on her hands when doing the stitch work. I adore Vickie Howell. She is a great teacher. Cannot wait to see more of her videos in the future. I can't wait to make my cardigan!
Joscelyn Williams
This is a great project. It gives me confidence that I can do this. She is a very good teacher and easy to follow along with.
Student Work
Related Classes
Crochet