Object Styles For Continuity
Lesson 8 from: How to Create Marketing Materials for Small BusinessesErica Gamet
Object Styles For Continuity
Lesson 8 from: How to Create Marketing Materials for Small BusinessesErica Gamet
Lessons
Class Introduction
04:25 2Defining The Glossary Of Design Terms
26:26 3Adobe In Design Demo Update Your Current Materials
08:44 4Adobe In Design Demo Business Card Part One
39:08 5Adobe In Design Demo Business System Materials
23:55 6How To Procure Free And Low Cost Stock Images
11:51 7Adobe In Design Demo Postcard
16:16 8Object Styles For Continuity
07:40Lesson Info
Object Styles For Continuity
Alright, whew, that was a lot of work just to get that, right? I don't want to have to do this again, I don't know about you guys, but I don't ever want to have to do this again. So what I'm gonna do is I'm gonna take this object and we're gonna create an object style, so that any time I want this particular item to show up, I can just type it in and it automatically works. So let's do that. I want it so that when I create an image - let's take this guy and copy this, I'm going to paste him across this image here, and actually I'm going to select that and I'm gonna go to styles, and I'm going to do what I call "The Terminator". I'm just gonna click on this basic paragraph style and hold down the option key so it gets rid of any overwrites. So it automatically brings it back to the default text so it looks like nothing else in our text, so that's totally, entirely fine because I'm going to use this special object style, and we're going to put something right in here. Let's put it right ...
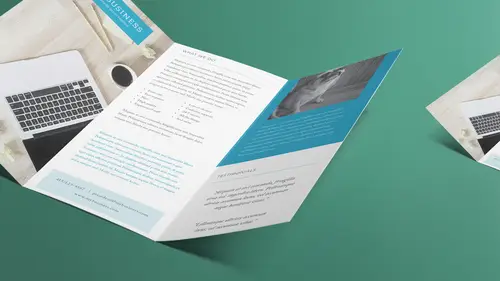
about here. Again, it's going to look different in just a few minutes. Alright so, let's go back to where we have this item. Select this, I'm going to go up under the Window menu, and I'm going to choose styles, and object styles. And this works a lot like the paragraph and character style, you create something and then tell it "Hey, that's a style". So again, I don't have to put in this information, it's already there for me. So I have what's called a basic graphics frame and a basic text frame. And you can see that it started out as a basic text frame but I did some overrides to all the stuff that we just did to this style. But all I need to worry about is the little new style down here. On Opt. Share alts and the reason I hold down the Opt. Share Alt is so that it automatically opens up all my options for me. If I don't it just calls it a new style and I have to double click on it to open it, that's why I hold down the Opt. Share Alt key. So I do that, and again a lot of information. Let's call this Tagline Box, so remember the box. You have too many things called Tagline or whatever, it gets confusing which one you're talking about. And so I'm basically gonna leave everything selected so I want to make sure for sure that transparency is turned off. If there's a dash, there isn't a way to say "No, don't include this information" it's either included and it's important, or if there's a dash, it means either I change the paragraph style and whatever is dashed, if it's on or if it's off, it won't show up as an override. Because sometimes you're like "There's a lot of stuff in this file, and I don't really care about most of it. All I care about is the box looking like it does. For the most part though, I'm just going to leave everything selected. And I'm gonna say Okay, what's gonna happen is now I have that as a style and I can make this a style, and nothing will change because it looks exactly the same. But I can just click on this item here and say 'Tagline Box', and now I've at least got all that background, but what we didn't see, is we didn't see the style itself, the text style change. That is off by default, so I'm gonna go into 'Tagline Box' and I'm gonna double click and edit it and one thing, when you're choosing styles, you just double click on a style and your cursor is sitting in something or has something selected, when you double click on it to edit it, it applies it to wherever your cursor is sitting. So just be aware of that, so you can either choose 'edit style' from here, or the style options, or what I do is I hold down all my modifier keys so on a Mac its Command+Option+Shift, on a PC it's Control+Alt+Shift, I hold that down and double click, and that way it doesn't apply whatever style you're trying to edit to whatever you have selected. It's one of those things that you just want to hold it down when you do that. So I'm gonna come over here to paragraph styles and it says it doesn't care, so it doesn't change anything. I'm going to click it so it's on and then I select paragraph styles, over here it says 'apply what paragraph style' you want, well, tagline. I'm gonna say okay to that. So now that changes, so again, if I came over here and said well, I want this to be set up like that, well, you won't notice it because there's no picture back behind it, let me just throw something back behind so you have something solid to show through, we'll just make a nice color, we'll send that to the back, so we'll do Object, arrange, send to back so we can actually see it. And I click on that, and now I come over here to tagline box and just say tagline box, there it is, it's in the right style, it's in the right - now, it's a bigger box because the box size isn't something you can define. It's basically whatever style you created. Now there is a way to work around that, you can tell it that it's automatically just the size of the text plus a little bit extra. That's a lot more steps but you can do that, it's in the text options style box, so you can do that, I do that for captions, photo captions, that it's only the size of the text itself. But I can do that and now I automatically have that style, that's in there. So again, as I create it I can just make sure that any time I create it, now you notice this is left justified, we had it right justified, so what happened here? Right justified and I can make sure that, oh that's weird, I wonder if the style let's check the paragraph style. Paragraph style is redefined, let's redefine that style so it's right justified okay, so now we have that,and of course it doesn't fit there because I put it off to the right, so I might create another option style called Tagline Left, so there'll be one for the left side and one for the right side as well. And again, you notice when I set this up here I made sure that it's set for a bleed, I don't actually have my bleed lines even showing, I should, I should be able to see that I have a certain amount of bleed when I set up the file on our document setup. I should tell if I have a bleed here and maybe it's an eighth of an inch all the way around. So then, I have this red line that shows me that's the bleed line, I make sure that that tagline came to it, I need to make sure this image comes to it, and also that the image isn't even there. SO already, I can see that this isn't even big enough, I'm gonna have to make this picture bigger to come all the way to the bleed, so you can see you need to make sure when you set up a bleed, that you also make sure that your image has enough of a bleed. So I need to make this guy bigger, and make sure that I have enough so that when I trim it, I actually have everything I need for that bleed and I can turn on the preview to bleed and make sure that I have an image that comes all the way to the edge of that bleed as well, so when I go to print it and they print four on a page, they can print put this many here and they trim it back to our bleed so our image comes all the way to the edge of our page. So that's kind of what we put in a postcard and how we set up the styles and how we reuse those again and again so this tagline again I can use this in the next item we're going to do, which is brochures, and I believe I have those here so we're going to do one brochure, and we're going to do a tri fold brochure in the next lesson as well. So I can take that tagline, that tagline probably will work fine across, well I don't have any large swatches of color here, but it would work great on something like that, maybe I want this tagline to be in that style, so again I can take that style, I can bring it into this document and make sure that I'm using that same style and again, I have that consistency across all of my marketing pieces.
Class Materials
Bonus Materials with Purchase
Ratings and Reviews
Laure Donteville
How lucky to attend this class in person!!!! So worth it and it was exactly what I needed to have the right tools and give me the confidence to jump start my business. I can't wait to finally put together my ideas to create my business cards and send my very first postcards to reach my future clients. Thank you Erica for such a funny and interesting class on things that usually feel so overwhelming. Yes, you can be a designer!!!!
Cynthia Dauterstedt
Erica is just awesome - did several of her courses and she has a great style, is funny and explains very well the basics and beyond what "Design Dummies" like me need to know to get the stuff done they don't have money to pay an expert for. Good Job, worth each penny!
julie haskett
She said at the beginning that her purpose was to make us confident enough to use Adobe In Design and she absolutely did. Perfect class, perfect instructor. Really enjoyed this and lots of info absorbed. Can't wait to put it in action.