Lessons
Lesson Info
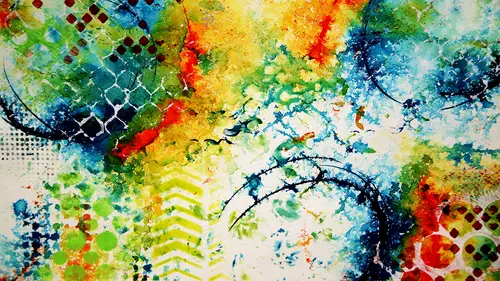
Paper Towel Printing
So the first technique that we're going to do on some of our papers is called paper towel printing so we're going to turn a very simple paper towel which you guys have in the bottom of your cart we're going to turn that into a printing plate so paper towel we will have won two three cups and a pipe at which you should have in your cup with all your brushes and into each of these three cups I'm going to put too pipettes full of water don't ask me how I came up with the exact proportions to get the exact right amount of color and water into one full paper towel but this is what it is pipe it is three ml eso fue those of you out there who need to know exactly how big of a pipe at that was three milliliters and then we're going to take some acrylic I have the acrylic inc up here which I will gladly share with you in a moment as soon as I get out two sections I know they stopped making them the full sheets of paper towels I loved it when they were full now there are all these little tear of...
f thanks to section so it looks like one of the regular old full size paper towels um acrylic inks highly concentrated acrylic color in the format of an ink so it's really fluid but it's really really concentrated stuff um and these air by daler rowny and my favorite colors to use well any color but the ones that I'm using today this is flame orange this is process magenta got to you guys and indian yellow so when I'm choosing colors if I'm going to be doing a technique where all the colors are blending together on the surface personal preferences I wanted not make mud okay um if you guys want to make mud that's fine I'm not going to come out there and slap your hand but so that I don't muddy my colors up I'm going to stick with colors that live right next to each other on the color wheel if you think about it in a simple way and I'll repeat this later too because I know repetition helps here's my primary colors red, yellow and blue if I want to avoid making mud at any given time I don't want to be using all three of these primary colors. So take any one of these out red and blue make offered green what it makes purple so I can use these two with purple, red and white make pink so I can add pink any of these colors was another blue here's, another blue any of these colors, no matter what I dio if I mix and mixing mixing mix I'm going to get nothing worse than purple I'm not going to get brown mud guys here's another to just just to reinforce this blue and yellow make that there we go I heard that earlier green so with the green I mean, with the yellow and blue I can add all different kinds of look at this any of those, no matter what I d'oh, I'm not going to get mud, right? Okay, so if you think about the colors that your primary colors make, as long as you're not, um, representing all three primary colors at the same time, you're going to be fine. So that's my trick on picking colors, this first technique that we're doing with the acrylic and I'm going to use pink, orange and yellow now that said, in every class, every time I teach this class, somebody goes and picks one that would normally make brown and in this particular technique it's not so vital because we're not really blending the paints together you'll see what we do in just a second, but, um, so you could kind of throw the rules out the window. At this point I could put orange and purple together and I would be fine except where the colors meet and where those colors meat and blend together it's going to be a little more of a neutral somebody told me recently, it's a chromatic neutral ok I call it mad you call it chromatic neutral so I'll get it means the same thing okay so this is why I had to take the jangly bracelets all right? We're shaking these guys up now into our cups with water we're going to take this acrylic inc and we're going to take one full pipette not drop but one full actually let's do tio two pipe it's full of the color in each one so there's my process magenta this one is not for king sometimes when these air brand new the pigments get clogged up in the end of them and oh hopefully oh yeah um one and if that happens to you just get like a paper clip and unwto un bend it and then you can kind of shimmy it up in the tip to get it cleaned out one to now I'm going to show you this process all the way through um quite quickly and then I'm going to give you the acrylic ink so while I'm doing that just kind of be finishing up your stamp on and then you'll get yours in just a second so I'm going to swirl these up just to mix them now hear a sparkle girl and you love the shimmery stuff this they make this and shimmer as well you can also add glitter like a really fine glitter into the mixture as well and that's going to add it to your paper I always say that if you pick the shimmery ones, shimmer has a way of overpowering everything, so I usually pick one shimmery color to two non shimmery colors, just a as a guideline. Now, when I'm folding at my paper towel to dip it into these inks, there is no right or wrong way to do this. You could crumple it up and to put in there, that would be fine, but usually what I do is I fold it until I have excuse me, this sort of triangle shape, because I have three colors, I'm going to dip one point of each of the triangles into the color. I'm going to start with my lightest color first, no real reason just because I am, and I'm going to soak up until it's all out of my cup, and then I'm going to go into my next lightest color, and so I got up and then into my third color. Now, when I take this out, I don't want it to be totally drenched, like dripping right now. If it is, I could kind of squeeze it into one of the cups, but I know because I've done this enough that that's the perfect amount of water and ink to saturate one full, and I'm not going to name the brand, but eight a brand of paper towel so you don't the paper towels to be super absorb it but also not the really cheap ones so this is from one of those big warehouse stores all right and then when I opened this paper towel up it's going to be quite juicy but look at that it's pretty as it isthe right? Okay so tied I and then I'm going to pull out some of my paper I'm going to lay this gently over top of the paper and then I'm going to take things like my handmade stamp and I'm going tio press down now anything goes as far as what I use to make the marks through this paper towel but check this out okay so that was just simply pressing down overtop of this saturated paper towel with the handmade stamp now it doesn't stop there I could dio another and another and another and another probably I don't know I've never really counted but maybe twelve pieces of paper with one paper towel would be totally reasonable some of the other things that you guys have in that middle section of your cart are you have other texture making things and in the bottom again thanks to deco art we're so grateful for your generosity you guys have a whole stack of temple how exciting is that so check this out actually want to do that in just a second because the paper the the paper towel is still really juicy at this point and again if I press down and roll over it like I'm going to show you it you'll see it's better to do things like this bubble wrap when I teach kids in my studio I always say with the bubble wrap yes it's very exciting but my one rule is it the tool no popular so it's okay if you guys accidentally past him today but there we go so that bubble wrap comes in all different shapes and sizes I love to collect them all I'm sorry and you're welcome nothing is going to be safe from the site clayton anymore for you so different size bubbles on there and let's see how that came out okay right now how simple was that? But look at the beautiful the different colors going on any of your papers were going to be doing lots of different techniques so let's try it on some of this notebook paper and now I'm going to go ahead and oh there's another one okay attribute this is just for you're going to start rating your kitchen and everything now this is just a hot plate for putting a hot pot on but we're using it of the texture making tool so again I'm just going to press it down on to my paper now sometimes no once the paper towel starts getting less saturated I actually will use a breyer, you guys have one of these in your cart as well. Now here's, my tip on this prayers can be really expensive for using them what they're intended to be used for, but when we use them in this crafting purpose, where we're just adding a bunch of acrylic paints and stuff like that, this is the clay roller so much less expensive than a traditional breyer. Ok, again, our part alternatives sells these as well, it's just it's going to be like, in your clay section in your craft store. So three dollars versus fifteen dollars, I'm all about that, okay? And they work great. So we're just going to roll over top and there we go. So here's, the pattern that was made with that trip, but you just get that kind of honey comb thing. Okay, now I wanna show you, um, you do have one big piece in here like that, and we're going to make something at the end if we have time with this one big piece. So just tio this technique on one one part of this because we're gonna do all different techniques on it. Now over top of that, I'm going to take my stencil, lay it down and roll with the brera and see what that does, you guys see that right it's like I don't even know what to call it's like reverse printing this is my this is my ink pad for those of you who do rubber stamping this is like my ink pad but I'm laying in over top of my paper and impressing things through so knock yourself out as far as that would not drive oh hello right this is this is now kalash tissue when this dries it's two layers I pull them apart and I have two pieces of tissue that I could include into my into my art as well and because it has the acrylic in it it's a little stronger the acrylic makes it just a little stronger so this thiss paper towel actually turns into art itself yeah, these guys can go out there here's some blues and purples blues and purples blues and purples but you guys can share tio ok purple pink and orange pink and orange, orange and yellow well, there's plenty left. Marine blue there you go. And you guys yeah, pass them around. All right, thanks for catching me on that. Chris. I just want to make sure that you can fall alone like thiss waters they're not well yet they want to pipe at full on those yeah, I just got so excited doing this like getting my hands all painting I just lost track of that two pipettes full into your and you had to pipettes of water in each one of those as well, right? Yeah, excellent that's that is the proportion in colors. Okay, I'm going to keep printing. Well, you guys were setting that up. Nothing is safe in my studio for making marks even the bottoms of my bottles you compress the bottle down anything that compressed texture through what else do I want? Let's try this one like yours what is the consistency be again? Should be kind of his parents should be kind of opaque that's a great question, kate the consistency is about the consistency of like whole milk I would say, but as far as the transparency goes, it just depends on what acrylic inc you're using some of them are opaque, most of them that I use their transparent but there are a couple that are opaque now if you don't have acrylics inc you can do this with acrylic paint, you just have to water it down a little bit more. So the consistency that I like is is usually like whole milk maybe cream if you're using acrylic paint it's going to be thicker if you're using like fluid acrylics which are pretty close to the acrylic inks, it'll be about the same consistency about the same proportions as you guys have there looking good if you still have white afterwards, you can take your your whole paper towel thing and just kind of squeeze it a little bit and that's going to get all the extra white out and to two hours one of their one of these people just one yeah, this is one full size paper towel or if you get the tear off one's it's actually too, because that's, what covers my papers? I'm gonna try some with my daughter's homework and I do have extra homework here that I will share of anybody need math homework in here, right? So we're doing this straight up over the paper sometimes I want to protect part of the paper from having a design and to do that, all I have to do is cut a mask o beautiful sarah, that looks great. So if I wanted to mask out an area on my paper before I printed, I'm just going to cut simple at a paper put it on top of the paper that I'm going to print on first, layer this over top and see what kind of problem this is like that plastic grid that they dio I don't even know what they do needle point on it or something and then when you peel that away you have you see the resist there so I have the heart shape that's just masking it out before I do my printing who pretty colors out their super exciting and then what's the surface that we have oh that's a conniption table this is kind of like freezer paper ok it just a nonstick surface okay? They use it for packing I get it from you line it's just a poly coded paper. Oh sure. So waxy three years just like a waxy thing ok it's going to be really tempting to do this all day because I could just get started on this but I know you guys were starting with your prints let's get like six let's just say six prints done and then we can move on to another technique and believe me this is not the on ly layer that's going to go on here we're going to do more printing over top so you just want to get and if you want to trade colors this is great if your if your neighbor has a different color that you want to use as a matter fact if anybody wants to use this orange and pink and yellow color this still has plenty of juice in it. You also in your packet I believe have um a piece of delhi paper daily paper is this transparent wonder paper that um is going to take paint and all the techniques that we throw at it but then when we cut it up and collage it into the surface wherever there isn't paint it is transparent and so it's a great layering technique as well teo you throw in the deli paper into your stash of papers I see what's going on it's a little bit waxy so it feels like there's one side that is not as waxy is the other and if you print on that side it it absorbs this wet acrylic much better with the acrylic inc you also might have in there a label to sort of this this size right here this is a sticker so later on you can cut things out and and use it as a sticker one thing to keep in mind too I usually have a piece of paper beside me who that's pretty I usually have a piece of plane paper beside me so this has the residue of the acrylic on it and if I want tio I can clean it off on another piece of paper and it makes a really light ghost print but it's a great way to clean your tools as you're going and then at the end sometimes this one that I've cleaned all my tools off on it's one of my favorite pieces of paper just just keeping in mind every time you put a tool over top of the wet mediums it's retaining some of that color so if you have a little piece of paper off to the side that you roll off all your wet tools on you'll end up with a really cool piece. The collage paper at the end.
Class Materials
Free Downloads
Bonus Materials with Purchase
Ratings and Reviews
carlos.lijeron
As a proud father looking for ways to share good times with my kids, I'm glad to have found this course. I have tons of ideas that I can now capture on paper using a variety of tools. My plan is to take some time on Sundays to do only ART with my kiddos, especially on cold Winter days. The class is very informative, particularly in the items to get. Since this is new to me, I would not have any clue on what to buy, but Andrea gives you the ins and outs of what works and what doesn't ... a really good time/money saver. I highly recommend this course. Thanks CreativeLive !! You guys are awesome.
Haden
Wow, that was SO much fun! Lots of wonderful techniques I hadn't tried before.
Melissa
This is a great beginner course and is loaded with creative and simple ideas. I love the fact that Andrea doesn't waste anything! She makes great suggestions for reusing items that would normally end up in the trash and she shows you simple ways to cut corners on your crafting supplies. This is about making collage paper, not a final work of art. I can't wait to get started trying out her ideas.
Student Work
Related Classes
Paper Craft Ideas