The Power Of Local Adjustments Presets
Lesson 11 from: How to Build and Use Lightroom PresetsPye Jirsa
The Power Of Local Adjustments Presets
Lesson 11 from: How to Build and Use Lightroom PresetsPye Jirsa
Lessons
Class Introduction
03:22 2Why Use Presets?
03:30 3The Value of Your Time
05:38 4Images With Presets vs. Without
06:03 5Four Way to Batch Process
22:11 6How to Create a Simple Develop Preset
13:52 7How to Create a Powerful Universal Develop Preset
08:36 8Mastering the Anatomy of a Develop Preset
09:41Lesson Info
The Power Of Local Adjustments Presets
The power of local adjustments, that's next. Delicious. Okay, let's pick an image. Do I have an image selected here? Smoothing skin. Oh, my gosh. What do you know. (audience laughter) So, we'll pick the one that her eyes are open, that's fine. It's a good example image just because you can see that there are little bags underneath the eyes. Alright. So, let's just... Let's keep this simple so we're not repeating stuff. I'm gonna go ahead and... The same preset is included with the class, so I'm just gonna click "soft color import". It's basically done, right. If we want to go for more of a kind of bright and airy look, we can go glam. What do you guys like better? What should we do it on? [Audience members] Soft. Soft? Oh, you're listing a blown-up version, huh. Okay. Let's go soft. And can I brighten it a little bit? My screen is dark your guys' is... That's about right. Okay. So, what we're going to do is, I'm gonna zoom in. This is the next side, of... We talked about the develo...
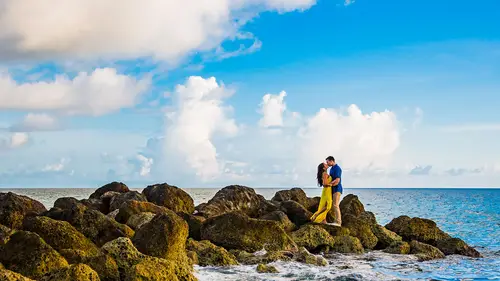
p panels. What about local adjustments? This is huge, this is the other side of creating presets. Our local adjustments. So if you click on this local list and pull-down, you'll notice our list. So these are ordered based on the frequency of use. So we are dodging and burning most, detail enhancing second, retouching last, and then sometimes we do special effect type stuff over images. So they're in order based on how often we're basically using them. So, knowing what you guys know, I'm gonna click "new", we're gonna reset this out. Hold down "alter option", click "reset" so that everything resets. You guys now understand how to break things out mentally, what does what. If I wanted to create a preset that's gonna soften the bags underneath her eyes, how would I do that? What am I looking to control in this side? I'm gonna make you all use your noggins. Clarity? Clarity. Highlights? Highlights. Shadows? Shadows. So, you can do highlights and shadows, they would work. Right? The only problem is they might not be as universal just because some images might be shot darker versus some images might be shot brighter. Okay? So, if you actually click, and we go to "line diminisher", what do you see? Contrast is a universal-type adjustment, right? It's just gonna adjust everything. So whatever it is, it's gonna pull it down. Clarity is where we really attack it. We're gonna pull everything down to -50. Sharpness gets pulled down too, because if we can blur it out a little bit, it'll be that much better. So, with that preset, we're just gonna click and drag right across the eye. Did you guys see that? Let me delete it again. Okay? That was awful. I was looking at the screen, I'm like, "Oh, man." Okay, let me look back here. Right across. Okay? Did that not diminish the line? Exact same thing on the other side. Can you guys see the adjustment being made? You can see it, right? Okay, now it's red. (audience laughter) She's a football player. You know. Gotta do the lines. So, that's a very simple line diminisher. Now we generally don't want to remove these lines. A lot of people when they get into retouching, they remove. Removing makes people look like aliens. Or like babies. Or baby aliens. Either way, it's not good. Okay. Let's do another one. (mumbles) There we go. Creating the sun. What, what? Okay. Let's find our image right here. Okay. This is a picture of me and Trevor's kids. So, we were hanging out on a family vacation. These are my two, Ethan and Ellie, and these are his six! (audience laughter) They're gorgeous, though, oh my gosh. They are the coolest family in the world. Sorry, you guys have the coolest families too. Everybody, at home, you all have the coolest families. My bad. (audience laughter) So, I'm gonna click "soft color". I'm gonna go ahead and just brighten the image. And just to have maybe a variation on what we've done so far, let's use a different color. Just so you guys can see what it does. Looks nice, right? Nice poppy color? It prints really, really nicely. Like if you guys like metal prints and that kind of stuff. Vivid colors, they come out so well on metals. So the key to making this effect work nicely is to pick an image that has a clear, direction of light that exists, right? I'm gonna show you where it's not gonna work, and you'll understand exactly what I'm saying. But in this image, the scene is actually... It's an overcast day, but the scene is indeed backlit. You can see it. You can see the lighting around their hair, you can see it on the back of the grass. You can see the light coming through. You can even see a little bleed right here on the top of the frame. So, to make this convincing, choose the area of the frame where the sun would naturally be coming from. Go to your brush, and we're gonna scroll down the effects, though we don't generally do this that much. But here's what it's doing. It's boosting up exposure, pulling down contrast. What happens when a sun flare comes in? It's bright, and blown out, and contrast gets hazy around it, right? Highlights get boosted, shadows get pulled. Whites and blacks are left alone. What does a sun flare do to the color in an area? Warms. Warms it up, so we're gonna warm it up. We're gonna reduce clarity by -60, we're gonna minus out saturation on the existing colors, because remember a flare also... A flare washes out existing color and contrast. I hope right now, you guys are like, "Oh my gosh, literally everything that a flash or all these different things do in a camera can be simulated in post by me just creating something that mimics it". If a flare creates warmth, minuses out contrast, kills saturation, you can literally make a flare in post. Okay. So I'm gonna make it a larger size. I'm gonna go and place it right where the sun would be. (gasps) A flare! And we can actually... You can actually strengthen or minus it out, either way. But it's doing everything... Now, you guys are like, "Mm, I can tell that's a flare." Well, it's because I just did it in front of you. (audience laughter) But I guarantee... I've posted so many of these images online, and people are like, "Oh my gosh, Pi, that's an amazing flare, how did you do that?" And like... I'm not telling. (audience laughter) It's my secret. Okay, so, again, let's pick another image that'd work well on... (mumbles) There we go. This is Ethan. My kids are my little guinea pigs. Okay, where's the sun coming from, guys? Upper left. Upper left? Let's grab our flare. Flare bell! Who wants more flare bell? Flare bell all day long. Do we actually... I want a bell next time, like that. We'll call it the flare bell. More flare bell. Okay, so you can actually use this to enhance an existing flare, like these ones that have existing flare, you can actually enhance it if you want to. Or you can add flare to a scene, like in this one, where we just pick the direction of light. The case it is not going to work well, and you'll understand this. I mean, guys, if you can't identify where the sun is coming from in the scene, it's not gonna work. It's not gonna work. Like, for example, why would there be a flare right here? That just makes no sense. Okay, so... (mumbles) I always say, "Okay, so". I really do love queso, though. (audience laughter) I realize I say that a lot. Let's find another... It would actually probably look convincing in this shot, if you put it up in the corner right here, where the sun's coming from. Cool beans, does that all make sense? Okay. Next, enhancing detail. We're gonna do that now. Let's pick this out. Okay, let's just apply something to this so we have something set up. And what I'm gonna do, is I'm gonna brighten this for their skin tones, right? Power of local adjustments. Let's go ahead and drop in a radial filter of a little burn right here. So now we've retained most of the sky detail, but I want more pop. So. "Sky cloud ocean". What do you think you use this for? (audience laughter) Who picked out the name of that? No, it's literally labeled "sky cloud ocean", like use this on skies, clouds, and oceans. So when our people ask, like "What should I put on a sky?" Sky cloud ocean. Either way, it'll work. Alright, so what is this doing is it's pulling exposure a little bit, it's adding a bit of contrast, it's boosting the highlights and pulling down shadows. What does boosting highlights and pulling shadows do? Contrast? Yeah, and what is the exposure doing? It's pulling it down a little bit and then adding a little bit of contrast, right? We're also adding mid-tone contrast in the clarity. We're adding a little bit of saturation. Okay, so now all we do is we paint this over something like the sky. And we get tone and detail back. And you can simply adjust exposure to whatever level you'd like on the image. Okay? Very simple way of adding back your sky and your detail to an image. I want to also do a little bit of detail on enhancing, because it's fun. So that's one type of detail enhancing. We can also detail enhance over clothing. Let me find a pretty picture to do that with. Let's do this one. Okay. Hey, by the way, how about a sun flare for this one, yeah? Hm? Kim's feeling it, she's got that smile on her face. I can see it. I'm gonna do the same thing, radial burn. Okay, we're gonna go ahead and drop this down. Sun flare. Okay, and now we're going to go to "new", and we're gonna go "general all-purpose detail enhancer". Boosting contrast, boosting highlights, boosting clarity, boosting saturation, boosting sharpness. Clothing? Works fantastically well. Just don't put this over skin. Watch this, you're going to see her dress just pop. Can you see that? Okay, I'm gonna bring it over... What I can do is just paint it over both their clothes. And let's say, I can just bring it over their entire heads and faces and everything. It's easier to do it this way than to do it, like, trying to be precise. Then just hold down "alter option", and subtract it off the face. It's subtle enough that you don't need to go crazy on this, and you don't need to go too detailed with it, it's not... Okay, if you wanna adjust the slider up and down in strength, here's a little trick. Hold down "alter option", go right over the slider. You can actually pull this to the right to strengthen. You can pull it to the left to reduce. Cool? Okay, so let's take a look. I mean, this is... What I just did, this 15-20 seconds, is what we call and advanced edit. Like, that's an advanced edit. Okay, so, here's before, and the after. Very simple, easy-peasy, beautiful breezy. Covergirl. What? The brush tool. Yes. You know, it's got the two separate circles. Yes. Which one is the one you're actually... What do the circles do? That's a good question. No, so what's happening is, we have a feather edge, right? So when I'm using a flare, the feather edge is always up to the max. I mean, generally my feather is up heavy. So what's happening is, it shows you two concentric circles. This one is where the majority of the effect is, and then out to this edge is where it's gonna fade off. So by the time it reaches this, it's at zero percent. Now, you can adjust that feather by pulling this to the left or to the right, okay? This is no feather, this is full feather. Think about your effects again. The way that a sun flare works is that there's bleed, right? A flare comes in and there's bleed over edges. It makes sense to have a full feather on that. When I do detail enhancing, I don't necessarily want a hard edge where it's starting and where' it's stopping. I want to keep it a little more subtle, and so I want that softer edge. So generally we leave feather all the way up for most things, with the exception of if you're working in tight detail areas, like say you're actually detail enhancing on the eyes. Then we'd change that. We'd actually pull that down a little bit. But for the most part, you can't really go wrong leaving it up a little bit higher. So if you were to zoom in to her eyes... Boy, I wish there was a preset for eyes. Oh wait, oh wait, iris... What? Just kidding. Okay, so again, you guys can snapshot and see what these things are doing. But this is one of those cases where a feather is kind of a little bit annoying to deal with. It's not... Like, I could leave it on there totally find and just wrap it around. But if you wanna get it a little more precise, you can. Let me do it just to make sure we don't miss this part. When we feather... When we edit the eyes, you wanna remove it or hold down "alter option" to get the eraser brush. Remove from the area of the eyes where there's shadow. So we follow the existing light in the eyes to get a more convincing effect. So if you look at this... Where's my... There it is. Okay, so you can see her eyes. Okay, now, just think about somebody's eyes. When you look at this, what is it doing again? If your iris... If you're to look closely at your iris, it has highlights and shadows that make up all the little striations in the eye, right? So if you want to boost that, same exact thing again. Boosting highlights, pulling down shadows, adding a bit of contrast, adding some exposure. Maybe getting a little more color at it. That's it. And the easiest way to tell if you've gone too far on eyes, by the way, is to zoom out. To zoom out, especially to this view. If your eyes, from a thumbnail view like this, if the eyes look like alien eyes, like they're coming out at you, then you've gone too far basically with it. This one, the funny thing about it, is it looks that way because there was a lot of light going straight into her eyes, which in this case you would never brighten beyond what's already there. The preset's actually doing a lot of that, like if you switch this back to the soft color, you'll notice the eyes actually diminish quite a bit. So the glam color preset is actually boosting up the brights, the whites of the eyes. So if you notice that, you can always pull it down a little bit, if you feel like it's too bright. Can you please repeat that shortcut for the... That when you're doing the brushing thing, you have a shortcut for lowering or highering. What was that? Shortcut? The shortcut, yeah. For lowering, or... Oh. So when you have a preset select, for example, when you clicked in, here's the pin. And, by the way, guys, if your pins disappear, press H. H is the shortcut for "hide pins". So if you're like, "Oh my gosh, I put a pin there but I can't see the pin!" It's because it's toggled off. So press H to turn back your pin on. And then select the pin, hold down "alter option", left is gonna reduce the strength. Right is gonna increase the strength. Cat eyes. Left arrow and right arrow key? Yes. Or left, dragging left on your mouse, I'm sorry. So I'm dragging left on the mouse, dragging right on the mouse, while holding down "alter option". You have a question come in from Scott Hamill earlier that said, "Can you save the auto-mask setting in the brush preset?" Okay, so this is where, I'm dying for DxO to make these kind of updates. Local adjustments in terms of presets, they don't work the way you'd want to. Yes, the auto-mask will save, but it'll literally drop the same mask over the next image. Which, in cases of brushes, it's never gonna line up. Even if you're shooting the same subject with the same composition, there's always gonna be a little bit of movement there. So as soon as you go to the brush tool, you really need to apply it on every image. Now, there's certain things that I'm dying for, like for example, great time to show this. This is not a tangent, I promise. But this'll make a lot of sense. I know, should we just calm down. So if you look, I created this stylization preset, so if we brighten this up, just so you can see it. You'll notice that it actually blurs. Do you see how it added basically a tilt-shift effect to the image? So you can actually step it back, or forward. You can make it radial, or square. But there's a major problem. While you can add local adjustments with... I'll show you. So, I can actually click here, and it'll add... Do you see how it's adding multiple pins? See all those pins being added? So basically all I have to do is move that pin over where I wanted the effect to be, right? So I'm gonna move it over their faces. This added three different pins to the center of the image. Okay, and now we have blurred out edges, and... Do you see the effect? You guys can see it, right? Vigorous nodding would be good. Like, yeah, there you go. Okay, so the problem is while I can actually click another preset, and it'll make that adjustment, what it won't do is remove it. So, see that little thing that says "must manually reset"? Adobe has not built in the ability to actually make no local adjustment a preset. If they did, it would be amazing, because then you can apply local adjustment presets and have different groupings and all that kind of stuff. And if you don't want it, you just remove it. But right now, the only way to remove it is to actually go over here and click "reset". Or, you have to click a different preset that applies it in a different way. But there is no way to manually remove it. At least right now. Maybe they'll put out an update, maybe there's an update out already that does it, but up until at least two weeks ago, last time I checked, it doesn't work. So any time you apply local adjustments, they have to be removed manually.
Class Materials
Bonus Materials with RSVP
Bonus Materials with Purchase
Ratings and Reviews
April S.
When I first saw this course being offered I thought, I know how to save my own Presets, and I didn't think there could be much in this course for me. I like to listen in to courses while working sometimes though so I tuned in to this one just for "noise" in the background. Well, I was quite wrong about the content. This short course is a jewel in my opinion. Pye does show how to name, save, store Presets, but there is so much more. He delves into some pretty great detail about why and how you would save some adjustments and not others (In Camera vs Universal settings), and he explains in a precise, clear way (with demonstration) of how each setting affects an image. I have watched and also own several Lightroom and Photoshop courses. All are great, but none of them covered this topic in such a way as to make me think I don't need this course. I'm going to buy this course now so that I can watch at my own pace and really glean every little gem from it and put this info to immediate use. Thanks Pye!
Suzy Petrucci
I was literally wishing for a class like this a few weeks ago because I spend way too much time meandering though LR wondering if there's a more methodical and efficient and consistent way to get through lighroom editing. This class nails it. The what, where and why about each of the sliders and a foundational order in which to use them. Great system Pye. Thank you.
Nicolet Groen
I was a bit hesitant to buy because I am an interior and still life photographer and Pye is working in a completely different niche. But boy, I am so glad I got it. I finally created a set of presets that adjust my images in the way I want. The content is very structured and jam-packed with info. Next thing to figure out is how to create and use adjustment brushes, and yes, that is also explained it this course. Love it. Thank you Pye!