Lesson Info
10. Creating Universal Develop Presets
Lessons
Class Introduction
03:22 2Why Use Presets?
03:30 3The Value of Your Time
05:38 4Images With Presets vs. Without
06:03 5Four Way to Batch Process
22:11 6How to Create a Simple Develop Preset
13:52 7How to Create a Powerful Universal Develop Preset
08:36 8Mastering the Anatomy of a Develop Preset
09:41Lesson Info
Creating Universal Develop Presets
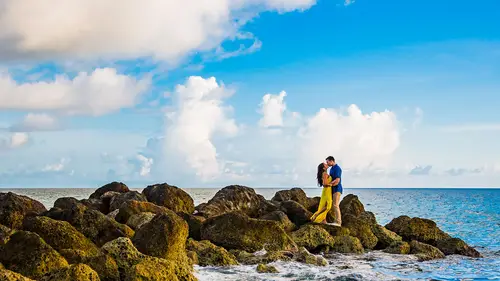
In-camera versus universal settings. This is our process. I want our people to choose their temperature and tint and exposure in camera. That's what they're gonna do. I wanna make the other things universal basically. So base tones, presence, tone curve, HSL, split toning, detail, and effects. And the way that I'm gonna do that is I'm gonna layer my developing process. So, we know that we're not gonna adjust, say for example temperature, or we're not gonna adjust warmth with temperature because that's an in-camera, that's a, I want the shooter to that, right? They're gonna choose that. But I do know that in general, based on my style, I do like to add a little bit of warmth to my images. So let's figure out how to do it consistently. So, here's the way I want you guys to work. We're gonna create the following universal presets. We're gonna start with one that's good contrast, has vivid color, soft skin, and overall warm skin tones. So let's leave temperature, tint, exposure, everything...
there alone. What are some of our formulas? Soft skin we can create that, pulling down highlights and pulling down the whites a little bit. I'm gonna raise the shadows and raise the blacks just a little bit to kind of preserve detail. I'm gonna lower my clarity by quite a bit. Now that's layer one of your adjustment. Your base tones. Now you'll notice that it flattened out a little bit too much. So I'm not gonna go to contrast. What I'm gonna do instead is pick my curve. And with my curve I'm gonna make a small tone curve adjustment, boosting my highlights, my mid-tones. We're gonna pull a little bit. Let me look directly at this so I can see it. Puling down shadows. Okay. We'll go somewhere around there. We're gonna adjust my temperature a little bit. Okay. So already we've done that. Now the beautiful part about this is that if you think about creating presets in this fashion, you can create a preset to preserve dynamic range, another preset to add back contrast, and another preset to do whatever, right? So I want you guys to break apart every single thing that we're doing. HSL, we wanna adjust down our reds and our oranges just a little bit. And maybe a little bit of yellows down a little bit too. Okay. Why do we do split toning over these images? You guys might notice, if you look right over the forehead area, you'll start to see this in every single image. Over your highlights, what daylight balance is the sun? Or sunlight? Roughly. (audience speaking faintly) 55, 58, somewhere around that range, right? It's bluish. So what you're gonna see in strong highlights is actually blue tones over skin. Do you not see that? Are you starting to, can you, now that I've identified it, can you see it? Where actually the highlights on her skin actually has blue tones in it. Okay. It looks a little bit unrefined. Now, I could go up to temperature, and I could say, well, let's just warm it up a little bit. But the temperature algorithm, it's doing similar things like contrast where it's affecting every single thing of the image all equally. Right? Not to mention, what about when you're shooting indoors and it's 3,600 kelvin. And you make a temperature adjustment to your preset, it's gonna apply it to that. So this is where, base tones, is what we use to preserve dynamic range. In our preset methodology. So I said this. I'm gonna go, the basic framework of a preset is gonna work, and you guys can do this differently if you want. But I just layered out the different ways that I would control an image. Dynamic range. I'm gonna control this with base tones. Okay? Contrast. I'm gonna control primarily with curves. Color. I'm gonna control primarily with split toning. What we've just done now is created a layered approach to processing. And this is what's gonna make your presets become universal presets. Because now you're not making temperature, tint, contrast, or any other adjustments that are gonna vary from scene to scene. You temperature's gonna adjust from scene to scene. Your contrasts adjust from scene to scene. All these things are gonna vary from scene to scene. We're gonna choose these. So now when it comes to, I need a little bit of extra warmth and kick, I go down to split toning. Okay? A good number in split toning, and this was one of the recent updates that we just released this week was actually to make a small update to split toning. 'Cause what we found was originally split toning was set to 60. Which worked really well in a lot of situations. But then in some situations we'd end up with slightly green tones. So after testing, we realized that it should be somewhere like around 45. It's a tiny adjustment, but it makes a huge difference. We're gonna put the saturation at 10. So the way that this works is your hue is adjusting color tone. So if you look at this little, if click this little button, you can see that the way that split toning works is going up and down is adjusting saturation. Going left to right is adjusting hue. Hue is overall color. Saturation is the strength of that color. So what we've done is we've selected kind of this warm orange tone. With a low saturation of like say 10. We give it a bias to be in the highlights. So we push that adjustment up until the highlight range. Right? So somewhere around like 40 is fine. The other thing I like to do is I'll give it a slightly different tone in the shadows. So for example I might do 40 and 5 for the shadows. So what that just did is was it placed warming tones, emphasized towards highlights throughout the image, that are a little bit stronger than the same or similar color warming tones that are placed in the shadows of the image. So now look at her skin tones. I'm gonna flip this on and off. Do you see it popping out the blues? So, we've just created a uniform adjustment for skin that you can apply to literally every single image. And it's gonna automatically make your skin tones better. You're gonna nix that bluish hue that you would get. And you'll get that bluish hue from flash. Anything that's daylight white balanced you're gonna get that bluish hue from. I had a question that had come in from Mike in Massachusetts who said, "Why did you increase shadows with the slider? And then lower shadows with the tone curve in the same preset? Aren't those just canceling each other out?" That's a really great question. So, I'm controlling dynamic range with my base tones. And I'm controlling contrast with the curves. Now, for this specific image, he might, you might see it kind of canceling each other out these two effects. But I'm not thinking of it that way. I'm thinking about in general, as we make these adjustments over the set of images, I wanna first choose the level of dynamic range that I wanna preserve. And then I wanna add contrast back appropriately. But the contrast that we're adding back is a little bit different. So, you have a little bit more targeted control over the tone curve, and those specific points, versus shadows and blacks, which are a little bit more heavy handed. So, yeah, it kind of does reverse itself in certain cases. But you don't really have another option. And I'll show them exactly why. Let's just apply a gentle amount of sharpening. Okay. And then I always add a little bit of noise reduction. You guys wanna know why things are, like why we do things fast? Like why do I have noise reduction built in? Well, I know that we do portraiture. And most of our brides, they don't mind their skin looking a little bit softer. Who wouldn't mind, I want my skin looking at little bit softer. I'll be honest. So, doing a tiny bit of noise reduction is gonna help to, do you see those fine pores? If we just bring this up by like 15 to 20, it actually will flatten out those pores just a little bit in the detail. And I didn't have to do anything in Photoshop or do anything, it just, it's just a cheat kind of in LightRoom. Okay. You'll notice that it's not enough to actually kill any hair detail. We still have all the hair detail. So this is where we go and do testing on like what settings are actually gonna work. So it's not gonna kill hair detail but it is gonna smooth out the skin just a little bit. Okay. So this would be basically the soft color preset. We basically made this. Which is very similar. You probably won't see too much of a change. Little bit of a change. So, that's just a general preset for this nice soft color. So here is, you can see the before and after on this is gonna be fairly, I wonder if that's the reset out before, or, not. Let's see. Oh it is. Okay. Cool. So if you look at the skin tones, do you, kind of see how the blue has been removed? It's a very subtle adjustment. And we create these different versions of this. So standard color's a little more poppy. Vivid color's even more poppy. For each level. Okay. And then what I would probably do on this particular image is just drop in a burn. Just pull the attention right into them. Okay. I wanna show them why those adjustments are made on different sides. And we're gonna do, viewer said, why not, like, what are those two things canceling each other out? This is exactly why. If I, and I've tried this before, if I said I wanna adjust my dynamic range with just my tone curve. Well, let's try that. I'm gonna pull down my highlights. And pull up my shadows. And do you see how you get that effect? It doesn't look right, right? We're gonna have to sit here, and like, add points, and like, even if we add these different points and stuff, you get this muddy looking image that looks absolutely atrocious. But, if I use base tones to control that. If pull down my highlights and pull down my whites, pull up my shadows, and pull up my blacks, do you see how we're at a much better place right now? It still doesn't look perfect. But the tones, they don't posturize. That effect that you saw a second ago, it's called posterization. It's when the tones just blend into each other and you get uneven graduation of tones. So now, I have just made a dynamic range adjustment. But, what is it missing? What is this missing? When you guys look at it, if I brighten this up, what is it missing? (audience speaking faintly) Contrast, right? So now if I add back contrast, via the tone curves, am I starting to get to a better place? Okay. And now, if I add in a little bit of a clarity adjustment, and you'll notice that on our HDR presets we'll actually use a little bit of dehaze. So this is where when you've made one adjustment tone curve is not enough. You start looking to the other things in your head that go, I can control it with this too. So we go down to dehaze. We'll kick in a little bit of dehaze. Okay. And now did we touch contrast? So could we not leave contrast again as the last option for, well, on a particular image if I need a little bit more contrast I'll dial it up or dial it back. So there is your HDR preset. So, why did we work it that way? Why do we do it this way? Because yes, they cancel each other out, but they work in different ways. And we have different controls over each thing. Did that answer his question? Yeah, thank you so much. Okay. Is that kind of cool? We preserved like, this is, when people say HDR, it makes me, it makes all of us kind of want to throw up, right? Especially if your clients are like, oh, I love HDR. And you're like, oh no. Like, crap. This is what we need to train them that HDR actually is, is it's nice. It's preserved dynamic range. It looks beautiful. It's poppy. But skin tones are still there. Okay? So what I would do to finish this out, is brighten it up a little bit. I'm gonna add a radial burn, right over the couple. Okay? And then we're still gonna do our split toning. So let's put back in that split toning. Okay. Let's go 40 and 10. And let's go, let's add in a little bit of blue. Sometimes I like to add in a little blue to the shadows. Kind of makes it nice split tone looking image. Okay. And then I have a little brush in here. If you guys are watching. Snapshot it. See what it says? Un-enhance HDR skin. So whenever you boost dynamic range, skin tone can get a little bit nuclear, right? Okay. So if you just bring this right over their skin and actually just paint right over their skin, it actually just knocks back the HDR effect off the skin. Okay. You can adjust it up or down as needed. And this image got a little bit overly manipulated in terms of shadows, so I'm gonna just pull it back a little bit. And there you go. I just want to show you the difference between the two different soft kind of looks, right? There's soft color, which is the one that we created. And, it has a really nice look to it, right? Do you see how, you can see those blues in her skin tones a lot easier in this image. Like the, kind of those blues and whites. And how they get evened out. Okay. So this is pulling the highlights and the whites and little bit down. If you want to balance out skin tones, like if you want them to kind of, even out, you pull the shadows up a little bit or leave them kind of where they're at, pull the highlights and the whites down. And what that does is it pulls the shadow tones on your skin closer to the highlight tones. Right? Your highlight tones get dropped and they get closer together. If you wanna go for that soft and airy look it's the exact opposite. So this is the glam color. And this is where they bloom. So usually you'd use a little bit of a lower exposure for this. But this is where our highlights and whites are boosted. Clarity is dropped further down. And what happens is these blown and white areas, they end up, do you guys know what blooming is? It's when a color wraps over another one. So, in the past you'd see those, you know those 80s glam shots that are like very hazy? That's blooming taken to the n'th degree. Essentially the perfect slider to show you that would be dehaze. Okay? Down one click is fine. But as you keep going, you get that like hazy look. This is blooming. But used to a small extent it can be really nice for skin. Okay. Now we can go back to slides. How many of us like that look of film? Like we like that kind of soft pastel vibe, right? Same exact thing. We talked about HSL. I'm gonna show you the nitty gritty of it. Okay, this image was shot 1/5th of a second, F1.4, ISO 3,200, 35 millimeters on a 583 handheld. It is possible to handhold and get usably sharp images at that. Obviously I would use my tripod in these cases. I just didn't have it with me. Okay. So what is our goal here? The goal was, and you don't have to pull up the slides guys, I'm just gonna look at it. It was a subtle fade, lower contrast, pastel colors, soft skin. Now, just so I can cheat a little bit, I'm gonna show you how to make the adjustments to the HSL. But then I'm gonna show you the actual pastel, like processing that I created. Which took me a lot of time to develop and I don't memorize every single number. So it, I'm gonna show it to you. Okay. So, let's say that this is our base image. I'm gonna get it up to kind of an appropriate exposure so that I know what adjustments that I want to make. And what I might do is, I might pull the highlights a little bit, 'cause usually like film tones, like when you're going for that soft airy film look, if you look at the highlights, they're not harsh, right? They're very soft highlights. Like the way film blows out is a very soft kind of look in general. So I would usually pull the highlights, pull the whites, and then add back a little bit of the shadows and a little bit of the blacks just to get the image kind of softer. Now, going down to clarity, I'm gonna minus out a little bit. We can actually revisit if we want to add a little bit more mid-tone contrast later. But with the tone curve, what I'm gonna do is I'm gonna flatten my highlights. I'm gonna flatten the shadows. Now, right here, oop, don't do that. Don't do that. Okay. So right here we have this soft matte look. And you can kind of see it. Can you guys see the matte kind of finish to it right now? Okay. So what's gonna happen is I'm gonna add a little bit of contrast back to both sides of the highlights and the shadows just by pulling them up a little bit. Isn't it great understanding how contrast works now? 'Cause now you can use anything. Like, oh, contrast works by pulling things apart. So I'm just gonna go pull the whites up and pull the blacks down, and now I have contrast. Okay. HSL, this is the big one. So if you want that pastel vibe, it's all about shifting your tones to a pastel look. And let me just go ahead and just adjust the white balance a little bit. So it's slightly warmer. So, a pastel look, like the greens, everything, is more muted, right? So what we would do is in the HSL usually I would end up raising the oranges and the reds a little bit. And the yellows. And then the greens get shifted more into like a teal. The aquas get shifted. The blues get shifted into teal. And it starts having that, that's that Fuji, kind of pastel vibe look to it, right? Now again I don't have all of these things memorized. So I'm gonna go down into color toning. And I'm just gonna show you guys pastel colors. Okay. If you want, screen shot it. Save this out. Saturation. What's happening right now is, in saturation pastel vibes can kind of tend to get, this is my version of pastel by the way, this isn't like, I feel like there's different interpretations of every single preset and look. When I see a lot of pastel type looks, the reds get, like the oranges and reds, they get to the point where someone looks dead. You know what I mean? Like where there's too much green in their skin and it looks like they're, they have those like dead vibes. So, for my pastel I actually boosted saturation in the reds, oranges, and yellows. And then I pumped it down in the greens, aquas, and blues. So it has more of this, kind of a bias towards skin tones. Okay. So we're pulling down the saturation of the aquas. We're pulling down all of the overall saturation. And when you look at the hue, we're taking our greens towards teal. We're taking our aquas and blues towards teal. And we're adding a little bit more purple. A little bit more magenta. Or we're bringing them to the right, to that more kind of magentaish area. And when you look at the luminance, what do you think these two again are? Oranges and yellows. Skin. I want the skin to be a little bit more bright. So I'm adding a little bit of luminance to it. We're pumping up the greens so that they come out like kind of bright and airy. We're adding a little bit more blues. 'Cause have you noticed when you see pastel images, do you see bright, like do you see dark vivid blues? Not usually. You see like very kind of light and airy powdery skies. So you have to often times boost the luminance, boost the brightness of the blues, so it becomes more soft and airy versus, okay? So, if you click the soft pastel preset, it actually will apply everything that we just did including the split toning, including the pastel colors, including all of that. And then we just simply adjust temperature to get to where we wanna be. On the look. Okay? So, temperature, tint, contrast, exposure, those are your tweaks. Everyone make sense? Did it make sense on how we use the tone curve to limit contrast? That kind of stuff. This one would be a fun one to do. It's high contrast, expanded dynamic range, exaggerated colors, but natural skin tones, and warm skin tones. So, I wanna walk you though it. Because we're gonna do it on this image, which is, they're quite a bit closer to the camera than most of the time, right? So we're gonna have to worry about skin just a little bit more. The process for the close-up HRD one, very similar. Base tones. You're gonna use that to control your dynamic range. Pull everything to where you want it. Add back your contrast. And you do the same thing, which we'll probably repeat a little bit when we get to the local adjustments, is nixing the effect over skin. So their skin is not like too crazy. But what I want to show you is, this is an image by one of my good buddies, Paul Von Rieter. Fantastic photographer. He's big into film. He's a hybrid shooter. Which is huge right now. It's a great way to like, differentiate yourself from other shooters is shoot film and digital. And he shoots them both to look like film. So this is actually a digital image off of his, I think it's his Nikon D4 or D5, one of them. 1/500th of a second, F28, ISO 200, 50 millimeters at one four. What I wanna say about certain types of looks is when it comes to Fuji filmic pastels, use them over the appropriate images. Images like this, where it's like a, you know kind of a party scene. Lots of color. Lots of everything. Probably don't really work that well for this kind of effect. Images that are, you know, like that are placed in front of a modern car. 'Cause this is essentially simulating film, right? It's simulating something that's vintage. So, this is a perfect scene for it because it very much simulates that kind of vintage vibe. But picking a scene where everything is modern, or everything just, doesn't fit that vibe, it makes it look like you dropped a filter in over your image. So, I like to say make sure that you're shooting that way to begin with. And then what I want to do is pull up Paul's image. 'Cause you'll see just in this little preset, I'm gonna brighten it up, and what we're gonna do is, I'm just gonna do soft color so you guys can see what the soft color version would look like. Has a nice look, right? It cleaned up the, you can see the softer whitish tones on her skin. And as soon as we apply soft color, you see how that shifts that out? Okay. Control. Virtual copy. Let's do pastel. Now once you apply the pastel, remember exposure and temperature. These are your two adjustments that you're gonna use to get to where you need to be. Ah, ah, ah. Okay. And then we're gonna go, so the first pastel that I'm showing you is more of a, a modern look. This is the Fuji 400H look. Which introduces grain and everything. So, what I'm say is that, this image can be developed all of these different ways. Because it works. It's the right type of scene. To kind of go anywhere you wanna take it, right? People always ask like, how do I get convincingly filmic images? They need to be shot first to be convincing filmic. Like, they need to be, to have that vintage vibe to them. Otherwise they are not gonna translate well. One of the worst ways to get them to translate is when you use a modern camera technique with a vintage filter. Okay. So imagine if I were to pop off a strobe, you know, and light you up. And create this really dramatic image. Like say for example this shot. Do you think that would translate well to film? Not really, right, because, this is a modern technique. It's designed to be vivid and bright. And then I'm going and applying a pastel and Fuji preset to this to make it look a certain way. It'll just look like you've applied a filter to an image. You have three beautiful images, with that other one there. The gal with the cottage or whatever. Yep. I'll pull it back up. How do you decide which one is the final? Which one do you show your client? This is a good, good question. The main thing that you wanna think about is well, it's gonna go back to the very first time you met your client. What is the client looking for? Because if they tell you that they like vintage tones and they like those kind of things, they want you to shoot light and airy. If that's what they want, you're gonna shoot that way. And if that's what they're looking for, you're not gonna give them both versions. Right? Wouldn't it be weird to have, like, like for example, if I deliver this to my client. And I give them two of them. And they're like, why is there two? Not to mention, if this were to go up onto a blog spread and let's say you have one image here, two images here, another here. Don't you want them to be the same tones? Same thing when it goes to the album. You're designing an album layout. Okay. You're designing a wall spread. This is like a classic film strip style wall spread. They, the tones need to match. So, that's gonna be based upon what your client wants. Or, a lot of photographers kind of say, look, this is my style. This is what I do. If you don't like it, go somewhere else. Which is totally fine. That's not the way that we work. But it's totally fine to do that. And then you simply just develop in one style. So, while they both look great, and they're both acceptable, you either need to let the client decide on which one you're processing or you decide. But don't do both. That'll confuse them. What you can do though, and what we're gonna talk about is when you are developing, like say, I feel so newbie when I use this, newbie. Game of words. So when you're using, like the, our post-producers know that we've separated this out. So if they're developing a set of images to be LGP color film, then they use the film black and white versions of each of these. Because those actually translate to the image. Right? So if we're post-producing modern, everything is modern. So there's LGP color in black and white, which is modern. And there's LGP color film and black and white film. So that way we keep the consistency in the image sets. And these are the two versions of the images that we would deliver to the client. 'Cause that makes more sense, right? And they also would work next to each other in a blog spread. I wouldn't put them next to each other in an album. Like I wouldn't do black and whites on one side, and colors on one side. I'd keep it all consistent.
Class Materials
Bonus Materials with RSVP
Bonus Materials with Purchase
Ratings and Reviews
April S.
When I first saw this course being offered I thought, I know how to save my own Presets, and I didn't think there could be much in this course for me. I like to listen in to courses while working sometimes though so I tuned in to this one just for "noise" in the background. Well, I was quite wrong about the content. This short course is a jewel in my opinion. Pye does show how to name, save, store Presets, but there is so much more. He delves into some pretty great detail about why and how you would save some adjustments and not others (In Camera vs Universal settings), and he explains in a precise, clear way (with demonstration) of how each setting affects an image. I have watched and also own several Lightroom and Photoshop courses. All are great, but none of them covered this topic in such a way as to make me think I don't need this course. I'm going to buy this course now so that I can watch at my own pace and really glean every little gem from it and put this info to immediate use. Thanks Pye!
Suzy Petrucci
I was literally wishing for a class like this a few weeks ago because I spend way too much time meandering though LR wondering if there's a more methodical and efficient and consistent way to get through lighroom editing. This class nails it. The what, where and why about each of the sliders and a foundational order in which to use them. Great system Pye. Thank you.
Nicolet Groen
I was a bit hesitant to buy because I am an interior and still life photographer and Pye is working in a completely different niche. But boy, I am so glad I got it. I finally created a set of presets that adjust my images in the way I want. The content is very structured and jam-packed with info. Next thing to figure out is how to create and use adjustment brushes, and yes, that is also explained it this course. Love it. Thank you Pye!