Lessons
Photoshop Playbook
02:27 2Adobe Bridge: Camera Raw
08:04 3Quick Select & Refine Edge in Photoshop
05:33 4Sharpening in Photoshop
09:40 5Correcting Distortion in Photoshop
07:36 6Black and White Conversions in Photoshop
08:45 7Content Aware in Photoshop
11:02 8Depth of Field Modifications in Photoshop
13:33Lesson Info
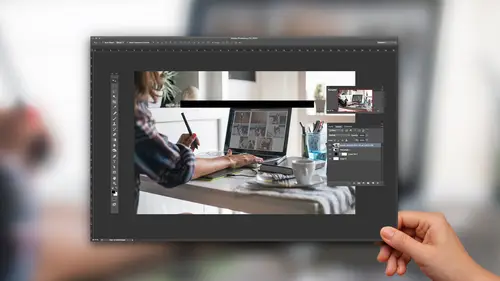
Content Aware in Photoshop
let's transition into some of the magic into some of the stuff that we can only do in photo shop, and I've sort of change this one over the years. Almost everything I do here is sort of problem solving, and it's very defined. It's hard to do that with the content aware tools, because they're all about totally reimagining your image. I want to show you a couple that you probably know a couple changes that there are, and I want to show you some that you might not know. And that's That's where I'll start with this 1st 1 to use an image that been using for a while. This feature was our first content aware future, and it came in in a photo shop CS for. And I don't know if it was because Social Media didn't exist then I don't know if it was because the economy was in bad shape, but to this day, when I show this feature, two people at least half the room has never seen it before. There's just low awareness of it. I think it's super cool. The idea is I have an image and I have content towards ...
the edges of my image, but I want to crop my image. I don't want to lose the content. Um, So what do I do? There's all sorts of different reasons. You might want to do this. Maybe I've got on instagram crop that square, and I want to change it and make it bigger. I want to make it landscape. Or maybe I want to go the other way around. Maybe I need to make an image square, but I don't want toe lop off somebody who's on the edge. What dough Ideo? Well, photo shopped actually is a great solution to that. And it exists in this tool called content Aware Scale. And so what we're gonna do is, uh, choose are rectangular marquee tool to select the area that we want and we're gonna navigate to content where scale And what happens when I pull this over is we can add to an image. What we're doing is we're actually adding water, sand, rocks. They were growing this image prenatal. So maybe I want to turn this into a web banner now, invariably, someone will say Yeah, but those guys you know, they're not supposed to be carrying long boards. Um, that's true. It's true. We'll work on that in just a second. There's a way to fix that. But we can also make the smaller there. We want to post this instagram, but we don't want to lose the family on the side. We could just keep coming in, and it's gonna remove all of that content that isn't as important. Throwing away the water, the sand, the rock since blending it all together. Really, really neat tool. Um, so let me show you how we fix it so that it doesn't distort the image. Okay, so I'm gonna cancel out of here, and before we go back in your nose, this is on its own layer, and I've got a larger canvas. I'm gonna take my friend the quick, select tool. Zoom in a little bit here. I mentioned before. I use this for everything I really do get myself a little more precise brush, and we're gonna just select this one guy here. Okay. Doesn't have to be a perfect selection again. I think people get really hung up on it, needing to be just right. It's not important for this workflow. What is important is that we give it a little extra room. So I'm gonna come down here and I'm gonna expand this, Um I don't know, six pixels. That's great. And then I'm gonna save that selection. And just to show you there's no tricks, let's call it creative Live, all right, And now let's go back in here, select the image just like we did before. Come into content where scale and given their long boards. But if I come appear to protect, here's creativelive and that guy's going to snap back and look the way he he should. So what it's doing is whatever it moves around, whatever reshuffles, it's always protecting that guy. I save a selection before I went in there of whatever I want to make sure I preserve. And it's not gonna mess with the men's room sign. Here is a way of looking at skin tones and whatnot and automatically doing that. I have had mixed success with that. The way I would do it is if you wanna wildly distort your image, but you don't want to change certain pieces. Select the pieces you don't want to change and save them, and then protect that it's a really useful feature. People use it all the time. If they have like a blawg that as a template, they have to fit an image into it. But it just doesn't quite conform to it. The other thing that people would use it for is, you know, going back to printing out photos, which none of us do as much as we used to. Four by six is full, full frame, right for by six. Well, if you double that, it's eight by 12. But what most people get when they get enlargement. Eight by 10 Your lopping off two inches That's a perfect example of I want large print it. I don't want to lose the content. So this is a great example. When you'd use that, I'll show you one more example of how would use this. Let's open this PNG here. It's a screenshot. Looks like photo shops. Yes, five. If I'm remembering correctly and I remember I went and showed this feature tow lorry Gruman at Cnet and she was Lorries. Just step one. She's very smart on. She's very tough critic, and the magic and stuff doesn't always get our attention. She wants the workflow features, and I showed her what I just showed you guys, and she was like, That's nice. And then I showed her kind of on a lark. I'm about to show you. And she flipped out, which was Ah, okay, well, let's say you have a screenshot and let's say you need to make that screenshot still a screen that's different than the original orientation of the screenshot. What you do is you select it and then you come into continent where scale, and as I compress it, it's just throwing away any pixels in between the interface that we're not using. If I had a photo in the middle and I wanted to preserve it, it's selected first and save the selection, and that I would protect that showed that tow lorry, and that was the one that just knocked her out. I would. That's awesome. I'd use that So cool. Um, always using different resolution monitors. My blawg, this and that. Different features mean different things to different people, but that's it's really handy when you want to do stuff like that. Designers can use it to re factor stuff, you know, let's say I've got an IPad pro and, ah, new IOS device comes out with a different orientation. And I've got all my mock ups for this Rather than having toe totally redesign all of them, I could re factor the you Why isn't content where Skip? So let's look at a little bit, uh, a little bit more magical actually reopened this one to show you tools that you probably know, But maybe you don't know exactly how they work. You may have noticed that if this document, sometimes you have the ability to make a selection and hit delete, and it'll just content aware fill it. And sometimes it will do that if you have a layer. If you have a multi layer file and you want to use content aware fill, you need to then come up here and go to edit fill content aware, and then it will work perfectly fine. The other way you can do this is with the spot healing brush. You want to make sure you said it to content, aware there's a lot of different ways to use the spot healing brush. But if I said it toe content, aware, I could just come in here and I can pick up trash. Aiken, remove stuff from the beach. The way that it works is it sniffs all around the neighboring pixels and it blends them altogether. Does a great job. Now, let's revert this file and say that we want to take this person on the wave here and move them. Now, this is where you would use content aware move. And one of the tricks with this one that a lot of people don't know is you don't have to use the content were moved tool to select it. Use any tool you want. Eso I've selected it already. And then I'm gonna come in here all these sort of magic tools and go to content aware move, and I can move it wherever I want it and drop it in there now, prior to about a version ago, maybe maybe two versions, I wasn't able to re scale it. I would just drop it in and it would move it. It's gonna do two things when I commit that one. It's gonna remove it from the original photo and the other is it's gonna drop it in there. What I can do now, though, as I could move it in here and then I can re scale it. So maybe I want to put him down there or something. I click that and it's gonna drop him in there. Now, the thing to know about all of these is that you can change the color and the structure. These air kind of nebulous controls. But you can do it after the fact, and that'll adjust how things are blended. Eso if you're not giving the result, you want monkey around with these structure and color tools. Ah, and you can get what you're after their. So the idea with content or move is it doesn't just place it somewhere. It removes the original instance of it. Um, these things were used for all different work flows. And once you once you lean on there, they're really great tools. One other one. I'll show you what? That Let's open this. And let's use um, let's use one of the country where tools that doesn't always work. So you might have noticed that say, I want to Ah, they want to remove one of the people from this image, and I go to use content aware fill, and I'm not gonna do it here. But I'm just guessing what would happen if I did Content aware fill on this. There's a pretty good chance it would sample from those windows up there, and I wouldn't get exactly what I want. But if I use continent where Patch, Um what I'm gonna dio is I'm gonna choose the area that I want to fill. Um, so I'm just gonna say OK, using that area, fill that again. The key to getting the results you want are playing around with the structure, which you'll notice kind of uniquely you could do after the fact. It's very different from the rest of photo shop in that After I've dropped that, I can play around with the structure and the color afterwards. There, um, the patch tool is really great. If you're wanting to fill stuff that you don't want it to pull from the boundaries, that's a little bit of magic. Photo shops got a lot of magic. Um, we spend a lot of time working on those features. And Rita Cher's lean on them all day. Every day. Content were fills really great for moving lens flare. Obviously, trash. It's great for D branding. You know, if someone's wearing, like logo wear and you're shooting for a different company and you don't want to advertise for that company content aware fill or the spot healing brush, you can remove whatever the logo is really easily and in a really good way.
Ratings and Reviews
Mike Thompson
I think this class was well worth it. I like that you are sharing this info, like the "secrets" so I can try them and have acquaintances ask, "how did you do that". It was great. Thanks!
user 12004e
Lots of good tips. Gets to some deeper aspects of the programs.