Lesson Info
4. Demo: Surfaces and Papers For Pastels
Lessons
Class Introduction
06:15 2Colors and Types of Pastels
05:20 3Demo: Blending Pastels
12:23 4Demo: Surfaces and Papers For Pastels
10:55 5Demo: Layer Pastels on Smooth Bristol Paper
07:20 6Demo: Oil and Dry Pastels on Tracing Paper
04:29 7Demo: Colored Paper With Pastels
03:22 8Demo: Pastels on Premium Mounted Boards
05:03Lesson Info
Demo: Surfaces and Papers For Pastels
This is the next sort of level up of papers that one might use. And I also am showing you here, I have different sizes of these stumps, and the only reason why you have different sizes, is because you might have a little tiny, noodly area, you would use a little stump like this. I tend to use this stump, because it has a pretty fine point for most of the things that I do. If I had a very small passage to kind of mix and blend, my finger's too big, I would use the stump. But this is a nice variation. There are really large stumps that you can buy, and that's really only if you wanna do a very big picture, and a large area to blend. Now this paper is called a sketch paper. This is also a Blick brand. And let me just find it in my pile of pages here. Tracing paper, here it is. Just so you can see what the cover looks like. It's a Strathmore sketch paper, and it's also recycled, so it has a little bit of tooth. It's not a refined paper. It's a sketch paper. So, it's like the newsprint. It'...
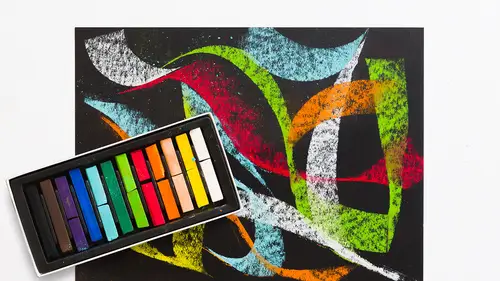
s intended to be used like the newsprint. I'm just gonna pull a piece out. Okay, and put this aside. So this is the exact same type of paper, and what I wanted to show you, is when you're using the chalks, whether they're the oil based, or the stick, there's a couple things you can do. I'm showing sort of these different areas of blending, and I'm actually gonna put a pad underneath, so that I have a smooth surface to work on, and I don't pick up the table surface. There. So, as you can see, it's also very much like the other paper. It's pretty blendable. It works really well. It has a little bit of tooth to it. But, it's not a beautiful, exquisite surface of paper. It's, I think, really I would use this more for my color study, or studies, but I wouldn't necessarily use it for a refined finish. You can create two different types of mark with either the dry stick pastel, or the oil pastel, but I'm gonna test the round one, so you can see why would you use a round. You can create these beautiful swirling sort of marks. You can go to the edge. Use the edge of that circle. This, you can do the same thing, but it's not going to be exactly the same kind of mark, just because it's a square base, as opposed to a round. So the tool itself can help you define passages on your piece, depending on, do I wanna make something where I'm, literally I need the turn, I need the curve of that round edge, or do I want something that's gonna give me more of a straight, really clear, crisp line? Now all of these marks that I've made, they're sitting absolutely on the surface of the paper. I haven't rubbed them in at all. So pastel has two ways of working. You can rub it into the surface with your stump or your finger, or you can let it rest absolutely on the surface. Now the issue with doing the second, is that you have more of a risk of things sort of blowing away. And, in talking about things blowing away, and you can see the dust right here, I'm gonna blow. This is pigment that's a dry powder that gets into the air, and can get into your lungs, so, in studio right now, we're doing just a small number of pictures here, I'm not too worried about it, but if I were doing this, like a series of pieces, or working a lot with pastel, I would have a mask, and the mask is really a nice tool for keeping your lungs clear of pastel dust, just like with charcoal. So, this is inexpensive. You can get this at the hardware store. I believe you can get it at the art supply store, something like this. It's just a very simple mask. Some people who work with pastel a lot use ventilators. They have ventilation in their studio and they're very, very careful about it. So, you wanna be mindful of that. If you do end up loving pastels, keep yourself covered with a mask, so that you're not breathing in the dust. So, let's talk about the fact that it's sitting on the surface. So, this is perfectly fine, but if I accidentally hit it, the color is just gonna move. And that can be disastrous, if you have a piece that has a lot of color that's sitting right on the top of the picture. It looks cool, but it's gonna be a problem if someone touches it. So what we do use for pastels, is, it's called spray fixative. And spray fixative is, well it's workable spray fixative. Means you can work on top of it, but it'll hold your pigment, your powdered pigment down on the surface. So, a workable fixative, you can get it at Blick, is an excellent tool for pastel and charcoal, and again, it's fumy. It's an aerosol, it has fumes, so you never use spray fixative in your studio. When I spray fix a drawing, I would take it outside, hold my breath, spray it, wait about 10 minutes, go back outside to get the picture, and bring it inside. I don't want those fumes in my studio. So, it's a great tool, but you wanna use it wisely. And it tells you on the side of the can. I did spray fix something for you to see here, and I did one side is rubbed in, and the other side is sort of textural. There's still a little bit of dust, but it's not coming off on my finger. We'll do the finger test. No red. Let's try this side. Well that finger's dirty. No red. Well, a tiny bit of red. So, the more you spray it, the more layers of spray, the more unlikely it is that anything that you put on top of it is gonna move the color that's already there. Now with pastels, I also like to keep my fingers clean, because I'm using these as tools. I don't wanna keep putting my finger back on with a color on it, and I'm using some other color. They're gonna start mixing on my finger, and create neutralized color. So, if you don't wanna make what people refer to as mud, a term I'm not, I don't love the word mud, because it sort of seems like an insult to the browns and the grays, and they serve a purpose in the palette. So, we won't call it mud. We'll call them neutral colors. But what happens is, if I have ... Let me choose a green. If I have green on my finger, and I've just used it somewhere else, and then I start using some red, and then I mix, all of a sudden, I'm gonna get some really neutral, grayish tonalities, and I just, you know, I have to be mindful of that, so keep your fingers clean. Keep a wet rag with you when you're using pastel, especially if you're using your digits, instead of the stumps, to move things around. The other tool that you can use to kind of move the color around ... So Kenna, I want you to make a suggestion for color to put on top of our red. Let's see. Would some kind of green tone be able to go over it? What would it do? It would go against it. So let's try that. Okay, so we're gonna do ... I'm gonna choose this green, because it's really zowwy. It's like a lime green. And I'm gonna put it over this area. And just as you said, look what it's doing. It's really vibrant, right? I'll make a line. I'll make an edge, I can do an edge with this, because it's a square shape. And, it really pops. If I rub it in, what is it doing, Kenna? What is it to your eye? So, neutralizing more, Yeah, yeah. Because they're opposites. That's exactly right. So if I put this next to this, it's going to look very neutral, versus this is very bright. It's actually how you create light and shadow. And you can see that when you see the two together. So, it creates a sense of almost space. That light green pops forward, because it's reacting as a complement, and the other is sort of sinking back in space. So that's kind of a useful thing to know. And again, the technique that I used was rubbing on one side, press it into the paper. The other side, let it sit on the surface. Let's not ignore, and we'll touch with these rounds too, but there's really no difference between these colors, and these colors. The only difference is the shape of the stick. So, I'm gonna test with a green also, but I'm gonna do it with the oil pastel, and this is dry stick pastel. Oil can go over dry stick. We've established that, but I'm gonna do ... See how well it rubs into the surface. So there's a pretty thick patch of the color, and you can do a gradation, where it's really gentle, showing the texture, both of the crayon itself, the tool, and the texture of the paper that it's on. So, let's test a little bit of rubbing into the surface, and see how it works in comparison to the dry stick pastel. I'm gonna try it with my finger, because you know I like to use my fingers. I'm gonna press it in, and it works. It's really quite wonderful. As I said, I used dry pastels, and I've used them for a very long time, and less with oils, because oils on top of water, you recall you can do it, but the oil creates just a different sensation and feel, and I was never really that into it, and then I got to play with it. I'm like, I love these oil pastels. So they rub in nicely. I'm gonna try it with a stump. I'm gonna grab a fresh stump, because the other one has red on it. And, now I'm able to push that color around, and it works out okay, but as soon as I hit the dry of the paper, it starts to feel a little bit funky. So, again, it's really a matter of preference. This is tiny little tip, as opposed to the big fat shape of my finger, so it depends on how small the passage is that you want to get to in your picture. It works pretty well. It does tend to start to pick up the color here, if I press too hard. You can actually see I'm lifting, because it's paper on paper, I'm lifting that color right off, and it's a little bit strange. It creates more of a bumpy texture, as opposed to a smooth passage. And starts to just push the color around. So the stumps can work, but only if the color is pretty thickly applied to the surface. So what else do I wanna show you? And that's on a smooth side, versus this side, which is really textural. So if you like a textural color, and you like that energy, you could spray fix a whole surface with this kind of texture, and not smooth it out, and just leave it there. And let's try that over here.
Class Materials
Bonus Materials with Purchase
Ratings and Reviews
Janelle
This class is titled getting started for a reason. It tells you all the basics about material use for you to just get started and play with the medium. Enjoy the process!
Student Work
Related Classes
Illustration