Lesson Info
7. Demo: Colored Paper With Pastels
Lessons
Class Introduction
06:15 2Colors and Types of Pastels
05:20 3Demo: Blending Pastels
12:23 4Demo: Surfaces and Papers For Pastels
10:55 5Demo: Layer Pastels on Smooth Bristol Paper
07:20 6Demo: Oil and Dry Pastels on Tracing Paper
04:29 7Demo: Colored Paper With Pastels
03:22 8Demo: Pastels on Premium Mounted Boards
05:03Lesson Info
Demo: Colored Paper With Pastels
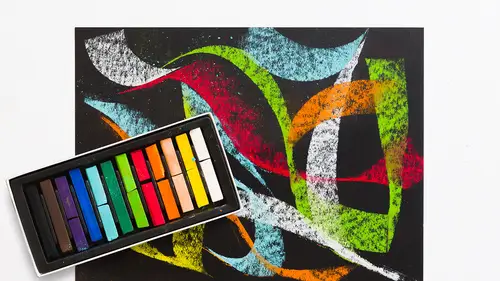
This is called Canson paper. And this is specifically designed for pastels. Canson and Fabriano both make this type of paper. And we have both, and they're very, very similar. I've generally used more Canson than Fabriano, but they're both equally good. Now this paper is kinda interesting because it has a tooth to it. I know this is somebody's favorite color combination, blue and orange. So look at this, look at the texture. It's very textural and it's very even. If I go dense, you don't see that texture anymore. This is an oil pastel I'm using on it. If we test with the dry stick, same thing. There's a lot of texture to that. And they designed this paper purposely to get that kind of quality because it hangs onto the pastel. Even the dry stick, it hangs onto that color really well. So it's great, but it's not great for a tiny picture. If you're doing a little small study, that texture is so large, it can be a little distracting. So my recommendation, and it works well if you push in t...
he color, finger, same thing, you can still see that texture, though. See if I can do this here. Even if I rub it in, I can still see the tooth of that paper. So it's great for large pictures. If you're doing a really small picture, I would flip the paper over. And I'll show you why that makes sense. Rub this in, again, you can always rub the color in with any of these papers. It works really well with either oil or dry stick. But let's use the flip side of the paper. And that would be, I'll just flip this over. And I've got a couple different colors here, you can see the Canson paper, and the Fabriano paper come in all these different colors. So it's really fun to experiment. I'm a huge fan of color-toned paper for pastels. It gives you a place to react to. It's a ground, it's instantly there. So it's super-fun. But let's just flip this paper over and this is the smooth side. I tend to use this side because I don't work with large pictures. I work fairly small. So I don't want such a toothy surface. Now if you look at this, it still has a texture but let's just test this color. There's the texture of literally this tool on this surface. But unlike this surface, you can see it kind of, I don't know if you can see those little gaps of color between the pigment, and it's letting the paper show through. And here, the gap is pretty much gone. It's just the texture of this tool. So my preference is the smooth side. So if you like the smooth, flip your paper over and don't use the highly-textured side. If you love the texture, use the textured side. And you can tell and I put an X to know which side is smooth, it says Canson, you can read it. So you can flip it over. You can see that it says Canson on what they call the correct side, or that's the textured side.
Class Materials
Bonus Materials with Purchase
Ratings and Reviews
Janelle
This class is titled getting started for a reason. It tells you all the basics about material use for you to just get started and play with the medium. Enjoy the process!
Student Work
Related Classes
Illustration