Lesson Info
11. Camera Settings Overview
Summary (Generated from Transcript)
The lesson discusses camera settings, focusing on the file type (JPEG vs. raw), white balance, and color space. It explains the differences between JPEG and raw files, highlighting the benefits of shooting in raw for more editing flexibility and higher image quality. The lesson also covers white balance settings and the importance of adjusting it based on the lighting conditions. Lastly, it discusses the two color spaces (sRGB and Adobe RGB) and their implications for editing and printing photographs.
Q&A:
What is the difference between shooting in JPEG and shooting in raw?
JPEG files are processed and compressed, resulting in smaller file sizes and automatic adjustments made by the camera. Raw files, on the other hand, contain unprocessed and original data from the camera sensor, providing more flexibility for editing and preserving image quality.
Why do photographers shoot in raw?
Photographers shoot in raw to have more control over the final image and the ability to make adjustments to white balance, exposure, and other settings without degrading the quality of the image.
What is white balance and why is it important?
White balance is a setting in the camera that controls the color of photographs by correcting the color temperature of the light source. It is important because different light sources have different color temperatures, and adjusting the white balance ensures accurate and natural colors in photos.
What are the advantages of shooting in the Adobe RGB color space?
Shooting in Adobe RGB provides a larger color gamut compared to the sRGB color space, which can be beneficial for editing and printing photographs. However, it is important to note that most Internet platforms still use the sRGB color space, so converting images to sRGB may be necessary for optimal online viewing.
Lessons
Class Introduction
23:32 2Photographic Characteristics
06:46 3Camera Types
03:03 4Viewing System
22:09 5Lens System
24:38 6Shutter System
12:56 7Shutter Speed Basics
10:16 8Shutter Speed Effects
31:57Camera & Lens Stabilization
11:06 10Quiz: Shutter Speeds
07:55 11Camera Settings Overview
16:12 12Drive Mode & Buffer
04:24 13Camera Settings - Details
10:21 14Sensor Size: Basics
18:26 15Sensor Sizes: Compared
24:52 16The Sensor - Pixels
22:49 17Sensor Size - ISO
26:59 18Focal Length
11:36 19Angle of View
31:29 20Practicing Angle of View
04:59 21Quiz: Focal Length
08:15 22Fisheye Lens
12:32 23Tilt & Shift Lens
20:37 24Subject Zone
13:16 25Lens Speed
09:03 26Aperture
08:25 27Depth of Field (DOF)
21:46 28Quiz: Apertures
08:22 29Lens Quality
07:06 30Light Meter Basics
09:04 31Histogram
11:48 32Quiz: Histogram
09:07 33Dynamic Range
07:25 34Exposure Modes
35:15 35Sunny 16 Rule
04:31 36Exposure Bracketing
08:08 37Exposure Values
20:01 38Quiz: Exposure
20:44 39Focusing Basics
13:08 40Auto Focus (AF)
24:39 41Focus Points
17:18 42Focus Tracking
19:26 43Focusing Q&A
06:40 44Manual Focus
07:14 45Digital Focus Assistance
07:35 46Shutter Speeds & Depth of Field (DOF)
05:18 47Quiz: Depth of Field
15:54 48DOF Preview & Focusing Screens
04:55 49Lens Sharpness
11:08 50Camera Movement
11:29 51Advanced Techniques
15:15 52Quiz: Hyperfocal Distance
07:14 53Auto Focus Calibration
05:15 54Focus Stacking
07:58 55Quiz: Focus Problems
18:54 56Camera Accessories
32:41 57Lens Accessories
29:24 58Lens Adaptors & Cleaning
13:14 59Macro
13:02 60Flash & Lighting
04:47 61Tripods
14:13 62Cases
06:07 63Being a Photographer
11:29 64Natural Light: Direct Sunlight
28:37 65Natural Light: Indirect Sunlight
15:57 66Natural Light: Mixed
04:20 67Twilight: Sunrise & Sunset Light
22:21 68Cloud & Color Pop: Sunrise & Sunset Light
06:40 69Silhouette & Starburst: Sunrise & Sunset Light
07:28 70Golden Hour: Sunrise & Sunset Light
07:52 71Quiz: Lighting
05:42 72Light Management
10:46 73Flash Fundamentals
12:06 74Speedlights
04:12 75Built-In & Add-On Flash
10:47 76Off-Camera Flash
25:48 77Off-Camera Flash For Portraits
15:36 78Advanced Flash Techniques
08:22 79Editing Assessments & Goals
08:57 80Editing Set-Up
06:59 81Importing Images
03:59 82Organizing Your Images
32:41 83Culling Images
13:57 84Categories of Development
30:59 85Adjusting Exposure
08:03 86Remove Distractions
04:02 87Cropping Your Images
09:53 88Composition Basics
26:36 89Point of View
28:56 90Angle of View
14:35 91Subject Placement
23:22 92Framing Your Shot
07:27 93Foreground & Background & Scale
03:51 94Rule of Odds
05:00 95Bad Composition
07:31 96Multi-Shot Techniques
19:08 97Pixel Shift, Time Lapse, Selective Cloning & Noise Reduction
12:24 98Human Vision vs The Camera
23:32 99Visual Perception
10:43 100Quiz: Visual Balance
14:05 101Visual Drama
16:45 102Elements of Design
09:24 103Texture & Negative Space
03:57 104Black & White & Color
10:33 105The Photographic Process
09:08 106Working the Shot
25:29 107What Makes a Great Photograph?
07:01Lesson Info
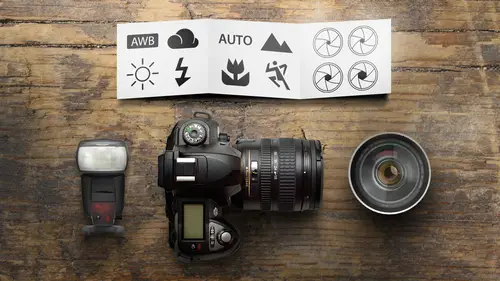
Camera Settings Overview
Alright, it is time to continue our exploration of the camera, and we're now gonna be getting into the camera settings. There's a lot of secondary features, in your camera, that are very important. And, I think, this is a good time, to go over those, and some of the recommendations, and what they control. First up, and probably the most important, is the file type. And so, when you have a digital image, it needs to be stored, in some sort of file, that you can write, to a memory device. And one of the options, is JPEGs. And all photographers, no matter what level they shoot, deal with JPEGs, in some way or another. Because, whenever we send photos online, or we email people photos, we're usually sending JPEGs, in many situations. So, something we're definitely going to be use, cameras can shoot JPEGs, straight outta the camera, of course, and what happens in these, is it goes through processing. And so, that means the camera is gonna determine the final look of your image. It doesn't j...
ust come out, exactly as the camera saw it. It adds a little bit of contrast, changes the colors a little bit. There's certain things, that traditionally look in a photograph, and the camera adds that in, automatically, on JPEG images. It also goes through compression, to reduce the file size, to make it faster to transfer, so that we can store more images on a memory card, and hard drive. The problem with compression, is when you compress something, you are generally throwing something else out. And in this case, if you were to compress this image, over, and over, and over again, those subtle differences, in the blue, become very large differences, and the colors are not as smooth as they could be. And so, that's what would happen, kind of in theory, if you go too far, with the idea of compression, reducing the file size down. And so, it's not the best option, for photographers, who are trying to gather the most amount of data. But, you do end up with the all-convenient JPEG. And so, when you wanna post a picture, at your favorite social media site, the JPEG image is the way to go. That is still the standard, and it looks like it's gonna be the standard, for quite some time, right now. It's just so very common. All of our computers, phones, and every other device, can read JPEGs. It's built into the standard operating systems. It's very easy to deal with. In virtually all cameras, you will have the option of shooting raw. And this is the original information, from the sensor. It gets the original data. It does go through a raw converter, so that it can actually convert analog information into digital information. And it does apply the white balance, which we will talk about, in a moment. But, the nice thing, is that it is removable. So, if you've made a mistake, in how you set the white balance, you can fix it, with raw, and no implications, no damage to the final photograph. You end up with this raw image. And every manufacturer has their own proprietary raw language, which is a little bit of a frustration, 'cause they have their own ideas, of how they think it should be stored. And this gets to be a little bit of a problem, because this is often too big, to send to somebody, via email. It's not the type of image, that's gonna be accepted, at a lotta websites, for being posted, and so forth. And so, this is your original negative. And if you can think back, to the days of... Film, where you had negatives, photographers kept the negatives. That was really important. But, you wouldn't share your negatives with other people, you would make a print, and you would share the print, but you always keep the negatives. And so, photographers these days, keep the raws, they'll make JPEGs from those, according to the needs, and they'll keep very close track of their original raw images. To work with a raw, you're gonna need software. Your camera comes with free software, in most every case. There are other companies, like Adobe, that make products, that work with these raw images, from all the different manufacturers. And so, most photographers these days are working with some sort of program, that can read a wide variety of raw images, and make adjustments, and then save it as a JPEG, and so forth. So, if you shoot raw, you get a raw, and if you want, you can make a JPEG. Or, a different JPEG, or a different type of JPEG. If you shoot JPEG, you can't get raw. You're done, it's over. You've skipped that phase. And so, that's why most photographers wanna shoot raw, 'cause it's the original data, from the sensor. So, JPEG images are processed, and compressed data. Raw is the unprocessed original data. And so, the JPEGs are smaller, they're easier to work with, and so, somebody new to this, might be a little worried, like, well, I like the easy to use JPEG option. But, the raw is gonna have a lot more benefits, down the road. So, I wanted to do a little test. So, in the studio, I am shooting two playing cards, but one's kind of hidden in the shadows. And this is kinda true, in real life. You'll shoot something, for the highlights, and there'll be something kinda dark, and you want it brighter. Well, what's the difference, between raw and JPEG? Well, in a lotta different programs, you can just brighten things up, right? So, let's brighten up the JPEG image, and let's brighten up the raw image. Can you see a difference, in how far we can push things, after the fact? And so, if you need to make any sort of adjustment, raw is gonna give you more options. Now, in the next example, let's over-expose portions of our scene, and this will happen, from time to time. There's a bright spot of light, and you would like to pull some detail, back outta that light. (clears throat) Well, let's try to darken up these areas, and see what happens. Okay, not too much, with the JPEG. And the raw holds a lot more color information there. And that's because, it hasn't thrown out that original information, that came from the sensor. And so, if you wanna make adjustments, you wanna be working with raw images, 'cause it just gives you more latitude. If we were to look at the histogram, and we'll talk more about the histograms later on, but I know a lot of you are already quite familiar with them. This shows us the range of brightness. And you can see, the JPEG images are either kind of scattered, in the data that they've collected, or it's completely cropped off, and it's just thrown away a lot of information, from that particular image. And so... For most photographers, image quality is really important, and that stars with the raw image, from the camera. Here's an example. I was shooting in a slot canyon. And on the back of the camera, things seem to be okay. There were some highlights and shadows. And then, with several different software programs, you can turn on clipping information, that'll show you highlights and shadows, that are beyond the range of the sensor. And you can see here, there's actually a lot of stuff, that's beyond the range of the sensor. Now, you can play with images, that are JPEGs, and you could adjust the shadows, and the highlights, and correct for some things, and I did that, in this case, and I was able to kind of resurrect some of the shadow information, and some of the highlight information. But, when you shoot with a raw image, I went in, to adjust that, and the only thing that I continued to lose, was a couple of the very most bright spots, right there. And so, this is a really tough situation to shoot, because it's bright, and it's dark. The raw image captured a larger dynamic range of shooting. And so, it should be the preferred choice, for most people, most of the time. Now, some people are a little bit more strict about this than I am. They're like, shoot raw, all the time! No questions asked! Well, there are some reasons, to shoot JPEGs. And if you know that you're getting the right exposure, file size, transferring is really important. So, for instance, you're shooting your friend's wedding, just as a nice little gift, and they want really high quality photographs. You're gonna shoot raw for that. But, they said, could we have a slideshow, at the reception? And you're thinking, wow, I'm gonna have to download raw images, that's gonna take 10 minutes, per card. Then, I need to send them through a software program, to turn 'em into JPEGs, so I can get 'em into the standard slideshow programs. That's gonna take, like, another half-hour. That's gonna take me, like, an hour and a half, sitting at a computer, to do this. Complete waste of time. Shoot raw, plus JPEG. Use the JPEGs, to do your slideshow. Use the raw, for the final prints. And so, there are several cases, I know some sports photographers, that they know their exposures pretty well. That's kinda dialed in. They need to shoot fast, on their cameras, because JPEGs are smaller in file size. Your cameras will be able to shoot faster, and through more photos, more quickly. And so, there are sports photographers, who will shoot in JPEG, and it's because they know, that they're getting good results, and it's good enough, for the purposes that they're shooting. But, if you don't know what you're gonna be doing with 'em, and you want the full file, to go back to, you wanna be shooting in raw. So, in your cameras, is gonna be a menu setting, that's gonna give you the option, for changing these images. Changing JPEGs, you'll have different options, usually between small, medium, and large, depending on what size you want. Now, I know this is kinda strange, for a lotta people watching. Like, why do you wanna shoot a medium-sized JPEG? Can't you just make it smaller, in post-production, on your computer? Yeah, but you know what? Not everyone, who has a camera, has a computer. And some people need to shoot a particular size image, right in the camera, 'cause that's all they have. And so, there are a few cases, where you know you do not need 50 megapixels of little Fluffy! You know, you just want a small, basic shot, to post online, for some reason. And so, you can do this, in different sizes. But, if you are gonna shoot JPEG, at least go in there, and make sure that you're shooting a large JPEG, for most of your photographs. You didn't spend all that money, for all those megapixels, not to use them. We wanna try to get the highest quality possible. Now, many camera companies will also have different versions of large images. It's the same number of pixels, but it's compressed, and they're throwing away extra color information, to reduce the file size. And so, you wanna keep the largest size file, that you can handle. In general, it's gonna be the largest option that they have there. I don't think there are many good reasons, for shooting smaller sized images, other than, you know for sure, you don't need a larger size image. I know I have shot my camera on small JPEG. That's right, I shoot small JPEG. Occasionally. I need something, for a presentation, on a screen, and I know that on-screen, it's only gonna be 600 pixels by 600 pixels. I'm not gonna waste 42 megapixels, or 30 megapixels of information, if that's what I know that that final picture is. But, when I'm not shooting, and I don't know what I want... Or what this can be used for, I want the most possible. Now, each company will have their own different layout. Nikon uses fine, normal, and basic, for their compression settings, so you want the fine quality, with Nikon. With Sony, they call it extra fine. Just different names, different companies, who use these different names. So, take a look at what they are, and I know, like with Nikon, it comes by default, to normal, and you can bump it up, to fine, to get a little bit higher quality. So, besides JPEG, we now have the raw option. Many companies are now starting to offer multiple size raw images, so you could shoot small, medium, or large. Once again, you would normally shoot the largest one you can, unless you know that you don't need as much. Now, for a period of time, I had a camera, that had a whole lot of megapixels, and I just didn't need all those megapixels, when I was traveling, doing straight photography. It was just overkill, and I set my camera to medium raw, just because I knew what those photos would be used for. I just don't need the giant 50 megapixels. That was kinda like the turbo mode, for my camera. And so, you do have to be aware, 'cause you don't wanna be wasteful, but you wanna be prepared for anything that you might need those images for. So, the file size will depend a little bit on your camera. We'll talk more about that, in a bit. And the JPEGs usually compress things down, to about one-third the size, which means you can get three times as many images, on a memory card, or a hard drive. And some of you are like, wow, I can store more images! No, that's not necessarily better! Memory cards are, basically, cheap at this point. I recently spent, I don't know how much, 30 bucks, 40 bucks, and I have a memory card, that stores a thousand raw images. That's gonna last me a long time. I was in Europe, for a month, traveling, and at about $100 in memory cards, I stored all my photos! And I get to use 'em over, and over, over again! And so, memory cards are not a big deal. Hard drives have gotten very cheap. And so... You should be shooting the large size, unless you specifically know you need something smaller. White balance is a setting in your camera, that controls the color of your photographs, and it is there, because your camera doesn't know what color the lights are, that are illuminating your subject. And so, it thinks everything is white. And so, it's gonna see these different-colored lights, if they are color. And so, this is a scale, that goes from 2,000 Kelvin, which is very reddish, to 10,000 Kelvin, which is very, very blue. Now, there's gonna be, usually, three different settings, for normal daylight settings, which have slightly different color temperature to them, and then there's a number of ones, for artificial light. The one, that's most different, than all of them, is tungsten. Those are the lights, that a lot of us have in our homes, and it's got a very warm orange glow to them. And so, if you're taking photos of people inside, their skin tones are not gonna look correct, you need to adjust your white balance, to tungsten, if that's the type of lights that you have. There are a couple of other settings in here. One is a Kelvin setting. It's a manual setting, where you get to choose where it is, on a specific Kelvin temperature. There's another option, where you can shoot a gray card, or something that is neutral, and white, and the camera will figure out what color is illuminating it, and it will correct for it, and that'll vary, from camera to camera. Not all cameras have that. And then, there is the automatic option, where the camera will just look at the information, and try to give you the best color balance that it can, given that particular situation. As we go through this class, you're gonna find out, I am not a big fan of auto. I'm really glad my parents didn't name me Auto. (laughs) Just would've been horrible! I generally don't like auto, but this is one of the rare cases, where auto white balance is... One of the most frequent choices I make, and it's partly because it does a pretty good job, most of the time. And secondly, I shoot raw, for most everything. And if I shoot raw, I can correct it later, without any degradation to the original image. And so, if there is a little tweak I need to make, I can safely make it later on. If I'm shooting an image, and the color doesn't look right, it's got too much blue. In Adobe Lightroom, which is the program I use, there is a temperature slider, and I'll just grab that temperature slider, and I'll adjust it over, to the other side, and go, okay, well that's too much yellow. Let's find a happy medium, somewhere in between here. And so, no damage to the original image, and I can quickly correct it, in that case. If I am out in the field, and I notice, I'm not getting the right color, I will adjust my white balance, because I like to have positive feedback, on the back of the camera. I like to really get a feel, for what's going on. And so, if I know it's gonna be cloudy all day, yeah, I'll probably switch it over to cloudy, but it's not my first priority, to worry about. I'll leave it in auto, and then adjust it as necessary, from there. Your camera has two different color spaces, that it can record colors in, neither of which are the full visible spectrum, that we can see. Cameras, by default, will come with, there are cameras, usually set to JPEG, and JPEG images record images in an sRGB, in most cases. And so, the color space, on many cameras, is set here. But, you can set it, to a larger color gamma. And if you hope to do editing, on your pictures, or you plan to print your pictures, you wanna choose the Adobe RGB. The truth is, is that there's not a huge difference between the two. But, it does give you a slightly larger color gamma, which will be advantageous, when you're printing your images, and you're editing, and you're working, and you're adjusting the brightness levels. Most, all of the Internet, at this point, is still on sRGB, just trying to keep the fewer colors, so that the data transfers a little bit faster. But, if you have something, on Adobe RGB, you can export it, as the smaller size. Now, you can make things smaller, but you can't make things bigger, after the fact.
Class Materials
Bonus Materials with Purchase
Ratings and Reviews
a Creativelive Student
Love love all John Greengo classes! Wish to have had him decades ago with this info, but no internet then!! John is the greatest photography teacher I have seen out there, and I watch a lot of Creative Live classes and folks on YouTube too. John is so detailed and there are a ton of ah ha moments for me and I know lots of others. I think I own 4 John Greengo classes so far and want to add this one and Travel Photography!! I just drop everything to watch John on Creative Live. I wish sometime soon he would teach a Lightroom class and his knowledge on photography post editing.!!! That would probably take a LOT OF TIME but I know John would explain it soooooo good, like he does all his Photography classes!! Thank you Creative Live for having such a wonderful instructor with John Greengo!! Make more classes John, for just love them and soak it up! There is soooo much to learn and sometimes just so overwhelming. Is there anyway you might do a Motivation class!!?? Like do this button for this day, and try this technique for a week, or post this subject for this week, etc. Motivation and inspiration, and playing around with what you teach, needed so much and would be so fun.!! Just saying??? Awaiting gadgets class now, while waiting for lunch break to be over. All the filters and gadgets, oh my. Thank you thank you for all you teach John, You are truly a wonderful wonderful instructor and I would highly recommend folks listening and buying your classes.
Eve
I don't think that adjectives like beautiful, fantastic or excellent can describe the course and classes with John Greengo well enough. I've just bought my first camera and I am a total amateur but I fell in love with photography while watching the classes with John. It is fun, clear, understandable, entertaining, informative and and and. He is not only a fabulous photographer but a great teacher as well. Easy to follow, clear explanations and fantastic visuals. The only disadvantage I can list here that he is sooooo good that keeps me from going out to shoot as I am just glued to the screen. :-) Don't miss it and well worth the money invested! Thank you John!
JUAN SOL
Dear John, thanks for this outstanding classes. You are not only a great photographer and instructor, but your classes are pleasant, they are not boring, with a good sense of humor, they go straight to the point and have a good time listening to you. Please, keep teaching what you like most, and I will continue to look for your classes. And thanks for using a plain English, that it's important for people who has another language as native language. Thanks again, Juan