Lesson Info
11. Menu Functions: Image Quality
Lessons
Class introduction
12:33 2Photo Basics
04:07 3Camera Controls: Exposure Control
03:57 4Camera Controls: Top Deck
21:14 5Camera Controls: Drive and Metering
33:54 6Camera Controls: Back Side
26:44 7Quick Menu Overview
26:28 8Camera Controls: Back Side Navigation
08:21Camera Controls: Left Side, Right Side, Bottom and Front
15:05 10Lenses
06:17 11Menu Functions: Image Quality
13:59 12Menu Functions: Focus Settings
20:18 13Menu Functions: Shooting Setting
21:19 14Menu Functions: Flash Settings
05:31 15Menu Functions: Movie Setting
19:22 16Menu Functions: User Settings
05:38 17Menu Functions: Screen Set Up
09:10 18Menu Functions: Button Dial Settings
15:23 19Menu Functions: Power Management and Save Data Set Up
04:40 20Menu Functions: Connection Settings
13:43 21Menu Functions: My Menu
03:13 22Menu Functions: Playback Menu
08:14 23Camera Operations
13:12Lesson Info
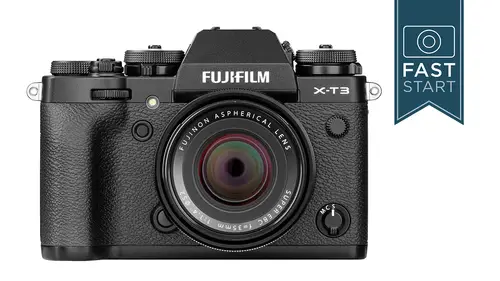
Menu Functions: Image Quality
All right, folks, it's time to dive into the menu section, which is the largest section on this class. So the accompanying pdf that comes with the class will be handy here because I've taken everything and I've listed it all out so that you can see it very cleanly and easily. And you can kind of scan around and find the various menu items. And along with that, I do have recommendations down here, and this is what I would call starting recommendations. I know that you're gonna have your own way of operating the camera, but if you're not really sure in a particular setting, this is a pretty good starting wave as a default system for the camera work. So with that in mind, take a look at that. When that is available, we're going to dive in to the menu functions. So first thing is, is when you hit the menu button, you're going to notice a bunch of tabs. So Fuji has come a long ways in the years that they've been out organizing their information, and so everything is organized into these dif...
ferent tabs, and I have to think that they have done a pretty good job. One thing I don't completely understand is why they have hidden the playback menu and that is available when you press play back and hit the menu button. You can then activate the playback menu, and you also get the set up men you at the same time as well. But when you hit menu, you're not going to see the playback options, so we'll deal with that when we get to it later on. It isn't as we navigate our way around, you'll be using the selector on the back of the camera. Or you can use Thief Focus stick in order to go up, down, left and right and enter and make changes throughout the menu setting as we go along the way. At any point, you're in the menu and you would like to take a photo and get out of the menu. Well, usually, you can use the display back button on the back of the camera, but the shutter release will always kick you out of the menu and take you back to shooting photos at any time. Very quickly. The first tab. We're gonna be dealing with deals with image quality first item in here is image size and as a word of warning. There's gonna be a lot of things in this section that we have already talked about, and that is because they're shortcut buttons. Items are listed in the quick menu, and so here is kind of the official place where everything is listed, and so first item is image size. This deals with Jay Peak images. We've already talked about this back in the queue menu, but you can choose small, medium and large as well as different aspect ratios, depending on what your needs are. Next up is image quality, and the basic choice here is raw JPEG or raw plus J. Peg. And so, for the finest quality you want to get raw. J pegs are still really nice, but they're fast. They're easy to use, and they're also very small in size. As we go through this menu section, you'll see my recommendations on the right hand side of the menu in gray. But in red, I will have secondary recommendations that are maybe a little bit more advanced users. Depends on how you're using the camera, but these are going to be my recommendations as we go along, and they're also set up the same way in the pdf that comes with the class for raw recording. This camera can do a UN compressed option or a lossless compressed. And things like this interest me quite a bit because I want to know how much difference does this make on image quality? So I ran it through a test, Judy, my standard little subject and then enlarging it, taking a look at the highlights and shadows to see how much difference between the 56 megabyte file and a 27 megabyte file. And I looked really, really closely, and I looked in a lot of different ways and areas, and I I couldn't really see any difference. So I said, Well, maybe there'll be a difference if I try to mess up and correct for things. So what I did is I overexposed by four stops, corrected it in post production, and then I went in and examine the results, and I wanted to see Is there a difference here? And as I examined it very closely, I couldn't really see any difference here either, So I decided to do it one more time. This time I would under expose by four stops, correct it in postproduction, examine the results and see if one is keeping MAWR information than the other. And in all of these cases, I could see some subtle differences between the two of them, but not anything significant that a normal person would notice in normal photographic situations. And yet one file sizes twice the file size of the other. And so I think, for most people, the lossless compressed option is going to save about 50% of space and be essentially the same in quality. The one minor caveat that you might want to check in on is to see if whatever software system computer you're working with can process and look at the lossless compressed because it's possible that it may take a bit more time. There are some programs that may not work quite as friendly, with lossless compressed raw versus the UN compressed raw. So I would say, do a little bit of a test on your own to see if you see any difference yourself but myself, I'm shooting lossless compressed on this. It saves me half the file size and gets me a file that still looks absolutely fantastic. Next up is our film simulation. We've talked a little bit about this before. Back in the quick menu, I gave you some visual examples, and this is for J. Peg users. For the most part, uh, choosing how you want your image toe look, and I say J Peg users, for the most part, because there is a little reason why I use it, even though I shoot raw with the camera most of the time. And that's because sometimes I like to shoot black and white. And when I put the camera into a monochrome mode here and I shoot raw images, what happens is in the viewfinder, I get a black and white image. When I played back the image, I see a black and white image on the back of the camera when I downloaded to a computer. It's black and white for a moment when the preview comes up, but then when the full image comes up, it's a color image, in which case I turn it black and white. Make the appropriate adjustments for it. And so, with black and white, I think this is the ultimate black and white camera. Any muralist camera that can shoot in black and white because you get to see the world in black and white. But you're actually recording a raw image that you'll get to make infinite adjustments on later on. And so, if you want to adjust what the view of the images like that's a good reason for changing this, along with people who shoot JPEG images. One of the options for black and white is you can warm the image up, or you can cool it down a little bit, so adding just a hint of color and so a quick example of what that looks like A. So you can see you can adjust these two different levels as to how much cooling or how much warming of blue or yellow you would prefer in a particular image. And this will only come on when you are in a black and white mode. Next up is the grain effect, and there's a lot of people who shoot film who like Fuji, because food she does a lot of things that emulate the way film looks, and this is one of those options is you can emulate grain in a photograph. So let's take a look at an image and crop in real closely to see what this grain looks like. We have different levels from off weak to strong, and if you want to add that into your images, this is the place to do it. Normally you're going to keep that off color chrome effect. This is a new one we haven't seen before, and I'll have to admit the testing that I have done is not extensive on this. Supposedly, it's supposed to deepen the colors in the shadow regions. It's a very, very subtle effect. And so the difference in my example is something that you're gonna have to look really closely out on the screen to see what the differences in these colors and it's supposed to be a bit of a soft color enhanced shadow contrast for a calm look. So, uh, test it yourself, see if it's something that you like or not. Once again, for J. Peg, images is not applied to the raw images, white balance. We've talked about this a couple of times. There's a button on the back of the camera that allows you direct access to this, but you can go in here and access it as well. All right, second page on image quality. First up here is the dynamic range, and this allows you to protect the highlights in your J pegs. Now, in order to use this at the 200 or the 400 level, you're going to need to use a higher I S O. And so it is one of the requirements of this particular system. You cannot do it at the low I s O of 1 Next up is de range priority. And rather than setting a particular number, you can just simply said it too strong or weak. And it will add it appropriately for that particular situation. And so if you don't always want to keep it set in one spot that you always wanted to have a particular look to it, you could do it here. Highlight tone. This is Mawr. Once again, items we've talked about back in the queue menu. This is going to take the highlights and either make him more intense and brighter or pull them back and make him a little bit darker. We have the same option, essentially with the shadow tone. Do you want those shadows to b'more intense? Or do you want to lighten up on the shadows? And so if you want deeper shadows, you would do a plus two three or four. For instance, The plus here is not like exposure compensation. It's mawr, intensifying that particular aspect of what we're talking about color. You could also substitute the word saturation here. How much intensity and color do you want with your J pecs and then sharpness? How much sharpening do you want to have done to the shape to the J picks? I think zero is a good middle ground to start with some cases, he might want a little bit mawr. If you like a nice crisp look to your images again with the noise reduction zero. Setting in the middle is a good place to start. If you do shoes a lot with Hirai esos, you may want to test out some of the higher options to see if they look good to your eyes. Long exposure, noise reduction is something a little bit different. What happens here is when you shoot a long exposure like a 32nd exposure. What it does is it processes that information for another 30 seconds, trying to reduce the amount of noise. And it's kind of frustrating when you're out the field because you do a long exposure and then your cameras all tied up and can't do anything for quite a bit of time after the shot. And so I wanted to see. Is it really worth the noise reduction time in processing? So I did a 32nd exposure magnified. Wanna look at the results between turning noise reduction off and turning it on, and I don't see much results here, and so you may want to test it in your own world to see if it works for what you're doing. But for my testing so far, this just doesn't seem like it's worth it to leave on. And once again, it's only working on J pegs. It's not working on raw images at all. All right, our third page with image quality is lens modulation, optimizer, and so what's happening here is that the software of the camera is improving the definition of the images by adjusting for diffraction and maybe a slight loss of focus at the periphery of the lands, which is kind of a common lens. Attributes or problem when you shoot with lenses is that there are imperfections, and Fuji knows what imperfections it's own. Lenses have and can make subtle adjustments in that. It's a very, very subtle adjustment. But it does seem to be a good thing, and I probably just leave it on for everything. Color space is referring to the total range of colors that you can record, and J picks generally will come set to SRG be. Most of the Internet runs on s RGB, which is fine, but when you want to edit, work on your images and make adjustments, then you want Adobe RGB, which is a slightly larger gamut of colors. Pixel mapping is something I hope you will never need to use in your camera. It clones out hot pixels. If you were to have some sort of pixels that were dead or not working on the sensor, it would go into this. It would scan the sensor, look for these hot pixels and then clone them out. I've never had to use it with the Fuji camera and kind of hope that is the case with you as well for our custom settings. We talked about this in the quick menu. You can prescribe or set up many different custom settings, seven of them to work in different ways. I've set my camera up to record different looks. Some images I want nice and colorful. Some I want black and white. Sometimes I want is a contrast in black and white. You can set up a variety of those in here, and this is where you would select them. Actually, creating them comes next. And so here's where you can edit and save your custom settings in here and so you can go in and choose one of them and choose the specifics on how you want to have done.
Class Materials
Bonus Materials with Purchase
Ratings and Reviews
Justina Tumaite
Thank you it's super helpful. I loved it :)
Eric Geerts
I've been with CL for quite a while and I pretty much got used to (all of) John's top quality classes. Kinda been waiting for this one over the last months. So thanks again, John, for your consistent 5 star quality standard!!
Robert Felice
I loved this class! How much did I love this class? I loved this class and I don't even have an X-T3! I have the Fujifilm X100V, a camera similar enough to the X-T3 that this class easily covered 85% - 90% of the features on my camera. It's also a camera new enough that there isn't much available on how to use it. This class got the job done for me. Well done, John!
Student Work
Related Classes
Camera Guides