Lessons
Lesson Info
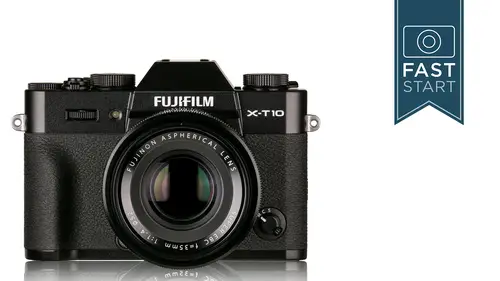
Back Side: Quick Menu
Alright, back on the back of the camera, next up is the Q button. So there's a lot of different controls on this camera and I typically will separate them into three different categories. The most important ones have buttons and dials on the outside of the camera so that you can easily change things. And then there's the whole menu section which is kind of the collection of everything that the camera can do. In between the two you have the quick menu, which is a quick shortcut to some of the most popular features within the menu system. And so we're going to take a quick look into the quick menu and go through what's in here, and when we get into the full menu, you're going to be saying hey, wasn't that in the quick menu? Yes, there's going to be a lot of things that are in two different places. So once you're in the Q menu, you'll be using the back buttons to navigate through the camera through the functions, and then using the back dial to adjust that particular setting. And so you'r...
e not diving away from this into one of the modes, you're just simply going to highlight that area and make a change on it. So, starting on the top row. We have our custom setting, and we have seven different settings that we can program into the camera, and we can program it in in the full system, but what we can do is if you have different shooting modes. Let's say you like to do portrait photography, but you also do a little bit of sports photography, and you do a little bit of landscape photography, and when you do each one of these different types of photography, you make a lot of different changes on your camera, with the metering system and the focusing system, and it takes a lot of changes to go from one to the next. What you can do is program in all of your favorite settings to one of these seven different modes, and then you can come in here and quickly change from one mode to the next. And so it's just a very quick way for making many, many different changes that you do on a regular basis. The base mode is basically where you are at right now. And so then you can change it to any of the other custom modes. Next up is the ISO button, and this is where we can change the sensitivity of the sensor. Now the best information is collected on the sensor when it's set to ISO 200. And so if at all possible, it's best to keep it at or as close to 200 as possible. You're going to raise it up from that for situations where you need faster shutter speeds. Often times it's when you are working under lower light conditions. And so if you were going to be say photographing in a reasonably dark restaurant, you'd probably be at ISO 1600 or because it's very dark in that type of environment. And we do have a couple of oddball things going on on the list here. If you go up to the very top of the list, you'll see the later H, and that is a high setting that has to be turned on, and that is going all the way up to 51,200, but you do have to unleash a certain requirement in the menu system that we will get to that will allow you to get up there. We do have a low setting that gets you down to 100, and then we have three different auto settings which allows us to set parameters on the auto setting. For instance, we could set a top ISO of ISO in auto one, but in auto two, we can set it to ISO 6400. So we're going to be able to really customize the auto ISO settings, and have three different favorite ones put in here. To be honest with you, I don't know of any other camera that has so many options for controlling the automatic ISO. This is something that we will talk further about when we see these additional menus in the menu system itself. Let me give you a quick little demo on the camera because there's a mistake that I often make, and I'm going to guess some other people make that mistake as well is I'm going to hit the Q menu, and I'm going to go over to ISO, and I'm going to hit the okay button, thinking that it's going to enter into an ISO mode where it makes changes, and it just kicks me back to regular shooting. So that was the incorrect way to do it. What you're supposed to do is just navigate to the feature you want, and then you can turn the dial and set the appropriate setting. And then once you're done, you can hit okay, and that kicks you back out of it. If you want to get into the full menu setting, we will have to go into the full menu, and we will be doing that in the second half of this class. Alright, so back on the quick menu. Next up is something called dynamic range. And what this dose is it tweaks with your image a little bit, and this is the first of many different features in this camera that will tweak the image quality of your camera and adjust it in slight ways. The important thing to note right now is that if you shoot RAW images, this has no impact on your final photograph. If you shoot JPEGs, it does have an impact on it. So that is a setting we'll make once we get into the menu setting. And so let's take a look at an example of what this is doing. And I've included the histogram down at the bottom to show you exactly what it's doing, and what you want to pay attention to as I go through these three different images, this was shot at ISO 800 with a DR 100 set. If we go to 200 and 400, you'll probably not notice much difference. And so let me go through these again, but let's go to the next series, and notice the area in the yellow boxes on this greenhouse roof as I go from 100 to 200 to 400, you've noticed it's gotten a little darker. If you look at the histogram, I'll go back to 200 and 100. What the camera is trying to do here is it's trying to rescue the highlight information and it doesn't want to blow that information out. So it's going to hold back information and try to prevent those light areas from getting too light. And so this is a potential way of solving an exposure problem, but in order to get this, you have to shoot at ISO 800, which is a bit of a downside because you're going to get a little bit more noise there than you would at ISO 100. And once again, this is only impacting people who are shooting JPEG images. So it is something that does work and is something that could be useful in some particular situations, but I can't say that I would just recommend it by default turning it on. So you will not be able to use the DR unless you use ISO 800 and up. Alright, next item is white balance. So our eyes automatically adjust as we go from different lighting scenarios. For instance from daylight, inside under fluorescent lighting or tungsten lighting, but our cameras can't make the same changes that our eyes change, and so it has to look at different information, and it bases everything on this Kelvin scale. And so under bright sunlight it's usually pretty close to around 5,000 degrees Kelvin. Shade has a bit more blue in it because of the blue sky, and the tungsten light, or the incandescent light, is the most different that we're usually going to encounter. Just those type of bulbs that we often have in our homes. And so if we are getting funky colors with our photos, you might want to take a look at the white balance and adjust it to match the lighting that you are working under. There are a couple of others beyond these that are listed. One is a color temperature setting to where you can specifically set it to a very manual number. Whatever number you think it needs to be. We have a custom setting, which is where you would shoot a white object, perhaps a white piece of paper, and the camera would then be able to have a better understanding of what type of light source, what color light source is lighting the scene, and it can automatically correct it. And then finally there is auto white balance, and the camera simply looks at the entire image area, concentrating on the highlight, brightest information, and seeing what color that is, and trying to adjust that more towards the white setting. And that does a generally pretty darn good job, and it's where I leave the camera most of the time, unless I notice a problem. And so I'll leave the camera in auto white balance, and if it's not right, I'll adjust it to shade or tungsten, or whatever the case happens to be in. So this is one of those things that you do need to be kind of up on as far as keeping aware of. If you shoot RAW, it's less important because you can make adjustments later on without negatively damaging your photographs. If you shoot JPEGs, you do need to keep a pretty good eye on this because you can adjust it later, but it's better if you get it done ahead of time, because it's just less leeway in post production with JPEG images. Next up we have noise reduction. So this is again another type of image manipulation software. If you shoot RAW, it has no impact. If you have JPEG, it will have impact on your images. The camera has built in noise reduction that it will use in a variety of cases. Generally what we're looking at is setting high ISO settings and doing long exposures over ones second. When you get a lot of noise, the camera can use its own built in software to solve the problem. And for say kind of a newbie to photography, or someone who doesn't want to get in a lot of post production time working in Photoshop or lightroom, this would be something that's kind of nice to turn on. But for the more serious user, they're going to want to do this themselves later on. Next up, very important one, is the image size. And so this is where you get to choose the size of JPEG image that you're going to shoot. If you're going to shoot RAW, this doesn't matter too much, but you might as well get it set right. And so we have three different options.. Large, medium and small. So obviously you're probably going to want to get the largest size on it, which is going to be about a 16 megapixel image. Unless you have a very specific need for a smaller size image. We also have a crop option, an aspect ratio. Now the sensor in this camera is a three by two aspect ratio and so you're probably going to want to capture that entire sensor area, but if you didn't for some reason, you do have an option of a 16 by 9 aspect ratio, which is like an HDTV, or a one by one square ratio, and you would be able to see that in the view finder. So if you knew that was the final crop you were going for, it could make some sense to do that. But in general, I would recommend three by two, because you can always crop it later on. So large three by two is definitely a good recommendation here. Next up is image quality, and this is basically where we get to choose between JPEG and RAW images. And so I highly recommend shooting RAW. It's going to get you the best quality images. If you are going to shoot JPEG, there are two different types of JPEGs you can shoot. Either fine or normal, it's the same file type. It's just how much compression is done on that image. And fine is going to get you the best quality image. We do also have the option of shooting a RAW image and a JPEG image. And this is not something I recommend for most people because you end up with two files, and if you can handle a RAW, you can make a JPEG from it anytime you want. But there are some special circumstances where you need both a RAW for one source or one reason, as well as JPEGs needed for another. But for most people I'm going to recommend RAW. For maybe new photographers, I'll say that the JPEG fine is very good. Fuji has one of the best reputations for really good looking JPEGs. And so they do have very good looking JPEGs, but if you want the full information, you'll get that with the RAW image. Next up we have our film simulation. And so once again, does not affect people who shoot RAW, only JPEG. And this is where the camera, and this is where Fuji really does a very good job. They do film emulations, where they used to make a lot of film. They still make film these days, but they made some of the most popular films that people shot over the years, and they have now mimicked those colors and contrast and that style into these different film simulation modes, and this is just a very, very subtle tweak on the colors of your image. Earlier we were talking about some of the Instagram type filters that you could use on the camera, and this is much, much less than that. So here's some examples, and some of these are very, very subtle. And so the vivid or velvia is going to have a little bit more saturation. The provia is going to be very, very natural. Classic chrome, it's kind of hard to describe that, but it's a little bit more neutral in color, but it's been very popular with people. They very much like it. There's a couple of PRO Neg. High contrast and low contrast for studio type work. They have a black and white option and black and white options with different colored filters as well as a sepia, which adds that kind of brownish look that you might see on photographs that were 100 years old at this point. And so it's kind of nice to do it. If you know that's what your final image is going to be like, one of the advantages on the mirrorless camera is you get to see that effect while you're looking through the view finder on the camera. And so they're kind of fun to play with in some cases, but in general as I say, if you shoot RAW, they're not going to have any lasting impact on your images. Alright, lots of little image tweaks here, and we're not going to get into too many examples here, but you can adjust the highlight tones. So if you're not satisfied with the JPEGs that you're getting, you can kind of hold those highlights back or you can make them even a little bit brighter. We can do the same thing with the shadow tone as well. And so it's just doing every so slight adjustments to the JPEG images that you're shooting. In the highlight, the shadows, as well as the color to make the color a little bit more intense, or a little bit less saturated. Normally I would just leave all of these at zero. Another one for the sharpness. You can pump it up a little bit, you can bring it down a little bit. Going down to the bottom row. So one of the things that keeps throwing me off on Fujis, and I'm not going to say it's bad, it's just different, is that I'm always used to the self timer being part of the drive dial, or the drive functions, but they have a separate place for the self timer, and so they have a two second self timer and a ten second. Ten second is obviously good if you want to get in the picture yourself. Two seconds is good if you're shooting from a tripod. You want to press down on the shutter release and let the vibration settle out so that nothing is touching the camera when you're actually shooting the photograph. Alright, then we have our focusing area. And so we have the choice between a single point and a zone focusing as well as the entire area. So let's look at a little bit more about what's going on here. So the camera has a lot of different focusing points and you can choose anyone that you want, and you can move it around on the frame. And in fact you can change the size of the box by changing the back dial on the camera once you've activated this feature. You can also put the camera into a zone mode which is using 3, 15, or 25 points, and then you can move that box to wherever you want in the frame. And that tends to work out really well for subjects that are moving. So any sort of sports or action I like using the zone mode. And then finally, if you're not sure what you want to be focusing on, you can use the wide or tracking mode. This is where it looks at the entire area and it will light up the focusing boxes that the camera has achieved focus on, and it is looking for the subjects that are closest to the camera. And because sometimes that isn't what you want to focus on, that's why I prefer using the single point in many cases. And so I prefer single point most of the time, zone for action, and I tend not to use the wide and tracking unless something is very, very erratic in its movement and perhaps maybe like a bird in flight would be a good reason to use wide tracking mode. And so those are the three different areas that we choose. Now I will have to do a little side note here and mention that Fuji calls this the AF mode, and this is what very few, well, let's put it this way, nobody else calls it the AF mode on other cameras. Because I deal a lot with other cameras and try to have terminology that works throughout all the cameras in the whole industry, this is really the area that you're focusing. Are you focusing in a small area or a big area, but Fuji does call it the AF mode, which is a little confusing because they have another place that they also call the AF mode that we'll get to in a little bit. Next up we have our flash modes. So once the flash is popped up, we have a variety of ways in which the flash can fire and be used with various devices. So one option is auto flash, were the flash will fire whenever it needs it. And so if the flash is up and it doesn't need it, it won't fire. And that's available in the program mode and the full auto. There is a slow synchro mode where the camera will utilize very slow shutter speeds if necessary and you might get better light in the background or some interesting blur if your camera is moving. It's a fun technique to use under lower light situations. There is a commander mode where you can use the built in flash to trigger an external flash. You will of course need one of the Fuji external flashes to do that. Related to the slow synchro mode is the second curtain sync mode where the flash fires in synchronization with the closing shutter rather than the opening shutter. And if a subject is moving in there, it'll give you the illumination at the end of their movement rather than at the beginning of their movement, which can be a lot of fun for subjects that are moving quickly. I don't know why you would really need it, but if you have the flash popped up, you can electronically turn it off. Normally I would just push it down, but we do have that option in there. And then forced flash is where I often leave it on. Which means that if the flash pops up, it is going to fire no matter how bright or how dark it is out there. And this is great for fill flash options when it may be bright outside, but you want to add a little bit more light as a catch light to the portraits that you're shooting. Another option on this is red-eye removal, and it's a little different on this camera than on many other cameras on the market. What it does here is it shoots with a normal flash and then it corrects for this on the JPEG image after the fact via software. So this is an interesting feature which I think is pretty nice and works pretty well. One of the things I don't like about the way other cameras work is they fire a pre-flash which is a little bit distracting to your subject and this is not the case with Fuji. What it does is a software fix after on. Now the downside to the software fix is it may not do the job that you hope it does, and you may need to go back to the original image and work on it, but in general it seems to work pretty good and I think it's a better way of solving the red-eye problem. And the top shutter speed on the came is 1/180th of a second and what I have found though is that the camera will fire just fine at faster shutter speeds, and I've had no problem shooting flash up to 250th of a second. And this is something that you may want to try with your own flashes. Perhaps you're hooking it up with different brands of flashes, and you'll get slightly different results, but even though the 180 has the X by it, try it at 250 and see if it works for you, if you want to go up to that faster shutter speed, because it does work for me and I've seen it work for other people as well. Alright, finally we have the LCD brightness. The LCD is the big screen on the back of the camera. If you want to adjust the brightness different than normal, you can. The only time that I would do that is if I'm trying to show people photos on the back of my camera out in bright sunlight and it's hard to see the screen. Normally I want to leave it at zero, because it's also a basis for judging exposure of a picture as you're shooting it. And so you'll be looking at the back of the camera and you want that screen to be as accurate as possible, so generally you're going to want to leave that right at zero. Now, one of the coolest things about this is with recent change in the Fuji's customization, is that if you don't really use some of the features in here and there is about six different items in here I would never adjust on my camera, you can now go in and customize this, and you can change the order. You can move things around, and you can delete things that you don't use in there, and you can add in other things that are not here right now. So you can fully customize this quick menu to hold the 16 most important features that you use on a regular basis, and you would do that by going into setup menu number two, edit save quick menu, and making those adjustments. Once again, we'll be passing by that again when we get to the menu section. So that is the quick menu, and we'll be seeing a lot of those features again when we pass by them going through the menu system.
Class Materials
Bonus Materials with Purchase
Ratings and Reviews
Dan Meylor
I purchased my Fujifilm X-T10 over a year ago and recently realized that I wasn't using it to its fullest extent. John's Greengo's video on its use opened me to a wider use. The information is clear, well organized, sequential, and helpful. I don't have the time to read a small print booklet and found the visual presentation useful because I could go through the steps on my Fuji. I'm still a little unclear on the seven custom setting and think Fuji should explain what each does. Thanks, John, for your work and encouragement.
user-98aab8
John Greengo's approach to teaching is the best. Each visual, each explanation and each example he demonstrated touched every sensory way of learning. The PDF print outs are a great bonus. Thank you for doing this video.
honolulube
I'm thinking about purchasing an XT-20, this course was very helpful to understand the camera beforehand. note: the opening slide in John's (excellent) presentation, shows an XT-1 not an XT-10... but I'm buying an XT-20, I think I got that right. - perhaps just an Easter Egg hahaha
Student Work
Related Classes
Camera Guides