Lesson Info
12. Quick Menu: AF Mode
Lessons
Class Introduction
04:48 2Camera Overview
12:06 3Photo Basics
06:03 4Top Deck: Overview
04:23 5Top Deck: Exposure Control
27:35 6Top Deck: Metering
07:17 7Top Deck: Drive Mode
21:01 8Camera Controls: Viewfinder Display
09:26Backside: Playback
08:50 10Backside: Auto Exposure Lock and Focus
10:04 11Backside: Quick Menu Custom Settings
04:35 12Quick Menu: AF Mode
08:27 13Quick Menu: Dynamic Range & White Balance
04:35 14Quick Menu: Noise, Image Size, Film Sim & Color
13:49 15Quick Menu: Self Timer, Face Detection & Flash
05:21 16Function Button of Fuji X-T2
12:08 17Left & Right Side of Fuji X-T2
06:51 18Bottom of Fuji X-T2
09:40 19Front of Fuji X-T2
05:50 20Fuji Lenses
07:37 21Q&A
02:38 22Camera Menu Overview
02:56 23Image Quality Settings
18:04 24Auto Focus and Manual Focus Menus
20:50 25Shooting Settings
19:13 26Flash Mode
08:18 27Movie Mode
05:09 28Camera Menu Q&A
02:53 29Set-Up Menu: Basics
01:38 30Demo: Add Items to My Menu
03:26 31User Setting: Sensor Cleaning and Sounds
04:39 32Screen Set-Up
07:36 33Button Dial Setting & Power Management
12:06 34Save Data Set-Up & Connection Setting
07:59 35Playback Menu
08:52 36Camera Operation Overview
14:30 37Firmware Addendum
30:43Lesson Info
Quick Menu: AF Mode
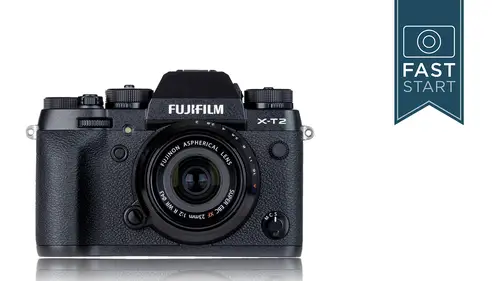
Next up is the AF Mode area. We've been kind of dancing around the issue of auto focus and this is where we're gonna dive into it a little bit more closely. We can choose between a single point, a zone of points or wide tracking area which is pretty much the entire area of the frame that we're looking at. So, let's take a look at what we have here. So, the camera has a lot of focusing points. You're gonna see a white focusing bracket. That's kind of your selected area. If you achieve focus, it's gonna turn green. If it can't focus, either because the object is too close or too dark, or doesn't have enough contrast, it'll blink red at you and that will be your warning that it's not getting good information. Covering almost the entire area of the frame we have contrast detection points numbering 325, so we have a lot of focusing points. But, it's the ones in the middle, those slightly larger boxes which are the 169 phase detection areas and so this is different types of focusing. The pha...
se detection is the type of detection points that are often used on SLRs. And they are very good at being fast. And so if you want to focus on something quickly you want to be using the phase detection points. Now they also have contrast points basically layered on top of them as well so they're kind of a combo of both. But the outside ones are only using contrast. And contrast detection points are very good about being accurate and in focusing, it's important to be fast and accurate so the ones in that center box, that large center box are going to be your best ones. And if you recall, when we were in the continuous high mode, that's the area where it's going to be tracking focus. So there's a number of options when it comes to the focusing points. 325 is a big number and great number if you want to be very, very specific. But when it comes to moving the focusing point from the right hand side to the left hand side, there are 25 columns. That means you're going to have to go left 25 times and so a lot of photographers like to just simplify it down to 91 points, which is still healthy number of points. And so, it's going to be them just kind of grouped every other like is what it's doing essentially. And so, if you want to change it down to 91 points, you'll be able to do that in the menu settings in the auto focus, number of focusing points option. Just another little side note, didn't know where to put it, the camera can focus down to EV-3, that is not darker than darker. It's just a light level that would be considered very low. It's probably about on the order of full moonlight at nighttime. So, it is a very, very low light level. All right, the three options that we have in here are single point, and that's going to be a basic box around a single area of detection. And you're going to be able to use the focus stick to move it anywhere you want. For the rest of the class, I'm not gonna show you the 325. I'm just going to show you the 91 focusing point area, just so it's got a little less clutter on it. Now, on the back of your camera, you will press in on the focusing stick to activate the focusing area and then you can move the area if you want at any time by using the focusing stick or the control pad on the back of the camera. Or, excuse me, you can use the focusing stick anytime to control the direction. Once you activate the focusing point, then you can use the control pad to move it around. If you want to change the size, and there are five different sizes, you can either turn the front dial in, or the back dial in. And if you're not sure what the middle size is, if you press in on that dial, it'll always change it to the middle area. And then if you want to go to the center point, you can either press the display back button or press straight in on the focus stick button. So, lot of different controls in here. Next up is the zone setting and this is where we get to choose a group of boxes either three by three, five by five or seven by seven. And what I'm looking for is I'm looking for a box about the size of the subject that I'm trying to focus on. I don't want it to be overly large. And so, I'm trying to choose the smallest one that'll do the job. And then, finally, there is the wide or tracking area. And this will be good for a very simplistic focusing system. First off, it generally just focuses on whatever is closest to the camera. If you were going to hand the camera to a family member or friend who didn't know how to operate the camera, this would be the simplest way to have the camera set up for focusing. Because, it's just got a lot of information to work with and as long as they don't put something between their subject and the camera, it's going to be doing a decent job in general. But, if you're very specific and choosy about your focusing you're gonna want to go with the single point. And so let me show you a little bit on the camera. Let's adjust the table here so we can play around a little bit with focusing and so let's go ahead and get a little bit wider angle so that we have a subject in the foreground here. And so, for our focusing, I'm gonna go into the Q menu and we can select, let's see, spot, zone and large area. So, if we choose the large area, and we focus, well it sometimes will choose what's close to you, but right there, so it's choosing what's close to us. It's still choosing it, and so it's seems to have a bit of a memory cause it's not just choosing what's closest, I'm wrong on that. It is trying to decide what your subject is. And so, I find it really strange that it's focusing on the background there even though there's another subject very close in the foreground. So, I'm gonna jump into the Q menu. Let's go down to single point. And so now, I can just use the focus stick. And I can put it in the background. I can put it in the foreground and this is where I like to have it because I have very specific control of it. Now, if I want to change the size of this, I'm gonna press in on the focusing stick and I can turn the dial around and if I want to get back to the normal size I can press in either on the front or the back. It goes back there. Now, if I want to go, if I'm off to the side, and I say, "You know what, i just want it back in the middle." Press straight in on the focusing stick. That'll do it. It'll also do it if you press the display back button. Once this is activated in this screen, we can use these up down buttons for going left and right. But once we're kind of in the normal shooting mode those buttons do something else and you need to use the focusing stick to go back and forth. Now, the last option in here is the zone area. And, so, this is a... I'm gonna change this to just a little bit darker so you can see the box on this and turn off some of our displays. And so, there's our focusing box. We have it set very large, so I'm going to press in to activate it and then I'm going to change it to a smaller size. And now I have a box that I can choose that's kind of a medium size box. So you can choose virtually any size box that you want in order to focus which I love on this camera cause you're really not limited at all by what you're trying to do. And so, you can have whatever size box you want and you can put it wherever you want. But be aware that when you are using with a box like this, that it is doing a better job on those center focusing points, that big square in the middle. And so, lot of focusing options in there. Get in there, play with them on your camera. Make sure you're familiar on how to change all that stuff. So, that's our little screen on focus adjustments. And as I mentioned, be aware that the continuous high tracking area is using, I believe it's the 49 focusing points there in the middle. Single, zone, and wide tracking are once again the three focusing areas.
Class Materials
Bonus Materials with Purchase
Ratings and Reviews
John Simpson
I highly recommend this class! Been shooting Nikon for 40+ years and decided to give my Nikon gear to my daughter and go the smaller and lighter Fuji X-T2 for travel. Excellent camera and this course was outstanding in helping me learn how to use the camera. I have watched a number of Nikon oriented instructional videos. This video by John Greengo is the best organized and informative presentation I have ever watched.
Monroe Nevels
We all learn from different methods. I, for one, learn best by watching you while teaching, and being able to work along side you, with my camera in hand, and then follow you. I highly recommend this class if you really want to know how to use your camera. Thank you John for helping me to relive my film days, and integrating into Digital. I now have my Fujo X-T2 programmed and I LOVE IT!
a Creativelive Student
Really appreciate John putting these Fast Start Series together. Went through part of the training waiting on my Fujifilm X-T20 to arrive, which did today. That allowed me to dive into the menu settings and get the camera ready to use. I found that we are on Firmware 3.0, so, I have some updates to get installed. The training was great and informative as always. Don't hesitate to look for his Fast Start for your particular camera, and the in-depth training on Photography Fundamentals. It is well worth your time and money to get this training, especially if you are an amateur like myself, but, thanks to John Greengo I am quickly learning to use my camera in Manual Mode, most of the time.
Student Work
Related Classes
Camera Guides