Lesson Info
19. Front of Fuji X-T2
Lessons
Class Introduction
04:48 2Camera Overview
12:06 3Photo Basics
06:03 4Top Deck: Overview
04:23 5Top Deck: Exposure Control
27:35 6Top Deck: Metering
07:17 7Top Deck: Drive Mode
21:01 8Camera Controls: Viewfinder Display
09:26Backside: Playback
08:50 10Backside: Auto Exposure Lock and Focus
10:04 11Backside: Quick Menu Custom Settings
04:35 12Quick Menu: AF Mode
08:27 13Quick Menu: Dynamic Range & White Balance
04:35 14Quick Menu: Noise, Image Size, Film Sim & Color
13:49 15Quick Menu: Self Timer, Face Detection & Flash
05:21 16Function Button of Fuji X-T2
12:08 17Left & Right Side of Fuji X-T2
06:51 18Bottom of Fuji X-T2
09:40 19Front of Fuji X-T2
05:50 20Fuji Lenses
07:37 21Q&A
02:38 22Camera Menu Overview
02:56 23Image Quality Settings
18:04 24Auto Focus and Manual Focus Menus
20:50 25Shooting Settings
19:13 26Flash Mode
08:18 27Movie Mode
05:09 28Camera Menu Q&A
02:53 29Set-Up Menu: Basics
01:38 30Demo: Add Items to My Menu
03:26 31User Setting: Sensor Cleaning and Sounds
04:39 32Screen Set-Up
07:36 33Button Dial Setting & Power Management
12:06 34Save Data Set-Up & Connection Setting
07:59 35Playback Menu
08:52 36Camera Operation Overview
14:30 37Firmware Addendum
30:43Lesson Info
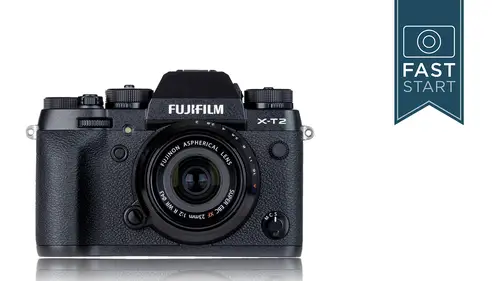
Front of Fuji X-T2
Moving around to the front of the camera, we have a little PC Sync Terminal. This is for anyone who wants to work in the studio or who has studio strobes. This is the synchronization with the flash and just in case you're new to photography, PC in this case has nothing to do with personal computer. It actually stands for Prontor-Compur, if I remember correctly, and it's for synchronizing the timing of the flash so that it fires with the shutter in the proper way, and so, if you're gonna hook up strobes or a wireless system, as I say, that's when you would use this. The focusing mode controls how your camera focuses. It's either a single, continuous, or manual option, so let's take a closer look at these three. Pressing down half way normally activates the focusing system. And so, Single-shot, it focuses on a subject and it locks in, then you can take your photo, which is how I have my camera set up most of the time. When you get into situations where the subject is approaching or movin...
g away from you, then you wanna be in the Continuous mode 'cause this camera can track that movement back and forth. If you're working off of a tripod or you like to manually focus, you can put it in Manual Focus, and remember that the AF-L button on the back of the camera is an override, so if you want to auto-focus and let the camera do its best, and then you manually touch it up, press that AF-L button for a little bit, let it focus in, and then grab the Manual Focus ring and turn. And so, important settings when it comes to the focusing. Normally most people are gonna be in S, when they shoot action they're gonna go to C, and then, kind of for special situations, going to M for Manual Focus. And there are gonna be lots more that we're gonna be talking about when it comes to focusing when we get to the Auto Focus menu setting. There's a number of settings that we're gonna get to tweak and adjust the settings even further. The Image Sensor, it's a 24 megapixel sensor, it's an APS-C, or a 1.5 Crop, if you're trying to compare it with, say, other full-frame cameras out there. It's using a unique sensor in this, it's the X-Trans CMOS III sensor and the X-Trans sensor is different than your typical Bayer Pattern in that the red pixels have been moved around so that they are a bit more random so that you do not get moire on your images. And so, that way, your camera does not need to have what's known as an optical low-pass filter in front of the sensor that slightly makes your image a little bit blurry. And this is the way most cameras have worked up to this time because there was this moire problem where you got these repeating pattern lines that would not look right. And so they've rearranged the pixels on it, they've taken off the optical low-pass filter, and what you'll find from these cameras is that you get very sharp images because of the system. It works very, very well and it punches above its weight, you might say. It competes almost on par with a lot of the full-frame cameras out there because of this system and it's part of the secret mojo of what Fuji's doing about getting such good image quality out of it. Alright, next up we have some Lens Contacts which you wanna make sure are not broken or obstructed because they're communicating with the Fuji lenses. We have our Lens Release and our Alignment Pin, which you will hear click when you have properly lined up. And I know there's a few people out there that might be very new to photography and so I just wanted to show you on mounting and dismounting your lenses. And so, the Release Pin is right down here and so you take that and you just turn the lens a little bit. There is a marking on the body and a marking on the lens where you wanna line things up. That little pin is right down here and when it snaps into position, you'll hear it snap in. It actually snaps in, you can see it on the bottom of the lens. There's a little notch where it goes into, so when you line up orange to orange, listen for the click. That means you've done it correctly. Be careful about changing lenses in dirty and dusty environments because dust can get into the sensor very easily and so, just be a little bit cautious and oftentimes, hold the camera upside down so dust is less likely to fall into the sensor. And as I said, we have our orange Alignment Pin right there that you'll see on all the different lenses so that you can get that lined up properly. On the front of the camera, we've talked about this button. Officially is known as the Fn 2 Button, it is currently programmed to handle the Drive settings, but if you don't like that or you wanna reprogram it, you can reprogram it to do many, many different functions by diving into the Setup Menu, as we will see as we get into the Menu section in the second half of this class. The Front Command Dial we've used for a few things. You can change apertures with it, you can change photos in the Playback Mode, and we can also change our exposure compensation if our Exposure Compensation Dial is set to the C, or Customize, setting. There is a little lamp up here that will turn on when the self-timer is activated or as a low-light Auto Focus assist, and this is something that I like to turn off because I think it's very distracting for people that I'm photographing at times. And so, you can turn this AF Illuminator off by diving into the Auto Focus menu system and that way it's not turned on. If you are a private investigator sitting in a darkened car on a dark street, you definitely wanna turn this off 'cause it would be like a giant flashlight showing exactly who and what you are.
Class Materials
Bonus Materials with Purchase
Ratings and Reviews
John Simpson
I highly recommend this class! Been shooting Nikon for 40+ years and decided to give my Nikon gear to my daughter and go the smaller and lighter Fuji X-T2 for travel. Excellent camera and this course was outstanding in helping me learn how to use the camera. I have watched a number of Nikon oriented instructional videos. This video by John Greengo is the best organized and informative presentation I have ever watched.
Monroe Nevels
We all learn from different methods. I, for one, learn best by watching you while teaching, and being able to work along side you, with my camera in hand, and then follow you. I highly recommend this class if you really want to know how to use your camera. Thank you John for helping me to relive my film days, and integrating into Digital. I now have my Fujo X-T2 programmed and I LOVE IT!
a Creativelive Student
Really appreciate John putting these Fast Start Series together. Went through part of the training waiting on my Fujifilm X-T20 to arrive, which did today. That allowed me to dive into the menu settings and get the camera ready to use. I found that we are on Firmware 3.0, so, I have some updates to get installed. The training was great and informative as always. Don't hesitate to look for his Fast Start for your particular camera, and the in-depth training on Photography Fundamentals. It is well worth your time and money to get this training, especially if you are an amateur like myself, but, thanks to John Greengo I am quickly learning to use my camera in Manual Mode, most of the time.
Student Work
Related Classes
Camera Guides