Lesson Info
8. Camera Controls: Viewfinder Display
Lessons
Class Introduction
04:48 2Camera Overview
12:06 3Photo Basics
06:03 4Top Deck: Overview
04:23 5Top Deck: Exposure Control
27:35 6Top Deck: Metering
07:17 7Top Deck: Drive Mode
21:01 8Camera Controls: Viewfinder Display
09:26Backside: Playback
08:50 10Backside: Auto Exposure Lock and Focus
10:04 11Backside: Quick Menu Custom Settings
04:35 12Quick Menu: AF Mode
08:27 13Quick Menu: Dynamic Range & White Balance
04:35 14Quick Menu: Noise, Image Size, Film Sim & Color
13:49 15Quick Menu: Self Timer, Face Detection & Flash
05:21 16Function Button of Fuji X-T2
12:08 17Left & Right Side of Fuji X-T2
06:51 18Bottom of Fuji X-T2
09:40 19Front of Fuji X-T2
05:50 20Fuji Lenses
07:37 21Q&A
02:38 22Camera Menu Overview
02:56 23Image Quality Settings
18:04 24Auto Focus and Manual Focus Menus
20:50 25Shooting Settings
19:13 26Flash Mode
08:18 27Movie Mode
05:09 28Camera Menu Q&A
02:53 29Set-Up Menu: Basics
01:38 30Demo: Add Items to My Menu
03:26 31User Setting: Sensor Cleaning and Sounds
04:39 32Screen Set-Up
07:36 33Button Dial Setting & Power Management
12:06 34Save Data Set-Up & Connection Setting
07:59 35Playback Menu
08:52 36Camera Operation Overview
14:30 37Firmware Addendum
30:43Lesson Info
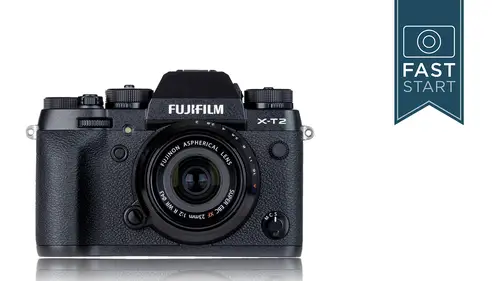
Camera Controls: Viewfinder Display
So on the back of the camera we have our LCD, liquid crystal display and our EVF. So this is, as I said before one of the best EVFs on the market to date. On the LCD I wanted to give you a little demo on just some of the things that I found on it. At first, when I first got may hands on the camera, it was very tricky for me to get the camera into its kinda vertical tilt on this, and there's a little lever here on the side of the camera, I'll just kinda see if we can get the lighting on it right here, and so if you push up on this it tilts out to the side here, so that you could shoot vertically looking down. And so it's very easy to do, just up a little bit and then out. And so when you do flip the camera out there is kinda a little nub in that you can grab on here. But I have found that it's best to put your thumb at the top and push in a little bit so that way it rotates out a little bit like that. So let me do it from the side here, go back in, and so it seems to be putting less pre...
ssure on the hinges there. Now I guess I like the side view here 'cause that you could really see what's going on. If you have it, bring it out and then you tilt it down. You can see that the angle that you can get, right about there, is kind of only so far down, and you are better off if you just leave it in right there so now we can get that angle out a little bit further. So just leaving it in there and pulling it out like that you can get a little bit steeper. So if you're trying to hold it over your head it's better to do that than to bring it out here 'cause the bottom starts hitting there and it can only go in so far. And then as far as the tilt up, you can do about a 90 degree tilt there, and at any point you wanna flip up on this, you can go out like that. So there's a lot of nice little options on here. And go ahead and push that back in there for right now and keep it there for the rest of the class. Alright. So I just wanted to show you that little bit. And so let's talk about the viewfinder and looking through the camera. Over on the side of the prism system, it's not really a prism system but the housing for the EVF is a diopter. Now this is the control for the focusing of the viewfinder. So what you wanna do is you wanna look through there and you wanna look at the information that you see, the numbers and so forth. And you wanna turn that dial so that it is sharply in focus. And it's gonna be a little bit different for everybody and it'll occasionally gets bumped so you may need to adjust that from time to time. But if you look through the viewfinder and everything's out of focus, it may have nothing to do with the focusing of the lens. It may simply have to do with that diopter. Now right below the eyepiece is an eye sensor. And I guess technically it's not really an eye sensor it's just a sensor. It senses when anything is right behind the camera usually three to four inches and then it switches to the view, to the EVF as opposed to the LCD on the back of the camera. Now there is a button on the opposite side of the diopter, the view mode. Now the normal mode that a lot of people will have the camera in is in the EVF, where it automatically switches to the LCD mode. And so depending on where the camera is, if you're holding it out you look at the big screen on the back of the camera. If you hold it up to your eye it switches over to the EVF. If you press down on the view mode you can switch it to the next setting, which is EVF only so the viewfinder for your eye is turned on all the time. It does use a lot of battery power and so it's not recommended that you use that kind of in all cases. The LCD on the back of the camera, if you're working off a tripod or you don't want it to go to the EVF, that's kinda nice. I know when I'm working with the camera on the, on a tripod and I'm moving my hands around the camera, every time my hand goes in front of the sensor it switches over to the EVF, which can be kind of irritating, and to avoid that just put the camera in the LCD only mode. And then finally, there is an EVF with the eye sensor, which means it'll only turn on the EVF when you hold the camera up to your eye. And so this is kind of nice for battery saving as that it only turns the viewfinder on when you're looking through the camera. Now if you are using a traditional camera strap and you have the camera hanging over your shoulder or around your neck or something, be aware that with the camera up against your body, your body is likely to be triggering that eye sensor and turning on the viewfinder and wasting battery power when you are not using the camera. So in many cases I recommend turning the camera off if you're not planning on shooting the camera in the immediate future, to save battery life for this reason. Press the view mode button again and it cycles back to the first of those four options. So you simply just press the button to cycle through those different options. So take a look at those options, see which ones work for you. Okay, next up, we have a screen set up, and so what you see in the EVF or in the LCD can be totally customized. There are so many different things that you can turn on or off whether you like these things. So let's go ahead and take a look at our viewfinder display and many of the different options. Now, as we go through this, well let's just go ahead and start with the frame. First off, one of the things that I've noticed with the frame is it's about 98 or 99% accurate. You get a little bit more than you see. So when you see something in the viewfinder and you line up an edge with it, you'll notice that you're getting a little bit more than that edge on your final images. There is a focusing frame that is in white that you can navigate with the little joystick around to different parts of the frame. We have grid lines that can be chosen between a grid of nine, a grid of 24 or the HD framing lines. And it gets a little quirky, there's, it's just a little quirky on Fuji's part here. You can select which one of the frames you like with the framing guide line in the set up menu. And then you choose whether you wanna have it turned on or off in the display custom setting. And the mistake that I've made, that I hope I'm not alone at, is I've gone and I've selected the grid nine and then I didn't see it in the viewfinder. It's because you have to select the grid that you want and then you would select to turn it on. And so we'll talk more about this as walk through the menu system as well. The electronic level is really nice for anyone who wants to make sure that they have a level horizon. And so it's an easy way to line up the horizon and when you do it correctly it turns green to let you know that you have correctly lined up the camera. And this is something that can be turned on and off like a lot of the features that we're talking about in the set up menu, under the screen set up, under the display custom setting. There's gonna be a long check list of items that you can turn on or off in the viewfinder. Next up is exposure information. It's the very valuable information down at the bottom of the screen. It's gonna tell you about your shutter speeds, apertures, all your basic exposure needs down there. And just as a reminder, the blue color means that you are manually setting that particular feature. White means its automatically set, and red is a warning that the camera can't get the correct setting for what it needs to. And so you wanna be very careful when you see the red come up. The exposure indicator is over on the left. We talked before about how this will show you whether you are underexposed or overexposed. The histogram can be turned down on the right and this is a graphic display of the brightness of the image and so it's kind of a light meter in a shape. And so once you know how histograms work, it's a great way of telling if you're overexposed or underexposed. And this could be turned on and off in our display custom settings for, in the menu. Up in the top right is recording information. The arrow indicates which card you are writing to. The card that is in white is the card that you are writing to. Sometimes they'll both be white 'cause you can write to both cards simultaneously. It'll tell you how many pictures you have left and what format you're recording. As far as raw or large or small or fine or normal quality JPEGs, and so you'll just see the recording info up in the right hand corner. There is a very cool distance indicator. I love this little thing. And so this will show you not only where you're focused at but it does that with the little white arrow or the white line. But in blue it shows you your depth of field. And as you change where you are focused the depth of field adjusts as it does in the real world. And so it's a very good representation of what's going to be in focus in a graphics way with that indicator and that can, of course, be turned on or off in the menu settings. Now up along the top is a variety of information. I'm not gonna go through each one of these. It just tells you if a particular feature is turned on or off. And you're gonna be able to control each and every one of these things in the display custom settings in the set up menu. And so it's a great viewfinder in here. As I said, it's a very large viewfinder, but it's one that you get to really tailor to the way that you like to work.
Class Materials
Bonus Materials with Purchase
Ratings and Reviews
John Simpson
I highly recommend this class! Been shooting Nikon for 40+ years and decided to give my Nikon gear to my daughter and go the smaller and lighter Fuji X-T2 for travel. Excellent camera and this course was outstanding in helping me learn how to use the camera. I have watched a number of Nikon oriented instructional videos. This video by John Greengo is the best organized and informative presentation I have ever watched.
Monroe Nevels
We all learn from different methods. I, for one, learn best by watching you while teaching, and being able to work along side you, with my camera in hand, and then follow you. I highly recommend this class if you really want to know how to use your camera. Thank you John for helping me to relive my film days, and integrating into Digital. I now have my Fujo X-T2 programmed and I LOVE IT!
a Creativelive Student
Really appreciate John putting these Fast Start Series together. Went through part of the training waiting on my Fujifilm X-T20 to arrive, which did today. That allowed me to dive into the menu settings and get the camera ready to use. I found that we are on Firmware 3.0, so, I have some updates to get installed. The training was great and informative as always. Don't hesitate to look for his Fast Start for your particular camera, and the in-depth training on Photography Fundamentals. It is well worth your time and money to get this training, especially if you are an amateur like myself, but, thanks to John Greengo I am quickly learning to use my camera in Manual Mode, most of the time.
Student Work
Related Classes
Camera Guides