Lessons
Day 1
1Introduction
18:50 2Optimizing Your System
11:30 3The FCP X Interface
43:20 4Importing and Organizing Media
1:05:14 5Projects/Timelines
43:06 6Working with Clips
37:22 7Editing Audio
1:00:09J and L Edits
15:49Day 2
9How to Dissect an Edit
1:24:19 10Let's Edit Something For Real
1:18:45 11Introducing Music
1:18:56 122:45 pm - Audio Mastering
1:22:18Day 3
13Introduction
05:14 14Color Tools and Effects Part 1
1:07:44 1511:00 am - Color Tools and Effects Part 2
1:07:44 16Effects and Titling
1:17:04 17Exporting
47:49Lesson Info
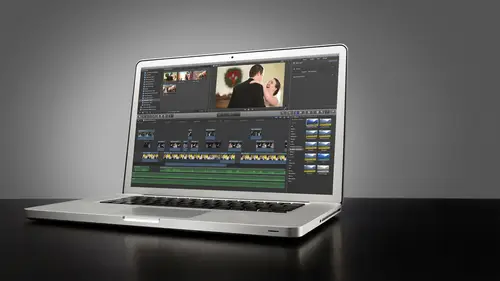
Effects and Titling
The first thing I want to do it and cover is work with letter boxing to get that wide screen look it's a very simple process but I do want to illustrate it for you guys keys so you can see how I do it and how quickly it can be done. I really do like I do enjoy doing this to all of my films giving about two point three five to one uh anamorphic widescreen panavision for matt I just like it just lends it more to a cinema look and when we export it with that setting when you put it up online well on video around smug bug it actually maintains that aspect ratio so you don't have black bars on top and bottom and when you when that gets embedded into blog's and stuff it just looks cinema it's very cool I get a lot of compliments on that and a lot of guys do it it's great some people prefer not to do it and that's fine again this is another one of those personal preference things it's not not a must but something I like to do so we're gonna cover that the workflow behind that we'll get some i...
nto some video well, let me just preface this what we're doing here is we're kind of just wrapping things up in our project it's edited its color grated now let's go through and just let's, tweak it let's, make some polish is so video stabilization, we're gonna go through. I'm gonna show you how to use markers and we're going to go through and mark areas of our timeline that sort of need attention, they're called to do markers, and then we have a list of it'll give us a basically a to do list in our timeline from the timeline index window, which allows us to kind of go through the project and see where our problem areas are rectify them and move on with exporting. So we're gonna do some we'll do that, we'll do some video stabilization will find shots that air a little bit off kilter or maybe a little shaky, and we'll fix him, get him locked down nice and tight for a nice polish look, we'll do some basic titling this is going to be real quick. I'm just going to show you how I generate quick title just for to mark the end or being the beginning of a film in my feature films, sometimes we'll do a little bit more advanced titling with motion tracking. Unfortunately, we don't do them here in final cut, but if you look up some tutorials on apple motion, which is a compositing program the apple makes they have some great tracking tutorials, and those were gruesome sharpening. We'll apply some sharpening the clips that we feel like it will enhance sharpening is one of those things that could be easily overdone, so we don't want to overdo it, but we will show you how we apply that on were to get into some noise removal to which is great cause I have some clips here that are pretty nasty pretty high, so high I s o n the shadow regions of these clips, we have a lot of noise, so I want to be able to pull that out without me destroying my image on guy have a plug in that does a great job with noise removal, so it can be pretty tricky with video. I know and, you know, getting noise removal without making your faces look weird it's the same thing in photography fusing light room, which has it absolutely wonderful noise removal element to it, but if you overuse it, you start to get a little it looks like painted it almost looks like the faces you know what you're looking at a watercolor almost get a lot of like, fuzzy bleed I don't even know how you describe it it's just you know, it just doesn't look right, it looks painted over and it looks almost airbrushed we don't want that we wanted to look natural without losing too much resolution in detail we'll get into that a little bit of noise removal, we'll get into some re timing in slow motion using some footage shot in sixty frames per second, some fun, some fun footage I don't do I don't honestly don't use a whole lot of slow motion in any of my productions it's not sort of my style if I were to use it, I'll show you how I would use it and it's pretty simple on then we're gonna get in this rendering a little bit we'll talk about rendering sort of throughout the whole thing because all of these things we're going to do are going to require rendering, so I'll have plenty of teachable moments there to kind of show you the ins and outs of rendering and final cut and what you need to be aware of if things go wrong with rendering, so just, um useful, useful advice so we're going to be so this segment sort of a mish mosh of all kinds of different stuff, so we'll get into it. I don't want to cover one thing really quickly on going over here to the system yesterday there was a point in time where I didn't we were trying to somebody had asked if it was possible to change where the connector goes on a clip and the connector being that little line that goes from one club to another to reference what you know where the clip is connected to on the primary storyline and at the time I didn't realize it I said there was no way to change that there actually is a way to change it and somebody brought it to my attention I want to thank them because I didn't know that and that's not going to speed me up and I must have missed that my research and I'm glad I it was brought to my attention if you click on the clip you want to change the connector location and use command or option command click and it's gonna make me look stupid there goes it'll change where that connector goes okay so we can move that to marry it two different clips that's really, really helpful ok, so something I didn't know option command click changes where the connector will go so I'm glad we were able to rectify that I'm glad it's now in the program so whoever watches it, we'll see it and I'm glad I know that now because that's going to make my life a little bit easier, easier to sew very cool. All right? So now that that's out of the way, we're going to get into letter boxing so I'm going to click into my opening scene here where we've done a little bit of color grading work and I'm gonna show you how I do this it's very simple over into our affects browser and final cut that's this little window over here at our media browser toolbar click that's going to open a bar effects browser and I'm gonna just click in tow all and type in in the search field down on the bottom here letterbox okay it's a very simple final cut plug in not a plug in effect and by default this is not really doing much. You could look at the image up on top there and you see when I when I roll my mouse over it and I skim the image you get these two thin black bars well that's that's a letter box but it's not the type of letter box we want so what I'm gonna do is drag it over to our first let hana click on her first clip and you'll see that the effects been applied somewhat so what we need to do now is adjusted so we're just going with our clips elected we're gonna go over here I want to skimming off when you go over here to our effects palate and you'll see that the letterbox effect is applied and it says aspect ratio one point eight five two one ratio that is a that's, an aspect ratio and that's what it's creating by cropping the image and giving and putting his black bars there black right now because there's nothing underneath that clip if I click over here on the cliff there's something underneath it like that is shining through to the other clip okay, so we'll have to address that issue as well, and the unease e way to address that issue would be to just go through your project, emerge everything down to the primary story line. Okay? Because if I do that, you know that I'm going to be able to just work with everything right across the line we're not gonna do that. I want to show you things that you will have to look out for it's kind of more teachable that way. So my goal is to get the aspect ratio set to two point three five to one, okay? And all of these are just different aspect ratios commonly used in cinema filmmaking. Why do I pick two thirty five? The one well, it's just the way I like it it's not two anamorphic I could pick two fifty five to one and that just crops it down a little bit more for a really anamorphic widescreen working with three point odo one and that's really wide screen and some films aired only this I choose not to just to know on aspect ratios I mean, this is just personal knowledge. I just my opinion, so to speak, these air great formats for storytelling, I really think that the regular sixteen by nine aspect ratio was a great aspect ratio and I think you could do a lot of story telling in here it's much better than the old forthree box you know you got it the way I look at it is our field of view is wide screen we have peripheral vision it's almost like I'm max we can see things comes are you just looking I could feel the heat from her eyes boring into the side of my head on that's not the first time I've done that I think during the cinema course they did that to you I just don't want to get punched in the face I'm not gonna punch in the face again under table but basically so we have peripheral vision so we can see things in a more wide screen fashion that's sort of what thes aspect ratios are mimicking to me anyway that's when I like the storytelling like the storytelling at, you know canvas if you will hear that I have to work with because I like to align things you know what? I'm framing up shots and composing shots I like to use my rule of thirds obviously I like things composed far left and then far right and cutting between them to kind of tell a story to move the eyes around the screen I like to think in terms of screen direction when I'm editing so I like to go from like a wide shot to close up, you know, back out to a wide shot to extreme close up to medium shot, then do a close up so I'm constantly thinking about where the eyes being led and in addition to just close up some watch out something left right middle left, right middle and just kind of getting the eye to bounce around that's what engages you into something if everything is just a one medium shot, medium shot, medium shot, medium shot veer is going to get bored, and I don't know why it's just the same thing over and over and over again. So to avoid repetitive nous, I like this aspect ratio gives me a lot of field to play with and it's not too narrow. Do you question? Yeah, yeah, I photo shop a lot, I don't deal, I haven't done video much but what's the difference between using that crop tool in the bottom right of the window there and what you're doing now absolutely nothing. The only difference is this is pre set two to thirty five the one instead of me having to use the crop told to make that one time, then copied across the clips this is a pre set it's already done and this is already set up because I haven't I haven't exports setting that we're going to later on that we'll use these exact dimensions to export this and I want to make sure I'm hitting that mark every but yeah in theory there's absolutely no difference no difference sofia but anyway to thirty five the one is the one I like to use the nice thing about this this is another reason why I like to use this thiss affect preset is we have this offset slider which allows me to choose how to pan the image behind it so I can re compose my shots for the wide screen which is nice okay border size you're gonna have a border I don't use borders I don't never do that if you wanted to you could make a bakelite border you know not really my style but anyway that's basically what I do so now that I haven't applied I have to deal with this down below now I you know as you see here I am using part of this image and we cut to it later so just to rectify that I can't use my people and I can just drag it over and problem solved so you know as long as there's nothing underneath it you have black black video and that's a that's a setting so if you're refined yourself in final cut and you don't see black or you see something else there you would go into your playback preferences under final cut pro preferences playback and player background is an option you change that toe white or we could change it to a checkerboard okay so just if you ever come across that that's where he changed that pretty simple stuff all right cool so now that I've gotten it applied to one I do have to keep in mind that I have an offset setting here so I've pulled my offset all the way over so when I copy this effect to multiple other clips I'm gonna have to adjust that offset because each shot's gonna need to be reading recomposed I've gotten this down to a point where I can liken widescreen a full twenty five minute film about like a half an hour you know it takes me a little bit of time but again it's mindless work I could sit there get on the radio on or pandora on just listen so basically if I just you know it's like the clip that has the effect of nancy and shift command v copy over my effect now it's on this clip and we just use the offset slider to fix the composition which is nice and you know you really kind of read read doing some re storytelling because you the composition is a way of telling a story too you know so we can really kind of get into these image is a little bit more intensely and I like letterbox because it also makes close ups more intimate you're closer to get a little bit more intimate and I you know I see movies all the time if you really look at movies, they do crop foreheads and stuff if you look at the way that shots or composed don't feel like you need tohave head room because if I do that that shot is not nicely composed I'm thinking rule of thirds but her eyes in the upper third crops career ahead that's fine the focus is on her face it's fine. Okay, this is just all again all my opinion can use like multiple clips and paces as you can grab all these clips are here command are also shift mandy sex now this is one thing that annoys me about final cut this is a pet peeve. I hope they address this in velika pro legacy you could apply effects across a range of close without having to go into this dialog box. You'd have a shortcut that did it you didn't open this box every time where I have to check effects and then do it. It was a little bit quicker to dio not complaining at least we can do it the first version of follow up they put out that you couldn't even pace attributes from one club to another, so I'm really just happy that we can do that so again, we've got this issue down here doesn't look like we're using any of this clip, you know, so like you just look from storyline and then you know, delete it but it's going to be connected to something so we could just disable it, pop it off I don't even have to remove it from the storyline we just stable and again this is all semantics. I know other people want to do this a different way. That's fine, whatever this is just what I have here, it's all good. So now I can kind of go through here just change my offsets real quick looks good to me call this one I'm trying I'm trying he's the composition of the chandelier there to do that and that's it basically I'm just repeating that process for the entire film doesn't take long to do as you see her. I already did like probably a fifth of this film or whatever. So really not that bad on dh that's pretty much it now that that's been cropped and before we go through exporting, I'd like to kind of do the rest of it. Well, actually it doesn't really matter because we have a previous but when I go to export this, we get into our share settings for exporting there's a way to send this through to a programme called compressor and just exported out at that aspect ratio I have yet to find a way to do it directly out of final cut like that without having black bars and top bottom if somebody knows how to do what I love but I have yet to come across a way to do that so we have to do a little not a round trip but we have to export into another program let it do with let it do that change and then we'll have it out and what it looks like when it's done and I know you guys kind of lost it yesterday but essentially like that it's widescreen and I just I just like the format I think it looks great I think people really dig it and I know just personal preference so cool and that's it I mean that's the whole tutorial on letter boxing that's all you need to know is how to do that's real simple stuff. Any questions? Yeah. Is there a way to change the offset over the length of the clip or would you you know you could key frame and if you want eso basically that's good good with segways again, man because I can actually use that uh all right. So let's see? And most most effects parameters are key frame bubble okay, so if I run my mouse over in effect parameter uh uh get a prize ready, you get a prize ready oh, this is be alright tech guys need you way gotta lock up peter crashed prize way we'll get to that question I promise you I promise well, we're giving away another song freedom this time a single songs you can go to robin vanessa's page and check out what they love in that prize who is it going todo her going? Teo michael rolf's from san jose, california entered on twitter, facebook and our twitter facebook twitter handle are you rules that quote was we want to keep people looking good but in a stylized effect congratulations on your song freedom fun like a whore so we're still working on the problem so we just got a black screen let's take some questions are there any questions let's do it will come will come back to you guys you want lets go to andr first actually and then kind of a two part question did you say that the compressor is cropping your footage in the output? What it's doing? Okay, so is the point of adding the letterbox in final cut is that just so you can recompose because essentially just going to crop it out in exactly three composing that it's also giving compressor the guidelines that needs in order to teo crop it because in compressor I'm going to use a basically a setting that says crop to letterbox area of source so it's going to detect where the black bars are going across my my video across the board right on those lines so yeah that's basically the way that works what was your question? Did you have a question ok eso zane wants to know once again if you could show how to apply the affect our modifications to multiple clips which we might need to be I'll be happy to absolutely get back and peter's back up and running okay uh what about let's see her suppose you have several clips with an effect applied and you go back and make a change to one of the parameters and one clip is there a way to piss those changers something into the rest of the clips so kind of multiple yeah you could pace there won't it won't if you change one is not going to change the others but you could go back and re apply just just be careful because it's easy to duplicate you'll end up duplicating your effect so if you if you took it affected applied across four clips and they went back and changed one copied it and re applied it to the other three you're going to duplicate effects you gotta remove the other one first let me just answer matt's question real quick and then we'll go we'll go back and I promise I won't do that again all right so for example but coming to my opening sr and let's say, for example, I want to change this overtime the offset here it's really not that hard to do? Okay, I'm gonna open up my inspector going to my effect and most affect parameters give you the option of a key frame. The way to do that is you select the clips you want to copy the effect to after you, you know, after you've copied the effect from the clip that you want to duplicate the effect you highlight the ones that don't have yet have the effect and use command shift option or shift command v and that will bring up that dialogue box and I'll ask you what you want to paste to that range of clips perfect that's where that comes over here you see this little plus sign in the diamond? Okay, that's, the icon for a key frame it's next to the offset slider. If I wanted to work with that, I could base it like you just set a key frame here at the beginning of the clip, okay? And I can set another one somewhere along the line here by either clicking on the key for him again or by changing the parameter of the effect is going to simulate a pan down or tilt down rather pan tilt down so you can see now that the image didn't do that before. But I'm making it do it now, okay, now if I wanted that to continue all the way to the end, I can write click go to show video animation, okay? And then I have my letter box effect up here and you see the key frame that I created their key frames are just ways of communicating motion or an effect parameter over two points in time. All right, so now you can see here action makes a very interesting both pan and it gets a little bit more dynamic. It looks like it was done in camera really doesn't look like it's a pan and scan doesn't look cam burns effect so it's really kind of cool? Yeah, there you go so that's that's how you do that often? All right, what I'd like to know what I will do is when a film is done, I'll just ship z to move out, bring zoom out and see the whole timeline and this is not an optimized timeline. I don't have things to consolidated the way I want stuff like that and that's okay for now because they were just demonstrating, but basically what I would do is play back the whole film and set markers I just have my finger on the m ke and just set markers where I think there's places that things need to be done it's actually very funny went because we have our editors coming house and rob, we'll watch their films and rob just sits there with his finger on the m k and you could see the editor like creating jared teo like that's wrong that's wrong that I try to be really conservative? I'm not beating them up, you know, it's, sort of like I do want to playback, and I'll just let it play. And then when I see something, what you're gonna be looking for is down here on the primary story line. You're going to see markers pop up. So what if they're just little blue marker sofa hit? Mark, you see the blue marker and let's say the shot was shaky right here, otis it mark and I would just keep doing this the whole time. Let's say this transition coming up was bad. There's a black frame, it or something, mark, you know, and I'll just keep doing this. Mark okay? And what's great about markers is they have a really good use in a couple of different ways. Here in the program. I can select these markers individually and double click them, and it brings up a dialogue where I can name these markers, so if I want to say, um, bad cut or something like that. I know that's not relevant to what it is. Bad cut or who I want to say like let's say, I'm doing this because my editor's coming in tomorrow and I looked through her project and I just want to give her notes. I'll just say, okay, markers air on your timeline. Go take a look at what I said and I can type in notes here. So, um, bad color. Yeah, man collar or something like that. Okay, so what's cool about that is we have this nifty little window we haven't really talked about yet. It's called the timeline index and it's accessible from this little icon down here on the left hand side, if I click that it opens up a dialogue here, which is a really, really kind of cool, and what it will do is give me a virtual index of my timeline, which is really, really helpful when it shows me where all these different clips are and it's really helpful. If I click on tags, I can see my markers. Okay, now I have some other markets in here that are just leighton labeled with numbers as the ones I used probably earlier on we never labeled them, but you'll be able to see where I've made those notes. Okay and the position the timecode position that they're located at and what's nice is I can just click on it and it takes me right to it so the editor can basically go right down the list okay got a bad cut here let me go address that marker heal me address that bad color here let me address that and that's fantastic I love using markers for this we can make actually something called to do markers if we double click a marker and we click on this little list here in the middle icon it becomes red and now it's a to do marker okay and that's really cool and I'll just do that for the other ones here and it's not just changing the color of this other ever is a reason for this let's grab this one here two markers okay now I can look at my to do list by coming down here on the bottom and clicking on this little note pad icon so I could make a whole to do list which is fantastic when I went to win it when something is done I can convert that I could just check completed it turns green and disappears from my timeline index it's a great way to keep track of things that you need to do in your project let's say you're really involved in one scene but you notice something you while you were skimming you notice something wrong like earlier on but you're not working on that point drop it to do the marker on it and you won't forget to go do that or you'll know you have an idea of what how much work you have to do left so it's really, really to do markers or great another great thing about markers is they could become dvd chapters so let's say this is a long film or or to clean up at it of ceremony and parts of receptions and we want to break him down in the chapters for our dvd and it's all one timeline weaken simply create a marker and by the way, if you just hit mm real fast and then it'll open up that dialogue for you okay? And we just would click on this little ribbon icon over here on the right hand side and that is a chapter marker. Okay, so now let's say this is the first the second the first chapter is always going to be the beginning of your film notice how it by default it made it chapter two that's because wherever on putting this marker when the dvd program goes to write that disk it's going to know that this is a chapter two in the begining of the videos, chapter one all right, so I could rename this I don't know it's let's say it's the ceremony we know it's not whatever the ceremony okay done. So we have the little yellow or orange chapter marker here and then we have this little pin looks like a pin this is a poster frames selector if I drag this along the timeline I can choose a frame that I want to act as either a poster frame or an animated button start point okay, so poster frames khun b don't uses either stills or to mark off point in time where you want so like if you put a dvd and little thumbnails come up for the chapters they have little videos playing in and that's what this is denoting that that little poster frames is telling us where that video will start and by default whatever the dvd program allows, it might be a thirty second loop but it will always come back to this point in time. So the poster frames a great so you could go throughout your entire project and set markers and I use these all the time all three of their fantastic so good to have good to know about and then you know the time on index has other great things as well you can see we're keith were keyword tag clips were used on timelines you kind of go down through here and you want to see we're all you know your bride's prep keyword tags were used you could just navigate through the time line this way really kind of cool I mean the timeline index is a lot place and we're not we're only scratching the surface thing does a lot more than I'm not going to cover in this course okay if you're curious about it looking up there is really cool things we could do with roles we don't even really talk about roles what roles are and you see those here we can assign roles to video clips and audio clips and we can assign it and designated as dialogue or b roll or video and then we can sort by rolls we can view on lee those roles on our timeline so if I said show me on ly b roll it would show me only be shots designated b roll it goes beyond the scope of what I needed to do organizationally that's why I don't use it it's a great feature I just don't use it in my work folks I don't need to if that doesn't require it if I was doing a full film production and I had to keep track of several takes and shots and all this and everything's labeled with metadata for camera name and all that kind of stuff that would be different but I'm not using roles for weddings some people might and that's totally cool but that's the timeline index we really didn't get into that much but it's nice to know that it's there and what some of what it can do cool let's get in the stabilization any questions about markers, by the way at all any questions online about markers? Inga wants to know if you can delete markers in a bunch in a bunch you could delete from the timeline index so if we go here to, uh sorry goodall and I just got lost sorry because I'm looking at there we got markers if I want to see if I could actually do this delete no doesn't look like I can I can't believe you can delete him here. You have to go into the market and actually delete him from the timeline. Excellent. Thank you, that's. Good problem. Okay, so any other questions about markers were good. Okay, so let's move on to stabilization because this is really kind of fun and I've got some footage here. We're gonna show off the power of final cut stabilization tools and I don't really use civilization too. If a shot is excessively shaky, I just don't use it or I will cut around it, okay? I'm not going to leave it to a stabilizer to fix on all of my shooters problems I'll address the problem with my shooter because that's where it's coming from, okay, I'm not worried I don't wantto go just go out there and shoot I'll just fix everything in post I know I do not want that mindset so what I'm looking to use the stabilizer for is things like steadicam shots that maybe weren't a studies I want them to be and I can really find to net so I've got some footage here same footage we're working with before it's a steadicam shot and it's a nice shot don't get me wrong it's smooth the fly is nice it's got a slight horizontal pendulum like this and if I really want to get picky, I can remove that you selected clip and come over here to the video tab in the inspector and we click on stabilization I've already pre rendered this so we don't have the right weight for surrender you'll see that it zoom the clip in a little bit see that that's what's required in order to stabilize a piece of video. Unfortunately we lose a little bit of resolution we scale the clip up a little bit, you know, because what it's doing is the computer is analysing the video and then cropping it in and locking it down and you need that extra bleed on the side in order to do that I mean it's really a layman's explanation, but now watch when I play back it's rock solid there is no pendulum e it's very subtle all right, but it's definitely in my eyes I notice it and this is a very very subtle example okay and yes do I lose do I lose a little resolution? Yeah, I don't think the bride's going to notice that that much you know we're not blowing this thing up huge if it's a little soft on the tv is a little soft on tv you know it's a judgment call is personal preference I like a steady shot I think of the bride's emotionally invested she's not looking to see what shots of super and focus you know we want things to be in focus but if I could make it flow and edit together nicely adi expensive a little bit of ah sharpness I will sew this shot here is you can see is I scrubbed through it the cameras just kind of doing this little floaty thing it's a beautiful shot but the cameras floating a little bit you can see kind of dipped down right there and I just want to clean that up just highlight it stabilisation zooms it in just a touch of now that thing is rock solid. Okay, now this parameters here we can adjust if we want to kind of play with this to see if we can get it to work without being so zoomed in we can work with the smoothing options and translation smooth well basically be in overall smoothing rotation smooth will will adjust how much rotation it will it will detract and and how much compensation rotational it'll add and scale smooth will determine how far it won't we wanted to zoom in and you can see I was zooming in and out a little bit there based on the algorithm that it ran to uh to do this takes a little bit of rendering doesn't take long and I'm usually only applying as the short clips I would never apply this to a super long clip is not you know it's just too long to do that not that you couldn't this one too same thing let's watch the original really nice shot don't get me wrong it's a little bit of bouncing in it just from the footsteps and I guess my rig wasn't completely dynamically balanced stabilization now it just seems to move on a track right for them okay really fun I love using the stabilizer and and if you use it for very subtle things it works well it's not gonna work very well on a clip like this okay let's see what happens if I apply to this it won't give a second that's not that's not good okay and you see this on youtube all the time people posting like their skate videos and the videos going go on it's war being in bending all over the place you know that's been stabilized I don't want that in my films, this's a great example. You can see just by me skimming look at the edges of the clip, you can see how bouncy it is. How it's really good the horizon line is moving all over the place and I love this shot. I absolutely love this shot. I don't want to take it out because I think the fly is no good. Click on it stabilize, it is beautiful and it really didn't even zoom in that much just a little bit, maybe until like one hundred and five percent, you know? But it makes the shot so much more dramatic when it's just slowly creeping in like that. I really love it's a stabilization is a friend of mine. I really like it here's a good example of his locking down a shot. Let's go and it's like this clip this clip. This clip annoys me because this is one of the only angles we have on the cake cutting, as you can see, they're on a very small balcony. Well, no, I was back here behind this curtain and there was a photographer who keeps stepping right in front of me to get a shot and me are not a photographer, a maitre d I'm sorry, me and the photographer were live it at this guy because he kept stepping in and not I understand the maitre d's got to kind of go in and get the cake knife in all this, but he was like just while they're eating the cake I'm like when you move out of the way like and I have a right to this, so I have a I have really nothing from this other side actually see the guy walking around back there see m seem creeping in looking at his hands. Something happened back there, but I was like, living, so this is like, the only angle well, we have another angle, but this was I wanted to be able to have more than one angle so you can see me back there. I'm like peking it anyway, so stabilize perfectly locked down. Okay, so if you use this, that was that him that's, the photographer jenna, jenna. All right, so basically that that's great for that sort of thing is use it suddenly don't overuse it, just use it to give you a little bit of a little bit of steady it with a little bit of subtle, stable ization and it's perfect. So let's do some re timing and I, like I said, I don't do a whole lot of this in my films, um that's why I don't have any wedding footage that shot at sixty frames per second I rarely show I know a lot of guys that do and it's cool I like what they do with it I just I don't know I find myself if I when I've done and I just don't use it for some reason and this is my style but we shot this footage of sixty frames per second so you kind of get an idea of what we're doing here well essentially what we're doing is final cut has slow motion capability built into it all right where I can take this clip if I put this back in real time okay I can take this clip and I could go over here to our re time button right here everytime options and I can slow it down goodbye slow fifty twenty five ten percent I could slow down just like that okay if I play this back it's really slow notice how it's a little jerky though it's got like jerkiness to it like every because it's this is what we call fake slow motion okay um that's I don't know I would never want it like that we can make this a way we can kind of work with that to make it a little little bit better if we go up in here too every time and then come down to video quality changed to frame blending it's going to give me a little bit smoother motion because it's kind of inter plating frames but you're gonna see some blurriness in between the frames. I'm not crazy about that either. There's this other one called optical flow and optical flow will actually in a nutshell final couple create frames in between those frames so rather than blend rather than that having go frame, hold frame, hold frame. Hold what it's doing instead with frame blending it's, like blending them together like this and optical flow will actually create a frame in between them and estimate the motion. Basically, it's kind of cool. It works best when you work with footage. That was what we call over cranked shot at a faster frame rate. Okay, so this footage here, all my wedding footage shot twenty three nine, eight, this this fish out here shot at sixty frames per second. Okay, so it's, just really time motion that sixty. And now with what I've done is this this project is actually a twenty four frames per second project. The settings of this project, this only work. If you bring this footage into a composition that's twenty four frames per second on dh, what we're gonna do is instead of using the slow command here, we're going to go down to conform speed and if anybody remembers a program called cinema tools it was part of the original final cut studio cinema tools we had an option to let you do that to conform something from one free meat frame rate to another if something was recorded at a faster frame rate and you conformed it down to a slower frame rate it would actually do the conference conforming for you and you have a clip that was in slow motion so now just by conforming this twenty four frames per second we have nice slow fluid slow motion okay, the nice thing about working with slow motion here is that we can actually extend or slow down the cliff just simply by grabbing this little indicator bar we're looking at the re time option directly on the clip we just grab it and stretch it and you'll see here where it says slow watch the percentage change okay so we can actually slow it down like that and then play it back okay so again the more you slow it down, the more artifacts you're going to get and there are other great programs and actually if I use optical flow it might actually help a little bit let's put that on and let's let it render first I'm going to see what it does the key to getting good slow motion from what I understand is you wanna have a plain background you don't have too much business going on in the background you want to shoot a very fast shutter speeds to get crisp motion in your image on dh then you can use an optical flow or they have this program called twister which allows you to do really slow motion almost like a shot at a thousand frames per second. You get that real ever see the videos like the water balloon exploding as the pin goes through and it's just takes like forever for it to do that that's really cool that's either shot with a phantom flex camera which is extremely expensive we're done with good photography and using twixt their or sometimes even optical flow, but again, these are extreme examples of emotion I don't really use a whole lot of questions yeah, just a quick one is there a way to take a section of that clip and do it slow motion and bring it back up to speed and slow it back down there? Cool there's a couple different ways to do that, andi I actually have really I've only played around with it to do it like that so let me just go back here. All right? So let me just let me undo here to get us back to normal so if I were to split this clip this bladed and apply every time, get a three time here if apply every time here and orders conformity we'll see what happens that's your answer right there yes, you can do that very simple drag it out even more here you go it's really that simple? It doesn't take much to dio it's so much fun. So that's three timing guys I mean, you know and then what I would probably do with a clip like that is this compound it? You know so you just have it all is one and that's it yeah can you use the key frames to change it gradually good question. I know there's a way to do a speed ramp so down here into the dialog boxes of speed ramp it'll take it from zero to zero a ce for risky firms I'm sure you can sure you can let's try it let's, go back let's add our conform here's our everytime option now let me see if I go into my video animation I don't see a way to do that via key frames here and there's no way to kee frame it up here and since I don't see it down here, I'm going to say no but I might be wrong so maybe somebody out there has a better answer for you, but I don't use ah re timing nearly as much I want to cover a really cool thing that final cut pro does that is not part of my work flow but is really cool nonetheless and there's a lot of debate about whether it's better to do my form of editing this using multi clips rather than using compound clips because the method I showed you yesterday is this my fastest method, and I was showing you how to use compound clips. There was another way you can sort of do multi cam editing of multi of multiple cameras and audio sources. We can use multi clip it's rather than compound clips, multi clips, so let me just close the timeline in next year and let's, go into what we're going to do is create a new project because I need a timeline to work on, and this would be any old timeline that we were working on. So what is called this speech? And I'm going to go on ahead and use dad's speech from yesterday, and this is a good a good application for this would be if you're doing like cleanup at its and you're giving a bribe like a hole version of the speeches and the toasts are speeches in a ceremony, that sort of thing in your multiple sources to create a multi clip, and then we can cut between the cameras live as we watch it back. And then once it's all cut, and it'll automatically make the cuts for us down on the timeline, and then we could go back and change the shots and move things around to tweak it, which is really cool, what you could do with that. So what we're going to do is highlight all the clips in the video that we wanted we first have to sink it up, okay? And this is where I get lost, not losses where I check out because I've had so much trouble with final cut sinking up multiple video and audio sources on its own without the help of poor allies that I don't get to use this because we have four, five cameras of dslr footage for five audio sources, sometimes it doesn't work, and I'm not saying it doesn't work. I'm saying for me, sometimes it doesn't work, it doesn't mean it doesn't work, but what I'm going to do is use I have two video sources, so to video angles and an audio source, okay, which I'm gonna select all three of and I'm going to right click and click on new multi cam clip, okay, it's going to ask me to give it a name and we'll just call it speech hit, okay it's going to take a second it's gonna analyze the wave forms. Just like plural eyes does and it's going to sink things up now actually, let me backtrack for a second there's a couple things that you can do here there are some custom settings will call this speech again custom settings ok, it's going it could ask me a couple questions. I could just leave it to do its own thing and it will analyze the wafer horse. Okay, because this book this box is checked use audio for synchronization that's basically will be covered yesterday, then there's this thing called angle assembly I have never used it. Okay? And I really it looks like, you know, put them in a lister angles on a timeline or in the angle viewer according to these parameters, and then we can also use a different method to sink our clips let's say, for example, you shot a movie and use a clap clap board, sleet okay? And you don't want to use the audio to sing because maybe you don't have all the men. We only had video maybe was recorded on camera or something like that, for whatever reason, not that that's a good example, but you khun set markers on your clips individually in the event browser so I can go through these clips, find where the clapboard sleep, comes down, type m and put a marker and do that for all of my sources this is the long way of doing it you could do that for all of your video clips and then all of your audio clips so if you had audio too when you hear the of the clap that's where you put a marker on your audio clip then you'd select first marker on the angle to synchronize and it will use the markers to immediately sink things up it's much faster much more reliable to do it that way it just takes more prep work to get it done but that's definitely a way you can do that and that is awesome everything else in school we had speech are hit okay and let it create my multi clip so what it's done is put in a clip in the event browser and it's got this little four box icon on it that means that's a multi clip this little icon here that's on these other clips means compound clip it looks like a little murder two clips compound clip multi clip all right, so I'm just gonna highlight this multi clip and now when I have to do what I like to do when I'm working with multi clips just kind of trim it down to only what I'm going to use first and then I'll bring it into my my project timeline so what I'm gonna do is don't turn my skimming back on now I'm only seeing one angle right now only sing the top angle in my angle viewer we haven't gotten there yet, okay that's good right about there. So this is about where I'm going to start this clip okay, so I can set it in point here and now I'm just gonna drop it down in my primary story live line by hitting hee for repent okay? And it drops it down here right now it looks just like one big clip but if I high like this open an angle editor I can now see all I see both of my video angles and my audio angle let me just, um size these down limits we can see a little bit there. There we go. Okay, so I can see them and in the angle editor aiken rearrange these to be where I want them to be so the top bar would be like camera one the second borrowed the camera too, and this is the audio source, which means we now have to configure this toe work basically. Okay. So now that it's down here on the timeline, I could come up here to my event or project viewer and go to show angles and as you see here I've got both of my video sources and my audio source knows how this is the razor blade icon here that's how I'm going to cut between my two cameras and you can have multiple is this is just configured right now for a four up display you could have four of the nine sixteen you could have a lot of different sources and if your computers fast enough and you can get him to sync up, you can use this however you want and it's really kind of power it's a very powerful tool. So now what I need to do is configure where I want the audio to come from as I cut between these video clips, I don't want audio to come from the cameras I want the audio to stay with this audio external audio source, so I come up here to the top and I've got a couple different options. I've got video and audio, just video and just audio if I click on just audio come down here to dad's speech shortened, which is my audio clip and click on that I've now just told this clip this multi clip to use dad's audio now I did it while I wasn't at the beginning, so you see here it's actually making a change between the two if I skim through so actually what I want to dio is highlight this clip and just do that they're you know where I could just undo what I did come back to the beginning choose the audio source and now we're ready to go. So now the last thing I have to do is choose video on lee and now I'm able to cut back and forth between my clips. Let's, play this back and let's do some live switching weii haven't seen the bridegroom's angle yet. It will pop up there is ladies gentlemen, welcome to the n e and tongue we're the party way see this by clicking it will change the camera angle. I'm very exciting and happy for this moment. I'm pleased to see everybody here to serve this special moment with me. Wait can also change cameras by using number keys one and two and I won all I still something missing way always time they're missing something we talk of you shot one. We'll have to wait tom and howard but no but no daughter so I really feel you know so many missing something. Okay he's so cute he really so adorable I'm plus one double any is my border. So now if I had a third angle, I could be clicking to that too. I could have as many as I want happy get the idea. Okay, now look down here on the timeline it's actually created cuts for me they're not definitive cuts, they're just little perforated lines that indicate where I've made a camera angle switch or a source switch right now what's cool about this is I can go down here and shrimp let's say I cut away like I cut to a second too soon and the camera was still shaking I can easily tweak it just by going like that I can use my trim tool and do a roll at it if I need to or slip at it or I can change in angle completely let's say okay, so here's dad here's the bridegroom, the camera kind of moves a little bit and I'm not really crazy about the look on her face and then it goes back to him. Well, let's say I want to just make this dad again, right click active video angle choose the angle it's now dad okay that's multi clip it's awesome and, you know there's so many things that you could do with this the reason I don't use it in my work flow is just because I don't want to sit through all of my cleanups and switch it live like this and then go edited into my film it's cool once it's done because I could pull out pieces from the event browser just dropping down so I could essentially edit and then just drop it down into my event browser I've had system crashing issues with multi clip for some reason on my system in the past, I guess I just have a bad taste in my mouth with it, and since then I've just gotten faster using compound clips, but it's six of one half dozen of the other some people find it easier and better to do this. I find it easier and better to do with the other way. Yeah, yeah, I'm not familiar with paralyzed completely, but someone wants to know kp wants to know if you can create many clips and paralyzed and then apply it and then bring them in many clips, maybe sink everything everything else and then bring it in with with the multi class yes, you can finally poor allies will make a multi clip for you. You from plural eyes? Yes, yes so if you're not super happy with the synchronization features, that final cut hasn't how uses it because sometimes it can be I think you're not as good as part wise you could do that and paralyze first, then pull it into final cut he's multi clip just in journals that's pretty cool, yeah, it's very powerful and you know what, I'm doing cleanup at it, and I think a couple of my editors actually do use this to do there, clean up that it's and always sit there maybe lunch to switch cameras at school because you do with one hand here the word is on the honor thiss clicking back and forth to switching cameras live you know and then if you make a mistake just drop a marker down you get em on to keep under keypad creates a marker okay I got to go back to that point and fix that shot it might be a second or two late by the time you get down there and put the marker but multi clip is really cool it's got some great it's it's a really great feature so all right so again along the same lines of just cleaning up our footage trying to make it look as good as we can I've got some noisy footage that I want to work with and you'll be able to see it here in a second when I blow this up remember this clip that we cleaned up that's the original that's the cleaned up version now you really see the difference right after having not looked at it for a while and then you go back he said okay looks ok and then you go whoa that was really bad I mean at least idea um watch this when I when I just put this full screen look at all this noise right here see all that that's ugly I'll play back again okay that's bad we can remove that okay we can minimize it can't totally remove it we can minimize it working with noise removal is very similar to working with any sort of color correction the more you apply it the more it's going to degrade your image especially with dsr you know with footage like this you know that's that's highly compressed so we have we can't overuse it we can't over apply it otherwise it's going to be a problem cause other problems but I have a great plug in that I just absolutely love it's called neat noise removal video need video reduce noise reduced the ways I'm sorry so it's made by a company called need video I want to say the plug ins one hundred bucks somewhere around there for the pro version uh and it's worth its weight in gold in my opinion so if I take this noise removal of yours have reduced plug in and supply to my clip nothing happens okay? We have it works as a third party plug ins we have to go out into another interface to get it to work. So over here into my effects window even options window and all it says is to make this plug in work with final cut that has had to put a little pegasus clicked open clicked opens I'm just click it and it's gonna open up an interface and is going to show me the current frame of my image all right, now if I zoom in here you know there's noise there there's definitely noise there so I need to tell need where to pull that noise out what? I need to take a sample basically and the sample kind of has to be uniform and you wanted to be a large area if you can but if it's not uniform meaning it's too much for it to kind of process it'll tell you okay, but that's a good sample right about there good. So I'm mainly interested in my darks my shadow areas because that's where I really see the noise the most okay by doing that, I could just have auto profile it's telling the selected areas small and using a larger area might produce a more accurate noise profile. Yeah that's probably right, but there's so many things happening in this image that are so busy that it's not going to accept anything if I select a large area so I'm gonna continue building profile yes. Ok. And what it's done is actually reduce the noise. Okay, it's actually if you look here there's not nearly as much noise as there was before, okay? And the nice thing is yes, it does soften your image a little bit but it's not that noticeable to me anyway, some people might disagree with me whatever, but he'd apply you'll be able to once the supplies you'll be able to see the difference between the original and this one ok so if I if I just blow this up look at that it's gone it's really smooth now let me see if I can get it to play back it might need some rendering here let's let render give it a second so I use this a lot for what we had a ceremony recently is that a beautiful winery is outside and the ceremony started to get our and something leaked it was about twenty minutes late but it was the only twenty minutes late but it starts at sunset so twenty minutes when the sun is starting to set is it got quite dark to the point where guests couldn't even walk out by the end of it without our we have the video like the light on so baby a was getting progressively darker so it started out like dust we started out probably eight hundred or thousand ice because it was still the kind of dusky out and by the time ceremony was over I was cranked up to like sixty four hundred s o which is a no no on a five day mark to it's just the worst thing you can do it's gonna look awfully foolish actually had some of that footage because my editor used this plug in as the noise removal and it did a fabulous job it's not perfect but it took out so much noise that the shots actually were usable so you know her entire ceremony it was like three quarters of the ceremony was in the dark we finally brought a video light out because we weren't anticipating it to get that dark we should be portable video light real quick which was good because they wouldn't have been able to read their vows off there piece of paper it was it was literally that guard was out in the field no light except the moon and I think it was even a new moon so there was no moon it was like it was that bad so let me play this back now that it's rendered and you'll see that there's still artifact ng there but it's much less noticeable than that you know what is really hard to see on the tv I wish you could see on this monitor what it looks like it's actually not that bag's at that smoothing it out but yeah there's definitely a big difference there and neat noise removal is fantastic for for that sort of thing so reduce noise it's called about a hundred bucks and I use it all the time for just pulling out noise of things that of shots that are really bad so even if it's you know you're not shooting a practically night times their money out of a dark field even having something like that for a dark church ceremonies we work in dark catholic churches all the time and having something like that that you could do afterwards to help is incredible last thing I want to cover before the end of the segment is sharpening okay, so you know, this's assuming I've gone through my project and I've taken out noise and I've got my two do markers down and I'm just going down my list, okay, that shot was noisy check another one off the to do list let's move on. All right, so sharpening. I do like to sharpen certain shots not all shots get sharpened shark shots that are already tack sharp. I'm not going to re sharpen because you get the artifact ing around the edges. I'm not to concern with that. Let me pull off the letterbox here just kind of see this whole clip as I sharpened. I probably sharpen before I put the letter box onto okay, so maybe a little bigger. This is a nice shot. Okay, it's, just soft. It's got mean his focus is actually right here on the pillar and this is the building in the background is really kind of out of focus, so if I want to bring back some of the detail here, I can use a sharpener and it's under my video effects in my video fix browser sharpen and their listen I'm just using final cuts sharpener there is a ton of different sharpeners out there on the market a ton ah lot of plug ins to do sharpening I think a new blue even makes one which is cool. You guys have any suggestions from the on topic chat there any plug ins that you like to use share the love now let me see if I can, uh really make this a little larger so you can see maybe a little bit more detail as I do this let me just close this out high angles there we go okay, so this is with the sharpening applied and I haven't touched it or order adjusted any of the parameters yet that's without that's with and I'm going to just increase it just a little bit just to bring out some of that detail and we see if it really made a difference here it's very, very, very slight and subtle as it should be, it should not be more prominent than that, but it's nice because actually brought out a little detail makes it a more dynamic shot simple, simple, simple takes two seconds to render it look, you could see a rendering right now done it's fantastic I love background rendered by the way you've been playing that back sure see the hole I asked all of us especially chung a nanny and then sharpening it too much what you let me show you that's that's good curious if it has the same type of look that went way over sharpened photographs there you go that's over sharpened this we begin it pulls out the edge is way too much way too much but yeah it's all subjective again it's all depending upon what you were what kind of look you're looking for it's just what I do and play full screen again as we begin that's about where I put it that all of us that's fine. Okay? And you know all you sharpening on clips that aren't so apparent either like my jib shot here it's in focus for the most part but I you know, if I really wanted to draw a little attention to, like the beautiful detail in the chandelier and stuff I could use a sharpener too just drop in on their it probably won't do a whole lot just a little bit just to kind of make it pop they take a deeper but yeah, it's one of those effects that if you use too much it's gonna it's gonna let me see is there difference there? Can you see on the monitor a little bit in the chandelier that's where I was kind of hoping you would say it is more in the chandelier okay, very simple guys, not not rocket science. Very simple to use this kind of stuff. Are there any questions about any of the things I discovered? Yeah, good, right? What I'm all done with a clip or with a video, I do want to put some sort of a title on and I like basic titles. I'm not gonna go crazy and this is not going to allow you, but basically I like to have, like, some sort of a title sleep background and then, you know, what's a negative space for me to kind of put a title in here and again, I'm not doing any crazy tracking was going to some basic basic text title and then possibly maybe cem cem a little bit of motion animation just to kind of give it some depth. Okay, so what we're going to dio has come over to our titles media palate click on that and it come what we were given from final kinds all these preset animations I've got all this kind of stuff, basic lower third I've got a title that blurs in I've got a title that centered up and you got these this one's called boogie excuse me, this one's called boogie lights ok, a little bit, no clouds, no, I would probably not use that I'm a star wars fan but I ain't using that my film you know and that's kind of cool the feature is kind of cool like the way that kind of blends in on again I like it simple it's not going to be crazy and then there's also like a theme graphics that actually do some cool things and these airplane back really fast because it's just previewing okay, but I mean, this is whatever floats your boat there's all kinds of stuff in here if you find like you want to use it it's totally up to you some lens flare nothing's all right, so anyway, what I basically will use is generally just either basic title or blur or something along those lines so let's, just grab basic title so I can show you some animation parameters we'll just grab this over here and drag it you can do that, we can also place it. Um I'm going to play it off right there to get rid of the rest of it good it does act is a clip so it is connected. All right, move our connector if we want. So the titles in there now I can either just come up here and click on it and tight my new text or I could be in up here in the inspector and work with it as well so I just like the kind of click on it just to get a sense of what I'm gonna do so let's so put any and I'm not going to leave it ariel like that I wanted to look a little bit more dynamic than that what's nice is there is there is independent character selection's so I can kind of take let's just take this whole thing and we'll make it all oh I don't know let me grab bazooka gothic pro here that works and I can resize us by coming over here to the basic titling function and just resize it and then access vector are its not its scaling up and it's gonna keep its resolution which is really nice all right? I'm going to change my font style to more of a thin type and then I'm gonna change the end of something a little bit more thick just to give it a little bit more dynamic appeal and then maybe we'll change the color in here so we can change fila's well just by going down here to face and the color picture doesn't work but that's fine we'll just something ah little bit more gold just kind of matched with the gold that's in the shot something like that maybe that works now once that's done that's pretty much it all I have to do now is move it around so couple different ways we can do that oh and by the way there so the other ways you can affect this you can if you have multiple lines of text you increase the line spacing the space between the lines or we can adjust the tracking spaces between the the characters and we can actually do that individually character by character there is a baseline shift which allows me to move it up and down so that's one way of moving things around we can set alignments where we get a line out to the left or right we're the centre justifications if you have paragraphs of text we can use justifications so it's I mean it's simple but powerful word processing tools built into a tidal generator which is great makes it so easy on that as far as moving things around we would use the transform preset under hour video tab and we would just show transform and now we can move things around or we could just grab it and drag it to everyone. So remember we showed you in early on the video overlays title safe over lee's that's a good time to use it you turn those on this little switch here in the corner come down to overlay show title action safe zones right now I'm not in the title safe zone alright so might be a good idea just kind of move that over get it within that inner box that's it so what kind of time this out with the beginning of the clip right about here and we'll turn on snapping keyboards were cut in just pop it right in a place in order to resize it that's it okay, now I want to animate that we can use key frames let's say, for example, I just wanted to kind of give me a little slow creeping maybe scale up a little bit we can do that very simply. Okay, we can actually go into our text parameters all right? Going to size and let's say we just want to grow a little bit so let's start from the beginning we'll set a key frame undersized by clicking on the key frame and let's, maybe you start with it a little bit smaller hey, so you said a key frame when he set a parameter and that'll start at that parameter and then as we move forward we decides it up got a set of keys for him it's not working why's it not working let's go in here a show video animation and see what's going on here and it's not showing me. Okay? So there's another way we could do this? Apparently I'm doing a role let's go into our trends are transformed properties and see if we can figure this out I know I've done this before okay, so, let's, try this again, so we're gonna have it scaled down position scaled down. Let's, go over here. We'll add another key frame and scale it up. And then we can right click and go into show video animation and under transform, which these air the properties that we're adjusting. Right, here's, transform. I could just move that key frame over to wherever I wanted today. Okay? And over time, the title will grow. We can also set that for position or rotate or whatever you want to do is very simple, but key framing. Very simple. I don't need to do a whole lot of crazy stuff like you. Free me. Ok. Any questions? Basic title? Yeah. Anna, if you want it to fade into the video, would you seems like crosses all transition? Yeah, I would just highlight the just click the end of it and command tea. Or if you wanted it on both the beginning and the end of select the clip command to you to put it on both ends. There you go. Way to finish the whole thing. Tell me, there's, nothing left of my clip. Do I want to slip, edit and create the transition probably wouldn't, but okay, veria, very simple stuff, guys. With that, I'm going to take questions so awesome well, it's so much fun to see the tat rooms just kind of converse ng back and forth and sharing knowledge, so if you're watching and you're sitting at home and you're not in the chat room, you have exact clea to ours a little less than two hours to get online and ask your questions of robin vanessa, we have some of the best wedding filmmakers here in the studio and you have access to them through dzhokhar and I your little gatekeepers wei have so many questions they're kind of relate to everything that you've been talking about if that's okay a few questions for clarification some even refrained yesterday, but a few people just are wanting to know what is compression or minus of what compression even means compression meeting file compression is and what we're talking about okay, yeah file compression is the its the act of compressing video to fit within a certain rapper or kodak. So for example, footage that comes out of a five day mark too is h dot to sixty for kodak that's the kodak is the code decode that's what kodak stands for of you know the basically the file format of which the video was written too okay video could be written on compressed, it could be written compressed that could be written no m j peg there's always different formats just like with photos you have a lot of different options when it comes to compression weaken tiff jif, png, psd, there's all these different impression will pierce the breast but there's so much that we can do with video formats and the choice is up to the manufacturer of the camera what kodak they're going to use and by compressing we're more trans coding than compressing when we're working with footage and edit in post we're not we were compressing when we export out of the program you're usually always compressing down, you're never compressing upin quality or he's compressing down in quality impression on dh when we get into exporting in the next segment, you're really going to kind of see how that plays a role. But compression when we talk about compression when it comes to video formats is it goes from being light through lends to a sensor and written to, uh basically what amounts to either hard drive or silicone chip. Okay, at that point it has to be compressed into a digital format and that's what compression is? I hope that answered this question a question from nomad can you install third party tidal effects? Oh, there's a ton of them, I'm sure there are I don't use any, but I know boris is a popular maker of title effects I'm sure there's a ton out there yeah oh actually new blue makesem tyler's yeah they actually have some entitlement programs excellent back to color right off the bat this question comes from I believe it was from kp right off the bat the footage being color corrected is it compressed are un compressed I'm assuming it came from a cannon but I have a nikon d six hundred which can record un compressed from each team I which I assume will give me more latitude and post howto but how much more latitude compared to compress h dot two six four is that worth the investment to record un compressed he's if he has the ability to record on compressed he will definitely higher quality from his images yeah you know obviously the less compress we are making our video files upon capture them or data there's going to be to work with us and be a whole lot more there to work with you have dslr not the greatest when it comes to to file type they're not great when it comes to color space orbit depth there not bad I mean everything looks great but it's not un compressed it's not right you know raw red or red raw it's you know there's many varying levels of quality when we talk about compression compression go hd my out from your camera on compressed that's great! I didn't even know you could do that yeah, I mean, I wonder if it even really is a fully un compressed signal coming out from a camera like that but it might be well, whoever you are, you're educating that girl way wantto learn tio hey actually I don't know everything we have a question that popped up yesterday that also popped up early today about yesterday when you edit your audio, do you usually have earphones on or do you really just coming out of the speakers? That that's an interesting question because I don't own a pair of nice high quality production speakers and I would love to have them he's also way also work in a room with several editors yes, and part of the other answer to that question is he will put on headphones when I simply can't take listening to the same sniff it of audio seven hundred times yeah, wei have the maid of honor speech down we know this maid of honor speech snow so it's on the beach in the south of france it's drilled in your head and it's this part where she goes make babies may I make you do that like seventeen hundred? I can't stand it and it's the third make the babies that you're crazy because she does this laugh after and it's super cute love the speech, but after you've heard nine hundred times make babies you on your head yeah, I I use a very high quality pair of headphones, but it's interesting because you have to be careful what you hear in your headphones may not really be what's happening because every all speakers and headphones are all different in their own way, so we'll play something back in her headphones, and then I'll unplug it and it'll come out of the speakers and sound totally different where the mix will seem off that's. Why I used my my audio meters and the one thing that final cut lax and I hope they put it in eventually is a real time audio mixer does not have a real time audio mixer with multiple failures and channels channel configurations that you could using mainly it's, because there's no tracks an audio mixing requires tracks esso on a program like this there's speculation that they might use rolls so you would apply role to a track of audio, and that role could become a channel on a mixer and then having multiple sliders and feeders, which, when pan on it would be fantastic because in final cut, seventy sees that all the time did I do my audio mix in real time, but, you know, this is a little different, so we have to kind of do it manually, and hopefully we'll come out without a future.
Class Materials
bonus material with purchase
Ratings and Reviews
Crispino Dourado
I've been using FCP since 2013 or so I thought! Until I went through the lessons here and boy was I hooked on! I've learned a ton of stuff that I can use from this course! Really awesome course for beginners to professionals and a must for wedding cinematographers! I loved every bit of this course! Thank you.
Ryan Pierson
Rob Adams and Vanessa Joy are incredible speakers and thoughtful educators. In three days, they take you through the basics of editing theory and explain everything you need to know to dive into FCP X. Rob even details how to do advanced color grading at a pace that is clear and easy to understand. Without a doubt, this course has done more to improve my personal and professional use of FCP X than five years of experience working with video and audio. A+ great course.
a Creativelive Student
Thoroughly enjoying this course! I have seen all of Rob & Vanessa's creativelive workshops to date and am constantly and consistently learning something new. Thank you for sharing your wisdom. I am really looking forward to working this into our company with our first cinematography wedding in May! Courtney Liske Photography
Student Work
Related Classes
Final Cut Pro X