The Purpose of Camera Movements
Lesson 11 from: Filming Families: The Modern Family VideoCourtney Holmes
The Purpose of Camera Movements
Lesson 11 from: Filming Families: The Modern Family VideoCourtney Holmes
Lessons
Class Introduction
09:38 2The Spark That Inspired Me
13:50 3What Are Family Films?
06:15 4Gear for Family Films
11:50 5Camera Settings for Video
02:56 6Frame Rates & Slow Motion
20:48 7Picture Profiles & Color Grading
06:47 8Settings for Audio Capture
14:13Exposure for Video
13:21 10Stabilization, Focus Techniques & Shifting Mindset
17:41 11The Purpose of Camera Movements
22:19 12Camera Movements Demo
12:02 13Visual Storytelling: How to Film a Scene
04:51 14How to Film a Scene Demo
09:22 15B-Roll & Use in Storytelling
17:57 16Jump Cuts & How to Avoid Them
04:30 17How to Look for & Film Different Types of Light
03:28 18The Importance of Audio
10:45 19What About Photos? How to Switch Back and Forth
17:31 20Client Prep
10:49 21Troubleshooting Artificial Light Issues
03:13 22Managing Client Expectations
10:39 23Uncovering Your Client's Story
17:51 24Developing a Story on the Fly
07:12 25Think Ahead as a Storyteller
11:45 26Student Film Critique
38:56 27Ideas for Your First Film
06:31 28Create a Shot List for Your Film
03:26 29Demo: Interaction With Family at Start of Session
20:44 30Demo: Capture Authentic Moments
21:17 31Demo: Work the Scene
28:12 32Demo: Decide What to Shoot
26:06 33Demo: Move From One Location to Another
23:21 34Organize Footage & Photos From a Session
07:53 35Cull & Edit Photos First
17:09 36Sourcing Licensed Music
14:57 37Begin to Edit in Premiere Pro
07:08 38Editing to The Music
19:54 39Scrub Footage & Insert Into Film
33:33 40Breaking Down The Final Film
37:38 41Editing: Color Grading
15:51 42How Much Should You be Charging?
11:03 43Marketing Tips for Family Film Business
10:28 44Delivery Methods For Family Films
05:05Lesson Info
The Purpose of Camera Movements
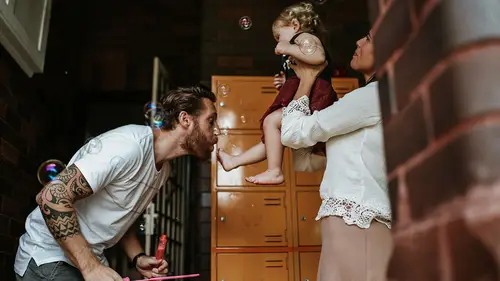
I wanna talk about movement. So I touched on this a minute ago, but one of the things that people tend to do when I first start shooting video is they just follow their subject around. They just follow whatever they're doing and so it's really important to start to recognize and understand when you should follow the movement and when you should let it go. Okay? So following the movement and then knowing when not to. If I find that I am following too much, I'm too close. I need to pull, I need to get back, okay? So if I'm following my subject too much, that's okay a few times, but if I'm following them too much and they're kinda all over the place and I'm having to follow that, I need to step back and allow them to move in the frame more. Just allow them to do whatever it is because what you don't want is for your movements to distract from what's happening in the frame, right? So understanding when to follow the movement and when to let go and in this moment, I was following him 'cause...
I wanted to kinda get this feeling. He was wearing, that's Elsa hair, okay? That's what that is. And I loved that and I wanted to capture the movement of the Elsa hair but then I saw this beautiful moment that was happening on the side as well and I had two, I had a choice. I could either follow him back, but I'd already gone that way, so or I could just continue moving onto this moment that was happening here. So I chose to do that instead of following him back. Okay, so it's okay to follow for a bit but then know when to stop, alright? What you don't want is to be following your subject back and forth all the time. If you find yourself doing that, that's when you need to step back and let them move in the frame instead. Counter movement. Counter movement is one of my favorite things to notice and look for and do during a session, and what this is is usually when I notice that, this is kind of ties in to following movement or not, so you can decide to, I could have decided to follow him up this tree as he's climbing, or I could counter his movement. So as he's going up, I go down. If your subject is moving that way, you move that way, the camera moves that way, okay? And so what this does is it just gives you this kind of beautiful emphasizing of the movement. (laughs) That was a great sentence. But it really helps add I think more visual interest than just following all the time, right? So you have a lot of choices to make there and it becomes instinctive the more you do it, but counter movement is something that I think is fun to notice and incorporate when I can. So I'll show you what that looks like. Okay? Oh, it was gonna loop and it didn't. (laughs) So what, it also makes that happen faster because I countered his movement. So if the person is leaving the frame and you kept the camera still, they would, it would take longer than if you went like that, okay? So it kinda helps end that scene a little bit more quickly. And so same thing here. And what I really wanted to capture just was the feeling of him climbing the tree. Like I wanted you to feel like you were there, so that's why I chose that. Composition still matters, okay? So you need to compose when you start. You need to watch composition as you are shooting and you need to compose at the end as well. And this doesn't necessarily mean the entire time that you're shooting, but when you go and choose to edit it because there's always like little camera shakes at the beginning and whatever, that's fine, but when you go to choose what you put into your film, be very mindful about composition because it's still really important. It still adds to the story, it still tells the story. I'm not gonna get into all the different types of composition. We have a thousand classes I think on that on CreativeLive, but it is exactly the same for photography as it is for video. The only difference is that you have a different aspect ratio. You've got 16 by nine instead of the normal whatever for photos is. (laughs) I'm super technical, you'll find. You'll find that out. So you have you know, a shorter bit, but all the same things still apply. Rule of thirds, everything. Negative space and framing and I love framing with foreground if I can. Using things in the environment to frame your subjects and just bring the attention to that. Using things in the foreground to reduce the amount of clutter so that we're really just focused on the subject and the story and what it is we're wanting to see, I want you to see. I have a lot of control as the creator. Okay. Intentional camera movements. How to do them and when to use them. I'm gonna show you examples of the camera movements that I do and talk to you about why I use them and when to use them. Oh, and when to use them. Okay, so the reveal slide. So the reveal slide is sort of like opening a book, okay? And that's the way that I think about it and I tend to use this movement a lot for the beginnings of my films. I feel like it's kind of a nice way to introduce things. If I have a lot of negative space in the front, I can usually put like a title or something as that opening and it gives me something that is not cluttered to work with, which is helpful. And I will also use it to open a scene. So if I'm shooting a scene, I've moved from one part, so every family session, I break up into a series of scenes in my head. So I might come in and they're in the bedroom, so that's one scene, and then they might move to the kitchen and that's another scene. So in my head, I'm thinking scenes and then I think about that when I go to edit the footage. So whenever we change to a new scene, then I'm kind of wanting to give myself an introduction, an establishing shot. That's what the reveal slide does. It gives me that opening to help me open the next scene or at least open the film with, okay? It's a great introduction shot. It's reveling. The reveal slide. So what it is is. I'm gonna use a TV, is that okay, as an example. I'm gonna get right behind and then move really slowly and subtly, okay? So I'm bringing whatever is in the foreground close to my lens so that I don't have to move a lot. If it's too far, I have to move further to reveal my subject, okay? If it's really close, I don't have to move as far and that makes it easier for me 'cause then I don't have to stabilize as much. (laughs) I don't have to stabilize for as long. So anything that makes it easier, that's my go to. That's the reveal slide. I'm gonna show you what that looks like. Right? I mean, it's really simple. Okay, that's the reveal slide. Subtle movement. This is probably what I use for the majority of my stuff. My footage is this subtle movement. I'm gonna show you what it looks like and I'm then I'm gonna show you how I did it. So I kinda just, oops. I kinda just like mimicked what the Mom was doing. She kinda went down with her head and so I just kinda was watching 'cause I wanted to make sure I still had her eyes in it, so I'm just kinda watching and really subtle movements. It's not anything drastic, but I'm just always observing and always watching and just making sure that whatever it is that I want to be in the frame is still in the frame but without making my camera movements so drastic, right? They don't need to be. If there's not a lot going on and I'm wider, I've got a wider shot, then I'm probably just kinda moving like this. I'm shifting weight from one side to the next and it's super subtle. I don't do it a lot and I don't rock back and forth like this (laughs) but I'm just showing you so I can keep going. But if there's a moment, that's what I'm doing and then when I choose that footage for my film, I just choose the movement in one direction. I don't typically choose if I do go back, I don't choose both movements, both directions, right? Yes? Can we see the example again? Yeah great, thank you. See how I'm like at the end just kinda barely going? And then right here. You can see it the most in the wall. See how much more my camera angle is to the right, or like to the left? This is the cutest baby. (laughing) So stinking cute. Imagine, yeah, so cute. Okay, the pedestal. I really like this one too. This is fun just visually interesting movement to add. It's not something I do a lot of, I don't wanna do too much of it, but I enjoy doing it. It's similar to the reveal in that it can reveal a subject. So for example if you had a baby on a bed and you started with the, you know, the front of the bed at your lens and then you just moved up, it would be a similar thing. So a pedestal shot is where you're changing, the direction of the camera is going up. Okay? So I just up or down, I think. So that's what this looks like. It just adds a little bit of visual if you've got something in the foreground. It's just that upward movement. I don't do a lot of it. It's subtle. The bird's eye pan. This is where your camera is more like this over and you're making an arc, but it's really subtle. Again, so subtle. I'll show you. So I wanna shoot kind of from dad's perspective, right? And so I'm really like right over his shoulder and I'm doing this bird's eye pan right over the top. And these are the movements I use, okay? So there's a lot of others out there, I'm sure. I mean, most of these are the basics, but this is what I use the most in all of my family sessions. Yeah? Are you standing on something in this shot? Oh yeah, a ladder I think. 'Cause he had a ladder or there was a chair or something. Oh, I'm definitely standing on something. (laughs) 'Cause kid's stepping on, he's on a stool. I'm high up, yeah. I'm probably barefoot too. (laughing) Okay. Shallow pan. One thing that I think I see a lot of new videographers doing is like, they're like, okay, I'm gonna pan everything. So you know, a pan is just simply this movement, right? It's this arc with your body that you're going like this and a lot of people, they just like their go to, they're like, I'm gonna pan the crap out of this. Right? And so I do use them, but I don't, what I think there's a deep pan, which I feel is like, you know, the closer it is into your body and like the more that you twist, that's pretty deep. That's gonna give you like more of an arc of the scene. This is a shallow pan, so I still do that movement, but it's really subtle. Like it's not as, it's not as far, it's not as deep, it's shorter, it's shallower, okay? So if you think of a pan as an arc, like a rainbow is quite, you know, like that and then it gets shallow. Well like, I'm trying to think of an analogy but I can't. (laughs) Shallow pan. I'll show you what it looks like. So the difference between the slide is that the slide, it's like parallel movement, right? It's just left to right, it's straight across. A pan is an arc movement, okay? You just don't want a really deep arc. I don't like a deep arc, so I would lean more towards what I call shallow, a shallow pan, right? So it's still giving that like, we're seeing this whole plant but, and I mean, I'm pretty sure I'm doing the movement now, I'm like twisting on my leg. I'm just moving my weight from my right to my left and then I bend my knee. Okay, dolly in. This is something I don't use a lot either, but it's like, these extra, so I would say I always do some sort of a reveal slide. The pedestal and the dolly in and out are some things that I do kinda just occasionally, like I sprinkle them in. So this is where your camera's moving in and I saw this and I was like, these leaves are kinda cool. They're in the foreground, I'm just gonna move through them. It's really when I'm feeling adventurous. (laughing) Because it's hard to keep this stable. (laughs) It's really hard to keep this stable. Oh, the way that you can do a dolly in is by, look, one way to keep it easier and more stable would be to go ahead and decide how far in you're gonna go, Spread your your legs out that wide, that distance, and then just do that, okay? So that's your dolly in. I'm gonna do it like this so you can see. So moving from back here, I've got this leg bend, that one straight, and then I just without moving my foot, I just move forward. Okay? So that's one way of making it more stable when you're doing that. It's harder if you're walking, okay? It's a lot harder. So if you can just keep your feet flat on the ground, it's gonna make that easier. Yeah? I'm curious when you're moving forward, are you also changing your focus and twisting at the, I mean, you're doing that at the same time? I just wanted to make sure. I assumed, but I just thought I would confirm that you're. Yes, yes. So unless I have moved forward, set my focus, then moved back, then just moved forward again, in that case, I wouldn't change the focal ring. But in this case, I didn't plan this, I was just like, gonna run with it, so I didn't, and what I did was I just turned the focal ring as I moved. That's harder. It's harder. Yeah? So why do you choose the 35s instead of by using the 24, 24 70? Because you can, yeah. Oh, why would I use a prime instead of a zoom? Is that what you mean? Yeah. Why do you choose to fix the lens? I just like primes. I've always shopped with primes. I've never owned a zoom, so that's one reason. I've never, I think I would find that it's heavier. I think the 24 to 70 is heavier from my experience. I know film makers that use it, family film makers that use it and they love it and it's great because you know, you have lot of options, you don't have to move as much. But yeah, it's just not for me. I like that this goes down to 1.4, I shoot wide open a lot, so if I was on the 24 to 70, I wouldn't have that as much. I think it's 2.8 or something, right? And I think I would get used to it, but there's two rings, right? One to zoom and one not to zoom. It's okay to zoom while you're shooting, just don't include it in your film. Please don't include it in your film. It's not a great look to zoom in for family films for this like artistry type of film. For me, it kind of reminds me of CCTV footage. Like, you know? (laughing) It's just, I just wouldn't do it, so I think that's distracting for the viewer like from a, you really want your viewer to become immersed in the story and so if they're zooming in and out, I know you didn't ask that question, but just to elaborate. Yeah. And yeah, I just haven't ever felt compelled to buy one. Not ever. I really like simplicity and if I had options, it would just make it harder for me. (laughing) The less options the better. Okay, that's the dolly in and then dolly out is the same thing in reverse. So I did it on this. It's super short and subtle, but it's basically we're going to the beach, so I shot a clip of the bag that said, to the beach and I just pulled back. That was harder. Look how close I am to the floor. So I do this a lot too where I'll be like dangling my camera. There's a lot of guessing that kinda goes on. I don't wanna say guessing. I really, I know what I'm doing. I set the camera, I set the focus, I trust in myself to know the distance and know exactly where my focus is so I can kinda just know when I've got it down and I don't see it. So I might set it here and then just pull back and so I'm really just, that's, it's okay to have it far away when you're doing it low. That's the dolly out. Okay, so I'm gonna show you a, oh yes? Question, go ahead. Do you ever? So what I catch myself doing is I'll do a dolly in, dolly out, pan on all the like, the same subject because I'm not really sure when I go back to edit which one I'm gonna use as a part of it. So do you do multiple of the same scene in different ways? Yeah, so it's really important to know why you're doing the camera movement in the first place, what you're gonna use it for. That's gonna help you not have to shoot so many camera movements of the same thing. I do shoot a lot of, I shoot a variety of things to give myself options to work with later, but I think it comes with experience, and by experience, I mean shooting a film, editing it, knowing then, thinking to yourself, ah, wish I had these shots, this shot, this shot. That would have made this better. Would have been stronger if it had that. Then the next time you go and you shoot it again and you now know a little bit better, but then you still make mistakes then and then you go and you edit that one. It's the editing process that helps you know what to shoot. You get better at shooting and knowing how to shoot a scene after you've edited multiple times. You get better at it then. So I do do it, I do, but I think really knowing the camera movements and understanding why you're using them and what's the purpose of using them. So like, you know, I wouldn't do a reveal shot of something that was in the middle of a scene, because I know I've already done that earlier and I'm not gonna use that in the middle of the scene most likely.
Class Materials
Bonus Materials with Purchase
Ratings and Reviews
Adam Nicholls
Worth a watch! Courtney provides a clear and organised class, she is also very passionate about what she does which is always nice to see. She has a great back story which is fantastic. This course is good for beginners who have some knowledge in photography and want to learn more about video. I would recommend that people do not refer this class to the bible of filmmaking as I feel you can expand further on what Courtney teaches. Some useful tips for beginners but some methods I personally feel can be taught differently. I feel a gimbal is a useful bit of kit if used correctly. You can still use a gimbal when in manual mode providing you follow the basics rules! Obviously if Courtney prefers not to use a gimbal then that's also fine but I wouldn't discourage students from exploring useful filmmaking tools. Slow motion can be achieved with 50/60fps however I feel other frame rates should have been discussed like 120fps. I liked that Courtney engaged with the students as it gets them involved and will help them remember what they have learned during the class. Thank you for taking the time to share some of your knowledge
a Creativelive Student
Courtney's work is absolutely amazing and inspiring. I feel lucky that she has chosen to share her process and that this class is available! After watching all the videos and trying my hand at this video thing, I am feeling really encouraged and inspired to do more- both personally and professionally. I appreciate the way that she breaks things down in the video and that she shares her thought process. A really great course!
AShley
Courtney’s course completes me! I have storytelling “holes” in my film previously, but this course helped fill those holes to create a flow and a film with emotion. Not only is the course wonderful (and well worth every penny) but Courtney is wonderful as well! I had such an amazing experience at Creative Live!!!!