Lessons
Intro and Overview of Nikon D750
21:23 2Basic Controls of the Nikon D750
03:29 3Top Controls of the Nikon D750
23:35 4Back Controls of the Nikon D750
49:43 5Left Side of the Nikon D750
09:13 6Nikon D750 Auto and Manual Focus
11:06 7Sides, Front, and Bottom of the Nikon D750
12:47 8Lenses and Accessories for the Nikon D750
11:36Lesson Info
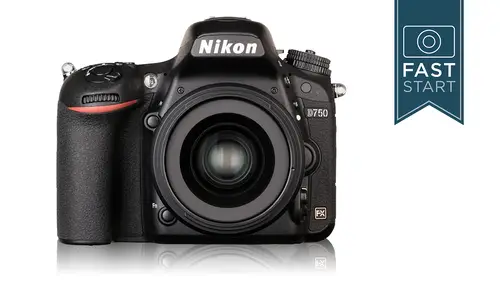
Left Side of the Nikon D750
Time to move around to the left hand side of the camera will start a top with the flash button it's got three different functions. First off it pops the flash up second, it changes the mode, and third, it'll change the exposure compensation, depending on what buttons you are pressing. So in order for you to make this work first off, go ahead and press it up on your camera, and we're going to be changing the front dial and the back dial to change a number of the functions on the camera. First off, just some general information about flash flash has a very limited distance, especially abe built in flash it's, able to illuminate subjects that are right in front of you but it's not able to reach much more than about ten or twenty feet, depending on a few variables that you have set. And so you've got to think about things that are right in front of you, that you can illuminate with this flash. One of the best reasons for using flash is for phil flash filling in the shadows, especially of a...
person that is right there in front of you, and so filling in those shadows, getting a little bit of highlights to those eyes is a great way for using flash and so that's the time to really be thinking about flash. Even when it's bright and sunny outside it's perfectly good time to use a little bit of built in flash because that's when the shadows are going to be at their heaviest, so if you want to make changes, what you're going to need to do is first off pop the flash up and then press the flash button and turn the back dial you'll be able to notice if you, uh, are looking at the back screen of your camera, the options that we have in changing these so in the flash mode, some of the options that you may see and these may differ slightly, depending on where some of the other settings are on your camera. First off the lightning bolt is the symbol for flash that means it's going to fire you may have your camera set in red eye reduction to help reduce red eyes slow sing it means that you are allowing the camera to use very slow shutter speeds toe let in ambient light. You may get some blurring in the background, but it may also be a very nice effect. The rear curtain will match the flash or synchronized the flash with the rear curtain just before it closes and there's some special effects things that you can use with people movie using your curtain that that could be kind of fun, I'll show you a photo here in just a moment not sure why you would have the flash up and want to turn it off, but it is a possible option if you turn the front dial on the camera while pressing down on the button you could do something called flash exposure compensation and this is something I highly recommend for people who are taking photographs of other people. The camera wants to fire off its normal tl automatic balanced flash and in many cases it's just a little too powerful and so I think powering down the flash to teach yell minus one, for instance will give you a little bit better skin tones and a little bit less of a harsh flash look on your subject in some cases, depending on what the subject is wearing, what the background is, it might be better to die alone all the way down to minus two to get better skin tones. It really depends on the situation and it's a bit of an artistic interpretation that you want to have it this point, but powering down the flash is a very common technique. Ah lot of photographers use flash control. This is something that we're going to be controlling as we get into the menu system on the camera so you can't make the change but you will see it in this part of the menu system you can use tt l control where the camera is figuring out how much power to put out of the flash. You can also have it do manual if you want and have the camera fire at full power, half power, quarter power, sixteenth power and so forth, and that might be really nice for somebody who's triggering other flashes or they're trying to do something very particular and unique. There is a repeating flash option where the camera will you, during a short exposure or a long exposure fire the flash a number of times to potentially stop something in action or just to illuminate in a struggle skop iq type way, it's a special effect mode there's also a commander mode where you could get this flash to communicate with external flashes, you could hook up several different flashes, nikon flashes and this can't. This camera d it's flash would communicate with those other flashes in order to trigger window flash and how much light to put on a subject in any particular situation. This camera has a top sync speed of one two hundredth of a second with flash, but you can actually go beyond that if you put it in what's called a f p focal plane high speed flash, where it fires multiple times during the exposure to expose your subject, and this is something that will allow you to shoot at much, much faster shutter speeds. Unfortunately, you have to be manually controlled in order to do this, and it has a very limited distance as to the distance that it will fire because the power of the flashes not very great, it's, because it's firing very, very quickly in those situations. So there is some implications to doing that, and we will seymour this when we dive into the menu system under the flash cities, and so if you do want to get in there, it is in the custom menu e three flash control for built in flash we'll talk a little bit more about these as we go through the menu so settings later in this class. So some of those examples, obviously we want to avoid red I I'm not a big fan of red eye reduction on the camera because there's a light that turns on that delays the taking of the picture by about one or two seconds, which is often just enough to ruin the photographs of kids that blink and turn away and think that you're already done with the photo because they already saw the light. And so I tend to prefer to do red eye reduction in sauce, where afterwards light room, photo shop or whatever program you have slow sink, you'll see that photo under slow sink I am panning with my subject. In the background has become blurry because I've chosen a slow shutter speed. The flash has stopped the subject in front of me, but because I was panning the camera, the building in the background was blurred rear curtain saint will synchronize the flash with the trailing curtains, so if something is moving through the frame and the camera is not moving, you'll have a more clear subject at the end of the blur rather than the beginning of the blur and the multi strobe fires the flash multiple times during, say, a four or eight second exposure some real quick general things. The top sink speed for automated flash on this camera is one two hundredth of a second, so if you have the flash popped up, I won't allow you to go faster than that. Unless you've entered that special effects f p mode, the range I would think about in most situations is about ten feet with the built in flash. If you need to shoot something further away from that further away from the camera, you're gonna probably want to get one of those external flashes that we talked about earlier in the class, so a pressing those buttons and turning either the front or dial we'll be able, you will be unable to change many of those functions all right, one button down from that is are bracketing button number of photographers like to shoot a bracket siri's of photos to make sure they get the correct exposure. So to activate this what you need to do is simply press hold down the button, turn the back dial to adjust the number of images that you would like to shoot you would then change the front dial to change the amount of change per from one image to the next. And so a normal bracket siri's often traditionally has been simply just three shots and so normal little bit darker and a little bit lighter by one stop but this camera can actually do up to nine frames two, three, five, seven or nine frames. You can also select an increment increment amount one third two thirds or one full stop increments and if you want you can add exposure compensation onto this whole effect. So if you wanted to do three pictures but you wanted him all to be lighter than average, you could simply dial in a plus exposure and then do a bracket on top of it for bracketing purposes. If you are interested in doing this the mode that I recommend that it be easiest to work with his aperture priority. Many of these cases were talking about static scenes with subjects that are not moving it's very difficult to do bracketing with subjects that are moving because they're going to be in different places in the different photos so, using the aperture priority mode, we can set our depth of field. We don't want our depth of field to change. And then the camera will adjust shutter speeds to let in more or less light to get that bracketed siri's. So that's. I think the best way to make the most of exposure bracketing.
Class Materials
bonus material with purchase
Ratings and Reviews
a Creativelive Student
I am so glad I bought this class. I upgraded from a D5000 to the D750 about 2 weeks ago. This class help so much in teaching all the ins and outs that I never would have known by just trying to study the owners manual. I feel much more confident with my camera now. Thank you John and Creative Live. If anyone is trying to decide whether to buy this or not, I say YES do, it's a great help.
jessicasummerford
This class was well worth the money. If you invest in such a great camera, you are clearly invested in your craft. The best way to enhance that investment is to learn the camera top to bottom so you can use it to its full potential. Thank you John, this was so helpful! Now it is time to get out there and practice!
Robert Coates
Excellent educator! And fabulous print out guides! Having a D750 for three years, this course did not fall on deaf ears all this time later. This course put confidence back in my hands at the controls of this fabulous camera! Highly recommended.
Student Work
Related Classes
Camera Guides