Lessons
Class Overview
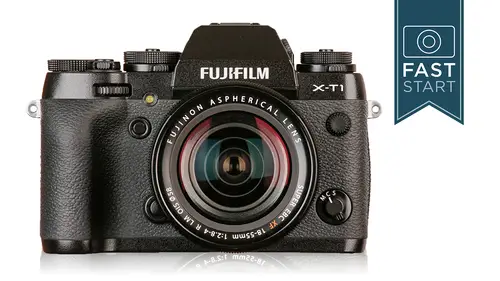
27:21 2Top Deck Part 1
32:16 3Top Deck Part 2
16:36 4Back Side Part 1
30:26 5Back Side Part 2
31:55 6Sides, Front, and Bottom
17:12 7Lenses
11:52 8Shooting Menu
29:33Lesson Info
Top Deck Part 2
All right moving forward top deck of the camera fuji is not known for their video in their cameras and so if you're buying this camera exclusively for its video performance, you're probably going to be a tad disappointed. I think it's perfectly good for basic video, so we have a video record button it's a little hard to get to and that's designed and on purpose you had a press that for a full second the camera does have stereo microphones, which is kind of nice and so let's talk a little bit more about the movie mode in the camera when you throw it into the movie mode, they'll give you a little red icon on the back and it will let you know how long you've been recording now there are a number of different settings for the movie mode the camera does shoot in high definition and full high definition and can do that at thirty or sixty frames a second. Now for most of us who are viewing things on tv thirty frames or twenty five if you're in other parts of the world like europe or asia perh...
aps that's kind of the standard frame rate in the advantage at shooting double that is that you can slow the footage down it doesn't look better when you just play it normally, but if you do want to slow it down, you'll have that option to have more resolution and this will be controlled in the shooting menu number four under movie set up if you want to get in there and make an adjustment from its current setting, some things to be aware of when you are in the movie mode is there is no shutter speed or also control the camera is taking control of that and doing it all for you the focusing whether you have the camera set to a f s or c which I will explain in due time here, the camera goes into a full time auto focus moz, who is constantly focusing if you don't like this, you can put the camera in manual focus the type of file that you'll get is an h two six four movie format, which is very common and should be something that you can easily deal with on max species and whatever else you might have. The maximum length of time is going to be fourteen minutes in full hd and twenty seven minutes in hd, so there is a a relatively short time limit on how long you're videos khun b and if you are going to be shooting videos, I highly recommend memory cards that have a class rating of ten or higher talk a bit more about some of the options on cards when we get to that part of the camera, but that's pretty common these days to have those faster type cards and so that's your record button on the top of the camera next up there's a little indication over on the left hand side of that what looks to be a prison on the top of cameron's focal plane that's where the sensor is in the camera for any reason doing very critical focusing you needed to measure from your subject to the focal plane that's where the focal plane is on the camera we have a hot you on this camera that allows us to add on a variety of flashes so let's talk about some of the flash options first off the e f x eight is the supplied flash and let me go ahead and mounted up right here on the camera seen how we haven't right here available to put on this flash is not very powerful. In fact, the eight in the number as you'll see in the other numbers of the flashes coming up indicates the power. I believe that is thie guide number in meters and so what that basically means in some very general sense is that you're good out to about eight meters that might be a little bit on the far side of the most extreme with the fastest lands with with a fairly high I s o thes e f x twenty is designed for the x cameras it's going to be more than twice as powerful because you can see twenty versus the eight way haven't e f twenty, which was not really designed for the x series but it's the same power and then fujii also has a forty two flash which will work automatically on the flash are on the camera and is quite a bit more powerful than the x eight but if you're looking for just a little fill in flash, the little x eight will probably be fine, but if you're trying to shoot a wedding and you're gonna group of thirty people that you're tryingto fill with flash it's not enough power for something like that now some of the flash options on this cameras we will get into the menu system here in a moment one of the options is auto flash where if you have the camera in the program mode, the camera will automatically flash if necessary. I do not like this moment I like having manual control over when the flash fires or does not fire and so I kind of like the forced flash because I think you as a diligent smart thinking photographer should make the choice if you want flash or not it isn't something that just goes on and off whenever it thinks it needs it this camera has a unique read I read red eye removal it's thankfully they've gotten away from the struggle scott pick flash, but they have a red eye reduction that has a facial recognition, looks for faces, looks for red eyes, and then we'll try to reduce the red eyes digitally in camera and it's nice, but I kinda like to have manual control over this, but if you find that you're shooting a lot of red eye and the camera does a good job for you, this might save a lot of time for you. We also have a commander option, which allows you to work with additional flashes that have the commander built into it so that you can have the on camera flash trigger other flashes to get better quality lighting. And then there is a slow synchro option, which allows you to use slower shutter speeds and match the flash up with these slower shutter speeds, which can get you a little bit more creative. Look for many different types of flash, and if you want to control any of these types of melons, you can jump into the menu in shooting menu number four and go under flash mode to make these settings. Now, as I mentioned before the cameras official, top sink speed is one hundred eighty eighth of a second, but I have found that the camera works with this f x eight, as well as other flashes at one two fiftieth of a second, but does not work with the radio triggers. So if you are hooking up to radio triggers, you don't want to do that. I have not tried it hooking up to the p c synch port on the camera, and so I'm not sure about that specific option. Can we have a question? Perhaps, yeah, I did have a question coming earlier, and it was from spend loves flow one he's using the flash at one, two hundred fiftieth does work pretty well, but notice that there is a small part of the bottom resulting that is black, so basically losing about a quarter inch from the bottom of the frame. So what is happening for will spend? I have I don't know because we'll tell you what let's do a test right here in class is going to turn this on, and just for simplicity, I'm going to put it in auto is so auto shutter speed, auto aperture, so it's total program and, uh, going to need something just real simple, the photograph actually is white as possible, and so I'm just going to take a picture of the notes for this class here on it. And just in case I better take this hood off because angle might be wrong, and what I'm gonna do is I'm going to set it at one eighty eighth of a second. Shoot a picture and then I'll set it at one to fiftieth of a second and we'll see if there's a noticeable difference between those two and so I'm just going to point it right here I will focus and it's kind of good lighting in here right now surprise surprise we're in a studio and so that's one one eightieth now I'm going to do to fiftieth but my camera back on the mark and let's hit play back hand so that's the one to fiftieth of a second and that's the one eighty eighth of a second and I'm not noticing any difference at all and just to take this test one further let me set it at one five hundredth of a second to see you okay, so I'm thinking we have a flawed experiment here and I'm going to go manual always got to go manual on and I'm going to change the iast two hundred f twenty two so it is super dark well, that may be too dark let's go to half eight no five six okay could barely see what's going on and we're going to go ahead and do this test again started one eightieth two fifty and five hundred comeback hit playback so here is a clear problem at one five hundredth of a second you can see flash has reached the top of our image but did not reese the bottom now the question is what happens at two fifty to fifty? It looks good all the way down to the bottom and I go down to one eightieth and I don't really notice any difference at all and so that's five hundred then let's just bring up information so that you can I can prove this to you in case you don't believe me because I'm a liar so you can see here one five hundredth of a second we're basically looking at the shutter blades there to fiftieth looks good and one one eightieth now this could be my camera I as I say I don't know why one two fifty it looks perfectly why not use it? And so this is one of those great reasons that you should test your camera out because there may be I don't maybe doesn't have the latest firmware or the flashes triggering at a slightly different time it's hard to say and so tested out see if it works for you and if it does use it but kind of keep an eye on it if you are really needing it now that there's ah whole good philosophy and we don't have time to go into this because then we'd be jumping into the lighting class as to what shutter speed you should be sinking in that but if you need it tested and if it works, go with it all right, so when the flash does fire it is firing using the system called t t l or through the lens and it's measuring the light through the lands and it's a generally it's a pretty accurate system what I have found that when shooting people which is a great way a time and place to be using flash it tends to be a little bit on the bright side and so by going into the flash compensation you can power the flash down remember the flashes firing automatically and what you're telling it is just don't be quite as bright and you can power it down one or two stops and in the example that I have on screen now I think minus one looks more natural but still has some of the added benefit of that on camera flash in this next example you'll see that t t l just blew it out it has to do with the fact that she has a dark top on and it's a dark background on the cameras trying to make up for it and so minus one is clearly better but I think minus two is much closer to the correct skin tone ality and so I would highly recommend pirate powering these flashes down a little bit if you're going to be photographing people fairly close up on the camera and you can do that in that shooting menu number four now my ex specific recommendations, I will tell you when we get to that menu section on the flash so that's a little bit on that now also kind of a run around that area on the top of the camera, we have our die achter on the left to the camera, and this controls the focusing of the viewfinder, and so it does not control the final image. It's simply controls how clear the view is in the viewfinder. And so if you look in the viewfinder and it's a little bit blurry and you think your eyes are going bad, take a look at that diop ter adjusted see if you can fix it for your eyes. Now the view mode button on the right is something I'm going to talk about in just a few minutes when I get to the viewfinder section. So just be aware there's a button on the side that we're going to talk about next up is the drive and meet oring levers, and you can actually see this better if we kind of move to the back side of the camera. And so let's talk about photo thoma tree, the light meter of the camera the camera has three different light meters built in the multi area, which uses two hundred fifty segments. To measure the light it's looking for light areas and dark areas and trying to come up with a great average and this is where I leave the camera virtually one hundred percent of the time there is a averaging area which just basically takes the entire frame and kind of takes one big long lump sum which might be good for certain situations but I much prefer the multi over it as an occasional tool the spot meter is nice you'll find some photographers really like the spot and they like to be able to read the light in a very highly concentrated area in fact this is looking at just two percent of the area directly in the middle of the frame when you have it in the spot areas so you need to be very careful not to leave it on spot unless you are consciously aware that it is there and that you are using it and so for most users I like the multi very multi purpose in their next up over on the left side is the dr button and I think before we dive into this it's a fairly lengthy section I think we're going to go ahead and take our break at this point and then we'll come back and get into the drive section but maybe we'll check in see if there's any questions we need to catch up on that sounds great john a lot of questions that are coming in, but if you've ever watched hungry no, you know that there's a slide for that for a number of these questions, so we've got them all here. We're recording them. I did have a question from thai photography earlier that was, how true is the viewfinder to the final image? The view finder is very accurate to the final image. There's. A couple of ways of asking about the accuracy. There is the composition, like, am I getting everything from side to side? And so, in that case, it is one hundred percent that's, one of the advantages of an electronic viewfinders, that it can show you the plane. Eliminate one of the things that I really like about elektronik. You find her like this one is you get to see the white balance, whether it's set correctly or incorrectly. And one of the ways that I've had to change my operation of the camera is normally I would have a camera in what I call the chimp mode, which means you shoot a picture, and you look at it because they call that chimp ng who with that on dso, you would look at the image to see how it came out, because intern slr it's it's a preview now, in this, this is an actual very much replica of what the final picture is going to look like. And so when it comes to reviewing images, I'll often have that turned off in these gamers because the preview is so accurate to the final image, having said that, the resolution of the built in viewfinder here is not the same resolution is the final image, and so your final image will be even more detailed then what you are seeing in the viewfinder and so it's very accurate, but not an exact representation. Great, thank you. We did have a little question from steve, who is wondering what the little tripod is that you're using for the demo. Oh, this is a little tripod I've had forever it's it actually says and let me spin it around so that cameras can see it here. It's a bogan three thousand nine, which I don't think you'll find anywhere anymore because it's known as manfredo and if I spend the legs around a little bit more, I think we can see down here the legs are a twenty one o eight and a can't even read this eighty nine I got a scratch on it it's hard to see the zero, nine, ten and if any case, if you just look up man photo, they probably have a really small tripod
Class Materials
bonus material with purchase
Ratings and Reviews
a Creativelive Student
I've purchased a number of John's courses and recognise how well he delivers complicated facts. Having just purchased a new X-T1 buying his fast start class was an obvious step, especially having looked at the manual. It was really well presented and made the switch from Canon so much easier. The inclusion of the notes was an excellent, additional support.I set up the camera as recommended and took it on a photo-shoot with my camera club a few days later. The content of the course and the settings suggested made the day. Now that I understood the camera it was easy to use and delivered great results first time. The course was the best 'accessory' I could have bought. Creative Live and John are a fabulous resource and so reasonably priced.
Jim Panzer
Great course, I received the X T1 and the first thing I did was see to if there was a course on CL I could use to get more aquanted with this awesome little machine. I have seen other course from John and he really knows his stuff, this one was no different. As a late comer to this camera, it would be nice if CL could update the course by adding a video going over the big 4.0 firmware updates, as that's the current one now. Thanks CL and John for helping me feel more at home with this camera!
Debra Robert
Great class! The learning modules are well structured and allow enough time for the viewer to absorb what is being shared. After completing the course I feel much more confident in understanding the X-T1, not a comfortable as with Canon (yet) ... there is definitely a learning curve moving from DSLR to mirrorless. So wish I would have taken this course a few months ago! Thank you!
Student Work
Related Classes
Camera Guides