Lessons
Class Overview
27:21 2Top Deck Part 1
32:16 3Top Deck Part 2
16:36 4Back Side Part 1
30:26 5Back Side Part 2
31:55 6Sides, Front, and Bottom
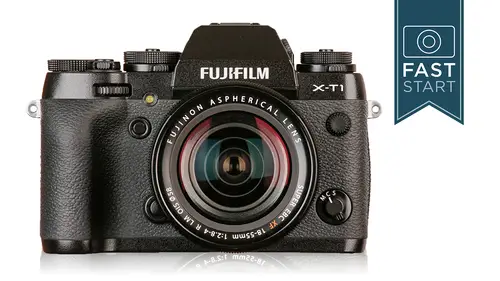
17:12 7Lenses
11:52 8Shooting Menu
29:33Lesson Info
Back Side Part 1
Now we're talking about the back side of the camera and we're talking about the drive mode, which is that little caller underneath the iast so dialling it controls a lot of different things, and some of these things were kind of strange that they've put him in the dr mode, but let's, go ahead and dive in and look at all that this little dial does so starting at the top bracketing if you want to bracket with the camera, you would turn this style over to the bracketing mode, but bracketing refers to a lot of different potential options that you will need to set up. You have the option of bracketing exposures I s o film film looks dynamic range or white balance. Now the standard bracketing that most people are going to do with a camera is with the exposure, and here is where you will take a normal picture and then the camera will follow that up with one that is underexposed and overexposed. And if you do want to do this, there is a limitation, unfortunately, but it can't be changed wait w...
ith the clicker, we could do three frames on this and they can be adjusted on ly up to one exposure value in each one you can do one third, two thirds or full exposure value and this is going to mainly be useful in the aperture shut a priority or program mode? It can be used in the manual and if it is, it changes the shutter speed in that case now in order to change what bracketing does, what you would do is you would dive into the menu shooting menu number one I think it's actually the first thing on the list is you get in there the bracketing advanced setting now you could change this too bracket the s o which it's kind of strange because I have a certain style of shooting and things that I shoot and I have a hard time imagining anyone ever using this but somewhere out there somebody's going to find a good, useful purpose of it that's why they put it on the camera, but I just don't imagine many people will be using that one there's a film simulation bracket which is kind of interesting because the camera has many different looks that you could have for instance, you could have a black and white look or a very vivid look that they would call ville via because it's like their old bill via film and you could have these cameras shoot these pictures very, very quickly and it would be much faster than you changing between one film setting in the next film setting in the next film setting dynamic range will become more clear when I explained how the dynamic range works on the camera that's a potential that it could be used under certain exposure issues and then the white balance one if you're not really sure about the white the correct white balance that one doesn't make a lot of sense to me because you should be able to see what's working in the viewfinder and if you shoot raw you can fix it later with no damage to the image so that one I think is one of the less likelier wants to get used very often all right let's move down to the next grouping of them s is for single shooting and this is where my camera is the majority of the time we do have two different low speed burst mode which means when you press down all the way on the shutter release it continually fires now we have three frames per second and a buffer capacity unlimited what that means is that you can fire it three frames per second until you run out of battery power or run out of space in your memory card. The continuous high city is at a very fast eight frames per second you will be able to get twenty three images if you are shooting raw or forty seven images if you're shooting j peg before the cameras slows down and shoots at a rate of about one or two frames per second after that buffer has been filled so if you're going to be shooting sports probably have it in the low or the high speed mode one of the things to know and I'll talk more about this when we get into the focusing section in just a little bit is that the center nine points are going to be used for the continuous high focusing area, so your subject needs to be within the center of the frame, or at least those center nine points to get the best focusing when you were in the continuous high speed mode. If it moves out of that, it may not be able to follow the focus very well, one of the other things that if you are going to be using the camera in this high speed mode and you're going to be doing focused tracking of subjects that are moving, he probably be best if you put your cameras high performance on in the power management setting in set up number two in the menu said he set up to there is an on off switch for high performance, and the camera will use more battery power and you'll need to charge the battery a little bit more frequently. But you'll get just a little bit more performance out of the focusing of the camera and just a little bit more on edge and ready to perform actions for you, and so I would. I don't know why they don't leave this on all the time it's potentially to get better battery life and so it's something that you could turn off if battery life is of greater importance to you then high speed performance but I've turned mine too high performance on and I've left it there all the time because I just keep a spare battery around in order to get the greatest performance out of the camera next up is multiple exposures and so multiple exposures allows you to take two different frames and combine them tow one digital image now this is something that you can do very easily in photo shop but occasionally it might be nice to do in the field because then you're able to compose things as you want them in the field so you would shoot one picture and then as you shoot the second picture of the the bonus of doing it in camera and not in photo shop is that there will be a ghost overlay of the first time wait so you can see how things line up and you can make maximum use of the image area and so it's kind of a goofy fun little artistic mode I don't use it very often but it does work perfectly well on the camera next up is an advanced filter and this one just seems strange that this is where they have put this and what this does is it well recorded jpeg image in a funny look to it, and so let me show you some of the examples we have our toy camera, which adds a heavy even yet, plays around with a funky color, and I think the sharpness as well we have a miniature look, which throws the top and bottom of the picture out of focus pop color, which I guess they're just having a little bit more intense colors. We have a high key, a low key in a dramatic tone as a lot of contrast to what it looks like. It's well, it's a heavy, dark filter along the top, and we have a very soft focus filter in this case s o some kind of goofy things that well, if you see me using them, you have permission to slap me something I am not going to be using other than just testing the camera. So I am done testing the camera and I don't need to see what these things are anymore, but if you want to play around, knock yourself out. Finally on here we have a panorama mode and this is kind of fun. This is going to be shooting in j peg on lee, and what the camera does is it shoots multiple pictures as it goes from side to side, and it creates one large wide screen image and this works in many different modes and there's some different settings. I'm going to show you here. Let me go ahead, jump to the next slide because we can. We can shoot particles as well. Of course. In this, yes, we have two different sizes. We can shoot medium and large. Medium is one hundred twenty degrees large. It would be further than that. And that degrees actually depends a little bit on the lens that you are using this to be kind of a normal linds. Now we could hold the camera horizontally or vertically as we scan across the scene. And if we hold it vertically will be able to get wider angle mohr area covered from top to bottom. The large one is really large, and so you need to have a pretty good wide angle shot to really get that full hundred eighty or even maurine there. I shot one here earlier with the ten to twenty four lengths that ended up being almost three hundred sixty degrees. And so let me go ahead and actually bring one more thing here to adjust these settings. When you put it in the panorama mode, you can change the angle or the direction so let's do a little live demo with the camera here, let me do the set up on the camera. First of all, and so I am just going to throw my camera back into the automatic settings because when it goes into the automatic it's going to be there anyway, but I'm going to need to switch over on the top to the panorama mode, and if I go left on the dial, I can change the angle of you, and for this one, I think I'm just going to go with a medium size. I don't want to go to the full large size, so I'm going to do a medium size and as far as the direction I can change which direction I turned the camera and because I want to try to get the most out of it, I want to turn it vertically, so this arrow will allow me to pan side to side like this. So what? I'm ideal and can I'm going to do a little shot of you and the camera that's recording me and I'm in a swivel chair, which is just awesome. Normally, I would just try tio move as smoothly as I can, and if you'll listen, hold it close to me so you can hear the camera firing and here we go now that one came out a little bit dark, and so I'm going toe. I'm just gonna let it be it's just gonna be a little dark eyes. Is it worth three shooting? I'm not going about it, but I do want to show you the photo here and so let's go and play back this image, and so let me take off way on the camera here. I'm going to take off some of this information. I'll show you how to do this in a moment and so here's our image, and if I press down on the image, watch what it does, it plays through that image, and so there's our studio there's my clicker, and so we could do a long version. I'll play that again, and so we could do a longer version, which is even more, and it stitches everything together. Now, the smoother you move and probably the more light you have little also help it'll be able to stitch those images together. Earlier, when I was doing this, we had somebody who was walking through the scene, and they caused a little bit of a problem because they were in multiple pictures and they kind of looked like a double exposure and so try to do it with things that are not moving in the case of the photograph on the slide right now, you'll notice that vertical waterfall well, the water is moving. But it's not noticeably changing in the image, so something like movement like that would be ok. But just be careful of people moving around and just try to be a smooth as possible in your panning of the camera and realize that it's not as good as the traditional panorama, which is where you would shoot individual images and stitch them later in the computer. And if something is really important that you get it very, very sharp, I wouldn't recommend the panorama mode it's kind of a quick and dirty way of doing it and it's perfectly fine for a lot of very simple stuff, but if you're really trying to get something of the absolute highest quality, I would shoot chip the panorama at first, just for fun, and maybe it'll work out, but if it doesn't work out, shoot single frames vertically across using a tripod and panning now get through it because occasionally the automatic stitch has some minor issues on it, so that is the drive mode on the back of the camera lot of goodies in there, and if I had to scold fuji and shake my finger at fuji is, why did you not put the self timer in this mode, the self timer, something that normally goes in there? And so it seems like it should go in there now. If by it not being in there, we can now combine self timer with double exposures and combine it with the advance filter in the panorama. I think the advanced filter shouldn't be in there, but it's part of the problem of having a physical layout of the camera, these controls elektronik. Lee, you can kind of combine anything you wanted, so they've chosen the game they wanted to play, which is a lot of physical controls and that's one of the downsides of it, but we'll find out where that self timer is in just a moment. All right, next up is that do you mode button that I talked about earlier, and this is where we're actually going to deal with it, and what it does is it controls where you see the image, either the idea, the high level viewfinder or the lcd on the back of the camera. I do know that there is an eye sensor on the back of the camera, and so when your face or your hand goes anywhere near the eye sensor it's going to flip over to the I screen if it's in the mode now, the standard mode that I think most people like on this camera is thie vf lcd sensor mt. I sensor so what's happening here is that as you hold it up to your eye, it automatically turns on the dvf when you hold the camera away from your face, it turns on the lcd. This works out pretty good most of the time, but sometimes people don't want the screen on the back of the camera turning on at all and so there's the dvf mode or they might on lee want it on the lcd. Another one that I like for battery conservation is the e v f I sense remote and so it will on ly turn on the ice sensor when there is your eye very close to the center, close to the e v f finder on it, so it doesn't turn the back one on it all, and the other one has turned off when it's not near you now be aware that if you were to put the camera on a camera strapped and hanging around your neck, that evey f would be turned on all the time because that ice sensor would sense your chest right next to the camera and would leave the e f on and so on this camera, unlike the sl ours that air out there, I often recommend turning this camera off if you're just gonna hang it around your shoulder and you're not going to shoot pictures for a short period of time with the sa lars you can kind of just leave mon because they're not turning on until you press the shutter release and with that ice sensor on either all the time or when it senses something close by and over your shoulder or over your neck it's going to sense it pretty close by and so for saving the battery power which the camera does go through fairly quick batteries compared to other cameras you need to be a little bit careful about how you work with that on the back of the camera there is a display back button and this is going to change the display also the back part of it is when you're in the menu system and you kind of want to back out of an area that you're in but let's talk about the display function of this first and what it's going to do is it's going to change the weigh the screen is displayed in the back of the camera and we're going to have a number of options and they may or may not be available depending on what modes urine so the info is going to give us the most important information obviously along the bottom the exposure information shutter speed aperture isil as we move into other parts of it it's going to show you where you're focusing frames are which focusing system you're using your exposure levels with your under exposed over exposed any special modes that you have turned on on the camera and then around the kind of the top and over on the right hand side are just gonna be a whole bunch of other general set and either how many pictures you have left, what other things they're turned on or turned off, and so this is kind of nice if you don't plan to use the lcd for viewing images and you just want information about how your cameras set up the next mode over is your standard display, and so this is going to show you an image it's going to show you where you're focusing frame is as well as the critical shooting information down along the bottom, and like I had mentioned before, the color of the shutter speeds and apertures will reflect kind of the mode that the camera is in a ce far as is that the standard setting is it something that you've adjusted, like evening program shift mode? Is that setting a warning problem because you've chosen to fast of shutter speed or aperture, so be aware that those colors do change and they do have a meaning to them. Your exposure compensation, of course, will be over on the left, and just below that, we haven't in focus green light that comes on, so when you're in focus, there's just another visual confirmation that you've achieved proper focus moving on to the next one is a custom display, and this is, well, there's thie off one, which turns everything off kind of bypass that won the custom display allows you to go in and customize through set up menu number one screen, set up, display custom settings you can display all sorts of interesting things. One of the neat things that you could have in here is your focus, distance and depth, the field this is this is very cool, folks, this is something I have been dreaming of for a long time in cameras, I was one of the camera to tell me how much is going to be in focus with a digital display, so not only does it show you where you're focused, and you'll notice as that blue line moves, it expands to show you that you get more depth of field when you focus at infinity versus when you are focusing very close up. Now, if you want to have that in there, you can go into that display custom settings and say, check, I want that in there. If you say now, it kind of clutters up the frame and I don't need it in there, you can take it out of there and there's a whole bunch of things that you can turn on or off in this custom display. Option and so there's going to be a whole long checklist and just check off the stuff that you really want in there and turn off everything that you don't want because it's just going to clutter up the frame now some other things that you might see in here depending on what mode the cameras in is a temperature warning blur warning isis mode s o other sorts of warnings that are either turned on or turned off there's a potential problem might come on you're unlikely to see those theis mode or the blur warning but I get the blur warning all the time and that's going to come up any time you're in a fairly slow shutter speed jungle question sure when with the temperature warm warning come up you know when you go to arizona just gets really warm there okay? I might be joking that would be if you leave the shutter open for a very long period of time and the sensor gets very hot or potentially when you are doing a lot of video recording and the camera is working very, very hard under warm conditions perhaps so if you were to do a thirty minute exposure, you might get a temperature warning or if you were going to be shooting video all day long with the camera and as you know you can only shoot in I think fourteen and twenty seven minute segments if you were to be doing one right after another after another after another, this is not designed as a professional video camera on one of those things that professional video cameras have is a heat sink, so some place where they could push that heat for it to cool off. And this camera is a very small camera and it's very tight in there and things can heat up if you work it really hard. Thank you. Way did have a question from butler kid earlier, can you see the history graham in the viewfinder? So, yes, you can, I was just show you they're just on the previous slide. Let me see if I can go back. I don't think I could go back that way start always there it might becoming yet still here see for this build so that in placed in one more. Yes, you can see the instagram in there, and this is I have a conflict of interest here, folks, because I really like the history, graham, but I really don't like anything in front of my image and it's one of the messages that I would like to go back to the designers of this camera and every other camera in the market and just bring them down on the neck and tell them nothing in front of the image, you know, I don't want to know how many frames I have all that should be on a secondary screen. I don't want anything for come compositional reasons, I want to be able to see my image clearly and so that's. One of the reasons I like to go in and customize and take off as much stuff as I don't need, and so this we're and we're talking now about while you're shooting versus you're reviewing the yes that's a different story. Yeah, I think one of the other neat things in here, especially for somebody like myself that is constantly having problems trying to level the camera and get it exactly so it has a very nice, not too intrusive elektronik level, and I will sometimes leave this quite active in the frame on it'll be blue and they tilt it back and forth, and then when it gets to its correct setting, it'll turn green. Now, when you dive into that set up menu for the screen set up, this is what your check boxes will look like, and so I encourage you to check off on ly as many as you really need, and so sometimes at the really parts of owning a camera you'll need to go in and turn it on see if you like it and then go back and turn it off if you don't really need it don't have it in there don't clutter up the frame keep it nice and clean for composition now the viewfinder on this this is so big they've done something that nobody else has done and that is they have a dual finder this way you can have the big image clean shows you exactly what your image is going to look like but it has a magnified little portion over to the right that shows you an image that and I was just checking this last night with my calipers is it's exactly twice a cz big as what you would see if the image was full frame and so it is ah larger magnified area for judging focus and so that way you can see the full image as well as the magnified one all at the same time albeit at the cost of image size of the large image it's a little bit smaller in size personally I'm not a big fan of the dual mode I think it's a neat option and it might be good for some people or it might be good for certain situations but I haven't found it really to my liking at this point now you can also use this display button when you are playing back an image and so when you play back an image there's going to be four options the first option is just showing you basic information which is going to be the date you shot it shutter speed aperture eyes so information and a few other small bits of data like I say, sometimes I don't want clutter in front of my image and so you can turn all of it off so that you could get a nice, clean look at your image. We do also have the option of rating images and so if you want to go through and get kind of what I would call a pre edit session in, go through your images and pick out a few of the highlights, you can give him two or three stars and that will carry forward as you go into light room or bridge or other such programs. And then there is the final and fourth option which is going to show you the history graham as well as additional information kind of outside the frame. I like this being able to see the history ram I don't like the fact that the image is very small in here and it's a very small thumbnail in size, I wish they to make that image a little bit larger moving around the camera so we're about in the back of the camera that's the display back button moving on next to our little control tab on the back wait, but first we'll talk about playback so general things on playback. So the playback button there up there in the top left. Of course we have the garbage button. If you want to throw your images in the trash, you can get rid of him right there. The selector left and right will be for going forward and backward through your images. We just went through the display options so you can change what you're seeing with your images. You can also go up for more information or down for less information and it's going to show you additional information about where and how your camera was set up. I believe one of the things that I saw that was kind of need is it showed you exactly where the zoom lens was set for that picture that you took. If you would like to zoom in on your image there's a couple different ways you can turn the zoom diallo or the back tile of your camera to zoom in. You can also press the focus assist button, and what this will do is it will jump in and show you what magnified area of where your camera focus, so if you focused and moved it up to the top left it's going to jump directly to that focus point now, if you want to look at other places in the frame, just use the selector on the back of the camera to direct that box up, down left and right now the cuban jumps into something called rock conversion, and so if you shoot a rock photo and you would like to make an in camera j peg and you want to make a few adjustments to it, you could hit the cuba and you'll be able to go in push and pull processing, which is to make it either brighter or darker or any of the other items that you see listed on here. You can go in and start making a little adjustment, so if you don't have your computer with you and you want to output ajay pig, that is kind of specifically tweaked according to the way you wanted to, you could do it right in camera. That's it's. Not something I do on a regular basis, but it is kind of nice to have that option directly in there. You know, if you do record a movie, there is some special controls from the movie. So a cz you saw with the panorama image that I playback for you, what I did is I hit the bottom button toe play the panoramic image. And so you can pause it as well as movies and then you would use the left and right for forward and rewind or hit the top button to stop it and another kind of little secret function is if you hit the ok button it'll posit I believe briefly and it will allow you to control the volume up and down so if you want to change the volume you could just hit the ok button and so those are things that you would want to control as you were playing back an image all right going around the camera we had the eighty l button in the stands for auto exposure of lock we'll have another button over to the right that is the auto focus lock button and so if you are setting the exposure or the focus and you want to lock them in you can press those buttons and have those locked it now exactly how you press in on the button can be controlled if you go into shooting menu number four and control the exact way that these buttons have done and there's two different options one is p for pressing which means you have to press down and hold down on the button. The other is s for switch which means that he would press it once it's like a light switch that turns on and they would have to press it again to turn it off now different folks have different styles of shooting, and in my style of shooting I pretty much never used the auto exposure lock because I'm often using manual exposure and so if you use manual exposure a lot, you're not going to use the a l button. I do use the f l button all the time because that can also be used for focusing the camera in a back button focusing system that I'm going to show you in just a moment. We've already talked about our rear command, I'll and then our focus assist this one is really nice when you are focusing, especially manually, what you can do is you can hit this button and it magnifies the image in so that you can see sharpest, very easy and this might be a good time to do a little live demo and we don't have a lot to focus on here, so I'm going to use a lens to focus on, turn my camera on and let's zoom in a little bit on this, and so if you can see we're on camera here, yes, we can see that we are out of focus and let's try single focus I'm going to jump in and hit focus assist and you can see now that it's magnified that small area and as I pressed down for focusing, you can see that it comes in focus you know, what I'm gonna do is I'm going to flip the camera in the manual, focus on the front of the camera, and I am going to unfocused my lands. So what I might do in manual focusing is I would hit the focus assessed, and then I would turn the focusing until it's sharp. Now, I can also adjust and go close or really close, and if I want to adjust let's, see if I want to adjust the frame down a little bit, I can do so here I'll get to that in just a moment. So let's, go back in zoom, zoom and now I can see magnified. I don't know how many times it's probably pretty close to ten times magnification, and I can really get that focusing. And then I hit the focus back and then I could take the shot and I can play that shot back and plant it back. And if I had focused assisted jumps right into where that focus point wass and so I think that's a great feature. I wish more cameras had that feature. I think it works really well and very well implemented on this camera. So fuji nice job, guys.
Class Materials
bonus material with purchase
Ratings and Reviews
a Creativelive Student
I've purchased a number of John's courses and recognise how well he delivers complicated facts. Having just purchased a new X-T1 buying his fast start class was an obvious step, especially having looked at the manual. It was really well presented and made the switch from Canon so much easier. The inclusion of the notes was an excellent, additional support.I set up the camera as recommended and took it on a photo-shoot with my camera club a few days later. The content of the course and the settings suggested made the day. Now that I understood the camera it was easy to use and delivered great results first time. The course was the best 'accessory' I could have bought. Creative Live and John are a fabulous resource and so reasonably priced.
Jim Panzer
Great course, I received the X T1 and the first thing I did was see to if there was a course on CL I could use to get more aquanted with this awesome little machine. I have seen other course from John and he really knows his stuff, this one was no different. As a late comer to this camera, it would be nice if CL could update the course by adding a video going over the big 4.0 firmware updates, as that's the current one now. Thanks CL and John for helping me feel more at home with this camera!
Debra Robert
Great class! The learning modules are well structured and allow enough time for the viewer to absorb what is being shared. After completing the course I feel much more confident in understanding the X-T1, not a comfortable as with Canon (yet) ... there is definitely a learning curve moving from DSLR to mirrorless. So wish I would have taken this course a few months ago! Thank you!
Student Work
Related Classes
Camera Guides