Lesson Info
5. Top Controls of the Canon 7D Mark II
Lessons
Canon 7D Mark II Overview and Basics
15:04 2Fundamentals of Photography Review
07:10 3Basic Controls of the Canon 7D Mark II
03:59 4Mode Dial of the Canon 7D Mark II
21:58 5Top Controls of the Canon 7D Mark II
36:13 6Backside of the Canon 7D Mark II: Viewfinder
18:51 7Backside of the Canon 7D Mark II: Left Side and Playback
12:14 8Movie and Live View Mode of the Canon 7D Mark II
12:51Autofocus Area of the Canon 7D Mark II
16:17 10AF Area and Quick Controls of the Canon 7D Mark II
10:14 11Left and Right Side of the Canon 7D Mark II
07:57 12Bottom and Front of the Canon 7D Mark II
11:25 13Lenses and the Canon 7D Mark II
15:26 14Canon 7D Mark II Menus: Shoot
53:05 15Canon 7D Mark II Menus: Shoot4 Movie
11:48 16Canon 7D Mark II Menus: AF1 - AF5
36:14 17Canon 7D Mark II Menus: Playback, Setup and C. Fn1
20:19 18Canon 7D Mark II Menus: Custom Functions
22:40 19Canon 7D Mark II Camera Operations
10:02 20Next Steps
02:54Lesson Info
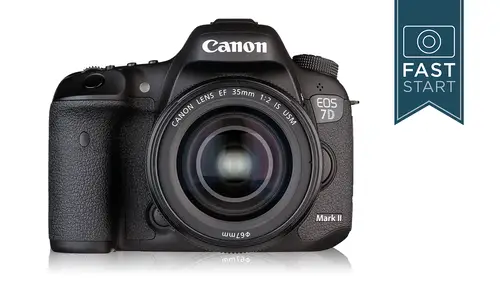
Top Controls of the Canon 7D Mark II
Continuing our route around the top of the camera a slight diversion to explain how cannon buttons work because some people get confused and they get lost and things don't work right, and so on the buttons that we're gonna be talking about here's how they work, you press the button. Wow, this is really weird. I'm explaining how buttons work, you release the button and you have six seconds there's, an invisible timer in which to make that change in after six seconds, that whole button kind of turns off and reverts back to its beginning, and so you press the button and you have to act quickly. You can't sit around and contemplate for awhile what you want to do, you need to do it within six seconds, and the buttons were referring to our right on the top of the camera, these air, very easy to excess, and we have dual purpose buttons. These buttons do two different things, depending on what dial you work with. Now there has been an important change for anyone who owns a seventy a five the m...
ark three or five day mark two cannon has switched the lettering in the words and what the buttons do, and so you may not notice any end result, but the association so, for instance, the first button on the left deals with white balance and misery the white balance to the left indicates that it works with the back dial, the meat oring works with the front dial, and so symbols or words on the right indicate the front dial and the only way that I can remember that is it they're a little bit closer to the front dial if you're on the right side and the back ones are a little on the left side there a little bit closer to the back, very subtle difference there, but that has switched between other cameras, and I have a feeling that there was a number of knock down, drag out fights in the canon board room about switching this system, and they had some reason why they went in and switched it, and I don't know what it iss because they didn't invite me to those bored me, but it has switched from earlier cameras, and so if you are used to looking at things in a certain way, yes, it is different. So let's talk about what all these buttons do starting on the left, press the far left button and turn the back dial the quick control dial, you will adjust the white balance of the camera. What this is doing is it's controlling the color that your camera is recording the light in because it does not know the type of light that you were photographing in it sees light reflected reflected off of objects, but it doesn't know what color the original light source is. So what you can do is you can set the white balance to match the shooting conditions that you were working in, and it is recommended in all situations that you match the white balance with the light that you are using. The light that is the most different from everything else is incandescent. This is often the types of lights that we have in our houses, our living rooms and so forth. And so if you're getting a very orange look, you can simply set the camera to the incandescent city, and it will know that orange is your true light source and it will adjust for those situations. The camera has a few other settings as well. One is a color temperature setting if you just wanted to set it manually, so this is a manual white balance option. If you want to set it to sixty, five hundred, you can set it to sixty, five hundred or sixty six or sixty seven hundred. You could be very, very exact about it. You can also do a custom setting, and this is where you would photograph a white sheet of paper, so you just take a white sheet of paper like this you can also use a great card. Black cards don't work too well because they don't have very much light, so either white or gray car just photograph this, fill the frame with the white object, and the camera will be able to figure out what color light is illuminating that white object, as long as it knows that you do have a very white object there, you can then go into the menu system until it this is supposed to be white, and it automatically corrects for and that's a system that can work very well. If you have unusual lighting, so let's say that you were at a stage performance, and they had consistent lighting throughout the entire performance, which doesn't happened very often. I'll have to admit, but in any environment where there is unusual set of lights, you could photograph a white sheet of paper, do the custom setting in it, and get perfect color in that scenario, when they're changing the lights, that gets to be in a very, very tricky situation, that we're not goingto be able to go in depth in. Finally, the camera has auto white balance, and this is where the camera will just look at the color information in the photograph in particular, what it's doing is it's looking at the highlights were the brighter portions of the image and trying to judge if they are mostly blue or mostly red and yellow to kind of figure out which way it should set the white balance automatically. In general, I'm pretty happy with auto white balance on the camera does a very good job and I leave my camera in auto white balance. Most of the time I will switch it from time to time. I usually will either stick it to flash or cloudy if I'm working in the studio or if it's a cloudy day we are here in seattle, so I use that a lot. Sometimes I'll use sunlight sometimes all you shade if I know I'm going to be working in that in that environment for quite a while. For the most part, I don't sweat it too much, and part of the reason is because I shoot raw images and we'll talk about ron jape later in the class. But one of the advantages of shooting raw is that you really don't have to worry too much about setting white balance because it can be corrected later. Now, I always prefer to get things right in camera, and so if it's an easy, quick change, I will go ahead and do that out in the field, but if I get something a little bit wrong, don't sweat it. If you shoot raw, you can fix it later without any damage if you do shoot jay pig yeah, you could work with your images later, but it is damaging the image a little bit and I prefer not to damage images in any way. So if you are going to shoot j pegs with this camera, which I know a lot of people are, you know, I'm gonna be shooting some j because I'm gonna be shooting a lot of sports and the camera works a little bit faster in the j peg mode, I'm going to want to make sure that I get the white balance set, so if I go to a basketball game, I'm going to shoot some test shots and make sure I get the right white balance for that gymnasium because I know I'm gonna be shooting there for the next two hours, and so are the white balance most of the time, but if you know you're going to be working in the environment, get it set right for the type of environment you're in next up, same button, but this time we're gonna be working with the main dial or the top dial on the camera. And this is controlling the media ring system, the camera, how it's reading the light for exposure and for setting the exposures, we have four different options. The kind of the traditional option that cameras had many years ago was center waited, which was his big fat spot in the middle. And then we added spot metering, which is a tiny area in the middle. So if you wanted to read a very precise small area of light, you would use the spot reading there's also a partial spot which is kind of a fat spot with bigger spot and most photographers who shoot with cannon that I know up use evaluative mitri and what evaluative metering is is it breaks the scene up into one hundred and fifty thousand pixels, using a lot of pixels to read the brightness levels in two hundred fifty two zones to figure out what's the brightest what's, the darkest what's, the average where's, the in between where's the median and what's the best exposure for that particular picture and from what I have seen, the evaluative metering does a near perfect job not perfect but close to it. I leave my camera in evaluative metering virtually all the time. I rarely use any of the other meeting systems at all. There are depends on high issue. There are some photographers who absolutely love spot metering and there is a very good tool for people to use there if that is what you want to do so it's a perfectly good tool and it's one of these personality styles do you like to do it this way or do you like to do it that way? Because both ways can work and it just depends on which way you enjoy working with and so their tools to use if you need them but as I say, I much prefer the evaluative most people do it does a very good job and it's definitely the best place to keep your camera when you don't know what your next shot is going to be having your camera in the spot metering system is one of the most dangerous things that you could ever do. I consider spot meter a little bit like a sharp kitchen knife it is a fantastic tool but you need to be careful with it. Yes, you have a question. We'll just could you give us maybe one example of when you personally would use spot metering. I have not used spot memory in years but let's just say that I was photographing somebody on stage and they were wearing all black and they had a spotlight on them and they had a black background and I wanted to make sure their skin tones look normal. I would point the spot meter at their face and I would check the reading and get the shutter speed and aperture and s so based on that information not their black clothes and the black background and so that would be the most iconic type another good one would be, for instance, if you had a bird in a tree and there's just a white sky behind the bird super super bright. But the bird as long as it isn't a crow that's, completely black or a white bird if it has kind of greyish feathers or not too bright, not too dark. Somewhere in between, you can get a reading off the feathers of the bird and not the bright background. And so any sort of bright or dark background is where you might use that great that's super helpful and those sort of extreme scenarios, right? Thank you. Good, good question. Okay, next button is our drive an auto focus button. When you hit the button and you turn the back dial, you are controlling the drive mode. This is the control over how many pictures you take when you press down on the shutter release button. So most of the time you're going to probably want to keep your camera in single shooting for basic photography. We do have two continuous modes for low speed, which is currently set at four frames per second. But you can change that if you want and high frame high speed is that at ten frames per second, and this is something that you will be able to go in and customize and some people kind of wonder, why would you want to customize it? Why would you want to make it less than ten frames per second? Well, I shoot a lot of running, and one of the things about the way runners run and people move is there is a certain speed at which people run, and I'm not talking about the speed of how fast they're running, but there, kate ids how fast their feet turn over, and I have found that for shooting runners, and anybody running six frames per second looks terrible, because what happens is you end up getting a very bad foot position on every other shot, and so for shooting runners, I would rather shoot at five frames per second or seven frames per second, and I don't want to be at six frames per second, and other sports and other types of activities may have a weird repetition where ten frames a second just doesn't look good, and nine frames actually looks better because it actually breaks up the cycle of what they're doing. And so you're going to need to know your sport really well till I figure out exactly how many frames per second is the right number, but the cool thing is, is that you can go in and customize this later on, we do also have additional continuous modes for silent shooting and this is one of the techniques that I employ when I doing travel photography so when I'm walking down the street and I'm shooting pictures and market stalls and other places of people I tend to want tohave my camera as quiet and discreet as possible and having a camera that is a little bit more quiet makes it a little bit less intimidating and that helps in almost all scenarios and so I will put my camera in the silent mode this also could be helpful for anyone doing wildlife photography it makes the camera just a little bit quieter disturbs the animal a little bit less self what is it doing when it's in the silent mode it is slowing down the action of the mere coming up and so rather than coming up really fast causing causing a big slap on the mir box it comes up a little bit more slowly this means that the camera is not quite as fast to shoot so in the silent single silent continuous shooting mode it will shoot it only three frames per second and so it's going to work a little bit more slowly it's not quite as responsive but if you can anticipate that extra little delay then it's a good mode any time you want to be a little bit more discreet when shooting finally we have a self timer mowed your standard ten seconds self timer it is also a remote mode. So if you want to get this little cannon rc six, it sells for around twenty bucks and it's a great way for you to get in the shot and have more time. You can also use it to trigger the two second self timer, so if you want to not use the cable release on the camera, you can either use thie, shutter release on the camera or the remote to trigger a two second delay. And the reason this two second delay is nice is if you have your camera mounted on a tripod and you touch the shutter release to fire the camera, you are touching and moving the camera, potentially causing vibration. If use the two second delay, you can press the shutter release, get your hands off the camera, the vibrations have a time to settle so that your camera is perfectly still. When you take a photograph, most of my landscape shots are done with a two second delay. I find that it is very efficient, and I don't have a big cable hanging out from the camera. There are other times where I'm trying to time something that's happening, perhaps maybe like a wave crashing on iraq that's, when I want to have the cable release, so that I could be more precise about the exact timing of the shot, so that is the drive mode, as I say, normally I leave it in single. The reason I don't leave it in high speed continuous is that when I take one picture in a normal function with my finger, I take two or three shots because the camera's firing at ten frames a second and it's so fast. But I, when I shoot sports, I typically do want it to be in ten frames a second just so that I can get those moments that are hard to see next up, same button, but the main dial on the camera. This controls the focusing mode of the camera. We have two focusing notes, one shot where focuses on a subject and stops, and then we have a servo for moving subjects, and then we have another mode that switches back and forth between the two. So with the focusing system, you press down halfway to focus, and in the one shot mode it figures out where your subject is, and as soon as it figures it out and gets a lock on it, it stops moving the servo mode. And this means servo mechanism producing motion at higher energy levels than then the input levels. So this is the device that is in the camera. The way that I remember servo is servo is a name of a cat in africa, it looks like a like a house cat but it's a wildcat it's called a servo and it moves around very quickly and so servos for movie and so servo is for action photography and that is where this camera is really going to be doing a lot of photography I think and so if you are photographing subjects that are moving the servo mode means the camera will focus on a subject and it will continue to track that subject as long as it is within the focusing points of the camera and so I think it's best to decide either are you shooting stationary photography or moving photography action photography and then making a choice as to which mode you want to be in the camera does have a mode that is in between these two that is called a I focus and auto detection mode there we go and the camera will automatically switch back and forth and this mode I cannot recommend high enough not to use this mode this is a terrible mode and the reason it's terrible is because it's a bit inconsistent and photographers really do not like inconsistency in the operation of their camera one time I was photographing a cross country race very similar to the photos that you see here and I accidentally had the camera in a I focus I made a mistake and the camera was tracking some of the runners coming in quite well but every once in a while it would lock onto the grass and focus on the grass and then stop focusing, even though these runners were coming in towards me all out of focus and it did, I didn't understand that the person was much more important than the grass, and so in this situation, I knew I was shooting runners. It would have been better if I just had chosen a servo, and as soon as I had a gap in the runners, I figured out what the problem was, and I switched it and I got good shots for the rest of the race. But for a couple minutes there, I was very worried that my camera was broken or my lens had a problem with it. And so if you are shooting sports, put it in the servo, the focus is something, in case you're wondering is not included on the one d x top of the line sports camera because they no professional sports photographers would never use that mode. And so I think you need to be able to use other systems for changing back and forth between one shot and a servo, and with the button right there on the top of the camera. It's, very easy to change back and forth now one of the big issues and all one of the big questions that we have, we have lots of questions on focusing a lot of those focusing questions are going to be answered when we get into the menu system there is not just a menu there is a bank of menus controlling the customization of the autofocus system so you can tweak it for the different types sports an activity that you might use the camera for so there's a lot of different focusing options and that we will continue to go through in this class they are spaced out in different areas because of where their controls are in the menu system or on the outside of the camera but this is one of the first most primary controls on focusing yes can you have a question I do john now I know you said we're going to go further in depth on a number of these focusing issues but maybe one quick one from richard who said do you recommend staying in the server all the time because you can take both still and moving shots so why why is it based on what you just explained that you I wouldn't stay in a service all the time? Well if you are a servo it is impossible or depending on how your cameras set up hard to focus on a subject lock it on and then recompose it off to the side there are so many button options don't write me a letter saying I'm wrong I know that I'm wrong if you have certain set ups and so it depends on how you liketo work that is not a bad scenario for instance, if you were going to photograph a football game where people are moving around most of the time but every once in a while they stop and you want to get a portrait of them and they're not moving it's an acceptable mode it's just that you can't focus lock and move it off to the side and so if you aren't shooting sports it's probably better to be in the one shop mode, but that is if you had if you're kind of tauron, why I want to do a little of this and I want to do a little of that it's better to be in the a I serve homo thank you. Okay, lots more focusing to come folks stay tuned in. All right, next up, what are we doing? We're going to the next button and this button controls flash exposure compensation if you press the button and turn the back dial on the camera so let's, talk about flash for a brief wait here so the camera has a built in flash you can also add on flashes and when the flash fires flash fires a bit of light light hits, the subject bounces in the camera and the camera is trying to figure out what is the correct amount of light remember the camera has no idea what you're photographing, whether it's a person or it's a rubik's cube sitting on a table it doesn't understand what's going on and it's just bouncing back and putting out as much light as it thinks it needs. And that's what tt l is all about through the lands it's looking at the light coming in through the lands. More often than not, the flash puts out a little too much power flashes a little bit like seasoning you would put on food you want some, but you don't want too much. You don't want to overwhelm the food, and so in many cases, most portrait photographers want to back off a little bit on the flash so that it looks a little bit more natural and it's not too harsh a flash. You'll get a little bit better skin tones, and so I often recommend going to tl minus one that is one stop lighter, then the recommended setting straight out of the camera. Now in this example here, I think t t l minus two actually has better skin tones, and so it depends on the exact setup of that particular shot. And so in this case, the top that she is wearing in the darker background has fooled the flash into firing more flash than it needs, so this is something that you need to adjust per photo that you are taking to get the look that you want, but I think a default good position is tt l minus one it's better to be underwhelming on how much flashy put out than overwhelming how much last goes out, and so we'll see plenty more flash controls when we get into the flash section in the menu. But this is just one of those quick ones that you want to be able to adjust very simply and easily, which is why we have a very important button dedicated to it right on the top of the camera. The same button also controls the so if you use the front dial up the camera now, one of the things you might want to notice about this button is that there is a small dimple on it, and it has got a slightly different feel to it then the other buttons on the camera and that is just to help you identify this button is something different, then the other buttons on the camera so that when you are holding the camera to your eye, you don't have to take the camera away from your face to be able to see this, but you should be able to do this with camera held up to your eye. You want to be able to make many changes as possible just looking through the camera and not moving it around taking it away so you press that button turn the front dial you will be able to change to the different eso settings I haven't listed all of them I've just listed the whole ones but they will range from one hundred two sixteen thousand which is a little unusual because normally would top out of twelve thousand eight hundred in sixteen thousand it's just this third of a stop you can actually take it up to twenty five and fifty one thousand if you go into the menu system and you kind of take off the restrictor is that they have built in on the camera and that's rather high and I'd like to show you a few results because I took the camera and I wanted to shoot it at all the isos to see how it looked and so I did my just standard test shot in the studio and then blow this up and take a look at the esso settings on this so I s a one hundred is fantastically clean looks awesome and I'm gonna worry about two hundred and four hundred and we're going to just move right all the way up to fifty one thousand and you could see that it is fairly low quality they probably shouldn't have put it on here they think they put it on here simply for bragging purposes. And so that is a emergency situation only so I would generally avoid fifty one in twenty five thousand. And, well, frankly, it's always better the lower you go, the better you go when it comes to s o but in general, one hundred sixteen hundred looks quite clean. You do get a little bit of a drop up at sixteen hundred as you do to go to sixteen and sixty four. And the big dropoff really seems to be coming in after sixty, four hundred there's a there's, a very big drop off their it's. Pretty biggest going from thirty two to sixty, four hundred. And so you want to be very careful about going up past sixteen to thirty two and sixty four. They are certainly doable in many, many situations, and those final three are really pushing it. Twelve thousand up are really pushing it, so you'd have to be pretty desperate if you need to be shooting in that low of light. But do your own test. See what you think. What did your own opinions with lenses and situations that you shoot in, and so the is odile, her button and dial are very easy combination, as I say, you should get used to being able to change this without moving your eye away from the viewfinder. For setting those twenty five thousand fifty one thousand you do need to go into the menu system the second tab on the shooting menu to go in and turn off the restrictor sze that allow you to use those higher and esos also there is going to be some very interesting cool and new ways of setting the auto esso on this camera that some other manufacturers have been allowing you to do and this is the first time that you've been able to do it with this much control in the canon camera and we'll be going through that as we get into the menu section later on in this class but that's the second tab in the shooting menu if you want to jump ahead and take a look and play with that right here and now all right next up on top few little items appear we got the focal plane indicator in case you need to measure the exact distance to where the sensor is in the camera the sensor is right below that mark on the camera we have our top lcd where I'm not going to go through all the details pretty obvious a lot of the settings that you're going to have in there of note it in the upper right hand corner our brackets which indicate how many shots you have remaining on the camera now this is slightly deceptive because it does not show you the total shots remaining if you have two cards in the camera, it shows you the total shots remaining on the card that you have acted so it's very possible you could put in two large cards and you don't see the number that you expect to see. There is another way of seeing both cards at the same time. I'll be showing you that in the next section, on the camera we have a fourth button on the top and that is just an lcd light which lights up the lcd so that you can see the camera under low light conditions out. The front of the camera is an in fun button. It is the multi function button and this is in past cameras. It has been the way you have changed focusing points. But now this camera has a couple of different ways of changing, focusing points and focusing systems. And so this is more of a general purpose function, but but that you, khun do ah variety of things with and you can go into the custom controls which is in the custom functions display in operations and you can go in and select one of many different operations. You can have it do flash exposure, lock exposure lock you could have it change between raw and j peg images. You can have it do exposure hold and you can also cycle the primary modes, which is the white balance meet oring drive, auto focus, flash exposure, compensation and sl so very quickly you can just simply press that button rather than going back to press any of the three buttons that we just talked about, and with this camera's new on screen display, you can very quickly see heads up looking through the viewfinder, all these controls that you are changing and this is this is a big change, and I think it's it's interesting because I own a number of cameras and some of the cameras that I have are mere lis cameras from other manufacturers, and one of the things that I really like in the viewfinder is theirs. You know what has been known as a heads up display? I don't have to take my eyes away from the viewfinder to make changes because I can see him right in the viewfinder on my cannon five d mark three if I want to change the drive mode and I'm shooting, I have to take the camera down here to see the top of the camera. What I'm changing with this camera with this function button set to cycle the primary cycles I can see in the viewfinder. What? I'm changing, and I'm going to show you more of that in an upcoming section when I go in to show you exactly what you see in the viewfinder so it's ah, very customizable camera and that button is very key to the customization and there's a lot of ways that you can tweak it for whatever you want to dio the little hump on this camera on the top that is the gps home. This camera has a gps on it so it can record location information for where you are and I'm not a huge fan of gps a love gps. I just don't use it in the camera a lot because it sucks battery power a lot from the camera and it it's a little bit iffy on how much it can pick up signals. It's not the strongest receiver in the world, and so it does work, but it's something that you want to be very careful and you want to think about how much access to battery power that you have, and I'll talk and show you some more about what that's like when we get into the gps settings in the menu at the camera. The hot you of the camera of course is where you're gonna mount on any of the flashes so let's talk about some of the different flash options we do have a built in flash we're going to get into that a little bit there is a button over on the side of the camera that pops the flash up and once the flashes up that side button over there will change the flash modes and essentially it dumps you directly into the menu system where you can change the flash functions on the camera so if you do want to use flash first thing to be aware of for all you newcomers is that flash has a limited amount of range if you want to light up the mountains in the distance you're built in flash is certainly not enough to do it built in flashes are good for generally about ten or fifteen feet and that's about it on camera flashes air good for maybe thirty forty or fifty feet depending on some of the different settings that you might have so flash is great for doing people photography when you want to add a little bit of highlights to the eyes a little glimmer in the eye filling in the shadows we often call this phil flash because we're filling in the shadows with a little bit more like in a great time to use flash is out on a bright, sunny day because that's when your shadows of the strongest adding a little bit of flashes going to allow you to see the person a little bit more easily so if you are going to do a quick portrait outside and you need to do it fairly quickly without a lot of setup, take one without flash and one with flash and see which one you prefer now this camera has several different flash modes on it there is a red eye reduction mode. There is the capability of hooking the camera with off camera kanan flashes that automatically set the correct amount of light you can force the flash on even though the camera doesn't think it needs it. You can use a slow sing, which is a slow shutter speed so that you can add a little bit of creative blur to your photograph, usually in the background of your subject. The camera normally fires three flash in synchronization with the first shuter curtain openings, but you can also do it with the second shutter curtain closing for additional effects for subjects that are moving. We also have the option of doing a multi flash technique where you can have the camera fire the flash multiple times in one shot so you could have a shot in this example I have a runner going through the scene it's probably about a three second exposure in the camera is firing the flash several times during that exposure. Now the top shutter speed on this camera is one to fiftieth of a second, so if the flash has popped up and you were trying to set a faster shutter speed, it just won't allow you to do it. If you have a cannon brand flash on the camera, it won't allow you to do it, and so you can't make a mistake here, but it's, just not going to allow you to make that mistake. Now there is a whole world of option and that you will see as we get into the menu sections for controlling the flash. It is what I consider a rabbit hole of features it's got one control inside another and there's a a ton of different options, and we're going to quickly talk about some of the more important ones when we get into that menu section. If you are interested in mohr flash power than the built in flash, I would recommend one of the intermediate or higher in flashes. I think these lower in flashes from cannon arm or designed for people who have cameras without a built in flash I thinkyou're built in flash does about as good a job as ninety e x or the two seventy e x the three twenty x is going to give you the ability to bounce light off of ceilings. And what's unique about it is it's got a hot light on it. This is a video like that stays on constantly, so if you are recording video, it adds a little bit of catch light for the subjects that are in front of you. Now the caveat on this is it's not a very powerful light, so you need to be very close to your subjects to illuminate him in any significant way. Probably the primary flash that I would recommend for this camera is the four thirty e x to it's going to be a lot more powerful than the built in flash it's going to give you the ability to bounce and swivel all around so that you can bounce it off of walls and ceilings and so forth and it's pretty simple to use and it's a lot more power cannons top of the line flash would probably be appropriate for a wedding photographer or anyone working professionally in any sort of large gathering group. So if you're going to try to take a group photo of twenty five people, you're going to want a pretty powerful flash to illuminate them if they're in a dark environment. For instance, the kind of key trick that this flash does is it does radio triggering, and so this flash can communicate with other six hundred artie flashes and communicate via radio signal now radio single signal is different than the other signals that the other flashes communicate with this camera because these other cameras use a line of sight communication, so if you were to have an umbrella or a door blocking the cameras built in flash and these other flashes if you were trying to use him in a remote mode, they may not see the trigger coming from the camera but using multiple of the radio triggers you're going to be ableto have much greater distances and you'll be able to go through solid objects like couches and walls and windows and so forth with any of the flashes. If you're interested in macro photography or portrait photography better quality light you're going to want to look at getting the flash off the camera and the o c e three court from canada is a great way of maintaining the t ell communications between the camera and the flash, but getting the flash about two to three feet off the camera works really well if you happen to use a flash bracket which is good for keeping the flash above the lens at all times even when shooting vertical and as I mentioned their arm or flash controls and customization when we get into the menu setting, we will more fully look at all the different options in there, but these are some of the recommended flashes and once again, as I mentioned at the beginning of this class, I highly recommend the cannon flashes. They are a bit more money than some of the aftermarket ones out there. But it's, mostly the control and ease of use that I think that makes it worth the extra money quality wise. Now, they're probably a little bit better quality. They also retain a used valley if you plan on re selling them, so they'll be much better in that regard. But I think it's, just the ease of use in the communication with the camera, is just much more complete in that manner. And so that brings us to a conclusion on the top deck of the camera. So a lot of stuff in the most important area where you're working all the time.
Class Materials
Bonus Materials with Purchase
Ratings and Reviews
Kanoelani Patenaude
I am a pro photographer in my dreams, where I know the in's and out's of my camera; however, reality proved differently, as real life would tell you, I was a deer caught in headlights just looking at my new 7D Mark II. I am a photographer enthusiast without the skills, but a lot of love for the moments one, or the profession/hobby of it can capture. I mostly shoot my husband, friends, and community surfers in the lineup, and of course, my children, who rarely sit still. Thus, I switched from Nikon to Canon, venturing on the 7D Mark II for the grand reviews of how stellar of camera it is for action shots (surfing, and kids, this was a no brainer). That said, and overwhelmed with the way beyond my skill set, but noted desire and aspiration to grow, I made the purchase, and sought help rather quickly as I wanted to feel confident with what I was utilizing to capture the best memories possible. I came into this CL course knowing the "on/off" button, and "auto" shoot mode. I came out of the course feeling like the pro in my dreams, and ready to shoot manual. John's teaching style is on point, and his detailed visuals are a huge plus. So impressed, I purchased, John's photography starter kit, and was even more blown away. My first shots post that course, I thought were great for my first educated shoot, and shockingly, I even received and email from one of the sponsors of the surfers I captured, asking if they could use my image for their sites and publications. Not bad for a newbie. Though, my intent was never a business purpose, I did not know if I should charge a small fee, or give it for free. I don't mind free as it's not my business, yet I don't want to ruin it for any photographers in town doing the same thing that are charging. Perhaps another course to help me with that. I highly recommend courses by John Greengo! Thank you so much, John!
user-cfdd6e
I bought my 7D Mkii the week it was introduced as an upgrade to my old 20D. I immediately noticed what a huge step up it was and to be honest was a little overwhelmed by all of the options and customisations available. In the year I've owned it I've managed to pick up a lot but I still felt there was a lot in there that I wasn't making the best use of. John's course has filled in the missing pieces and I now feel a lot more confident that I will be able to get the best out of this amazing camera.
J.R. Link
John's coverage of the Canon 7D Mod II was excellent. It helped immensely in understanding the myriad of choices available in this camera. I would recommend this course to any user of the 7D Mod II. camera. The only comment I would make is that it might be helpful if John didn't assume that we all are sports photographers. Some hints for other types of photographers would be a great addition to an already excellent course.
Student Work
Related Classes
Camera Guides