Skin Challenges: Dark Skin Outside
Lesson 11 from: FAST CLASS: Skin 101: Lighting, Retouching, and Understanding SkinLindsay Adler
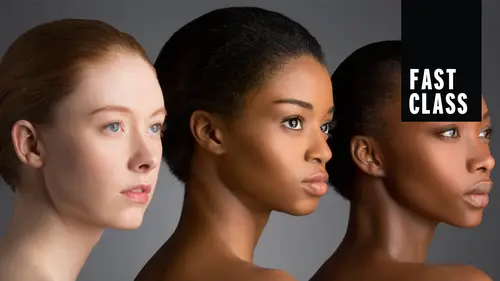
Skin Challenges: Dark Skin Outside
Lesson 11 from: FAST CLASS: Skin 101: Lighting, Retouching, and Understanding SkinLindsay Adler
Lesson Info
11. Skin Challenges: Dark Skin Outside
Lessons
Skin Essentials: White Balance
16:02 2Skin Essentials: Mixed Lighting, Color Contamination
15:42 3Camera Settings: Files
04:53 4Camera Settings: Color Spaces
15:10 5Color Management
11:03 6Exposure
06:21 7Shoot: Quality of Light
08:43 8Direction of Light
02:14Lesson Info
Skin Challenges: Dark Skin Outside
Okay, so number eight. Dark skin outside. Right? So here are your challenges if you're photographing very dark skin tones outside. All right, the really contrast the light that you have blows out the highlights and then also the shadows get too dark. And so upstairs we had a little bit of nice fill to fill in those shadows, but usually you don't have that. The next problem you have is a really contrasting scene. So it's hard to balance because you've got the subject who's darker. So if you expose for them now the background is really, really overexposed, you're trying to balance everything together. So how do you balance really contrasting light on the face and then also really contrasting light for the entire scene. Alright, so here's some of our solutions. First solution for the contrast you like? First thing I would do is if I can find shade, I will find shade. Try to get them out of direct sunlight because then it gives me kind of a neutral point. It's not too bright, it's not too ...
contrasting. And then I can pick whatever modifiers off camera flash reflectors and build the light in. So I'm controlling it instead of trying to fight with the sun. But of course we don't always have that. I diffuse the light if necessary. I did take one shot where we put the diffuser overhead. Obviously the downside is if it's really windy, it's a little bit harder to hold that, but I love diffused light. Um Diffused light just it looks like you took a gigantic soft box out on location and it's just beautiful and glowing. It's a little unwieldy and it's a little more challenging if you're trying to get full length shot. So trying to light a group, but for a headshot it's beautiful light. So I definitely would kind of go that direction for dark skin on location, avoiding the direct sunlight. And then if you are going to introduce light, try to use something that's bigger or broader and attempt not to have a contrasting light source. So if you're gonna use a speed light, we've got to have something on it. Soft box flash bender, like something to soften the light to make it a little bit broader than that Flash head. The next solution you have is for the exposure on the subjects, I want to darken down the highlights in some way. And so we were talking about this and I kept using this over and over again and I said compressing the exposure in the scene. So what that means is your camera can't capture the deepest shadows on dark dark skin and the brightest highlights in the middle of the day. So what you've got to do is you've got to help your camera out. So you've got to find a way to bring those highlights down And then fill in light in the Shadows. So you're making it. So if there's a 20 stop range, you're trying to bring it to like maybe seven or six something your camera can actually record. Um So you darken down the highlights and there's one way to do that is you can go in the shade or you could diffuse and that's what we did a little bit or you can under expose and that's to get those, those highlights, those bright lights under control. And then on the flip side you've got to give more detailed, bring up more light in the shadows and you can do that using a reflector or introducing an off camera flash or strobe on location. Alright, so compressing exposure as I talked about over and over again, pull in the highlights, build up the shadows and it will make your history Graham look like it's not um you know, peak on either side. It kind of pulls it in a little bit. So why you would add light? I said compressing exposure, improve the light on the face, definitely kind of overpower what the natural light was giving you if it wasn't ideal, especially for dark skin tones and then just change the shape of the light on the face. All right, so let's go back through high speed sync because I was kind of getting blown away. So let me make sure I can break this down notice how she is pretty nicely balanced with the background exposure on her face looks nice exposure in the background looks nice. It's no blown out highlights, no dark shadows, it's just kind of a good balance there. Well, that is not with natural light, that is with introducing strove to the scene. So here's what you have to, this is my pro tip. Okay? Um if you speed lights on location learn high speed sync. Okay so this is what lets you do um sync speed when you're shooting your camera has a maximum sync speed usually to maximum shutter speed that if you shoot faster than that, What ends up happening is you see your little shutter, you actually see the black bars and for most cameras that's 1/ of a second someplace around there. And so the problem is if I want to shoot a narrow depth of field like 2.8 But I'm shooting at my sync speed of 1 200 of a second in the middle of the day and bright sun, my background is going crazy over exposed. So then to darken everything down I've got to keep my sync speed so I have to keep closing down my aperture and all of a sudden I'll be at 56 f a f 11 and now there's too much detail in the background, it's not pleasing to my eye anymore. So by flipping your camera to high speed sinker to your flash. To high speed sync it allows you to exceed your camera sync speed which is really really nice because then I can use 11 thousands of a 2nd, 12 thousands of a second. So I can overexpose the ambient and still use strobe. And so that's a great way to compress the exposure on the scene, because I can under expose everything, so that controls my highlights and then build up the shadows by using flash.
Class Materials
Bonus Materials with Purchase
Ratings and Reviews
Student Work
Related Classes
Portrait Photography